Book 3 — The Tricks of Camping Out By STILLMAN TAYLOR PART II—Cooking in the Woods
Reading edition
Cooking in the woods requires more of a knack than equipment, and while a camp stove is well enough in a permanent camp, its weight and bulk makes this article of camp furniture unsuited for transportation by canoe. Patent cooking grates are less bulky, but the woodsman can learn to do without them very nicely. However, the important item which few woodsmen care to do without is the folding baker, or reflector. The baker is folded flat and carried in a canvas case, including baking pan and a kneading board. The largest size, with an 18-in. square pan, weighs about 5 lb., and the smallest, with an 8 by 12-in. pan in aluminum, only 2 lb. In use, the reflector is placed with the open side close to the fire, and cooking is accomplished evenly and well in any kind of weather. Bread, fish, game, or meat are easily and perfectly cooked, and the smaller size is amply large for a party of two or three.
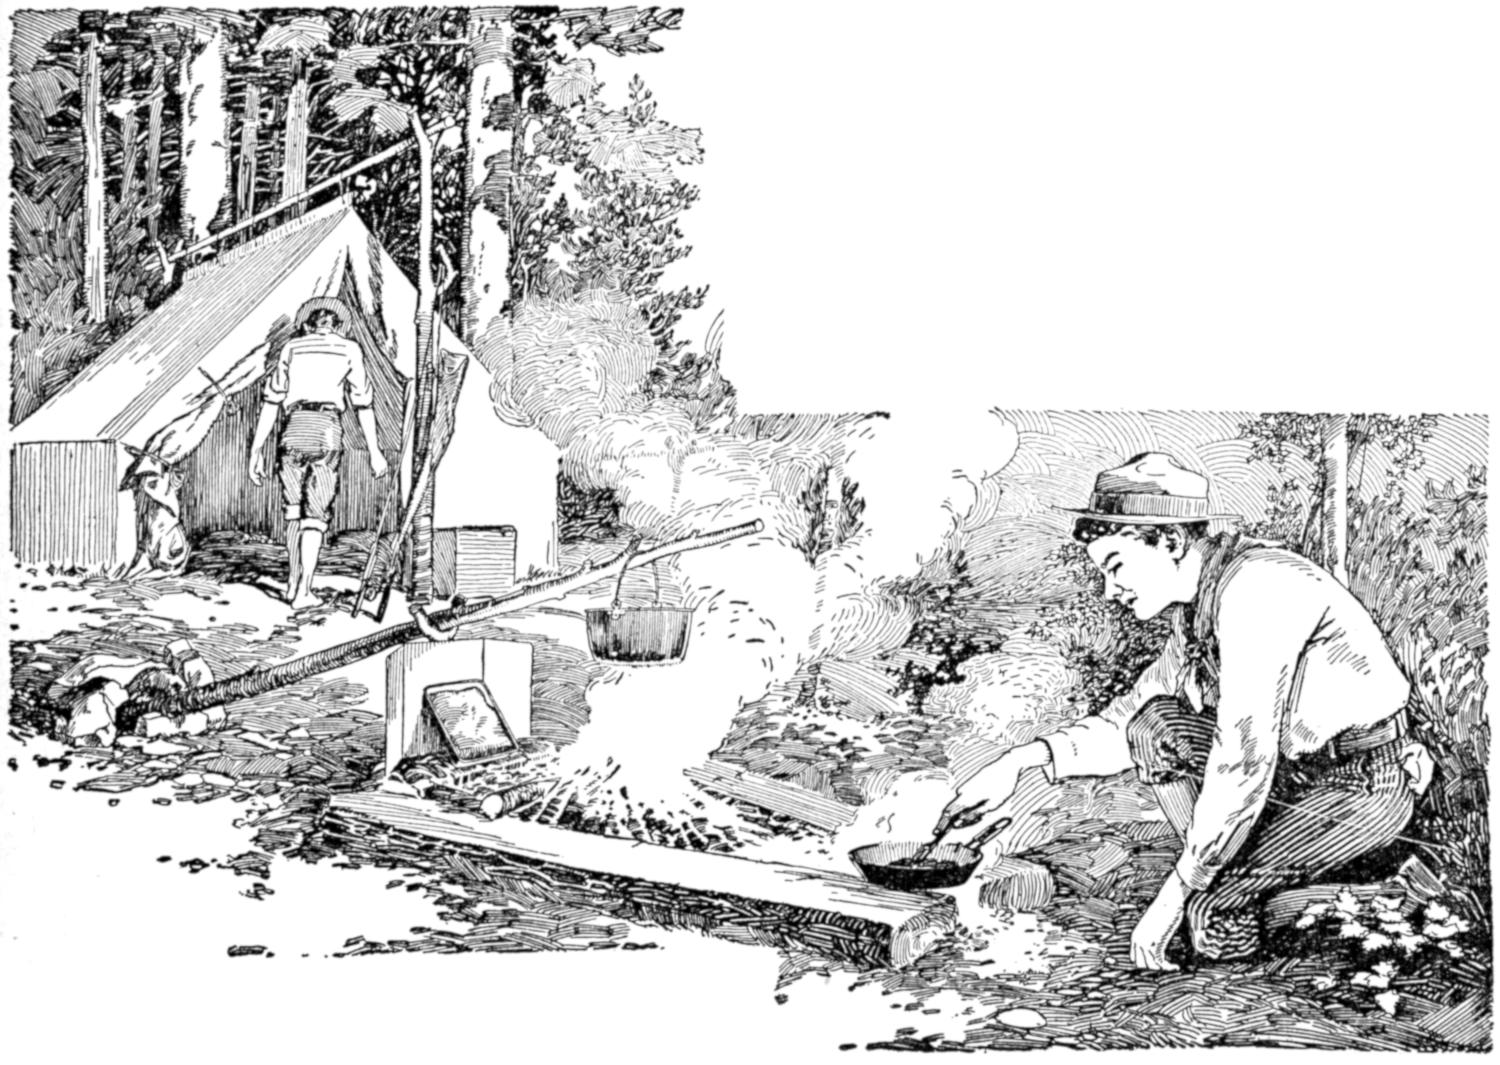
A Cooking Range Fashioned from Two Green Logs Laid in a V-Shape with a Few Stones Built Up at the Wide End over Which a Fire is Made of Hard-Wood Sticks
The camp fire is one of the charms of the open, and if it is built right and of the best kind of wood, cooking may be done over it as well as over a forest range. Many woodsmen prefer to build a second and smaller fire for cooking, and although I have never found this necessary, excepting in large camps where a considerable quantity of food must be prepared, the camper can suit himself, for experimenting is, after all, a large part of the fun of living in and off the woods.
A satisfactory outdoor cooking range may be fashioned by roughly smoothing the top and bottom sides of two green logs, and placing them about 6 in. apart at one end and about 2 ft. apart at the opposite end. At the wide end a few stones are built up, and across these, hickory, ash, and other sticks of hard wood are placed. The reflector is placed close to the coals at this end, and the fire is built between the logs, the broiling and frying being done at the narrow-end opening. Woods that burn slowly when green should be used for backlogs and end logs; chestnut, red oak, butternut, red maple, and persimmon being best adapted for this purpose.
The hard woods are best for cooking and heating, since they burn more slowly, and give out considerable heat and burn down to a body of glowing coals. Soft woods are quick to catch fire, burn rapidly, and make a hot fire, but burn down to dead ashes. Hickory is by far the best firewood of the North, in that it makes a hot fire, is long-burning, and forms a large body of coals that gives an even and intense heat for a considerable length of time. Next to hickory comes chestnut; the basket oaks, ironwood, dogwood, and ash are the woodsman’s favorites. Among the woods that are easy to split are the red oak, basket oak, white oak, ash, and white birch. Some few woods split more easily when green than after seasoning, and among them are hickory, dogwood, beech, sugar maple, birch, and elm. The most stubborn woods to split are the elder, blue ash, cherry, sour gum, hemlock, sweet gum, and sycamore. Of the softer woods, the birches make the best fuel; black birch in particular makes a fine camp fire, and it is one of the few woods that burns well when green. The dry bark of the hemlock makes a quick and hot fire, and white birch takes fire quickly even though moist. Driftwood is good to start a fire with, and dry pine knots—the limb stubs of a dead pine tree—are famous kindlers. Green wood will, of course, burn better in winter when the sap is dormant, and trees found on high ground make better fuel than those growing in moist bottom lands. Hard woods are more plentiful on high ground, while the softer woods are found in abundance along the margins of streams.
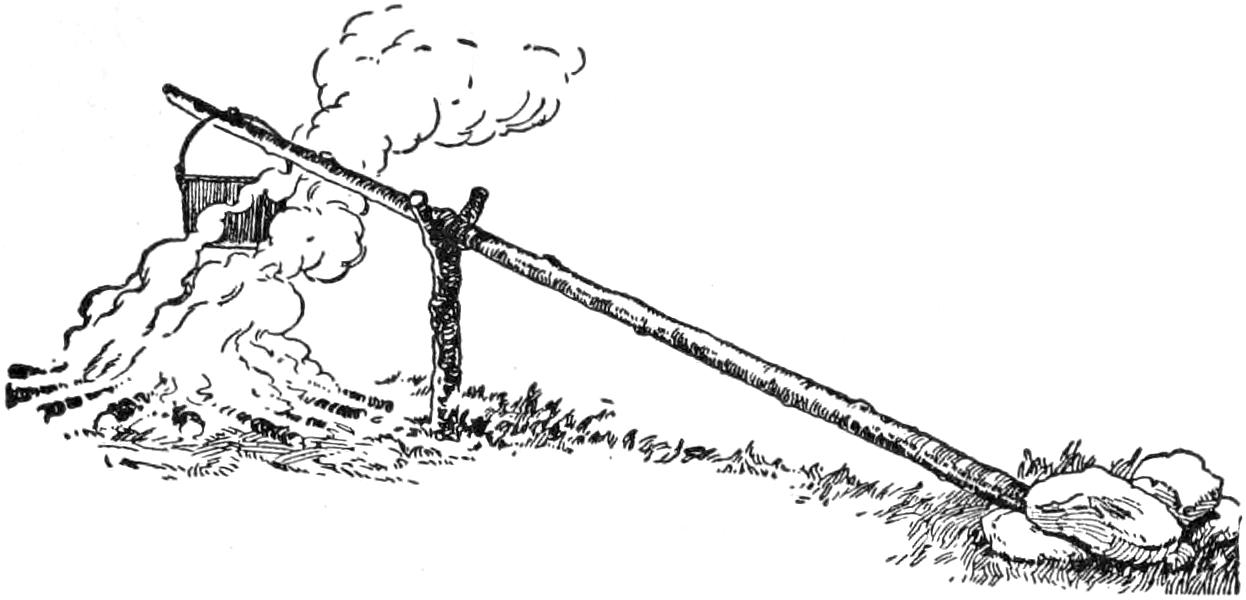
A Green Pole Placed in a Forked Stick Provides a Pot Hanger for a Noonday Meal
For cooking the noonday meal a small fire will suffice to boil the pot and furnish the heat sufficient to make a fry. Simply drive a forked stick in the ground and lay a green stick in the fork with the opposite end on the ground with a rock laid on it to keep it down, and hang the pot on the projecting stub left for this purpose. A long stick with projecting stubs, planted in the ground to slant over the fire at an angle, will serve as well. Let the pot hang about 2 ft. from the ground, collect an armful of dry twigs and plenty of larger kindling sticks. Now shave three or four of the larger sticks and leave the shavings on the ends, stand them up beneath the pot, tripod fashion, and place the smaller sticks around them to build a miniature wigwam. While the pot is boiling get a couple of bed chunks, or andirons, 4 or 5 in. in diameter, set and level these on each side of the fire, and put the frying pan on them. When the pot has boiled there will be a nice bed of coals for frying that will not smoke the meal.
When the woodsman makes “one-night stands,” he will invariably build the fire and start the kettle boiling while he or a companion stakes the tent, and as soon as the meal is prepared, a pot of water is started boiling for dish washing.
For roasting and baking with the reflector, a rather high fire is needed and a few sticks, a yard or more long, resting upright against a backlog or rock, will throw the heat forward. When glowing coals are wanted one can take them from the camp fire, or split uniform billets of green, or dead, wood about 2 in. thick and pile them in the form of a hollow square, or crib. The fire is built in the center of the crib and more parallel sticks are laid on top until it is a foot or more higher. The crib will act as a chimney, and a roaring fire will result, which upon burning down will give a glowing mass of coals.
Camp cookery implies the preparation of the more simple and nutritious foods, and in making up a list it is well to include only the more staple foodstuffs, which are known to have these qualities. Personal ideas are certain to differ greatly, but the following list may be depended upon and will serve as a guide.
Provision List
This list of material will be sufficient for two persons on an outing of two weeks. Carry in a stout canvas food bag 12 lb. of common wheat flour. The self-raising kind is good, but the common flour is better. It is well to bring a little yellow, or white, corn meal, about 6 lb., to be served as a johnny cake, hot, cold, or fried mush. It is fine for rolling a fish in for frying. Rice is very nutritious, easily digested, and easy to cook. It is good when boiled with raisins. When cold, it can be fried in slices. About 3 lb. will be sufficient. Oatmeal is less sustaining than rice, but it is good for porridge, or sliced when cold and fried. Take along about 3 lb. About 2 lb. of the self-raising buckwheat flour should be taken along, as it is the favorite for flapjacks or griddle cakes. Beans are very nutritious, and about 2 lb. of the common baking kind will be required, to boil or bake with the salt pork. For soups, take 2 lb. of split peas. They can also be served as a vegetable. Salt pork is a stand-by, and 5 lb. of it is provided and carried in friction-top tins or a grease-proof bag. It should be parboiled before adding to the beans or when fried like bacon. The regulation meat of the wilderness is bacon, and 5 lb. of it is carried in a tin or bag. Carry along 3 lb. of lard in a tin or bag, for bread-making and frying. About 3 lb. of butter is carried in a friction-top tin. For making rice puddings, take along 1 lb. of raisins. About 1 lb. of shredded codfish is good for making fish balls. Other small articles, such as ¹⁄₂ lb. of tea; 1 lb. of coffee; 3 lb. of granulated sugar; 1 pt. of molasses; 1 pt. of vinegar; 4 cans of condensed milk; 1 can of milk powder, a good substitute for fresh milk; 1 can egg powder, good for making omelets or can be scrambled; 1 lb. salt; 2 oz. pepper; 1 package each of evaporated potatoes, onions, and fruits, and 3 packages of assorted soup tablets.
This list is by no means complete, but it will suffice for the average person on the average trip, since the occasional addition of a fish or game will help to replenish the stores. When going very light by pack, only the most compact and nutritious foods should be selected, while on short, easy trips the addition of canned goods will supply a greater variety.
Woodcraft
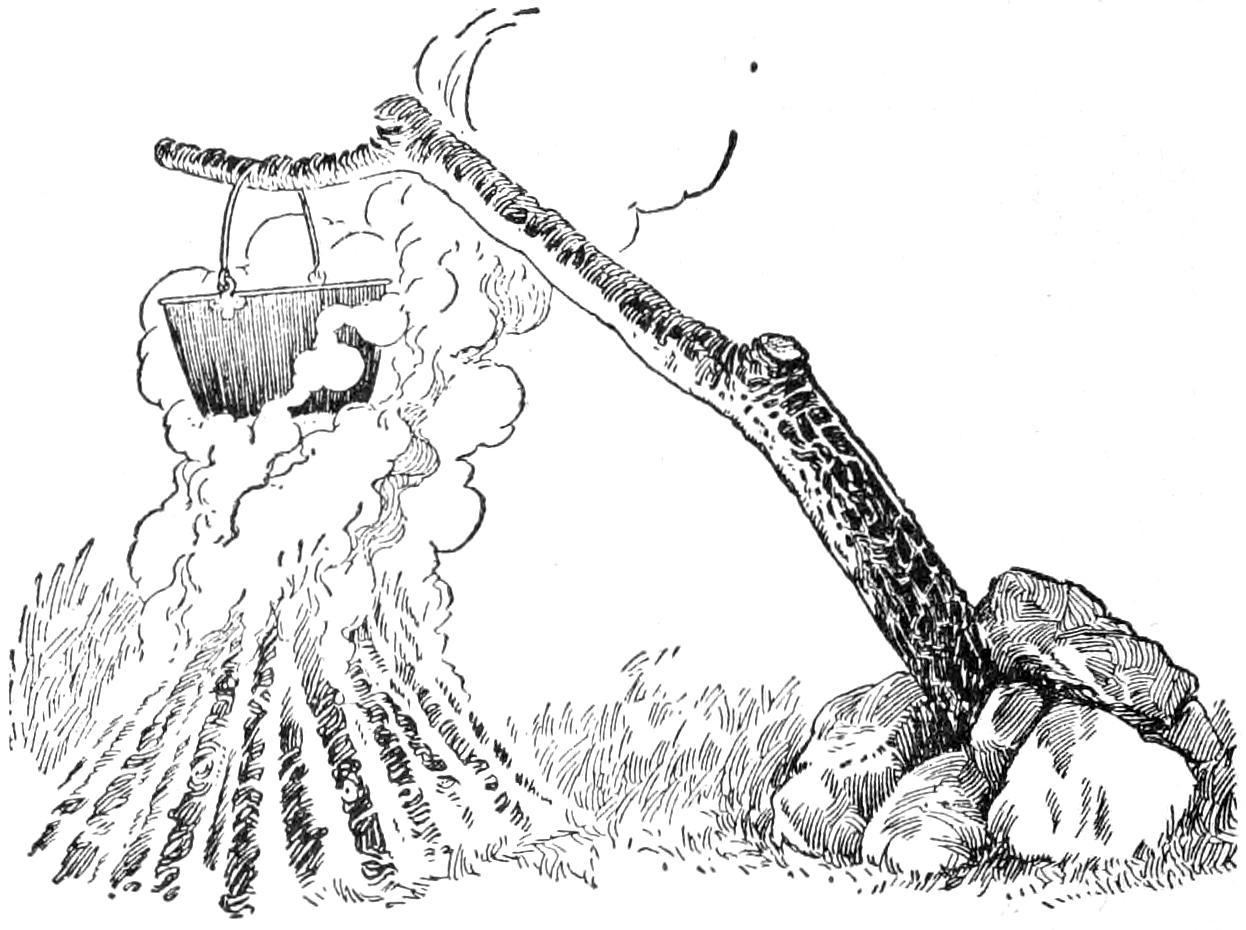
A Limb Supported at an Angle over the Fire Is Another Means of Hanging the Pot
While shooting and fishing and camping out are chapters in the book of woodcraft, the word is generally defined to mean the knack of using the compass, the map, and in making use of the natural signs of the woods when traveling in the wilderness. If the camper keeps to the beaten paths and does not stray far from the frequently used waterways, he needs no compass, and sufficient knowledge of the ways of the woods may be acquired from the previous articles, but if the outer ventures into an unknown region the value of more intimate knowledge increases as the distance to civilization lengthens, because it will enable him to keep traveling in the desired direction and prevent the “insane desire to circle,” should one discover he has lost the trail.
The Emergency “Snack” and Kit
The woodsman well knows that it is an easy matter to stray farther from camp than he intended to when starting out, and that it is a common enough occurrence to lose one’s bearings and become temporarily lost. To prepare for this possible emergency and spend a comfortable night away from the camp, he carries in his pocket a little packet of useful articles and stows away a tiny package containing a small amount of nutritious food. When leaving camp for a day’s hunting and fishing, the usual lunch is, of course, included, but in addition to this, the woodsman should carry a couple of soup tablets, a piece of summer sausage, and some tea. Wrap this in oiled silk, and pack it in a flat tin box. It will take up very little room in the pocket.
The emergency kit is merely a small leather pouch containing a short fishing line; a few fishing hooks; 1 ft. of surgeon’s adhesive plaster; needle and thread; a few safety pins, and a small coil of copper or brass wire. These articles, with the gun and a few spare cartridges, or rod; a belt knife; match safe; compass; map; a little money, pipe, and tobacco, make up the personal outfit without which few woodsmen care to venture far from camp. In addition to the above, I carry a double-edge, light-weight ax, or tomahawk, in a leather sheath at the belt and a tin cup strung to the back of the belt, where it is out of the way and unnoticed until wanted.
The Compass
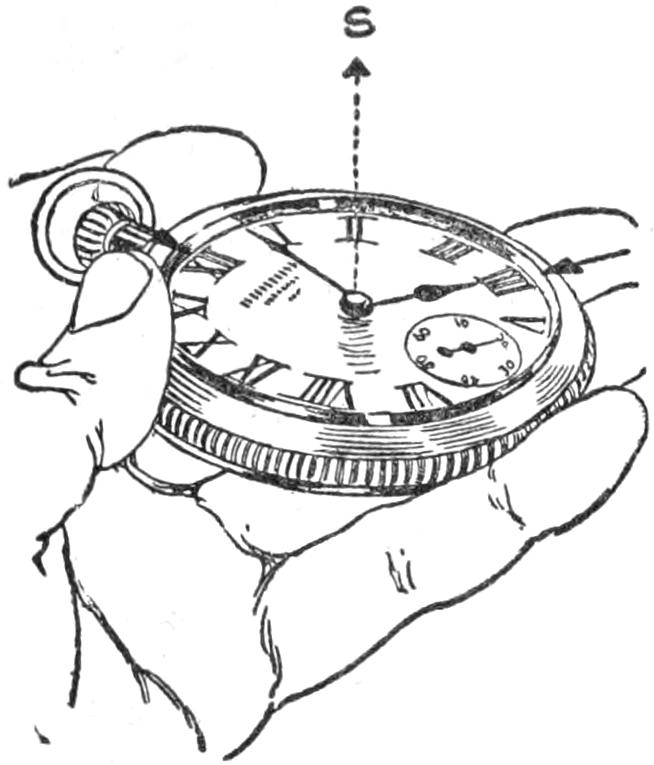
A small pocket compass affixed to a leather thong should be carried in the breast pocket and fastened to a button of the shirt. An instrument costing $1 will be accurate enough for all purposes. Many of the woodsmen as well as the Indians do not use a compass, but even the expert woodsman gets lost sometimes, and it may happen that the sun is obscured by clouds, thus making it more difficult to read the natural signs of the wilderness. The compass is of little value if a person does not know how to use it. It will not tell in what direction to go, but when the needle is allowed to swing freely on its pivot the blue end always points to the magnetic north. The true north lies a degree or more to either side. In the West, for instance, the needle will be attracted a trifle to the east, while on the Atlantic coast it will swing a trifle to the west of the true north. This magnetic variation need not be taken into account by the woodsman, who may consider it to point to the true north, for absolute accuracy is not required for this purpose. However, I would advise the sportsman to take the precaution of scratching on the back of the case these letters, B = N, meaning blue equals north. If this is done, the novice will be certain to remember and read the compass right no matter how confused he may become on finding that he has lost his way. The watch may be used as a compass on a clear day by pointing the hour hand to the sun, when the point halfway between the hour hand and 12 will be due south.
The compass needle is attracted to iron and steel, therefore keep it away from the gun, hatchet, knife, and other metal articles. Hold the compass level and press the stop, if it has one, so that the needle may swing free. Note some landmark, as a prominent tree, high cliff, or other conspicuous object lying in the direction of travel, and go directly to this object. Consult the compass frequently when making a detour, or when the landmark passes out of sight. When this mark is reached, select another farther on and continue the travel, always picking out new marks along the line indicated by the compass. When making camp, consult a map, study it, and so gain a good general idea of the surrounding country; and when leaving camp, take the bearings from the compass. By so doing a person will know in what direction he is traveling, and when the course is changed, keep the general direction in mind. When climbing a hill or making detours, take a mental note of the change in direction and the bearings will not be lost.
Maps
The maps of the U. S. Geological Survey are drawn to a scale of 2 in. to the mile and cost 5 cents each. On the back of each map are printed the symbols showing the character of the land, the contours, roads, and all important rivers and lakes in the district. For convenience, the map should be pasted on a backing of cotton cloth and then cut up into handy sections. Number the sections from left to right and paste a key to the pieces on the back of one of them.
Natural Signs
When traveling through underbrush the woodsman cannot see far ahead, and so lays a true course by noting the position of the sun. For example, here in the northern hemisphere the sun rises just south of east and sets somewhere south of due west. Therefore, if a person is going north, he should keep the sun on the back and to the right shoulder in the morning hours; full on the back at noon, and on the back and over the left shoulder throughout the afternoon.
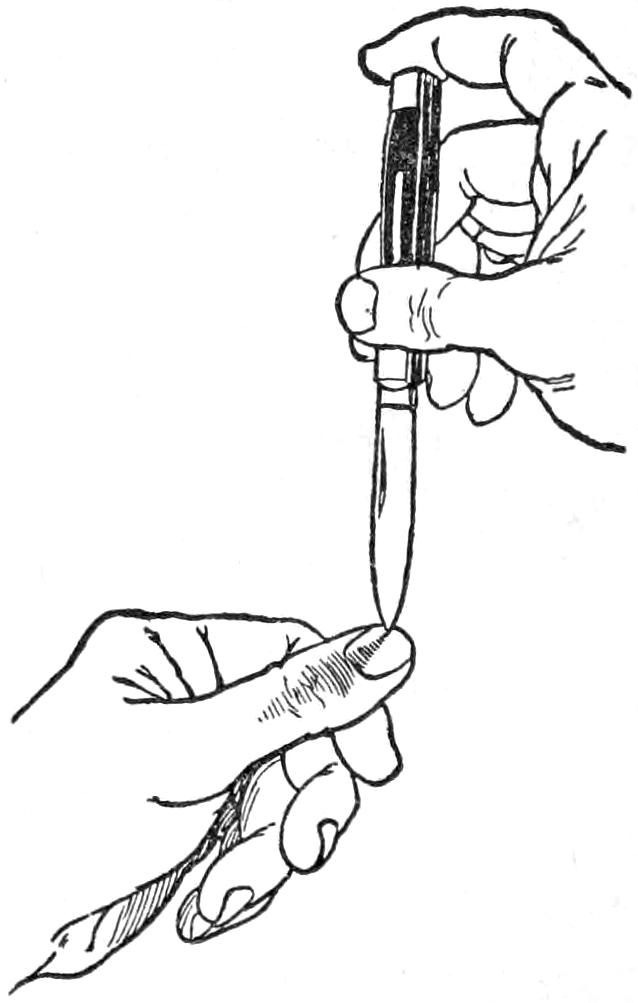
If the day is cloudy, set the point of a knife blade on the thumb nail, twist it around until the full shadow is cast on the nail, thus indicating the position of the sun.
The direction of the wind is apt to change and for this reason is an unreliable guide, while the so-called signs of the woods, such as the tips of evergreen trees pointing north, bark being thicker on the north side of trees, or moss growing thicker on the north side of the trees, are by no means to be depended upon. There is absolutely nothing in these signs. However, every woodsman is aware that the foliage of trees grows somewhat thicker on the south side, and that the branches are rather shorter and more knotty on the north side, but these and other signs are scarcely infallible, and if they were, few tenderfeet would recognize them.
When traveling by night, look for the Big Dipper or Great Bear, as the two end stars are known as the pointers, pointing to the north star.
Marking the Trail
When traveling over old and blind trails, look for the old blaze marks, and if doubtful about them, make new ones by breaking down the brushes every 15 or 20 ft., the bent part pointing in the direction of travel. If a road is encountered, it is easy to tell if it is a tote or logging road, for tote roads are crooked and wind about the trees and rocks, while the logging road is fairly straight and broad. Of course, tote roads lead nowhere in particular, but all logging roads are sure to come to a fork and lead to water. When breaking a new trail, blaze it by taking a single clip from a tree from the side it is approached, and on the opposite side make two blazes, indicating the way from the camp. If this is done, a person will always know the way back if the trail is crossed from side to side. This is the rule of the wilderness, but is not always observed to the letter, for many woodsmen blaze their trail by clipping the trees as they pass them. Be sure to blaze your own trail correctly, and when you come to a place where two roads or trails fork, set a stick to indicate the right direction.
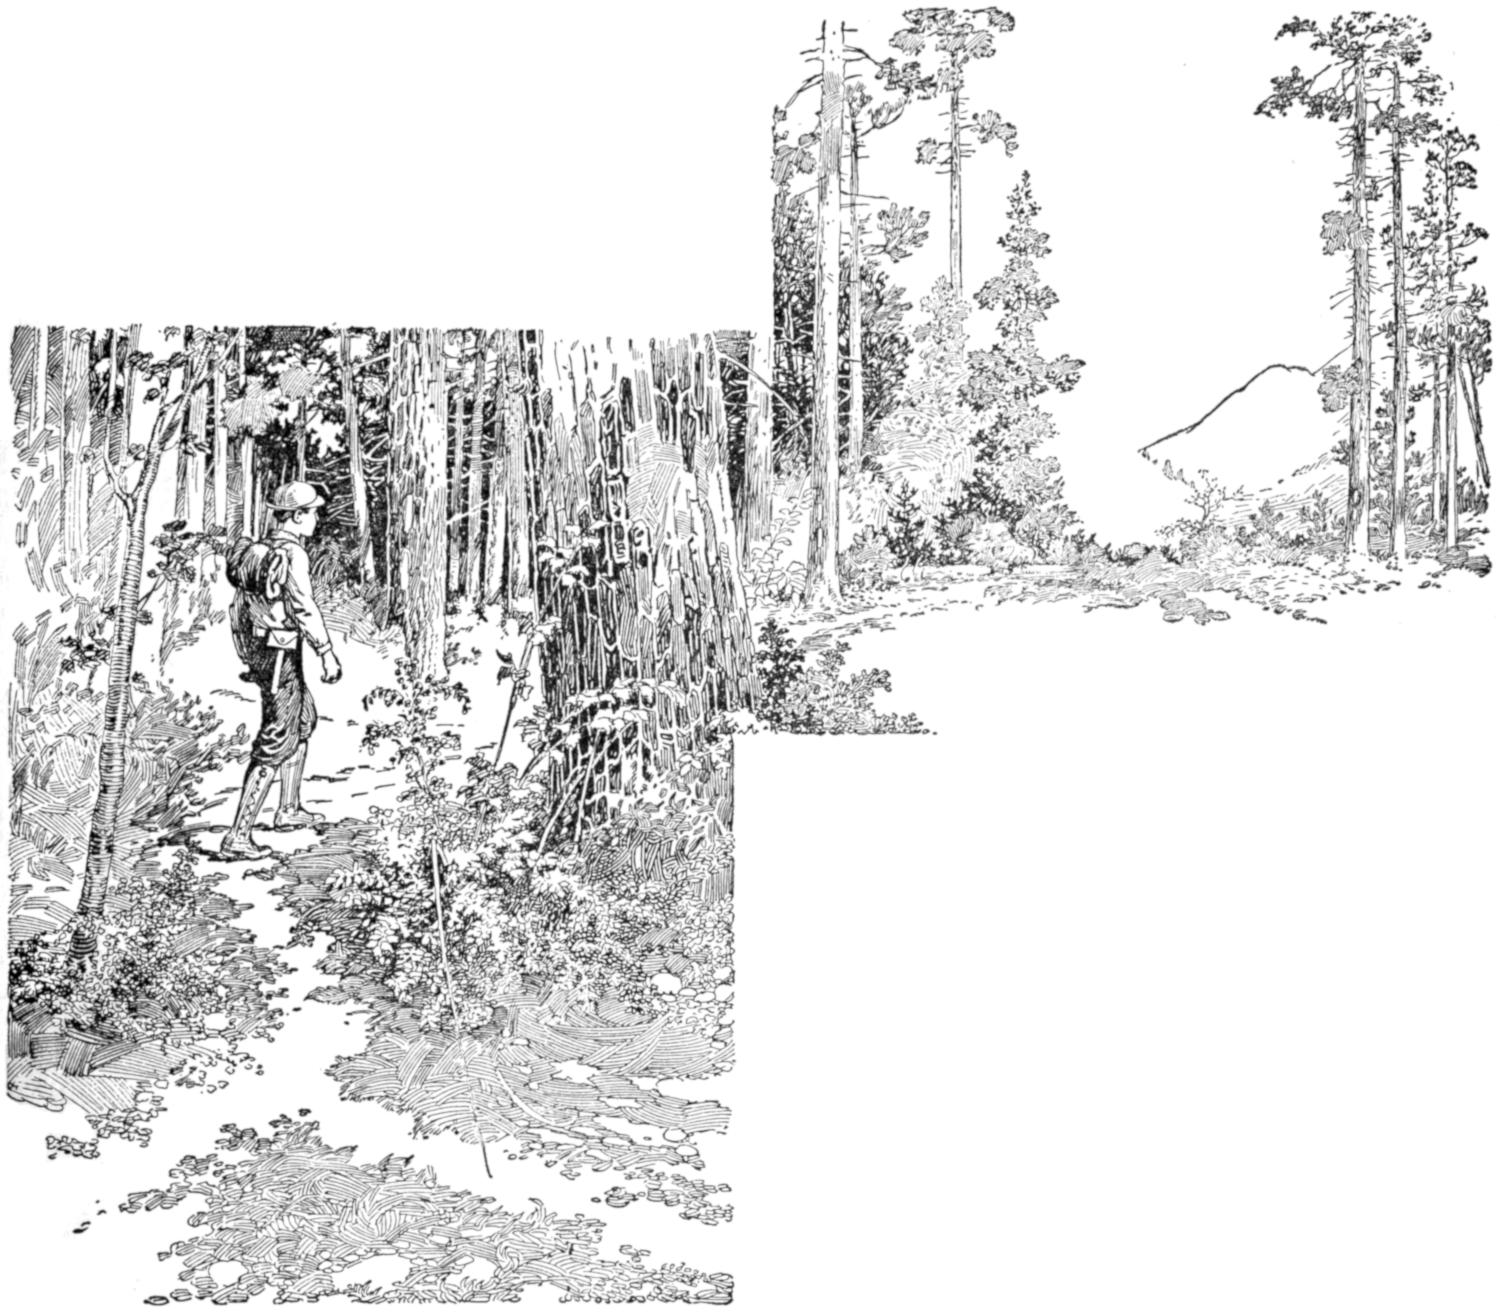
Note Some Landmark, as a Prominent Tree, High Cliff, or Other Conspicuous Object Lying in the Direction of Travel and Go Directly to the Object, and Look for the Old Blaze Marks
When a person becomes lost in the woods, as every woodsman is sure to do sometimes, sit down and think it over. Many times a person is nearer camp and companions than it is possible to realize, and if a straight direction is taken, a lumber road or a stream will be found that will give one his bearings. Above all, do not become frightened. If the emergency kit and lunch have not been forgotten, a day and night in the woods alone is not a hardship by any means. Avoid wasting energy by rushing madly about and forgetting to blaze the trail that is being made. Bend the points of the brushes down in the direction of travel Do not shoot the last cartridge to attract attention, and do not shout until hoarse. Sit down and build a fire of green wood, damp leaves or moss, so that it will smoke. Build a second fire a short distance from the first. This is the recognized signal of the one who is lost. The afternoon may be windy but the wind is certain to die away at sundown, and the smoke rising from the fires will be visible from a considerable distance. When an Indian gets lost he merely camps on the spot and awaits the next day for picking up the trail.