Book 3 — A Homemade Ellipsograph By J. A. SHELLY
Reading edition
The instrument illustrated was designed to take the place of the two nails and a piece of string for drawing ellipses of different sizes. It is made of hard wood, preferably maple or beech, and consists of a bar with one fixed and one sliding head, the latter having a wedge clamp to hold it at any point desired on the bar.
In the ends of the heads are driven two coarse needles that have been broken off about ⁵⁄₈ in. from the eye end. These ends should be placed ¹⁄₈ in. from the inside of each head and the same distance from the bottom, and driven in until the eyes are each ¹⁄₈ in. from the surface. A piece of linen thread is run through the eye of the needle that is in the end of the sliding head and knotted to prevent its pulling out, and the free end is run through the needle eye on the fixed head. The thumb tack in the fixed head is to secure the free end of the thread. The tack is driven in at an angle so that one edge sticks up enough to allow the thread to be pulled under it.
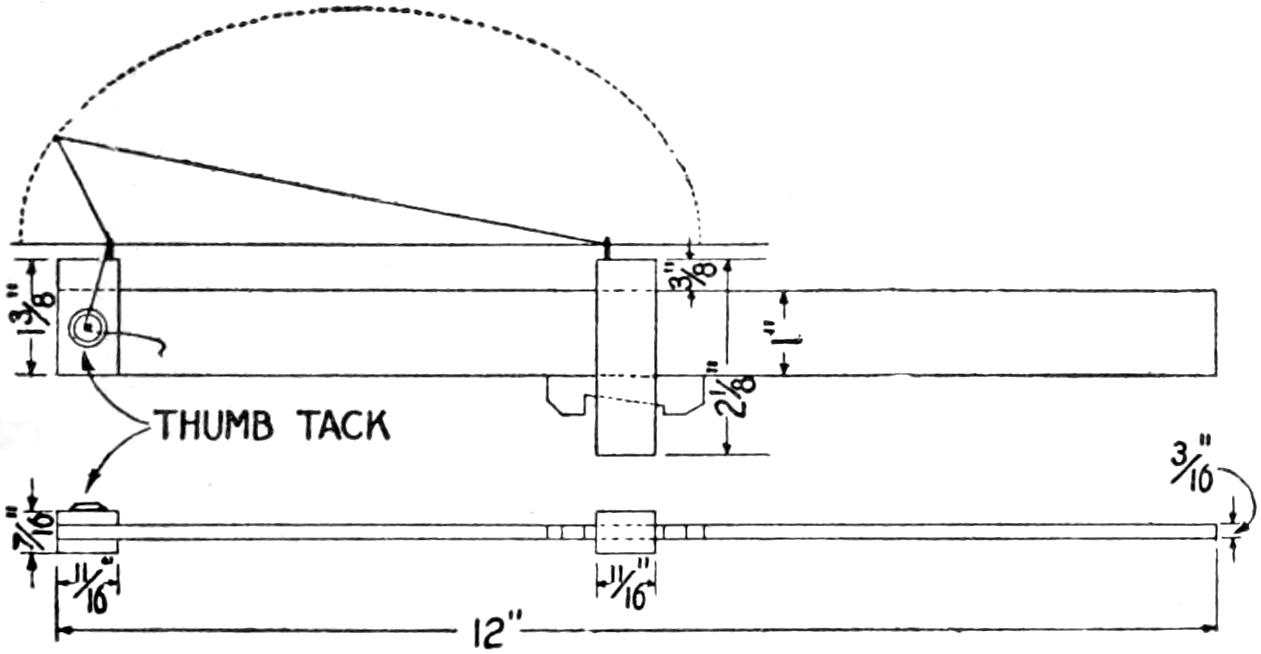
The Sliding Head can be Set so That Any Size Ellipse may be Drawn within the Scope of the Instrument
To operate the ellipsograph lay out the length of the major axis on a center line, then bisect the distance between these points and erect a perpendicular. On this line lay off half the minor axis, measuring from the center line; then from this point locate the foci by setting the dividers to half the major axis and scribing arcs of circles to cut the center line. Set the heads of the instrument so that the projecting needle ends will be the same distance apart as the foci, and clamp the sliding head with the wedge. Set the instrument so that the needle eyes will be exactly over the points where the foci are on the center line. A pencil, with a little groove filed ¹⁄₈ in. from the point, for the thread to run in, is set to half the minor axis and the thread is pulled taut and secured by the thumb tack. The pencil should be held perfectly perpendicular while scribing the line. The instrument must be reversed to draw the other half of the ellipse.
To draw an ellipse that will be an exact projection of a circle at any given angle it is necessary to determine the length of the major axis. This may be done by laying out the circle, either full size or to scale, and projecting two parallel lines equal to the diameter of the circle, or its scale, and connecting these lines with a line drawn to the required angle. The length of this line is the major axis.
¶Never run a glass cutter over the same line twice, as this will ruin the cutter. Alcohol rubbed along the line to be cut aids in the process.