Book 3 — Portable Fence for Baby’s Play Area By L. N. ROBINSON
Reading edition
A child in the “toddler” stage should be provided with a safe place in which to play without disturbing the household routine of the busy mother too frequently. The folding wood-and-wire fence shown in the illustration meets this need in a practical and inexpensive manner. It may be used in the home or out of doors, the fence being especially useful in the latter case, since it protects the child, and likewise the lawn flowers, which a youngster, unguarded, may injure. The fence is 25 to 32 in. high, strong enough to support a grown person sitting on the edge of it, and incloses an area of about 4 by 6 ft. This is ample for the child, and the folded fence is thus not too bulky to be transported easily. The materials cost less than $3.50, including hardware for the making of the fence, as shown in the working drawings. The wood used for the main frames is ¹⁄₂ by 2 in., and they are covered with wire mesh, the edges of which are nailed under strips, on the outer side of the frames. Care should be taken to insure that none of the wire strands is exposed, thus endangering the child, or the clothes of passers-by. The frames are hinged together, as shown in the plan, and fold into compact form. Two long and four short frames are required. Cut the top and bottom rails of the long frames 6 ft. in length, and those of the shorter frames and the stiles 25 in. The corner joints are cross-lapped by cutting away one-half the thickness of each strip, as shown at A. The joints at the top and bottom of the center stile, or vertical piece, are made as shown at B, and the joints at the crossing of the center stiles and the cross braces, as at C. The braces only are notched to fit the stile. Each of the joints is fastened with flat-head screws, countersunk. The ends of the braces are cut to fit flush into the corners of the frames, and are nailed in place. This provides a flat nailing surface for the wire mesh and the strips that cover its edges.
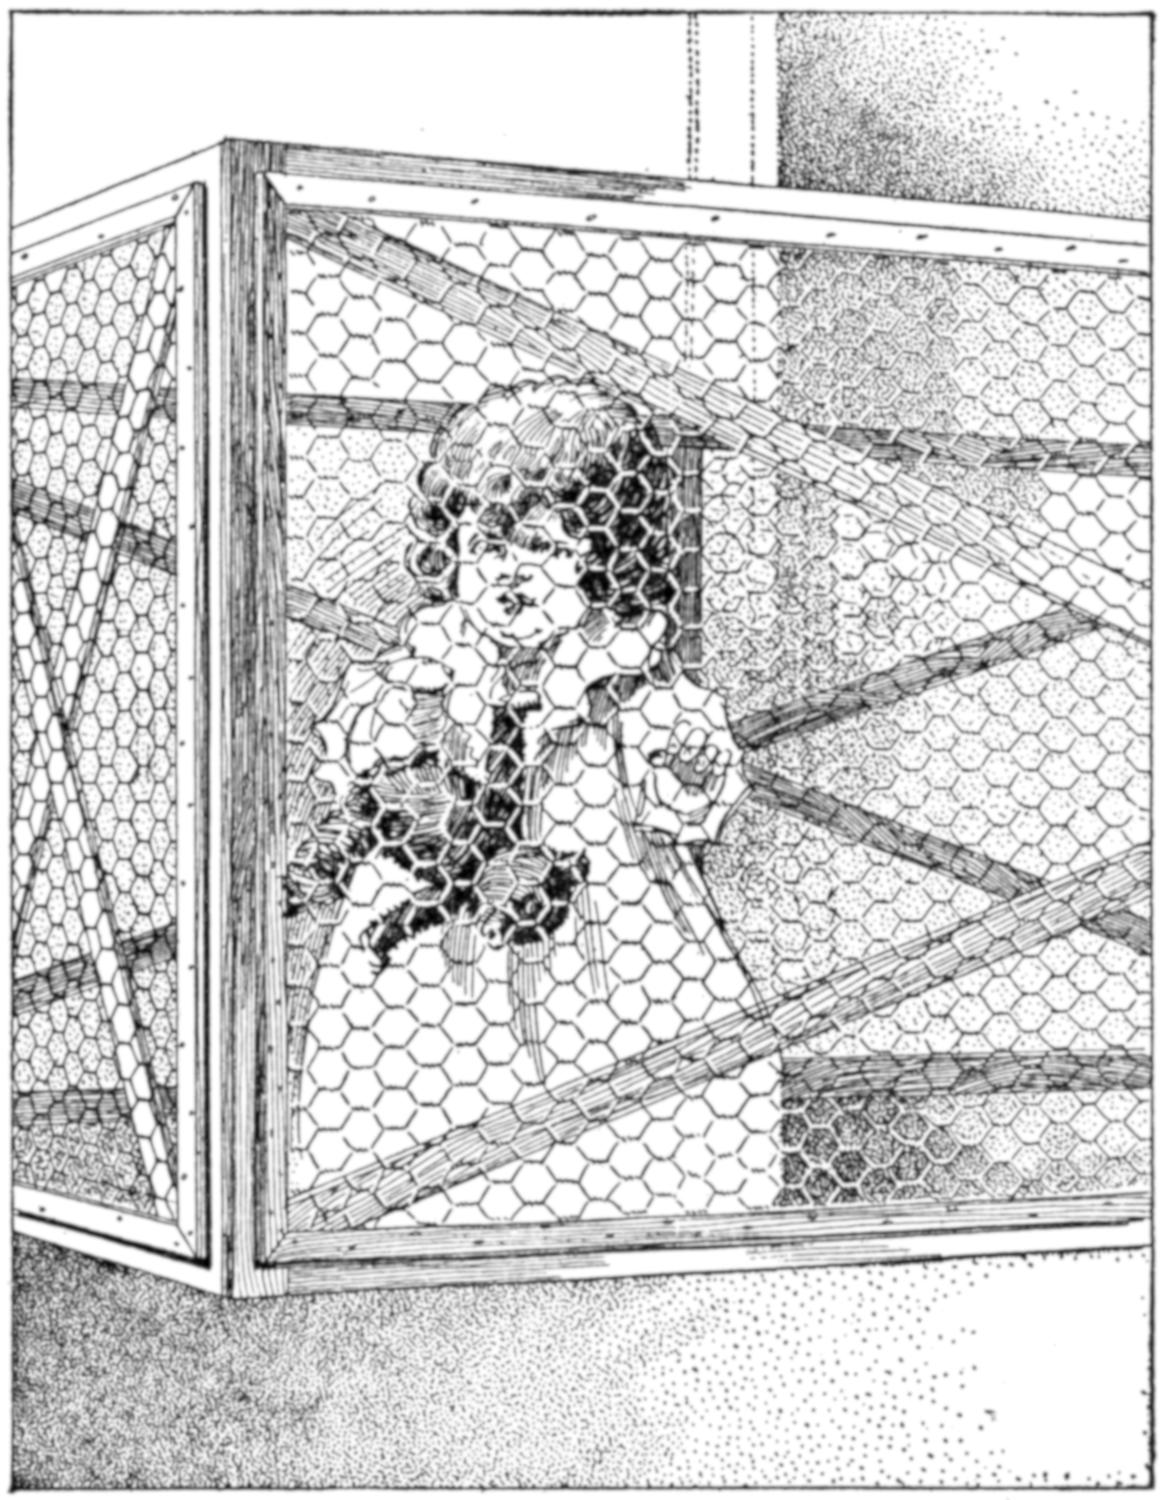
A Safe Play Space Either Indoors or Outdoors is Provided for the Child, and the Fence may be Moved Easily. The Construction Is Light yet Stable, and can be Carried Out without Difficulty by the Home Woodworker
Before putting on the wire mesh, all the exposed corners should be “broken” slightly with sandpaper, the wood wiped smooth, and finished with a coat of shellac. The wood may, of course, be left unfinished. In fixing the 1-in. wire mesh in place, fasten one end of the piece squarely at the end of the frame, nailing it with staples. Place a strip of wood under each end of the frame and bear down on the middle of the frame, or weight it, to produce a bowed effect. Then nail the other end of the wire securely; on removing the strips, the wire will be drawn taut. Tack the edges down, and repeat this process on the other frames. Next nail the covering strips on the front faces of the frames, mitering them at the corners, as shown at A.
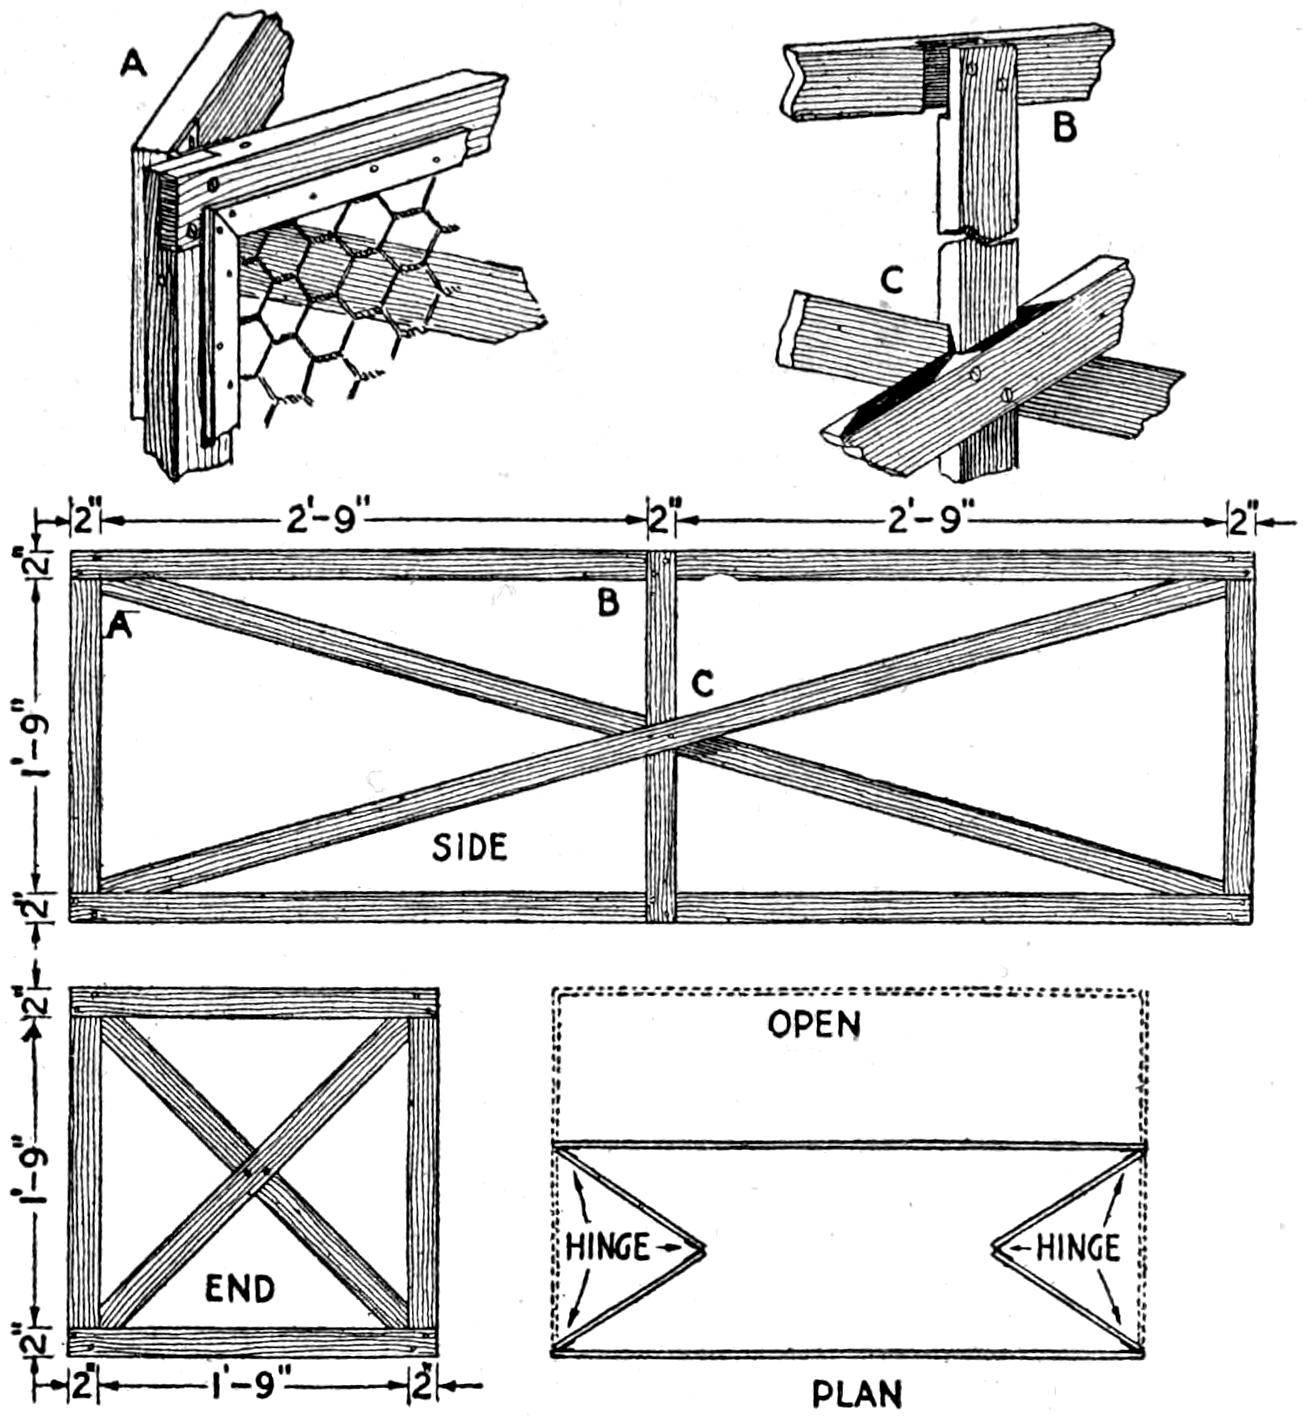
Join the Pieces with Well-Made Lap Joints, and Hinge the Frames as Indicated
The frames are then joined by means of hinges, as shown in the plan at A. Care should be taken that they are set so that the corners of the fence meet squarely and evenly when it is opened. Metal drawbolts should be fastened horizontally, one on the top of each folding joint between the end sections. These will prevent the child from folding the ends in, and possibly injuring its fingers. The completed fence is then given a final coat of shellac or varnish, the galvanized wire being left unfinished.
The materials required for the fence are as follows, the wood being listed in lineal feet, and smoothed on four sides to the dimensions indicated:
155 ft. ¹⁄₂ by 2-in. clear pine
50 ft. ¹⁄₄ by 1-in. clear pine
22 lineal ft. 1-in. mesh, 2-ft. wide wire fencing.
6 pairs 1¹⁄₂ in. iron plain butt hinges, with screws.
2 steel drawbolts, with screws.
¹⁄₂ pt. white shellac.