Book 3 — A Craftsman Leather Billfold By LIVINGSTON HAVILAND
Reading edition
The making of a billfold is easily within the range of an amateur in leather work, who will observe the instructions carefully. Seal, morocco, pigskin, and ooze sheep are satisfactory. Skiver, or thin leather, and silk moiré make suitable linings. When the processes involved in the making of the billfold are mastered, numerous other small articles in leather will suggest themselves, and can be made similarly.
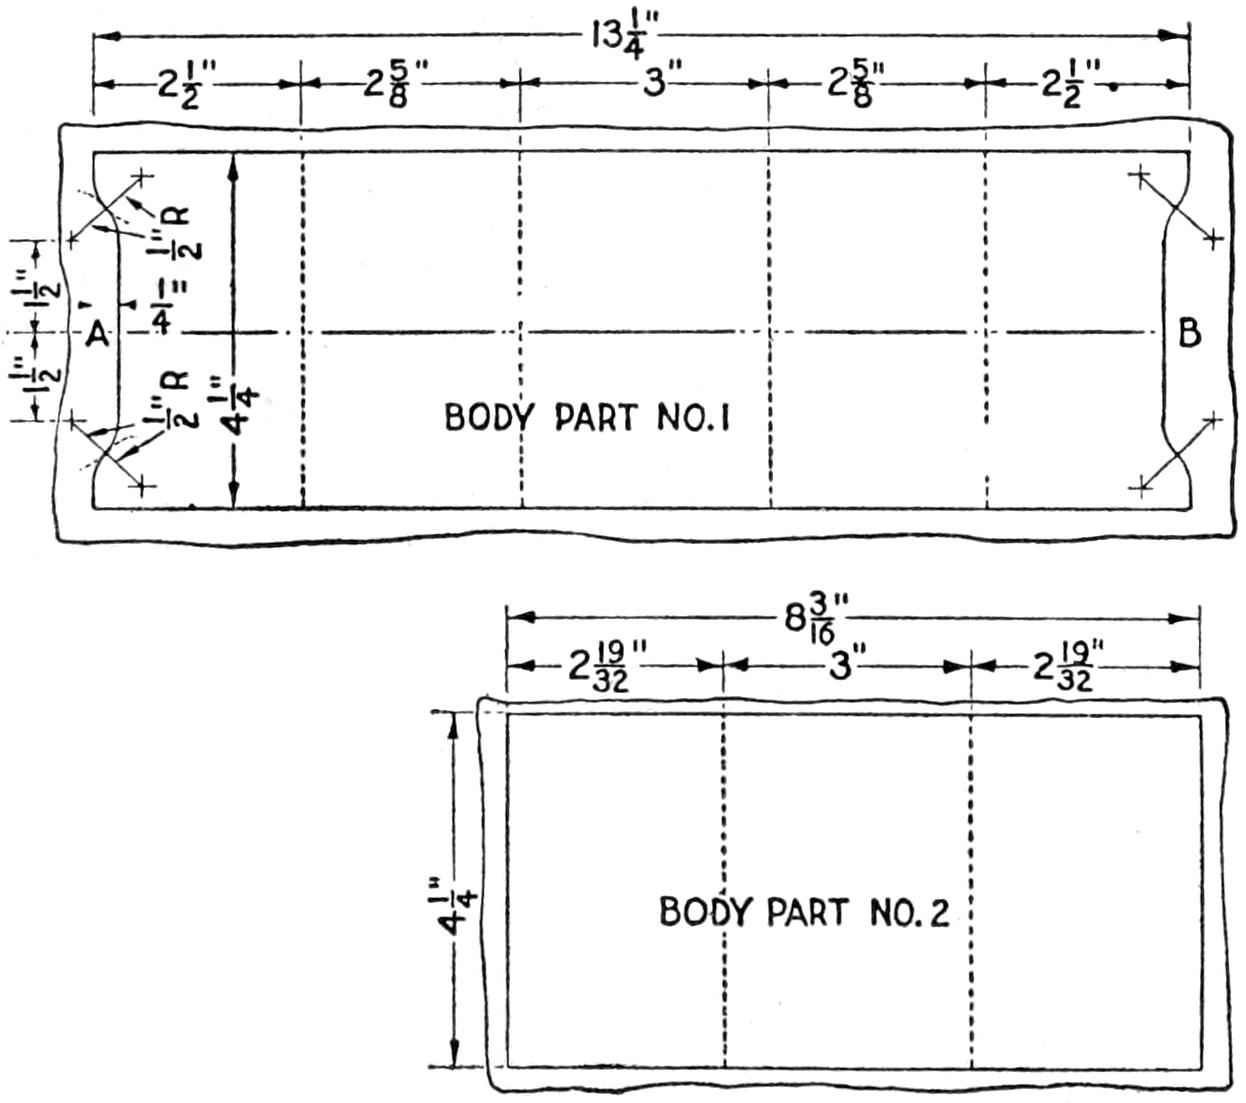
Fig. 1. Place the Pattern on the Leather and Trim It to Size Even with the Edges of the Pattern
The finished billfold is shown with the cardcase side up; folded, and with the bill compartment open, in Fig. 2. Begin the making of it by cutting a pattern of stiff cardboard for the main portion, or body part No. 1, as shown in Fig. 1.
Make a second pattern for body part No. 2, as shown in Fig. 1. Trim the leather to fit the patterns, a straight edge of metal being placed over the pattern as a guide for the knife. A close-grained hardwood board, or a piece of sheet zinc, is suitable as a base for cutting the leather.
Cut pieces of lining slightly larger than the patterns. If skiver is used, it must be glued to the leather with a good quality of leather glue, which should be pliable so as not to crack the leather. Do not stretch the lining, but merely smooth it gently, as otherwise it may cause the leather to buckle. Place the glued parts under a light weight to dry. In fitting the silk lining into place, apply a thin stripe of glue around the edges only, and permit them to extend beyond the leather. Then trim them off neatly.
Part No. 1 is to be folded to form the back of the billfold and also the two pockets for cards. The parts are glued as shown in Fig. 3. Weight the billfold and permit the glue to dry. The sewing may then be undertaken.
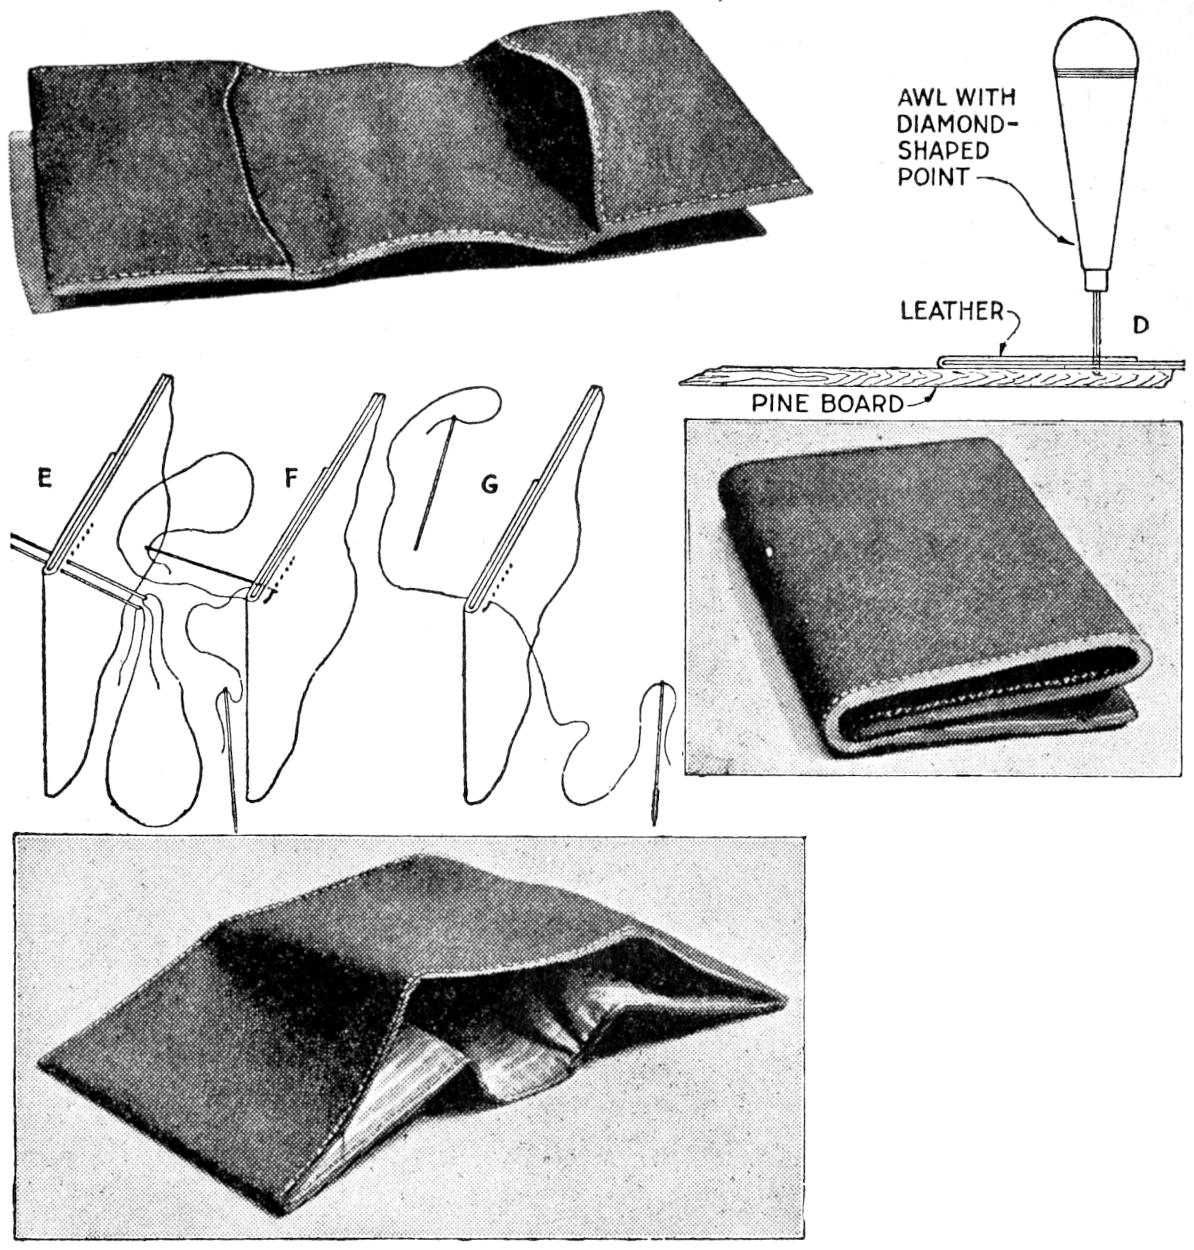
Fig. 2. The Photographs Show the Cardcase Side, the Folded Billfold, and the Silk-Lined Money Compartment
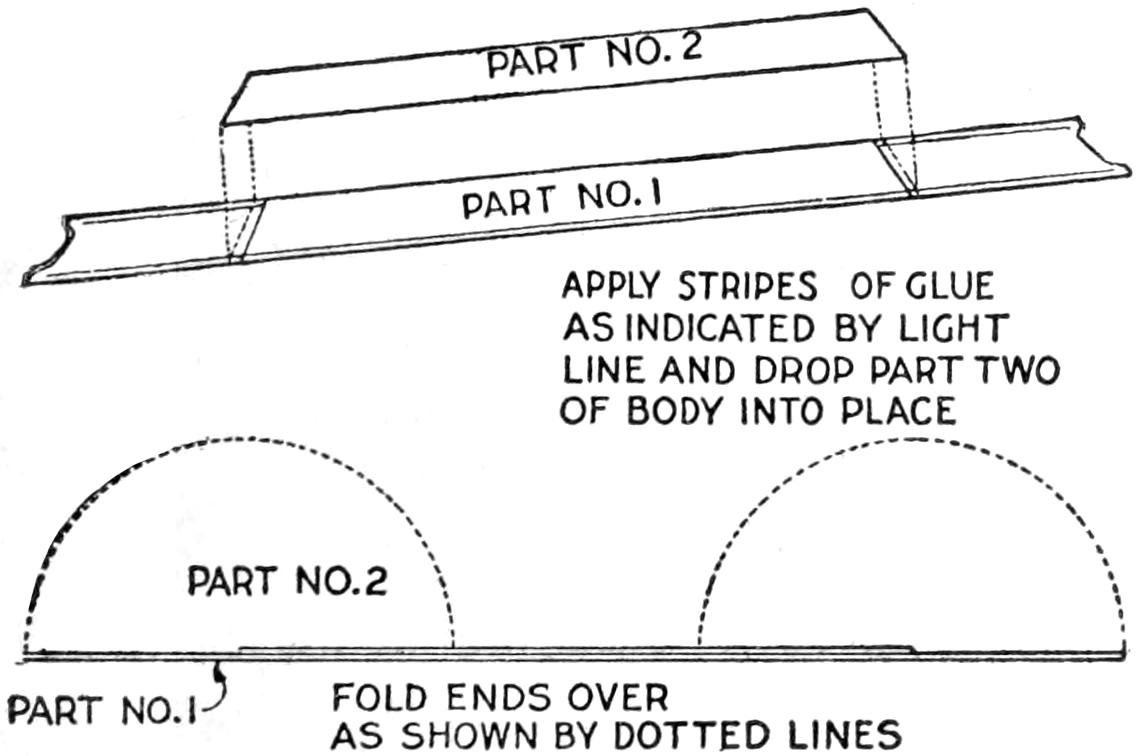
Fig. 3. Glue the Parts Together Carefully along the Edges, and Fold the Ends as Indicated
The neatness of the billfold will depend largely on the care with which the sewing is done, and the finish on the edges. Draw a straight line with a blunt-point tool along the edges to be sewed, ³⁄₁₆ in. from them. Mark the spacing for an inch of the stitches on a strip of paper and transfer them to the stitching line. Punch the holes, making certain that each is made with the awl held vertical, as shown at D. Back the open ends with strips of cardboard when punching holes in them. Heavy, waxed silk of a color to match the leather is used for the sewing. The work may be done by hand without a holder, clamped between two boards. Thread the two needles and start them from the right side, as at E. Pass the needle from the first hole through the second as at F. With the needles then in position, as at G, continue this stitch. Tie the ends of the thread neatly at the end of the stitching. Trim the edges and tool them to a smooth finish with a suitable metal tool, or rod, heated moderately, applying water with the finger tip.
¶The taper of a key is generally ¹⁄₈ in. per foot of length, and keys having a head are preferable because of greater ease in removing them. The width of a key is usually ¹⁄₄ the diameter of the shaft, plus ¹⁄₈ inch.