Part 1 — CHAPTER IV.
Reading edition
Practical Microscopy: Manipulation, and Mode of Using the Microscope.
In this chapter it will be my aim to discuss the best practical methods of employing the microscope and its appliances to the greatest advantage. First, the student should select a quiet room for working in, with, if possible, a northern aspect, free from all tremor occasioned by passing vehicles. The table selected for use should be firm, and provided with drawers, in which his several appliances can be kept ready to hand. The microscope must be placed at such an inclination as will enable him to work in comfort, and without putting strain on the muscles of the neck or fatiguing the eyes. The next important point is that of light. Daylight, in some respects, is an advantage; this should come from a white cloud on a bright day, but as a rule more satisfactory results will be obtained by using a well-made lamp, as this can be controlled with ease, and used at a proper height and distance from the microscope. To have a good form of lamp is as much to be desired for the student as for those engaged in the more advanced work of microscopy.
Whatever the source of light we must on no account over-illuminate. The object having been placed on the stage of the microscope, the body should be racked down to within a quarter or half an inch of the specimen, and then, while looking through the eye-piece, should be slowly withdrawn until a sharp image comes into view. The fine adjustment may now be used for the more delicate focussing of the several parts of the field.
Accurate adjustment of focus is required when using a ¼-inch objective; details of the object, as striæ, being brought into view when a stronger light is thrown obliquely upon them from the mirror. If a 1-inch objective is used the light often proves to be in excess of what is required, and this must be regulated by the aid of the diaphragm.
The iris diaphragm, made to drop into the under-stage, is more generally employed, as when racked up to the object it affords every necessary graduation of illumination.
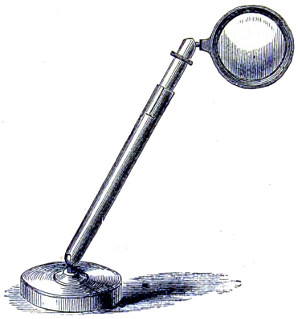
Fig. 201.—Bull’s-eye Lens.
To illuminate opaque objects the light should be thrown upon them from above by the bull’s-eye lens (Fig. 201). The focus of such a lens and the lamp placed at four inches from it, is about three inches for daylight, or two inches for artificial light. A large object may be placed upon the stage of the microscope at once, but smaller objects are either laid on a glass slide or held in the stage forceps.
When illuminating objects from above all light from the mirror, or that which might enter the objective from below the stage, should be carefully excluded. Dark-field illumination is a means of seeing a transparent object as an opaque one. The principle, however, is that all the light shall be thrown from below the object, but so obliquely that it cannot enter the object-glass unless interrupted by the object; this is best accomplished by Wenham’s Parabola.
Glass of any kind requires occasional cleaning; a piece of soft washed chamois leather should be used for this purpose. The fronts of the objectives may be carefully wiped, but not unscrewed or tampered with; a short thick-set camel’s hair brush may be passed down to the back lens, and all dust removed without doing any harm. If the objective is an immersion, carefully remove the fluid from the front lens, as even distilled water will leave a stain behind. For removing oil see special directions given at page 171.
When cleaning the eye-pieces, which should be done occasionally, the cells containing the glasses must be unscrewed and replaced one at a time, so that they may not be made to change places.
Any dirt upon the eye-pieces may be detected by turning them round whilst looking through the instrument; but if the object-glasses are not clean, or are injured, it will, for the most part, only be seen by the object appearing misty.
The object-glasses, when in use but not on the microscope, should be stood upon the table with the screw downwards, to prevent dust getting into the lenses, and they should always be put into their brass cases when done with. A large bell-glass shade will be found the most useful cover for keeping dust from the instrument when not in use.
When looking through the eye-piece be sure to place the eye in close proximation to the cap, otherwise the whole field will not be perfectly visible; it should appear as an equally well-illuminated circular disc. If the eyelashes are reflected from the eye-glass, the observer is looking upon the eye-piece, and not through it.
The Mirror.—The working focal distance of the mirror is that which brings the images of the window-bars sharply out upon the object resting upon the stage. In other words, the focus of the mirror is that which brings parallel rays to a correct focus on the object-glass. If employing artificial light, then the flame of the lamp should be distinguishable; a slight change in the inclination of the mirror will throw the image of the lamp-flame out of the field.
The strongest light is reflected from the concave side of the mirror, that from the flat side is more diffuse and less intense. Oblique light can be obtained by turning the mirror on one side and then adjusting it so as to illuminate the field from that position. All the necessary mechanism of the microscope is easily and quickly learned. The object-glasses or objectives are, as previously explained, designated according to the focal distance of a single lens of the same magnifying power. Thus a 2-inch objective is understood to be a combination which has the magnifying power of a single lens whose focal point is two inches from the object, and so on with reference to other powers. By the aid of different eye-pieces an extensive range of magnifying power can be obtained; for example, the 2-inch objective with a deep eye-piece will give the same amplification as the quarter objective with the ordinary eye-piece. Indeed, for certain observations, the combination of a wide-angled low-power objective, with a deep eye-piece, or compensating eye-piece, is considered to have an advantage.
It has been already explained that two objectives, one of much greater power than the other, but both having only the same numerical aperture, will show only the same amount of detail; the higher power on a larger scale. That is, supposing with a ¼-inch objective of 1·0 numerical aperture certain structure is resolved, then a 1⁄8-inch substituted with exactly the same numerical aperture, but with double the magnification, no more resolving power will be found in the latter objective than in the former. For this reason a doubt has been expressed as to whether high-power objectives—especially the more expensive oil-immersions, made to transmit large pencils of light through their larger apertures—are so well adapted for ordinary research as the best series of dry achromatic objectives, or even, in some instances, the medium aperture lenses; undoubtedly, for histological (physiological and pathological) work, the latter will be found to meet the students’ requirements quite as well as the former.
The student or amateur will do well to commence with moderate or medium powers, a 2-inch, a 1-inch, a ½-inch, a 4⁄10-inch, or ¼-inch. These, together with the A and B eye-pieces, will give a range of magnification from 30 to 250 diameters.
Penetration in the objective is a quality for consideration, as the adjustment of high powers is a work of delicacy, and in some cases their penetration is impaired by the arrangement made to obtain finer definition. The value, however, of penetration in an objective is always considered to be of more or less importance. It is a quality whereby, under certain conditions, a more perfect insight into structure is obtained. As a rule, the objective having the largest working distance possesses the better penetration. Theoretically, the penetration of an objective decreases as the square of the angular aperture increases. For this reason the medical student will be justified in choosing the objectives I have named, since these will be better adapted to his work and pursuits. The penetration of the objective is a relative quality assessed at a different value by workers whose aims are widely different. But for the observation of living organisms, the cyclosis within the cell of the closterium or valisneria, for instance, preference will undoubtedly be in favour of the objective with good penetration.
Resolving Power.—This is a quality highly prized by the bacteriologist. In the case of the high-angled apochromatic oil-immersion, with its compensating eye-piece, its resolution is found to be of very considerable advantage, because of its capacity to receive and recombine all the diffraction spectra that lie beyond the range of the older achromatic objective, with its smaller angular aperture. The actual loss of resolving power consequent upon the contraction of aperture from 180° to 128½° is ten per cent., if not more. Resolution depends, then, upon the quality and quantity of the light admitted, the power of collecting the greatest number of rays, and the perfection of centring. In other words, upon the co-ordination of the illuminating system of the microscope—mirror, achromatic condenser, objective and eye-piece. If diatoms are employed as test-objects, it should not be forgotten that there are great differences, even in the same species, in the distances their lines are apart. For this reason ruled lines of known value, as Nobert’s lines, are to be preferred. The following example will suffice to show the value of a dry 1⁄8-inch objective of 120° in defining the rulings of a 19-band plate, which is equivalent to the 1⁄67000th of an inch. This objective, with careful illumination, showed them all; but when cut down by a diaphragm to 110°, the eighteenth line was not separable; further cut down to 100° the seventeenth was the limit, to 80° the fourteenth, and to 60° the tenth was barely reached.
Flatness of Field.—This quality in the objective has, by the introduction of the immersion system, lost much of the importance formerly attached to it. Some writers assume it to be an “optical impossibility.” The compensating eye-piece has had the effect of contracting the visual field, consequently the peripheral imperfections of the objective are of a less disturbing character. It has, however, not been made perfectly clear whether the highest perfection of the two primary qualities of a good objective, defining power and resolving power, can be always obtained in one and the same combination of lenses.
Doubtless, defining power can be more satisfactorily determined by the examination of a suitable object, and the perfection of the image obtained; to assist in securing which, a solid axial cone of light equal to about three-fourths of the aperture of the objective must be employed.
To sum up, then, “the focal power of all objectives depends in their perfect definition, a property on which their converging power depends, and in turn their magnifying action is dependent; again, focal power is the curvature imprinted by the lens on a plane wave, and is reciprocal of the true focal length. It is appropriately expressed in terms of the proper unit of focal curvature, the dioptric; a unit of curvature.”39
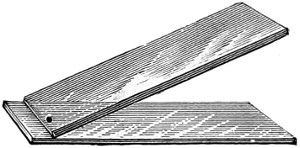
Fig. 202.—Seiler’s Test Slide.
It may be taken as an axiom with microscopists that “neither the penetrating power nor the high-power defining objective is alone sufficient for every kind of work. The larger the details of ultimate structure, the narrower the aperture—and the converse; the minuter the dimensions of elementary structure, the wider must be the aperture of the objective.” Every worker with the microscope must have satisfied himself of the truth of this statement, when engaged in the study of the movements of living organisms, or defining the intimate structure of the minuter diatoms, or of the podura scale.
Test for Illumination.—Dr. C. Seiler recommends the human blood corpuscle as the best test of good illumination. He prepares the object in the following manner: Take for the purpose a clean glass slide of the ordinary kind, and place near its extreme edge a drop of fresh blood drawn by pricking the finger with a needle. Then take another slide of the same size, with ground edges, and bring one end in contact with the drop of blood, as shown in Fig. 202, at an angle of 45°; then draw it evenly and quickly across the underslide, and the result will be to spread out the corpuscles evenly throughout. Blood discs being lenticular bodies, with depressed centres, act like so many little glass-lenses, and show diffraction rings if the light is not properly adjusted.40
Errors of Interpretation.—To be in a position to draw an accurate conclusion of the nature and properties of the object under examination is a matter of great importance to the microscopist. The viewing of objects by transmitted light is of quite an exceptional character, rather calculated to mislead the judgment as well as the eye. It requires, therefore, an unusual amount of care to avoid falling into errors of interpretation. Among test objects the precise nature of the structural elements of the Diatomaceæ have given rise to great divergence of opinion. Then, again, the minute scales of the podura Springtails, one of the Collembola, and their congeners Lepisma saccharina, the structure of which is equally debatable. Mr. R. Beck, in an instructive paper published in the “Transactions of the Royal Microscopical Society,” says that the scales of the Lepisma can be made to put on an appearance which bears little resemblance to their actual structure.
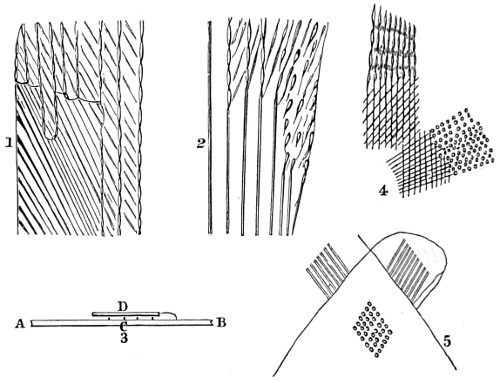
Fig. 203.—Portions of Scales of Lepisma.
In the more abundant kind of scales the prominent markings appear as a series of double lines. These run parallel and at considerable intervals from end to end of the scale, whilst other lines, generally much fainter, radiate from the quill, and take the same direction as the outline of the scale when near the fixed or quill end; but there is, in addition, an interrupted appearance at the sides of the scale, which is very different from the mere union, or “cross-hatchings,” of the two sets of lines (Fig. 203, Nos. 1 and 2, the upper portions).
The scales themselves are formed of some truly transparent substance, for water instantly and almost entirely obliterates their markings, but they reappear unaltered as the moisture leaves them; therefore the fact of their being visible at all, under any circumstances, is due to the refraction of light by superficial irregularities, and the following experiment establishes this fact, whilst it determines at the same time the structure of each side of the scale, which it is otherwise impossible to do from the appearance of the markings in their unaltered state:—
“Remove some of the scales by pressing a clean and dry slide against the body of the insect, and cover them with a piece of thin glass, which may be prevented from moving by a little gum at each corner. No. 3 may then be taken as an exaggerated section of the various parts. A B is the glass slide, with a scale, C, closely adherent to it, and D the thin glass-cover. If a very small drop of water be placed at the edge of the thin glass, it will run under by capillary attraction; but when it reaches the scale, C, it will run first between it and the glass slide, A B, because the attraction there will be greater, and consequently the markings on that side of the scale which is in contact with the slide will be obliterated, while those on the other side will, for some time at least, remain unaltered: when such is the case, the strongly marked vertical lines disappear, and the radiating ones become continuous. (See No. 1, the lower left-hand portion.) To try the same experiment with the other, or inner surface of the scales, it is only requisite to transfer them, by pressing the first piece of glass, by which they were taken from the insect, upon another piece, and then the same process as before may be repeated with the scales that have adhered to the second slide, the radiating lines will now disappear, and the vertical ones become continuous. (See No. 2, left portion.) These results, therefore, show that the interrupted appearance is produced by two sets of uninterrupted lines on different surfaces, the lines in each instance being caused by corrugations or folds on the external surfaces of the scales. Nos. 1 and 2 are parts of a camera lucida drawing of a scale which happened to have opposite surfaces obliterated in different parts. No. 4 shows parts of a small scale in a dry and natural state; at the upper part the interrupted appearance is not much unlike that seen at the sides of the larger scales; but lower down, where lines of equal strength cross nearly at right angles, the lines are entirely lost in a series of dots, and exactly the same appearance is shown in No. 5 to be produced by the two scales at a part where they overlie each other, although each one separately shows only parallel vertical lines.”
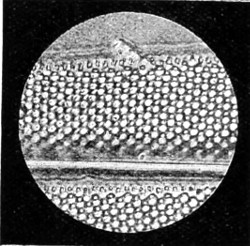
Fig. 204.—Outer Membrane of Upper Plane of Red Beads thrown by each alternate hole of grating; on lowering the focus white interspaces turn into blue beads.
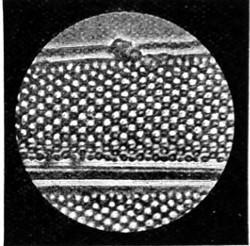
Fig. 204a.—Outer Membrane of Lower Plane of Beads thrown from remaining holes of grating; on raising the focus white interspaces turn into red beads.
Objective used, Zeiss’s apochromatic 1⁄12-inch oil-immersion, numerical aperture 1·40, magnifying power 1,750 diameters.
A well-known skilled observer of test objects41 says: “Practically the resolving power of our achromatic objectives on lined objects reached their maximum in the late Dr. Woodward’s hands. Amphipleura pellucida was then, as now, the finest known regular structure of the diatoms. There appeared then nothing more to be gained in resolution when one of the apochromatic 1⁄12-inch objectives of Zeiss, with its entire absence of colour, passed into my hands, and I soon became convinced that it possessed the power of separating the different layers of structure in the valve, beyond the grasp of the dry-objective. The result of this increase of power enabled me to split up, as it were, the one plate of silex forming the valve of Pleurosigma formosum into three layers, and which had never before appeared to be possible; proving, in fact, that magnification without corresponding aperture is of little or no account.”
“The intimate structure of these test objects,” says Mr. Smith, “is built up on one plan, each being composed of two or more layers, (1) a valve with two layers, as in Pleurosigma balticum; (2) two layers with a grating and secondary markings placed diagonally, as in Pleurosigma formosum; (3) with two layers of a net-like structure, as in Pleurosigma angulatum, the fineness of the striæ or gratings of which measure the 1⁄50000th of an inch. Five other diatoms afford evidence of this compound structure. The presence of beads or hemispheres in one of the focal planes, and depressions or pits in another, are emphasised in the micro-photograph itself; reduced portions of the valve are represented in Figs. 204 and 204a.”
A portion of a diatom valve, Pleurosigma angulatum, micro-photographed on a higher scale of magnification, 4,500 diameters, is given further on.
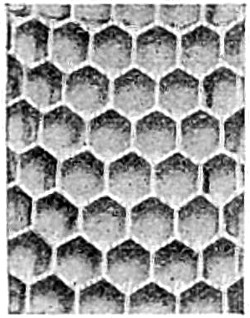
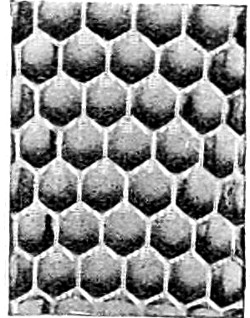
Fig. 205.—Sections of an old-fashioned Glass Tumbler, from photographs by the late Mr. R. Beck.
Errors of interpretation arise either from the small cones of illumination afforded by the dry-objective, or the oblique illumination formerly resorted to for the resolution of these difficult test objects, and several of the lights and shadows resulting from the refractive power of the object itself. But the most common error is that produced by the reversal of the lights and shadows resulting from the refractive powers of the object itself. To make this clear, I reproduce two reduced photographs of a small section of an old-fashioned glass tumbler, covered externally with numerous hemispheres, illuminated by transmitted light (Fig. 205).
This illustration well emphasises the difficulty there is in determining structure under precisely similar conditions to those we are accustomed to of examining valves of diatoms under the microscope. If these photographs be held in front of a strong light, they at once convey different impressions to the mind, the hemispheres appearing depressions in the one, and raised beads in the other. Both are prints from the same negative, but in mounting are reversed; and therefore the apparent dissimilarity is due to a slight inequality of illumination, which the mind accepts as light and shade.
Very similar appearances to those described will result if a thin plate of glass were studded with minute, equal, and equi-distant plano-convex lenses, the foci of which would very nearly lie in the same plane. If the focal surface, or plane of vision, of the objective be made to coincide with this plane, a series of bright points will result, from the excess of light falling on each lens. If the plane of vision be next made to coincide with the surfaces of the lenses, these points would appear dark, in consequence of the rays being refracted towards points now out of focus. Lastly, if the plane of vision be made to coincide with the plane beneath the lenses that contain their several foci, so that each lens may be, as it were, combined with the object-glass, then a second series of bright points will result from the accumulation of the rays transmitted at those points. Moreover, as all rays capable of entering the objective are concerned in the formation of the second series of bright focal points, the first series being formed by the rays of a cone of light only, it is evident that the circle of least confusion must be much less, and therefore the bright points better defined in the first than in the last series.
There are no set of objects which have given rise to more discussion as to their precise character than the scales of the podura (Lepidocyrtus cervicollis), to the intimate structure of which Mr. Smith turned his attention, and succeeded, I am inclined to think, in his attempt to settle the structure of these very minute scales, and which heretofore have been described as “notes of exclamation.” By the aid of the same power as that employed in the examination of the pleurosigma formosum, the old conventional markings have disappeared, and well-defined “featherlets” have taken their place. By careful focussing up and down, a series of whitish pin-like bodies is to be seen, with an intervening secondary structure. A micro-photograph of a portion of a scale taken by Mr. Smith shows that these pin-like bodies are inserted in a fold of the basement membrane, which, in his opinion, furnish unmistakable evidence of the fact that these projecting bodies are real, and must no longer be looked upon as mere ghosts. Quite recently, a micro-photograph of a portion of a podura scale was placed in my hands, taken by Mr. J. W. Gifford with a Swift’s 1⁄12-inch apochromatic objective, of numerical aperture 1·40, and a deep eye-piece, having a combined magnifying power of 3,827 diameters. Fig. 206 shows a portion of the photograph which, it will be admitted, supports Mr. Smith’s view of the structure of the podura scale.
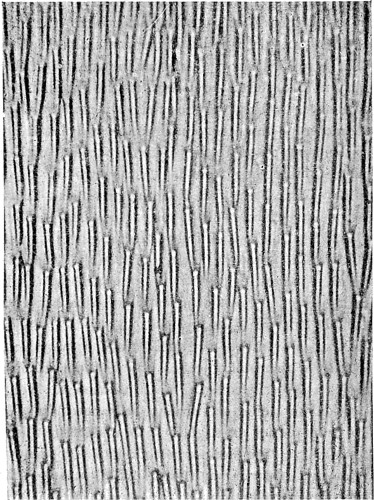
Fig. 206.—Podura Scale, taken with a 1⁄12 Swift’s Immersion × 3,827.
Many other errors of interpretation are not unknown to the experienced operator with the microscope, arising, for the most part, from an influence exerted by peculiarities in the internal structure of certain objects; for example, that offered by the human hair, and which, when viewed by transmitted light, presents the appearance of a flattened-out band, with a darkish centre, due to the refractive influence of the rays of light transmitted through the hair. That it is a solid or tubular structure is proved by making a transverse section of the hair-shaft, when it is seen filled up by medullary matter, the centre being somewhat darker than the outer part. It is, in fact, a spiral outgrowth of the epithelial scales, overlapping each other, imparting a striated appearance to the surface. A cylindrical thread of glass in balsam appears as a flattened, band-like streak, of little brilliancy. Another instance of fallacy arising from diversity in the refractive power of the internal parts of an object is furnished by the mistakes formerly made with regard to the true character of the lacunæ and canaliculi of bone structure. These were long supposed to be solid corpuscles, with radiating opaque filaments proceeding from a dense centre; on the contrary, they are minute chambers, with diverging passages—excavations in the solid osseous structure. That such is the case is shown by the effects of Canada balsam, which infiltrates the osseous substance.
Air bubbles are a perplexing source of trouble. The better way of becoming accustomed to deceptive appearances of the kind is to compare the aspect of globules of oil in water with bubbles of air in water, or Canada balsam.
The molecular movements of finely divided particles, seen in nearly all cases when certain objects are first suspended in water, or other fluids, are a frequent cause of embarrassment to beginners. If a minute portion of indigo or carmine be rubbed up with a little water, and a drop placed on a glass slide under the microscope, it will at once exhibit a peculiar perpetual motion appearance. This movement was first observed in the granular particles seen among pollen grains of plants, known as fovilla, and which are set free when the pollen is crushed. Important vital endowments were formerly attributed to these particles, but Dr. Robert Brown showed that such granules were common enough both in organic and inorganic substances, and were in no way “indicative of life.”42
Professor Jevons succeeded in throwing light on these curious movements. He showed that they were not due to evaporation, as some observers contended, as they continue when all possibility of evaporation is cut off, when the fluid is surrounded by a layer of oil, and enclosed in an air-tight case: but as Professor Jevons pointed out, these movements are greatly affected by the admixture of various substances with water, being increased by a small quantity of gum, and checked by a drop of sulphuric acid, or a few grains of some saline substance, which increases the conducting power of water for electricity. The Brownian movement, now termed pedesis, much depends upon the size of the particles, their specific gravity, and the nature of the liquid in which they are immersed.
The correct conclusions to be drawn by the microscopist regarding the nature of an object will necessarily depend upon previous experience in microscopic observations, a knowledge of the class of bodies brought under observation, and the skill of the observer in the use of the instrument—that is, in securing the best focus possible with any objective brought into use. I am indebted to Messrs. Beck for the following series of illustrations, showing the effect of under and over correction of the objective.
Directions for finding the best Focus.
The method of finding and determining when the screw-collar adjustment of the high-power objective has arrived at a point of perfect definition and magnification is as follows:—
Select any dark speck of dust, or an opaque portion of the object, and carefully focus this small particle by working the screw of the fine adjustment, move the screw up and down until you are satisfied the image is the sharpest and blackest that can be obtained, then once more test the focus a little above and a little below while closely scrutinising the effect on the image. It will now be seen that whereas in focussing on one side of the best focus the object disappears in a fog, by focussing on the other side it remains in view for a longer period, but alters its appearance; it is now no longer a black dot, but a bright dot of light surrounded by a black margin. The effects being thus dissimilar on different sides of the best focus, show that the objective is not perfectly adjusted for the cover-glass in use.
The next step is to find out whether the bright image is above or below the best focus, as on this depends the direction in which the adjustment-collar should be turned. To determine this it is only necessary to ascertain which way the slow-motion milled head of the microscope turns when moving the objective upwards.
In the case under consideration, the bright image will be above the best focus, which shows that the cover-glass in use is thicker than that for which the objective is adjusted, consequently the adjustment-collar must be moved in the opposite direction.
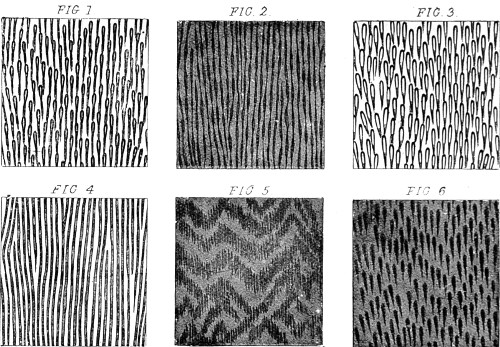
Fig. 207.—Podura Scale Test.
If the collar be turned too far in the opposite direction, it will be found that the bright image is below the best focus, and the cover-glass is then thinner than that for which the objective is adjusted. The collar must then be turned back again until the effect on each side of the best focus is exactly similar. This effect in the case of a circular speck of dust will be that the object disappears equally rapidly on either side, and does not instantly vanish into fog, on either side presenting the bright spot appearance, though not in so marked a degree on either side. When the object is in perfect adjustment the expansion of the outline is exactly the same, both within and without the focus.
A different indication, however, is afforded by such test-objects as the finer diatoms, and the podura scale, in which we have to do with a set of distinct dots and other markings. If the dots have a tendency to run into lines when the object is without the focus, the glasses should be brought closer together; on the contrary, if the lines appear when the object is within the focal point, the glasses should be farther separated.
The adjustment of the objective by the screw-collar in the case of the podura scale should be carried out in the way described, when the following effects will be observed to take place, usually in the order of their arrangement.
Fig. 1 shows the appearance of a podura scale when the adjustment of the object-glass is correct, and Fig. 2 shows the effect produced on each side of the exact focus. Fig. 3 shows the way in which the markings individually divide when all the adjustments are correct, and when the focus is altered the least possible amount only each way.
Figs. 4 and 5 show the two appearances on one and the other side of the best focus when the adjustment is incorrect, Fig. 6 showing the appearance of the same at its best focus.
The scales are magnified 1,300 diameters, and each square measures ·001 of an inch.
This method, however, of finding the best focus of an objective can scarcely be accomplished without a sub-stage condenser. It may therefore be of service to the student, and to those who are not disposed to purchase expensive forms of condensers, to know that either an inch or an inch and a half objective, or convex-lens mounted on a simple wooden ring with a flange, can be arranged to slip in the place of the diaphragm under the stage. This kind of condenser will prove to be of considerable value with a ½-inch, a 4⁄10-inch, and a ¼-inch; while a still more excellent achromatic condenser can be made out of a Steinheil’s aplanatic-loup arranged to drop into the central fitting of the sub-stage. As without a condenser of some kind it is hardly possible to enter upon any course of histological or scientific research.43
Working Accessories.
Troughs—Live-cages—Compressors.
A glass plate with a ledge, and some pieces of thin glass, although applicable for many purposes, are specially designed for objects in fluid. Thus a drop of fluid containing the object sought for is placed upon the slide and covered by a piece of thin glass; or, the object being put upon the glass slide and the thin glass over it, the fluid is applied near one side, and runs under by capillary attraction.
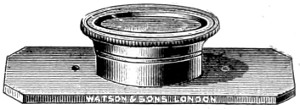
Fig. 208.—Varley’s Live-box.
Troughs and Live-box.—These are made of various materials, glass, vulcanite, brass, &c., expressly for examining infusoria and live animals. They should be so constructed as to admit of the use of a medium power, a ½-inch at least, under the microscope. They should also admit of being easily cleaned and repaired when broken; matters rarely thought of by those who construct them. An early devised live-box (Varley’s, Fig. 208) consists of two circular pieces of brass tubing, one sliding over the other carrying a disc of glass and fitting over another glass with bevelled edges to prevent the fluid flowing away.
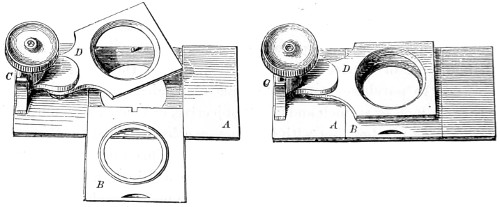
Fig. 209.—Ross’s Compressorium.
The Compressorium is used for similar purposes. By a graduated pressure the fluid is thinned out and a higher power can be employed for the examination of the object. Ross’s early compressorium consists of a plate of brass about three inches long, having in its centre a circle of glass like the bottom of the live-box. This piece of glass is set in a frame, B, which slides in and out so that it can be removed for the convenience of preparing any object upon it—under water if desirable. The upper movable part, D, is attached to a screw-motion at C; and at one end of the brass plate, A, which forms the bed of the instrument, is an upright piece of brass grooved so as to receive a vertical plate, to which a downward motion is given by a single fine screw, surrounded by a spiral spring, which elevates the plate as soon as the screw-pressure is removed.
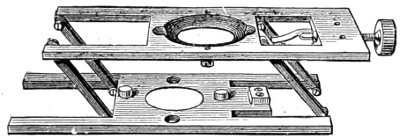
Fig. 210.—Beck’s Parallel-plate Compressor.
Beck’s Parallel-plate Compressor (Fig. 210) affords a more exact means of regulating the pressure, and can be used for a variety of purposes. It is also easily cleaned.
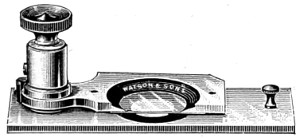
Fig. 211.—Rousselet’s Compressorium.
Rousselet’s Compressorium (Fig. 211) is a very effective form for general use. It is so arranged that the student has perfect control over the pressure to which the specimen should be subjected. The cover-glass is large in comparison with that beneath; being bevelled causes evaporation to go on very slowly while the pressure between the two glass surfaces is kept perfectly parallel.
Botterill’s Live-trough (Fig. 212) consists of two brass plates screwed together by binding screws, and holding between them two plates of thin glass, which are maintained at a proper distance by inserting a semicircular flat disc of india-rubber.
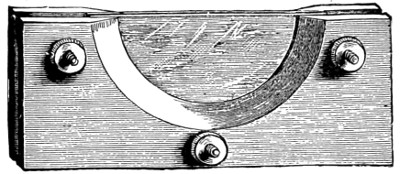
Fig. 212.—Botterill’s Live-trough.
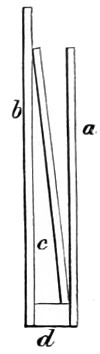
Fig. 213.—Glass Trough.
Glass troughs for chara and polypes (a sectional view of one shown at Fig. 213) are made of three pieces of glass, the bottom being a thick strip, and the front (a) of thinner glass than the back (b); the whole is cemented together with Jeffery’s marine-glue. The method adopted for confining objects near the front glass varies according to circumstances. The most convenient is to place in the trough a piece of glass wide enough to stand across diagonally, as at c; then, if the object be heavier than water, it will sink until stopped by the glass plate. At other times, when used to view chara, the diagonal plate may be made to press it close to the front by means of a wedge of glass or cork. When using the trough the microscope should be placed in a nearly horizontal position.
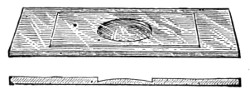
Fig. 214.—Weber’s Slip with Convex Cell for use as a Live-trough.
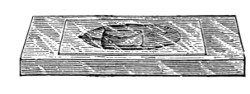
Fig. 215.—Current-slide Live-cell.
Cells for viewing living objects, and watching their movements, take many forms, usually determined by the makers for the purposes they are required to serve. The smaller glass troughs (Figs. 216, 216a) are made for examining the small infusoria, rotifers, &c., some of which take special forms, as the double or divided trough (Fig. 217) intended for viewing the circulation of the blood in the tail of a small fish, and at the same time keep up a supply of water and air.
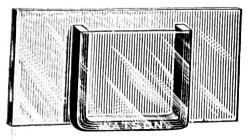
Fig. 216.
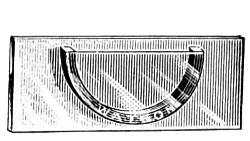
Fig. 216a.
The Frog-plate consists of a strip of plate-glass, or wood, pierced with holes on either side, through which tapes are passed to secure the frog in its place. At the extreme end is a shallow glass trough, made to hold a sufficient quantity of water to keep the web of the foot moist while under examination. In this way a continuous view of the circulation of the blood of the animal is obtained.
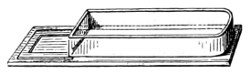
Fig. 217.
Growing Cells have received more attention from those who devote attention to the lower forms of life, the construction of which, for the purpose of maintaining a continuous supply of fresh water to objects under observation, and for sustaining their vital energy for a long period, is of some importance. The employment of live-cells is resorted to by microscopists, as doubtless there is much to be discovered concerning the metamorphoses which some of the lower micro-organisms, both of plant and animal life, pass through.
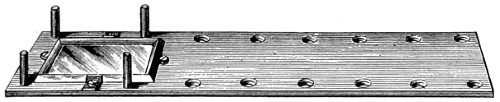
Fig. 218.—Frog-plate.
Holman’s life slide consists of a 3 × 1 inch glass slide, with a deep oval cavity in the middle to receive the specimen for observation. A shallow oval is ground and polished around the deep cavity, forming a bevel. From this bevel a fine cut extends, to furnish fresh air to the living low forms of life which invariably seek the bevelled edge of the cavity, thus bringing them within reach of the highest powers. He also contrived a convenient form of “moist chamber,” or animalcule-cage (Fig. 220), for the purpose of studying the growth of minute organisms, without in any way disturbing them for a lengthened period. This is also found useful as a dry chamber for holding minute insects.
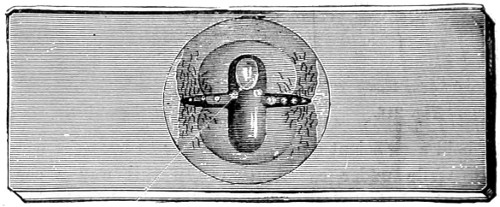
Fig. 219.—Holman’s Life Slide. Full size.
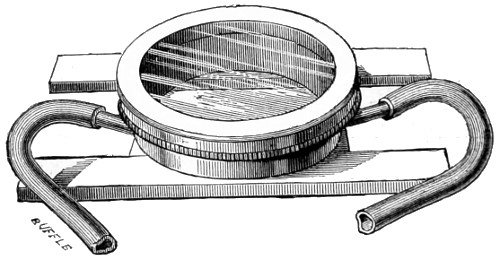
Fig. 220.—Holman’s Moist Chamber.
Zentmayer’s Holman Syphon Slide is used either as a hot or cold water cell. It should be deep enough to hold a small fish or newt, and retain it without any undue pressure. When in use it is only necessary to place the animal into it (as shown in Fig. 221), with some water, and secure it with a glass cover; then immerse the upper tube in a jar of water, while another, at a lower level, maintains a current. When the slide is on the stage of the microscope, one jar should stand on a lower level than the other, the slide being made the highest part of the syphon. The pressure of the atmosphere is sufficient to keep the cover-glass in its place.
The examination of the various kinds of infusorial life—rotifers, for instance—is facilitated by the addition of the smallest particle of colouring matter, either carmine or indigo. A small quantity of either of these colours should be rubbed up in a little water in a watch-glass, and a portion taken up on the point of a brush, and the brush run along the edge of the cover-glass; sufficient will be left behind to barely tinge the water with the colour, and this gradually distributes itself over the rotifers. Under the microscope this minute quantity will be seen like a rising cloud of dust, and as it approaches a rotifer it is whirled round in different curves, showing at once the action of its wonderfully rapid cilia. This colouring matter appears to be devoured, as it may be traced from the mouth to the digestive canal. Monads may be detected by this means, and the smaller forms of algæ, Euglena viridis and Protococcus pluvialis.
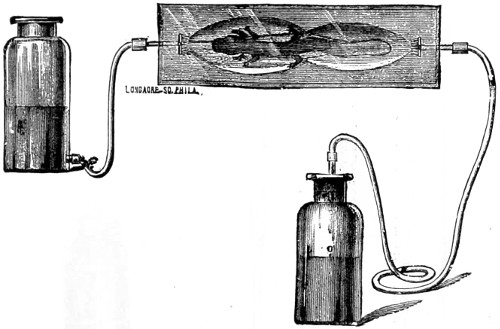
Fig. 221.—Holman’s Syphon Slide.
Dipping-tubes.—In dealing with infusorial or monad life it is convenient to keep a stock-bottle ready for their reception, and in a light favourable to health. When a live specimen is required for examination, the dipping-tube is brought into requisition. These tubes are open at both ends, and vary in length and diameter. Their ends should be nicely rounded off in the flame of a blow-pipe; in form either straight, or bent and drawn out to a fine point, as represented in Fig. 222. When any special specimen is required for examination, then one of the tubes must be passed down into the water, the upper orifice having been previously closed by the forefinger, and kept tightly pressed, until its lower orifice comes in contact with the object. On the finger being removed, the water rushes up and carries the creature sought for with it. The finger is once more replaced at the top of the tube; it is then lifted out, and the contents deposited in one or other of the glass cells described. Tubes with india-rubber covers can be had.
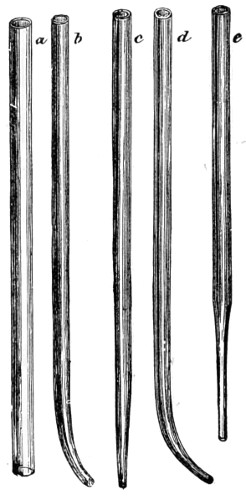
Fig. 222.—Dipping-tubes.
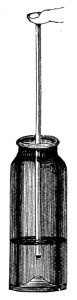
Fig. 223.—Stock-bottle.
Moist and Warm Stages.—In addition to the moist cells and chambers described it is often found necessary in working out the histories of minute organisms to keep them for some time under observation, and as far as possible in an undisturbed condition, and it is equally necessary to prevent evaporation of the water in which they are immersed. One of the best warm stages is that known as Maddox’s growing stage; this can be had of any optician. More elaborate adaptions are required for the study of special organisms, and for experimental research.
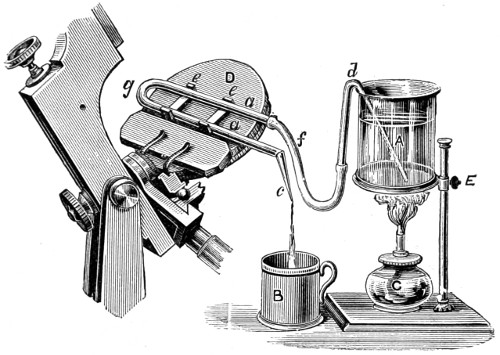
Fig. 224.—Bartley’s Warm Stage.
In that case Bartley’s Warm Stage (Fig. 224) is recommended. There are other forms of warm stages in use, many of an inexpensive kind and readily adaptable to any stage. Bartley’s has proved useful; it consists of a vessel, E, three parts filled with water and supported on a ring stand. This may be kept at any temperature by the small spirit-lamp, C; a syphon tube d conveys the warm water along f, and through the bent tubing which surrounds the object under observation on the stage, D, and then passes off through the open end, C, into the receptacle, B, placed to receive the overflow. Steam can be used for heating, or iced water for observing the effects of cold upon the organism.
A simple form of warm stage may be made of an oblong copper plate, two inches long by one wide, from one side of which a rod of the same material projects. The plate has a round aperture, the centre half an inch in diameter, and is fastened to an ordinary slide with sealing-wax. The drop or object to be examined is placed on a large-sized cover-glass and covered over with a smaller one. Olive oil or vaseline is painted round the edge of the smaller one to prevent evaporation, and the preparation is placed over the aperture in the plate. The slide bearing the copper plate is clamped to the stage of the microscope. The flame of the spirit-lamp is applied to the extremity of the rod, and the heat is conducted to the plate and thence transmitted to the specimen. In order that the temperature of the copper plate may be approximately that of the body, the lamp is so adjusted that a fragment of cacao butter and wax placed close to the preparation is melted.
Professors Stricker and Schäfer have constructed warm stages for accurate observations, and which fully answer every purpose.
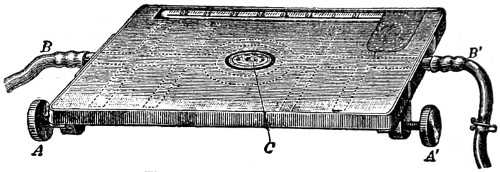
Fig. 225.—Stricker’s Warm Stage.
Stricker’s Stage (Fig. 225) consists of a rectangular box with a central opening, C, permitting the passage of light through the specimen under examination. The water makes its exit and entrance at the side tubes B B′, and the temperature is indicated by a thermometer in front. In this apparatus either warm or cold water can be continuously used.
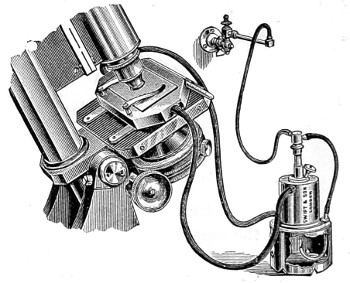
Fig. 226.—Schäfer’s Warm Stage.
Schäfer’s apparatus (Fig. 226) consists of a vessel filled with water (seen near the stage) which has been first boiled to expel the air, and then heated by means of a gas flame. The warm water ascends the india-rubber tubing to the brass box on the stage. The box is pierced by a tubular aperture to admit light to the object, and has an exit tube by which the cooled water from the stage returns by another piece of tubing to be reheated by the gas flame. There is a gas-regulator, by means of which any temperature can be maintained.
Methods of Preparing, Hardening, Staining and Section Cutting.
Numerous methods are employed for the preparation, hardening, staining, and section cutting of animal and vegetable tissues for the microscope, the details of which are modified, or varied as may be found needful, from time to time, by those whose intimate acquaintance with the subject entitles them to make innovations and changes in this very important department of microscopy. In the hands of the original worker, formulæ and methods will only be regarded as finger-posts pointing out a means of saving time in turning over pages to find this or that special method of staining. For this particular reason I have collected all the most accredited formulæ together in an Appendix at the end of the book, and arranged them alphabetically for ready reference.
As to section cutting, the student will do well to practise himself in making dissections, thick and thin sections, of vegetable and animal substances. The medical student will require no advice on this point, as the use of the scalpel, and those instruments needed for microscopical work, form an important part of his education. Of all the instruments contrived for delicate dissections, none are more serviceable than those which the student may make for himself out of ordinary needles. These may be fixed in handles as represented in Fig. 229, in addition to which, a pair of scissors and forceps, and a few small knives, such as those used in eye-operations, will prove most suitable. The double-bladed scissors represented in Fig. 227, with curved blades, are brought into use for cutting vegetable and other soft structures, the disadvantage attendant upon the use of which is owing to the curvature of the blades; when dealing with flat surfaces, the middle of the section is left too thick to exhibit structure.
The double-bladed knife of Professor Valentin was formerly held in high estimation by the microscopist, but this has been almost superseded by the microtome, which has taken the place of all other instruments, since by its aid uniform series of nearly all substances can be cut. The standard unit of a perfect section cutter, of any kind, has been fixed by the Royal Microscopical Society at the one-thousandth of a millimetre.
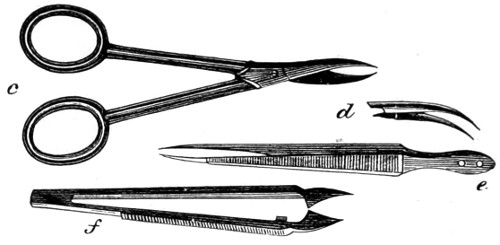
Fig. 227.—Section Scissors and Forceps.
The use of the razor for cutting sections has not been wholly abandoned, the method of using which is as follows:—Take the tissue between the thumb and finger of the left hand, hold the finger horizontally, so that its upper surface may form a rest for the razor to glide upon, take the razor firmly, and keep the handle in a line with the blade, then draw it through the tissue from heel to point and towards yourself. While cutting keep the razor well wetted with diluted methylated spirit.
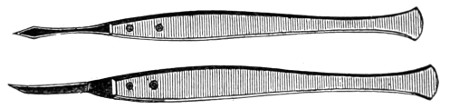
Fig. 228.—Dissecting Knives.
Some preparation is required for cutting sections with the single microtome. The substance to be cut must be embedded in some other material, as carrot, turnip, potato, alder pith, paraffin, or thick gum, with either of which the cylinder or well of the microtome must be so nearly filled as to leave only an excavation in the centre for the specimen to be operated upon to occupy. The various forms of microtomes in use, and the selection of the most suitable, is therefore a matter of some difficulty. I must content myself by particularising two or three typical forms in general use. As all the substances intended for cutting require preparation, it will be first necessary to attend to the following directions given by one experienced in section cutting, Mr. M. J. Cole44:—(1) Always use fresh tissues. (2) Cut the organs into small pieces with a sharp knife. (3) Never wash a specimen in water; when it is necessary to remove any matter, allow some weak salt solution to flow over the surface of the tissue, or wash it in some hardening re-agent. (4) All specimens should be hardened in a large quantity of the re-agent; too many pieces should not be put into the same bottle, and keep them in a cool place. (5) In all cases the hardening process must be completed in spirits. (6) Label the bottles, stating the contents, the hardening fluid used, and when changed. Attention to details is necessary, as if hardening is neglected, good sections cannot be made.
Embedding in Paraffin Wax or Lard.—Melt together, by the aid of gentle heat, four parts of solid paraffin and one part of lard. A quantity of this may be made and kept ready for use. Melt the paraffin mass over a water bath, take the specimen, and dry it between the folds of a cloth to remove the spirit, so that the paraffin may adhere to its surface, place it in a small chip-box, in the desired position, and pour in enough melted paraffin to cover it, then set aside to solidify; when quite cold break away the box, and cut sections from the embedded mass with a sharp razor.
To infiltrate a tissue with paraffin, place the specimen in absolute alcohol or chloroform for an hour or two, then transfer to a bath of melted paraffin, at its melting point (about 110° F.), and keep it at this temperature for several hours, so that the paraffin may penetrate to the middle of the tissue. Then remove the specimen from the paraffin and put it into a small chip-box, pour in enough paraffin to cover it, and set aside to cool. When quite cold, make sections as before, with a razor, or fix it into a microtome, with a little melted paraffin. The sections when cut must be placed in turpentine to remove the paraffin, and then into absolute alcohol to remove the turpentine, and finally in distilled water to remove the alcohol, when they may be forthwith stained. It is often found better to stain the tissue in bulk before embedding. In this case the sections will only require the turpentine to dissolve away the paraffin, and may then be mounted in Canada balsam.
Hardening and Preparing Animal Tissues for section cutting and microscopical examination.—Fresh tissues are not well suited for microscopical examination, but it is sometimes advisable to observe the appearances of a fresh specimen, especially if it is suspected to contain amaloid bodies or parasites. It will then be necessary to tease out a small portion of the tissue immersed in a weak solution of salt and water by the aid of a pair of fine needles (Fig. 229) and the dissecting microscope (Fig. 230).
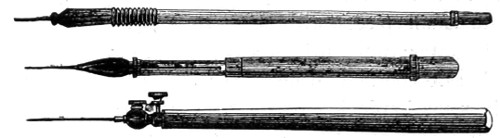
Fig. 229.—Needles for teasing out Sections.
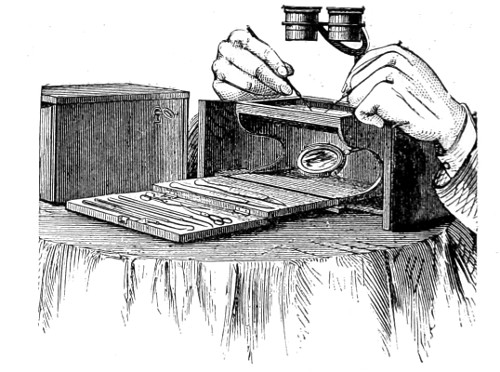
Fig. 230.—Dissecting Microscope.
The most important point in connection with an instrument of this kind is, that it affords firm and convenient rests for the hands, and should not be raised too high from the table.
The stage should either be made of glass, or provided with a glass dish for dissecting under water, or preservative fluid. A pair of aplanatic lenses, mounted on a focussing bar as shown in Fig. 230, will be found the most convenient to work with.
Investigations of this nature should be always carried out in the manner described, but preparations of the kind cannot be preserved any length of time, unless properly hardened in spirit or Formalin solution. The method of teasing out under the light of a condensing lens is shown in Fig. 231.
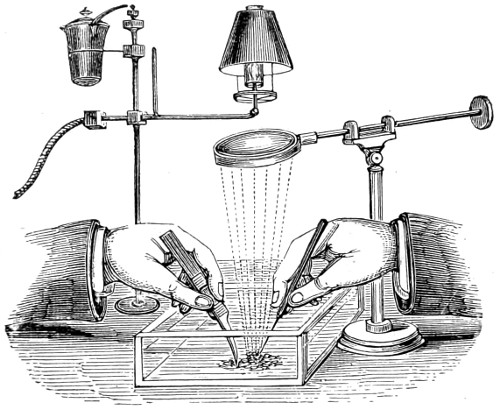
Fig. 231.—Method of teasing out Muscular Fibre, &c., in a fluid medium under Condensed Light.
It may be as well to state at the outset that physiological and pathological tissues can be hardened by immersion in methylated spirit alone, or a saturated solution of picric acid in methylated spirit in about a week, and it is said to yield satisfactory results, even some of the tissues being ready in twenty-four hours. The only drawback is that sections thus quickly hardened must be stained with picro-carmine. But, whatever method of hardening adopted, the tissue should be washed by means of a stream of water for half an hour, to remove all traces of the hardening agent, and on its removal pressed between folds of cotton cloth or fine Swedish filtering paper.
The principal hardening re-agents usually kept in bulk ready for use are the following:—
Absolute Alcohol.—This is suitable for the internal organs of animals, glands, &c. These organs must be perfectly fresh, and should be cut into small pieces, so that the alcohol may penetrate them as quickly as possible. The hardening is usually complete in a short time.45
Chromic Acid and Spirit.—Chromic acid one-sixth per cent., water solution two parts, and methylated spirit one part. This reagent hardens in about ten days. Then transfer to methylated spirit, which should be changed every day until all colour is discharged from the tissue. This is a suitable reagent for the preparation of cartilage, nerve trunks, heart, lips, blood vessels, trachea, lungs, tongue, intestines, and gullet.
Potassium Bichromate.—-Make a two per cent. water solution of this salt. This will harden specimens in about three weeks. Then transfer the preparation to methylated spirit, and change it every day until all colour is discharged. This is suitable for spinal cord, medulla, cerebellum, and cerebrum.
Müller’s Fluid.—Bichromate of potash 30 grains, sulphate of soda 15 grains, distilled water 3½ ounces. This hardens in from three to six weeks. Then transfer, as before, to methylated spirits, and change it every day until colour ceases to appear. Most suitable for lymphatic glands, eye-ball and its internal structures, as well as for tendons, and thymus gland.
Methylated Spirit may be generally employed, but it has a tendency to shrink some tissues too much; it hardens in about ten days. It is usual to change the spirit daily, for the first three days at least. Skin, mammary gland, supra-renal glands, tonsils, and all injected organs may be hardened in it. (See note on the adulteration of methylated spirit with rack-oil, which utterly spoils it for use.)
Decalcifying solution for bones and teeth. Take one-sixth per cent. watery solution of chromic acid, and to every measured ounce add five drops of nitric acid. This reagent will soften the femur of any small animal in about three weeks; larger require a longer time. Change the fluid several times, and test its action by running a needle through the thickest part of the bone. Should it not pass through easily, then continue the process until it does. When soft enough transfer to water, let it soak for an hour or two, then pour off the water and add ten per cent. solution of carbonate of soda, and soak for twelve hours to remove all trace of acid. Wash again in water, and transfer to methylated spirit until required. Teeth require a large quantity of the decalcifying solution for softening.
Microtomes.—The simplest form of “hand-cutting machine” is that worked by a screw, which raises the preparation, and at the same time regulates the fineness of the section. When a number of sections are required, or when a complete series of sections of an organ is desired, Cole’s simple microtome (Fig. 233) is in every way adapted.
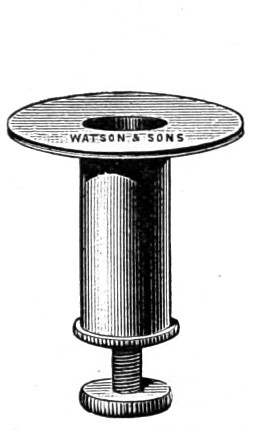
Fig. 232.—Hand Section Cutter.
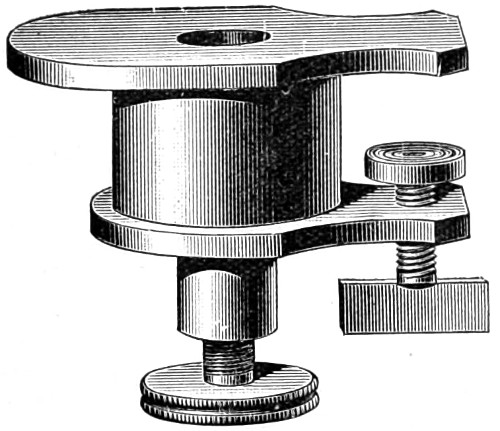
Fig. 233.—Cole’s Section Cutting Microtome.
The method of using it is as follows:—Screw the microtome firmly to the table, and with the brass tube supplied with the microtome, punch out a cylinder of carrot to fit into the well. Cut this in half longitudinally, and scrape out enough space in one half of the carrot to take the specimen; then place the other half of carrot in position, and make sure that the specimen is held firmly between them, but it must not be crushed. Now put the cylinder of carrot and specimen into the well of the microtome and commence cutting the section. A good razor will do, but it is better to use the knife which Messrs. Watson supply with the microtome. While cutting keep the knife and plate of the microtome well wetted with dilute methylated spirit, and as sections are cut place them in a saucer of dilute spirit. A number of sections may be cut and preserved in methylated spirit until required for examination or mounting.
When a specimen has a very irregular outline, it cannot be very successfully embedded in carrot; paraffin will then be found to be more suitable. Place the tissue in the well of the microtome in the proper position, pour in enough melted paraffin to cover it, and put it by to get cold and hard before attempting to cut sections.
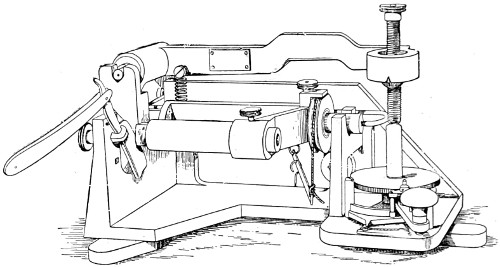
Fig. 234.—The Cambridge Rocking Microtome.
Cambridge Rocking Microtome.—This new pattern Cambridge Rocking Microtome (Fig. 234) possesses advantages over other instruments in use for cutting flat sections, and not parts of a cylindrical surface. The tube containing the paraffin is 30 millimetres in internal diameter instead of 20 millimetres, as in the earlier forms. The forward movement is also increased, so that an object 12 millimetres long can be cut throughout its whole length. It is provided with a dividing arc for reading off the thickness of the section in thousandths of a millimetre. The razor may be fixed either with its edge at right angles to the direction of motion of the object, or diagonally, for giving a slicing cut. The object can also be raised and fixed in position clear of the razor.
This microtome has both steadiness and stiffness in its geometrical arrangement and bearings, while the simplicity and efficiency of its mechanism for advancing the section between each stroke of the razor is remarkable. Although it may appear more complicated at first sight, it is found not to be so when brought into use.
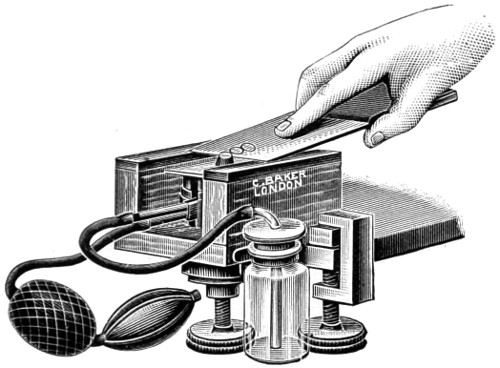
Fig. 235.—Cathcart’s Microtome.
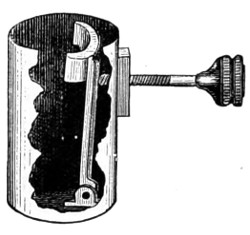
Fig. 235a.—Section Cutting Holder for Microtome.
Cathcart’s Freezing Microtome.—This is a convenient and useful microtome for freezing purposes. Since its first introduction it has been much improved. The clamping arrangements give steadiness, and the principal screw is more effective; the freezing-plate is circular, and the arrangements made for preventing the ether from reaching the upper plate secures the object in view. This instrument can now be used for embedding as well as freezing. The directions for freezing are as follows:—
1. Place a few drops of mucilage (one part gum to three parts water) on the zinc plate.
2. Take a piece of the tissue to be cut, of about a quarter of an inch in thickness, and press it into the gum.
3. Fill the ether bottle with anhydrous methylated ether, and push the spray points into their socket. All spirit must of course have been previously removed by soaking for a night in water. The tissue should afterwards be soaked in gum for a like time before being cut.
Work the spray bellows briskly until the gum begins to freeze; after this work more gently. Be always careful to brush off the frozen vapour which, in a moist atmosphere, may collect below the zinc plate. If the ether should tend to collect in drops below the plate, work the bellows slower.
5. Raise the tissue by turning the milled head, and cut by sliding the knife along the glass plates.
6. After use, be careful to wipe the whole instrument clean.
7. Should the ether point become choked, clear by means of the fine wire provided for the purpose.
8. The instrument is intended for use with methylated sulphuric ether.
9. In clamping the instrument to a table, or other support, care should be taken that the zinc plate is in a horizontal position. If the plate be not horizontal, the gum will tend to run to one side.
The arrangement made for cutting and embedding sections consists of a cylindrical tube (Fig. 235a) fitting into the principal well of the microtome, within which is a hinged plate, upon which the screw acts, as in an ordinary vice. To bring this into use the freezing apparatus must be first removed, and the embedding tube placed in the well, and firmly pressed into place.
Staining Animal Structures.
Specific stains are chiefly employed to assist the eye in distinguishing one elementary tissue from another. It is therefore necessary to stain all structures, as certain parts are seen to have a special affinity for one colouring agent rather than another, whereby they become more deeply stained, and consequently more clearly differentiated. For staining animal structures, borax, carmine, and hæmatoxylin are more frequently employed than others. The formulæ for each will be found in the Appendix “Formulæ and Methods.”
Staining Process.—Place the section in distilled water to wash away the alcohol; place a little of the carmine in a watch glass, and immerse the section in it for four or five minutes; then remove it to a solution composed of methylated spirit five parts, hydrochloric acid one part; shake well together. This solution should be kept ready for use. Immerse the section in this solution and leave it to soak for about five or ten minutes if over-stained, until the desired tint has been obtained. Sections of skin and fibrous tissue may be left until nearly all colour is removed, the glands and hair follicles will then be brought out more clearly. The section must be transferred to methylated spirit to remove all traces of acid, then to oil of cloves contained in a watch glass, lift the section from the methylated spirit by one of the lifters (Fig. 250), and carefully float it on the oil, in which it should be allowed to remain for about five minutes. This is the clearing process, the object of which is to remove the spirit and prepare the section for mounting in Canada balsam. First, however, place the section in filtered turpentine to wash away the oil of cloves; this is found to answer better than another plan adopted, that of removing the section from the oil of cloves and mounting it in balsam direct. The oil, however, has a tendency to darken the balsam.
Logwood or Hæmatoxylin Stains (see Appendix for the several formulæ). Staining by this agent is effected as follows:—
After the specimen has been hardened in any of the chromic acid solutions in use, transfer it to a seven per cent. watery solution of bicarbonate of soda for about five minutes, then wash well in distilled water. Spirit prepared preparations do not require to be transferred to the soda solution, but all sections must be washed before they are transferred to the logwood stain. To a watch glass nearly full of distilled water add ten or twenty drops of the logwood stain, in which it should remain for twenty or thirty minutes. Wash well with the ordinary tap water, which will fix the dye and cause it to become blue. Dehydrate in methylated spirit, clear in clove oil, and mount in dammar or Canada balsam.
Double-staining with Hæmatoxylin and Rosin.—Stain the section as directed above, then place it in an alcoholic solution of rosin, about one gramme of rosin to an ounce of methylated spirit, and let it soak for a few minutes; wash well in methylated spirit, clear in oil of cloves, and mount in balsam.
Canada balsam should be prepared for use as follows:—One ounce of dried balsam to one fluid ounce of pure benzole; dissolve, and keep in an outside stoppered bottle. Clear the section in clove oil, and place it in turpentine, clean a cover-glass and slide, place a few drops of balsam on the centre of the latter, take the section from the turpentine on a lifter, allow the excess of turpentine to drain away, and with a needle-point lift the section on to the balsam slide. Now take up the cover-glass with a pair of forceps (Fig. 236), and bring its edge in contact with the balsam, ease it down carefully as shown in Fig. 237, so that no air bubbles are enclosed, and with the needle point press the surface of the cover until the section lies quite smoothly and flat, and the excess of balsam is pressed out. The slide should now be transferred to the warm-chamber, and there allowed to remain for a day or two, or until set and hardened.

Fig. 236.—Forceps for Mounting.
Any exuded balsam may be washed away with benzole and a soft camel’s hair brush; then dry the slide with an old piece of linen cloth, and apply a ring of cement or Japanner’s gold size. Other methods for staining and mounting will be found to answer quite as well—that of Beneke’s is a useful one for staining connective tissue.
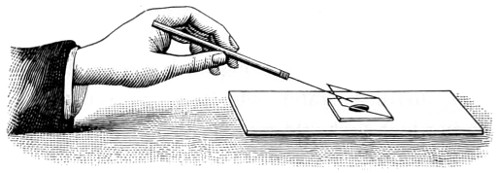
Fig. 237.—Mode of placing Glass Cover on Object.
For staining connective tissue a modification of Weigert’s method of staining fibrine is resorted to. Portions of tissue that have been fixed in alcohol having been embedded in paraffin and cut, the sections are detached and placed on glass slides, and stained for ten or twenty minutes with gentian violet, ten parts, well shaken with water 100 parts; filter, and add five to ten parts of a concentrated alcoholic gentian violet solution. Afterwards treat for one minute with lugol solution, of a port wine tint, dry with filter paper and decolourise with aniline xylol (aniline oil two parts and xylol three parts). Decolourisation having been stopped at the right point (judged from experience) mount the sections in xylol balsam. The fibres of the connective tissue should appear stained of various shades of violet.
Double Staining nucleated blood corpuscles. Two kinds of staining agents are required. Stain A: dissolve five grammes of rosin in half an ounce of distilled water, and add half an ounce of rectified alcohol. Stain B: dissolve five grammes of methyl green in an ounce of distilled water. Place a drop of frog’s blood on a glass slide, and with the edge of another slide spread it evenly over the centre of the slip, and put it away to dry; when quite dry flood the slide with stain A for three minutes, and wash with water, now flood the slide with Stain B for five minutes, wash again with water, and allow the slide to dry. Apply a drop of the prepared Canada balsam and a cover-glass.
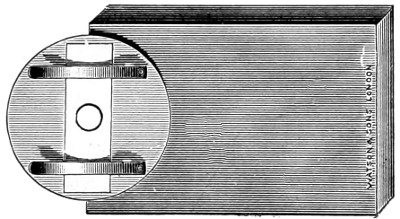
Fig. 238.—Shadbolt’s Turn-table.
The blood of such mammals as are non-nucleated should be treated in a slightly different way. Spread a drop or two of blood on a slide and dry it quickly; then put the slide on Shadbolt’s turn-table (Fig. 238) and run a ring of cement around it; allow this time to dry, and then apply a second coating, and before this becomes quite dry place on it a clean glass cover, and press it down gently with one of the fine needles (Fig. 229), until firmly adherent.
Epithelium.—Remove from the mouth of a frog by scraping some squamous epithelium; the columnar must be taken from the stomach; place it in glycerine, or Farrant’s solution on the slide; apply a cover-glass, and with the point of the needle press it down until the epithelium cells are separated and spread evenly over the slide. Set this aside for a day or two, then wash away any of the medium which may have escaped; dry the slide, and run a ring of cement around the edges, on the turn-table. Portions of the intestine of a rabbit or other animal may be treated in the same way. If it is wished to make permanent specimens of such structures, the intestine must be hardened in a two per cent. solution of bichromate of potash for a couple of days, then washed until all colour is discharged, and removed to a solution of picro-carmine for twenty-four hours, after which allow the stain to drain away, when it will be ready for mounting.
By the aid of the handy little spring clip (Fig. 239), objects of delicacy when mounted may be left to dry and harden for any length of time.
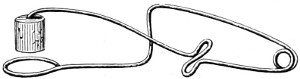
Fig. 239.—Spring-clip for Mounting.
Striped muscular fibre, taken from the pig, must be teased out in a two per cent. solution of bichromate of potash, in which it should remain for two or three weeks, when it may be transferred to methylated spirit, and allowed to remain until required for mounting. Soak a piece in water to remove the spirit, place a small fragment on a slide in a few drops of water, and with a couple of needles tease the tissue up, so as to separate the fibres. Drain away the water, and apply a drop or two of Farrant’s medium and a cover-glass, which cement down as before directed.
Fibrous tissue may be served in the same way. Yellow elastic tissue must be first placed in a solution of chromic acid and spirit for ten days, and then treated as directed for muscular fibre.
Non-striated Muscle.—A piece of the intestine of a rabbit should be steeped in chromic acid and spirit for ten days, then washed in water; strip off a thin layer of the muscular coat, and stain in hæmatoxylin solution. Well wash in ordinary water until the colour changes to blue, when it will be fit for mounting. Place a fragment on a slide and a drop of water, and carefully separate the fibres with a pair of needles. Drain off the water, as it is now ready for mounting, place on slide, and add a drop or two of Farrant’s medium, and place on the cover-glass.
Nerve Tissue.—Dissect out the large sciatic nerve from a frog’s thigh, and stretch it on a small piece of wood, to which pin both ends of the nerve, and transfer it to a one per cent. solution of osmic acid for an hour or two. Wash in distilled water; tease up a small fragment on a slide (as shown in Fig. 240), and apply a drop or two of Farrant’s solution and cover-glass.
Tissues containing air should be soaked in water that has been boiled for ten minutes; this will displace the air. (For Farrant’s medium, see Appendix.)
Glycerine Jelly.—Dissolve one ounce of French gelatine in six ounces of distilled water, and melt together in a hot-water bath. When quite dissolved, add four ounces of glycerine, and a few drops of creosote or carbolic acid. Filter through white filtering paper while warm, and keep in a capped bottle. This may be used instead of Farrant’s solution.
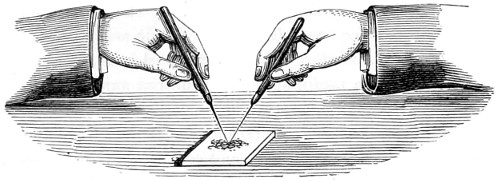
Fig. 240.—Method of Teasing out Tissue.
Nitrate of silver darkens by exposure; it is used in a half per cent. watery solution. Specimens to be acted upon should be washed in distilled water, to remove every trace of sodium chloride, and then steeped in the silver solution for some two or three minutes, after which they should be again washed until they cease to turn milky; then place them in glycerine and expose them to the action of light until they assume a dark brown colour, when they should be mounted in glycerine or glycerine jelly.
By means of this stain the endothelial cells of the lymphatics, blood vessels, &c., and the nodes of Ranvier, constrictions in medullary nerves, are rendered visible. Sections of any of these may subsequently be stained by logwood or carmine.
Several methods have been adopted for staining with gold chloride. Dr. Klein’s and Professor Schäfer’s are among the best.
Dr. Klein’s method of showing the nerves of the cornea is as follows:—Remove the cornea within fifteen minutes of death; place it in a half per cent. chloride of gold solution for half an hour, or an hour; wash in distilled water, and expose to the light for a few days; in the meantime occasionally change the water. Then immerse it in glycerine and distilled water, in the proportion of one to two; lastly, place it in water, and brush gently with a sable pencil to remove any precipitate, when it will be fit for mounting in glycerine. The colour of the cornea should be grey-violet.
Schäfer adopts another method—a double chloride of gold and potassium solution.
Osmic acid, first used by Schultze, is useful for the demonstration of fatty matters, all of which it colours black; it is also valuable for certain nerve preparations. Specimens should be allowed to remain in a one or two per cent. aqueous solution of the acid from a quarter to twenty-four hours, when the staining will be completed; but if it is desired to harden specimens at the same time, they should remain in it for some few days. Osmic acid does not penetrate very deeply, therefore small portions should be selected for immersion. This is a useful stain for infusorial animals.
Chloride of palladium, another of Schultze’s staining fluids, is used to stain and harden the retina, crystalline lens, and other tissues of the eye, the cornified fat and connective tissues remaining uncoloured. The solution should be used very weak:—Chloride of palladium, one part; distilled water, 1,000 parts. Specimens should be mounted in glycerine at once, or further stained with carmine.
Dr. Schäfer employs a silver nitrate and gelatine solution for demonstrating lung epithelium; this is made as follows:—Take of gelatine ten grammes, soak in cold water, dissolve, and add warm water to 100 cc. Dissolve a decigramme of nitrate of silver in a little distilled water, and add to the gelatine solution. Inject this with a glass syringe into the lung until distension is pretty complete. Leave it to rest in a cool place until the gelatine has set; then cut sections as thin as possible, place them on a slide with glycerine, and expose to light till ready for mounting.
Of the double stains Mr. Groves prefers only those where the double colour is produced by a single process—or stains in which one colour is first employed, and then another. Single stains are picro-carmine, carmine and indigo carmine, aniline blue and aniline red.
Picro-carmine is specially useful for staining sections hardened in picric acid. It is prepared in several ways:—
1. Add to a saturated solution of picric acid in water a strong solution of carmine in ammonia to saturation.
2. Evaporate the mixture to one-fifth its bulk over a water bath, allow it to cool, filter from deposit, and evaporate to dryness, when picro-carmine is left as a crystalline powder of red-ochre colour.
Sections can be stained in a one per cent. aqueous solution, requiring only ten minutes for the process; wash well in distilled water, and transfer them to methylated alcohol, then to absolute alcohol, after which they are rendered transparent by immersing in oil of cloves or benzole, before mounting in balsam or dammar.
To summarise Mr. Groves’ recommendations:—
1. Let the material be quite fresh.
2. (a) Take care that the hardening or softening fluid is not too strong. (b) Use a large bulk of fluid in proportion to the material. (c) Change the fluid frequently. (d) If freezing be employed, take care that the specimen is thoroughly frozen.
3. (a) Always use a sharp razor. (b) Take it with one diagonal sweep through the material. (c) Make the sections as thin as possible; and (d) Remove each one as soon as cut, for if sections accumulate on the knife or razor they are sure to get torn.
4. (a) Do not be in a hurry to stain, but (b) Remember that a weak colouring solution permeates the section better, and produces the best results; and (c) That the thinner the section the better it will take the stains.
5. (a) Always use glass slips and covers free from scratches and bubbles, and chemically clean. (b) Never use any but extra thin circular covers, so that the specimens may be used with high powers. (c) Always use cold preservatives, except in the case of glycerine jelly, and never use warmth to hasten the drying of balsam or dammar, but run a ring of cement round the cover.
6. Label specimens correctly; keep them in a flat tray, and in the dark.
Double and Treble Staining.
Dr. W. Stirling46 furnishes a brief but useful account of the methods he has employed with much success.
Osmic Acid and Picro-carmine.—Mix on a glass slide a drop of the blood of newt or frog and a drop of a one per cent. aqueous solution of osmic acid, and allow the slide to stand by. This will fix the corpuscles without altering their shape. At the end of five minutes remove any excess of acid with blotting-paper, add a drop of a solution of picro-carmine, and a trace of glycerine to prevent evaporation, and set aside for three or four hours to see that no overstaining takes place. At the end of this time the nucleus will be found to be stained red, and the perinuclear part yellow.
Picric Acid and Picro-carmine.—Place a drop of the blood of a frog or newt on a glass slide, and add a drop of a saturated solution of picric acid: put the slide aside and allow it to remain for five minutes; at the end of that time, when the acid has fixed the corpuscles (that is, coagulated their contents), any excess of acid should be removed as before. A drop of solution of picro-carmine should now be added, and a trace of glycerine, and the preparation set aside for an hour. At the end of that time remove the picro-carmine solution by means of a narrow slip of blotting-paper, and add a drop of Farrant’s solution of glycerine and apply glass-cover. The perinuclear part of the corpuscles will be seen to be highly granular and of a deep orange colour, whilst the nucleus is stained red. Some of the corpuscles will appear of a delicate yellow colour, and threads are seen extending from the nucleus to the envelopes. The preparation should be preserved and mounted in glycerine.
Picro-carmine and Aniline Dye.—For glandular tissue, none of the aniline dyes answer so well as iodine green, used in the form of a one per cent. watery solution. Stain the tissue in picro-carmine, wash it in distilled water acidulated with acetic acid, and stain it in a solution of iodine green. As it acts rapidly, care must be taken not to overstain. Wash the section in water, and then transfer it to alcohol; finally clear with oil of cloves. The washing should be done rapidly, as the spirit dissolves out the green dye. All preparations stained with iodine green must be mounted in dammar.
Picro-carmine and Iodine Green.—Stain a section of the cancellated head of a very young bone (fœtal bone) in picro-carmine, wash it in distilled water, and stain it with iodine green, and mount in dammar. All newly-formed bone is stained red; that in the centre of the osseous trabeculæ, the residue of the calcified cartilage in which the bone is deposited, is stained green. Many of the bone corpuscles are also stained green.
Ossifying cartilage, the back part of the tongue, Peyer’s Patches, solitary-glands, trachea, and bronchus, may all be treated in the same way. In preparing the skin, take a vertical section from the sole of the foot of a fœtus. The cuticle and superficial layers of the epithelium are dyed yellow, the rete Malpighii green; and the continuation of these cells can be traced into the ducts of the sweat-glands, which are green, and form a marked contrast to the red stained connective tissue of the cutis vera, through which they have to ascend to reach the surface. The outer layer of the grey matter of the cerebellum with Purkinge’s cells is, when double stained, red, while the inner or granular layer is green. Logwood and iodine green stains the mucous glands of the tongue green, and the serous glands, lilac logwood stain.
Eosin and Iodine Green.—Eosin is used as the ground colour. Stain the tissue in an alcoholic solution of eosin, which will colour it very rapidly, usually in a few seconds. Wash the section thoroughly in water acidulated with acetic or hydrochloric acid, a one per cent. solution, and stain with iodine green. This will double stain bone and cerebellum; but if logwood is substituted for the latter, the cerebrum and general substance become stained by the eosin, while the logwood colours the nerve-cells a lilac.
Gold Chloride and Aniline Dyes.—The tissue must be impregnated with chloride of gold, and then stained with either aniline blue, iodine green, or rosin. The tail of a young rat, containing as it does so many different structures, is an excellent material for experimenting upon. Remove the skin from the tail, and place pieces half an inch long into the juice of a fresh lemon for five minutes, wash it to get rid of the acid. The fine tendons swell up under the action of the lemon acid, and permit of the more ready action of the chloride of gold solution. Place the piece for an hour or more in a one per cent. solution of gold, remove it and wash it thoroughly, and then place it in a twenty-five per cent. solution of formic acid for twenty-four hours. This reduces the gold. During the process of reduction the preparation must be kept in the dark. The osseous portion has then to be decalcified in the ordinary way, with a mixture of chromic and nitric acid. After decalcification preserve the whole in alcohol. Transverse sections of the decalcified tail are made, and may be stained with a red dye, as rosin, and afterwards with a watery solution of iodine green. Mount in dammar.
Injecting Small Animal Bodies.
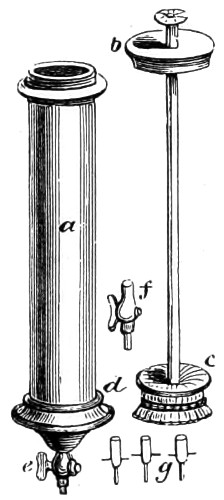
Fig. 241.—Injecting Syringe.
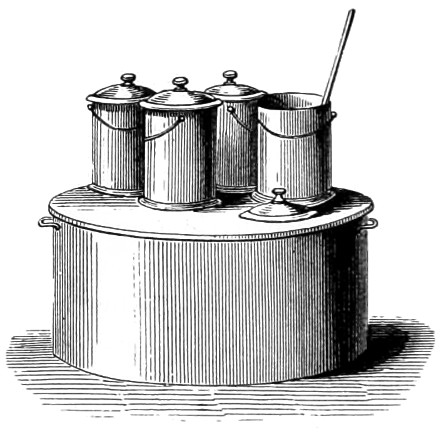
Fig. 242.—Water Bath and Melting Vessels.
The injection of animal bodies practised by the older anatomists, to render the vascular system more apparent, has not been superseded by the more modern methods of staining. The method of injecting even small bodies requires some skill, and a few pieces of apparatus made expressly for the purpose. First, a special form of brass syringe of such a size that it may be grasped with the right hand, the thumb at the same time covering the button at the top of the piston-rod when drawn out to the full. In Fig. 241 the piston rod is seen withdrawn, a is the body, with a screw at the top for firmly screwing down the cover, b, after the piston, c, is replaced; e is a stop-cock, to the end of which either of the smaller cannulæ, g, is affixed. The transverse wires are for securing them tightly with thread to the vessels into which they are to be inserted. In addition to the syringe, two or three tinned vessels are required to contain size, injecting fluid, and hot water.
The size must be kept hot by the aid of a water bath; if a naked fire be used there is danger of burning it. A convenient form of apparatus for melting the size, and afterwards keeping it at a proper temperature, is Fig. 242.

Fig. 243.—Artery Needle.
A pair of strong forceps for seizing the vessel, and a small needle (Fig. 243) is also necessary for passing the thread round the vessel into which the injection pipe has been inserted. These complete the list of apparatus. To prepare the material for opaque injections, take one pound of the finest and most transparent glue, break it into small pieces, put it into an earthen pot, and pour on it three pints of cold water; let it stand twenty-four hours, stirring it now and then with a stick; set it over a slow fire for half an hour, or until all the pieces are perfectly dissolved, skim off the froth from the surface, and strain through a flannel for use. Isinglass and cuttings of parchment make an excellent size, and are preferable for particular injections. If gelatine be employed an ounce to a pint of water will be sufficiently strong, but in very hot weather it is necessary to add a little more gelatine. It must be first soaked in part of the cold water until it swells up and becomes soft, when the rest of the water, made hot, is to be added. The size thus prepared may be fixed with finely levigated vermilion, chrome-yellow, blue salts, or flake white.
To prepare the subject, the principal points to be attained are: to dissolve the fluids and completely empty the vessels; relax the solids; and prevent the injection from coagulating too soon. For this purpose it is necessary to place the animal, or part to be injected, in warm water, as hot as the operator’s hand will bear. This should be kept at nearly the same temperature for some time by occasionally adding hot water. The length of time required is in proportion to the size of the part and the amount of its rigidity.
Injecting the systems of Vessels with different colours: Carmine and Gelatine Injection.—Carmine 30 grains, strong liquid ammonia 60 drops, glacial acetic acid 43 drops, gelatine solution (one ounce in six ounces of water) two ounces, water one ounce: dissolve the carmine in the ammonia and water in a test tube, and mix it with one half of the warm gelatine, add the acid to the remaining half of gelatine, and drop it little by little into the carmine mixture, stirring it well with a glass rod during the mixing; filter through flannel, and add a few drops of carbolic acid to make it keep. It is very important that the stain should be quite neutral, the test of which is the colour and smell of the fluid. It should be a bright red, and all trace of smell of ammonia must be removed.
Prussian or Berlin Blue and Gelatine.—Take 1½ ounces of gelatine, place it in a vessel and cover it with water; allow it to stand until all the water is absorbed and the gelatine is quite soft, then dissolve in hot water. Dissolve one drachm (60 grains) of Prussian or Berlin blue in six ounces of water, and gradually mix it with the gelatine solution, stirring well with a glass rod during the mixing; then filter as before.
Watery Solution of Berlin Blue.—Dissolve 2½ drachms of the blue in 18 ounces of distilled water, and filter. This staining fluid is used for injecting the lymphatic system.
Directions for Injecting.—The animal to be injected must be first killed by chloroform, and injected while still warm; to secure this place the body in a water bath, at a temperature of 104° Fahrenheit. Expose the main artery of the parts to be injected, clear a small portion of it from the surrounding tissues, and place a ligature of thin tissue or silk round it, by means of the small artery needle (Fig. 243). With a pair of sharp-pointed scissors make an oblique slit in the wall of the vessel, insert the cannula, and tie the ligature firmly over the artery behind the point of the cannula, into which put the stop-cock. Fill the syringe with injection fluid, which must not be too warm, and take care not to draw up any air-bubbles; insert the nozzle of the syringe into the stop-cock and force in a little fluid; remove the syringe so that the air may escape, re-insert the syringe, repeat the process until no air-bubbles escape, and then proceed slowly with the injection. Half an hour will be required to complete the process in an animal the size of a rabbit. To judge of the completeness of the injection, examine the vascular parts of the lips, tongues and eyes; if satisfactory, tie the ligature round the artery and withdraw the syringe; place the animal in cold water for an hour to consolidate the injection fluid. When cold dissect out the organs, cut them up, and place them in methylated spirit to harden. Change the spirit every twenty-four hours for the first three days. The hardening process will be complete in ten days.
To inject lymphatics by the puncture process, a small-sized subcutaneous syringe should be used, filled with a watery solution of the prepared stains. Thrust the nozzle into the pad of the foot, (or tongue), and then rub the limb to cause the injection fluid to flow along the lymphatic vessels into the glands.
When the blue stain is used add a few drops of acetic acid to the spirit while the hardening process is going on.
Of Injecting Different Systems of Vessels with Different Colours.—It is often desirable to inject different systems of vessels distributed to a part with different colours, in order to ascertain the arrangement of each set of vessels and their relation to each other. A portion of the gall-bladder in which the veins have been injected with white lead, and the arteries with vermilion, forms an attractive preparation. Each artery, even to its smallest branches, is seen to be accompanied by two small veins, one lying on either side of it. By this method four different sets of tubes have been injected—the artery with vermilion, the portal vein with white lead, the duct with Prussian blue, and the hepatic vein with lake. There are also opaque colouring matters which may be employed for double injections.
Injecting the Lower Animals.—The vessels of fishes are exceedingly tender, and require great caution in filling them. It is often difficult or quite impossible to tie the pipe in the vessel of a fish, and it will generally be found a much easier process to cut off the tail of the fish, and put the pipe into the divided vessel which lies immediately beneath the spinal column. In this simple manner beautiful injections of fish may be made.
Mollusca (slug, snail, oyster, &c.).—The tenuity of the vessels of the mollusc often renders it impossible to tie the pipe in the usual manner. The capillaries are, however, usually very large, so that the injection runs very readily. In different parts of the bodies of these animals are numerous lacunæ or spaces, which communicate directly with the vessels. Now, if an opening be made through the integument of the muscular foot of the animal, a pipe may be inserted, and thus the vessels may be injected from these lacunæ with comparative facility.
Insects.—Injections of insects may be made by forcing the injection into the general abdominal cavity, when it passes into the dorsal vessel and is afterwards distributed throughout the system. The superfluous injection is then washed away, and such parts of the body as may be required removed for examination.
Natural injection of Medusæ may be effected without injuring the vessels, with an opening at the side remote from it. The medusa must be placed in a glass vessel, with the bell downwards, and a bell-jar ending in a narrow tube above is placed over it and made air-tight; the medusa is then covered with the injection-mass, the air in the glass is exhausted, and as the sea-water runs out by slits in the lower side of the annular canal, the coloured fluid runs in. In the case of leeches and large species of earthworms, the natural injection is made from the ventral sinus. In all cases a glass tube is used, with a finely drawn-out point. The injection is complete when the injection issues from the counter-opening. Besides the animals mentioned, large caterpillars, beetles, and larvæ of various kinds are favourable objects for injection; the glass cannula being introduced into the posterior end of the dorsal vessel, and the counter-opening made in the ventral vessel, and vice versâ.
Staining Living Protoplasm with Bismarck Brown.—Henneguy having treated Paramœcium aurelia with an aqueous solution of aniline brown (known as “Bismarck Brown”), found that they assumed an intense yellow-brown colour. The colour first appears in the vacuoles of the protoplasm, and then in the protoplasm itself, the nucleus generally remaining colourless, and becoming more visible than in the normal state. If a yellow-tinted paramœcium be compressed so as to cause a small quantity of the protoplasm to exude, it is seen that it really is the protoplasmic substance which becomes coloured. All the Infusoria may be stained with Bismarck brown, but no other aniline colour employed exhibits the same property—they merely stain the Infusoria after death, and are in fact poisonous. Living protoplasm does not as a rule absorb colouring matters, and as Infusoria are chiefly composed of protoplasm, attempts have been made to ascertain whether protoplasm in general, of animal or vegetable origin, behaved in the same way in the presence of aniline brown. A tolerably strong solution of Bismarck brown was therefore injected under the skin of the back of several frogs. After some hours the tissues became uniformly tinted a deep yellow; the muscular substance especially had a very marked yellow tint. The frogs did not appear in the least incommoded. Small fry of trout placed in a solution stained rapidly and continued to swim about. Finally, a guinea-pig, under whose skin some powder of Bismarck brown had been introduced, soon presented a yellow staining of the buccal and anal mucous membranes and of the skin. Seeds of cress sown on cotton soaked with a concentrated solution of the Bismarck brown sprouted, and the young plants were strongly stained brown; but on crushing the tissues and examining them under the microscope, it was ascertained that the protoplasm of the cells was very feebly coloured: the vessels, on the contrary, showed a deep brown stain up to their termination of the leaf. The mycelium of a mould developed in a solution of Bismarck brown was clearly stained after having been washed in water, whilst it is known that the mycelium, which frequently forms in coloured solutions, picro-carmine, hæmatoxylin, &c., remained perfectly colourless. Other aniline colours injected under the skin of frogs stained the connective tissue as deeply as did the Bismarck brown; but the striæ of muscle remained colourless. We may conclude, then, that Bismarck brown possesses the quality of colouring living protoplasm both in plants and in animals.
Cutting, Grinding, and Mounting Hard Structures.
Take the femur of cat, or rabbit, remove as much of the muscle as possible and macerate it in water until quite clean; on removal hang it up to dry. With a fine saw make transverse and longitudinal sections. File the section down until flat, and smooth. Take some Canada balsam, place a piece on a square of glass and warm gently over a lamp until the balsam is plastic enough to allow of the section being pressed into it, and set it aside to consolidate. Take a hone (“Water-of-Ayr” stone), moisten it with water, and rub one side of the section upon it until quite smooth, then place the glass slip, with the section still attached, into methylated spirit, and in a very short time the section will be separated; wash it and remount it on the reverse side, and proceed to rub it down on the hone until it appears to be thin enough for mounting. Polish both sides on a polishing strop with Tripoli powder, and mount in Canada balsam.
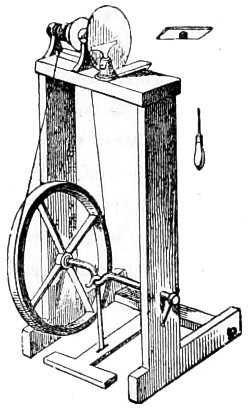
Fig. 244.—Small Lathe for cutting and polishing Sections of Teeth.
Teeth.—The enamel of the teeth is a much harder structure than that of bone, consequently it is found necessary to have recourse to a cutting machine. Hand machines have been introduced for this purpose, but the small lathe described in the earlier editions of my book has in no way been superseded by later cutting machines. Fig. 244 represents the small lathe used for cutting and polishing every kind of hard substance. With regard to the teeth, two sections should be made perpendicular to one another through the middle of the crown and fang of the tooth from before backwards, and from right to left, which will show the peculiar structure of the enamel. The section must be cemented to the carrier of the stock of the lathe, or to the metal plate a, and kept in position by the steel holder b; the wheel being set in motion by the first treadle. The embedding materials in use are either gum-shellac or Canada balsam. The former is more generally employed by the lapidary and grinder of lenses than the latter. As the enamel is liable to fracture under the saw, it will be necessary to lessen the friction by dripping water on the saw as it is made to revolve. Thick sections can be quickly ground down against the corrondum wheel. The final polishing of the section may be done on the lathe, or by rubbing the flattened surface with water upon a “Water-of-Ayr” stone, and ultimately set up in Canada balsam, which must not be too fluid, or it will penetrate the lacunæ and canaliculi, fill up the interspaces, and cause them to become quite invisible. As the flatness of the polishing surfaces is a matter of importance, the stones themselves should be tested from time to time, and when found to present an uneven surface must be rubbed down on a granite stone with fine sand, or on a lead plate with emery powder. If it is decided to use Canada balsam as the embedding material, this must be prepared in the following manner:—The section of tooth or bone must be attached to a slip of well-annealed glass by hardened Canada balsam, and its adhesion effectually secured by placing the slide on the cover of a water bath, or in the hot-chamber (Fig. 256), when the balsam, a thick drop of which should be used, will spread out by liquefaction. The slide should then be removed and allowed to cool in order that the hardness of the balsam may be tested. If too soft, as indicated by its readily yielding to the pressure of the thumb-nail, the heating process must be repeated, care being taken not to cause it to boil and form bubbles; if too hard, which will be shown by its chipping, it must be remelted and diluted with fluid balsam, and then set aside as before. When it is found to be of the right consistence, the section must be laid upon its surface with the polished side downwards; the slip of glass is next to be gradually warmed until the balsam is softened, care being taken to avoid the formation of bubbles, then press the section gently down with a needle upon the liquefied balsam, the pressure being just applied on one side rather than over the whole surface, so as to drive the superfluous balsam towards the opposite side; finally, an equable pressure over the whole will secure a perfect attachment of the section without air bubbles. If, however, these should present themselves in drying, and they cannot otherwise be expelled by pressure, it will be found better to take the section off and relay it as before. The thickness of the layer of balsam may be reduced by rubbing it down before applying the glass-cover.