PART II. CHILDREN'S LEAFLETS. (continued 3)
Reading edition
We cannot bring about the foggy, damp weather of Holland and England when we want it; neither can we bring the dry atmosphere of Texas—air so dry that meat will cure hard in the hottest weather without tainting. It so happens, however, that from one Fourth of July to the next we have many kinds of weather, and if one could not find conditions suited to almost any kind of plant it would be strange. If we cannot make the weather accommodate itself to the best comfort of the plant, we must set the plant so as to accommodate itself to the weather.
Pansies from foggy England and bulbs from the lowlands of Holland should be planted to bloom in the cool days of spring, and the phlox from Texas will prosper in the heat and drought of July and August.
With this idea well fixed in your mind, you will easily see that when you know the country from which a plant has come, a knowledge of the physical geography of that country will be helpful in knowing how to make the plant happy and prosperous.
We must also make the plant comfortable in the soil. There is great difference in what plants require to make them comfortable. Some, like thistles or mullein or ragweed, will thrive on almost any soil and are no more exacting as to food than a goat or a mule; but other plants are as notional as children reared in the lap of luxury. As a rule, flowering plants belong to the "lap-of-luxury" class.
Soil covers the land as thin skin covers an apple or as a thin coat of butter covers bread, and it holds more or less plant-food. When men erect school buildings and afterwards grade the ground they usually turn a part of the soil upside down. There is also considerable rubbish of the builders left scattered about, such as brick-bats, chips of stone, and the like, that go to make the place an uncomfortable one for notional plants. For this reason I wish particularly to call your attention to the manner in which you should prepare the ground on which you intend to plant. The first thing to do is to spade the ground thoroughly to the depth of at least ten inches. All stones as large as a big boy's fist should be thrown out, and all lumps given a bat with the back of the spade to break them into fine particles. This is to be a flower-bed and should be soft like your own bed. It would be better to make it up more than once. After the first spading it would be well to cover the bed with a coat of stable fertilizer to a depth of six to eight inches, which will give additional plant-food; and in spading the second time, this fertilizer will become thoroughly mixed with the soil. The surface should next be raked smooth, and your flower-bed will then be ready for planting.
We all admire the bright bulb flowers that are among the first to blossom in the spring. These mostly come from Holland, or at least attain their perfection there. We have just spoken of the importance of planting flowers at such a time that they may live their career when our climate is most like that from which they come. In the case of bulbs, spring and early summer is the most favorable time for them in this country, and fall is the proper time for planting.
The exact time in the fall to plant, how to plant, what bulbs to plant, when to put a winter overcoat on the bed, and other details, I will leave for Mr. Hunn to tell in the following Leaflet. He has had many years' experience in the management of flowers, and I advise you to read carefully what he says.
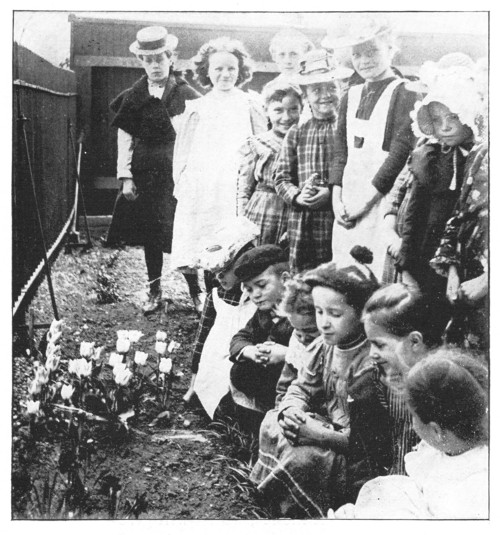
Fig. 368. A bulb bed at the school house.
LEAFLET LXXIX. A TALK ABOUT BULBS BY THE GARDENER.[100] By C. E. HUNN.
Perhaps you would like to hear from the gardener. Your Uncle John has told you something about preparing a bed for your plants. His advice is very good; but the bulbs we are to talk about are like those notional children whom he mentions and they do not want tallow candles for any part of their meal.
You should know that bulbs do not want to come into direct contact with the stable fertilizer. They want the fertilizer below them where the feeding roots may nibble at it when the bulb is hard at work developing the leaves and flower. You know that all the leaves and the flowers were made the year before, and the bulb simply holds them until the new roots have formed. No kind of treatment will make a bulb produce more flowers than were formed in the year it grew (last year); but the better the treatment the larger and finer the flowers will be.
If I wanted to make a bulb bed, I should choose, if possible, a sandy soil and throw out the top soil to the depth of six inches. Then I should put into the bottom of the bed about two inches of well rotted manure and spade it into the soil. Then I should throw back half of the top soil, level it off nicely, set the bulbs firmly on this bed, and then cover them with the remainder of the soil; in this way you will have the bulbs from three to four inches below the surface. It is dark down there and in the fall months the top of the ground is cooler than at the depth of five or six inches and the top of the bulb will not want to grow, while the bottom, which is always in a hurry, will send out roots, to push out the leaves and flowers the next spring.
When the weather is cold enough to freeze a hard crust on the soil, the bed should have its winter overcoat. This may be straw, hay, cornstalks, or leaves spread over the bed to the depth of six inches if the material is coarse; but if you use leaves, three inches will be enough, because the leaves lie close together and may smother out the frost that is in the ground and let the bulbs start. What we want is to keep them asleep until spring, because if they start too early the hard freezes of March and early April will spoil their beauty if the leaves or flowers are near or above the surface. Early in April the covering may be removed gradually and should all be off the beds before the leaves show above the ground.
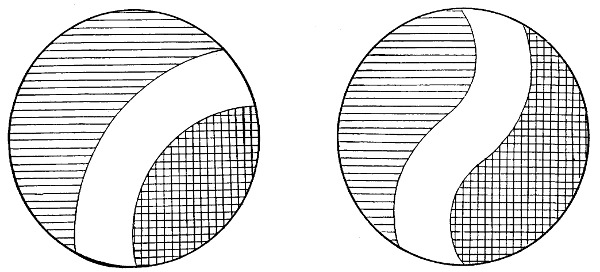
Fig. 369. Simple designs for bulb beds.
Perhaps many of you cannot find a sandy place for your beds; if not, make your beds as has been told you, leaving the stones in the bottom of the bed for drainage. Then, when you are ready to set the bulb, place a large handful of sand where your bulb is to go and set your bulb on it; this will keep the water from standing around the bulb. Very good results may be obtained on heavy soil by this method.
What kind of bulbs shall we put into these beds? Choose hyacinths, tulips, narcissus, or daffodils, with snowdrops or crocuses of various colors around the edge.
If you use hyacinths you can have the national colors, red, white, and blue, or many shades of either color, as shown in the diagrams (Fig. 369). Of tulips you can have stars or ribbons of yellow, white, or crimson, or in fact almost any color except true blue. In narcissus, yellow, sulfur, and white are the colors. The little crocuses come in yellow, blue, white, and striped colors, and are in bloom and gone before the large flowers take your attention. Many other bulbs are fine for spring flowering; but as most of them are more difficult to grow and many of them rather expensive, I do not think we will discuss them now.
Suppose we want a bed of red, white, and blue hyacinths (Fig. 369), and make it six feet in diameter: how many bulbs would you want? Now, hyacinths should be planted six inches apart each way, and the outside row should be at least three inches from the edge of the bed. You see you will want a little over one hundred bulbs, which, if one person had to buy them, would cost him a considerable sum; but if fifty or more boys and girls would club together it would be easy for everyone.
If you want a bed of tulips, they should be planted four or five inches apart instead of six inches. So you will need more bulbs; but they are cheaper than hyacinths. The narcissus bulbs, being still smaller than tulips, may be planted three inches apart; and the little crocuses, the first flowers of spring, should touch one another, as should also the snowdrops.
Perhaps many of you do not wish to wait until spring for your bulbs to flower, in which case we must try to persuade them to bloom through the winter, say at Christmas. Nearly all bulbs are good-natured, and may be coaxed to do things that nature never asks them to do; so if we go at it right we shall find it very easy to make them think their time to bloom has come, even if the ground is covered with snow and the ice is thick on the ponds. Hyacinths, narcissus, and crocus can all be made to flower in the winter by starting this way. Get the bulbs so as to be able to pot them by the middle or last of October, or if earlier all the better. The soil should be rich, sandy loam if possible; if not, the best you can get, to which add about one-fourth the bulk of sand and mix thoroughly. If ordinary flower pots are to be used, put in the bottom a few pieces of broken pots, charcoal, or small stones for drainage; then fill the pot with dirt so that when the bulbs are set on the dirt the top of the bulb is even with the rim of the pot. Fill around it with soil, leaving just the tip of the bulb showing above the dirt. If the soil is heavy, a good plan is to sprinkle a small handful of sand under the bulb to carry off the water, the same as is done in the beds outdoors. If you do not have pots you may use boxes. Starch boxes are a good size to use as they are not heavy to handle; and I have seen excellent flowers on bulbs planted in old tomato cans. If boxes or cans are used, care must be taken to have holes in the bottoms to let the water run out. A large-size hyacinth bulb will do well in a five-inch pot. The same size pot will do for three or four narcissuses or eight to twelve crocuses.
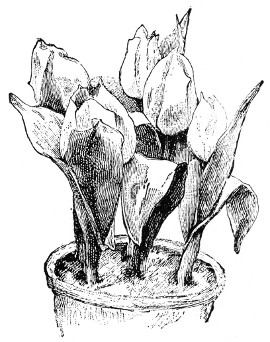
Fig. 370. Pot of tulips.
After the bulbs are planted in the pots or other receptacles, they should be placed in a cool place, either in a cold pit or cellar or on the shady side of a building, or, better yet, plunged or buried up to the rim of the pot in a shady border. This is done to force the roots to grow while the top stands still; as only the bulbs with good roots will give good flowers. When the weather gets cold enough so that a crust is frozen on the soil, the pots should be covered with a little straw, and as the weather gets colder more straw must be used. From six to eight weeks after planting, the bulbs should have made roots enough to grow the plant, and the pots may be taken up and placed in a cool room for a week or so; after which, if the plants have started into growth, they may be taken into a warmer room where they can have plenty of light. They will grow very rapidly now and will want lots of water; after the flowers begin to show, the pots may stand in a saucer of water all the time. When just coming into bloom the plants may have full sunlight part of the time to help bring out the color of the flowers. Fig. 370 shows a pot of tulips.
I want to tell you of two bulbs that do not need so much fussing with to get them to bloom for Christmas. One of them is called freesia (Fig. 371) and if I could have but one kind of bulb to flower in the winter, I should choose this. The little bulbs are not half as large as crocus bulbs and you will be astonished at the large leaves and flowers such a bulb can produce. The bulbs are about the cheapest of all winter bulbs and they grow without putting them away to make roots, as the tops do not seem as impatient to start as those of most other bulbs, but wait until there are roots to help them along. The flowers are borne on a slender stem and look very graceful, either on the plant or in bouquets. They are also very fragrant, and a pot with five or six bulbs will perfume a large room. All they need is good light soil, sunlight, water, and warmth to make glad the heart of anyone who plants them.
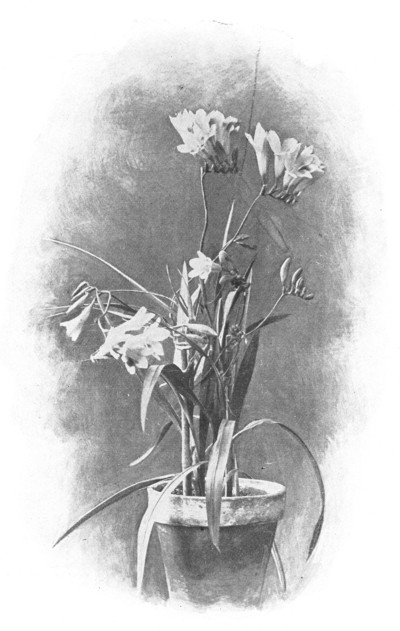
Fig. 371. Pot of the freesia.
The other bulb I should select is the oriental narcissus or Chinese sacred lily. This grows in water without any soil whatever. Just take a bowl or glass dish about three times the size of the bulb; put some pretty stones in the bottom; set in the bulb and build up around it with stones so as to hold it stiff when the leaves have grown; tuck two or three small pieces of charcoal among the stones to keep the water sweet; then fill up the dish with water and add a little every few days, as it evaporates. Set the dish in a warm, light place. In about six weeks the fragrant, fine white flowers will fill the room with perfume and you will have the pleasure of watching the roots start and grow, the top throw up long green leaves, and the flower clusters develop and open their flowers. Hyacinths may also be grown in water, but not as easily as this narcissus, or in such inexpensive dishes.
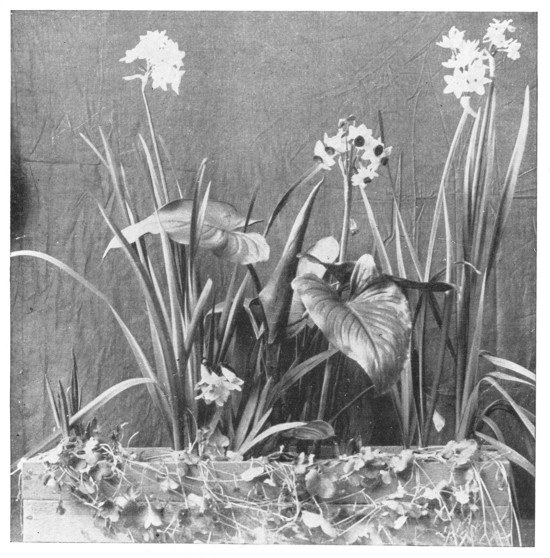
Fig. 372. Winter box of bulbs.
The picture (Fig. 372) of a bulb box was taken last winter from a box of mixed bulbs grown at Cornell. The calla in the center and the Kenilworth ivy trailing over the front were planted in the box in September, and pots of geraniums and other plants set on the dirt to fill the space. When the bulbs that were in pots were ready to be started they were taken out of the pots and set in the dirt in the box, where they grew and flowered; the tall stems are paper white narcissus, the best variety for winter. On each side there is a hyacinth just starting and in front a little freesia in bloom. When these bulbs were done flowering, small pots of blooming plants were set on the box and a charming window box was obtained with many different things in it through the winter.
Where to Plant Bulbs; and Other Advice for the Outdoor Garden.
A large part of the beauty of the flower-bed lies in its position. A flower-bed in the middle of the lawn is usually out of place. It has no "setting," as the artists say. It lacks background. It is merely an incidental thing dropped into the sward. It is out of place. A flower-bed should belong to some part of the general planting of the grounds, or it should be a part of the border or boundary surrounding the place. The center of any grounds should be left open, or free from heavy planting. A few trees may be planted in the center, if one desires shade; but all the masses of foliage and flowers should be somewhere near the sides or else near the foundations of the house or near other definite boundary lines. In such places the flower-bed is supported by other herbage. It has relation to something else. It forms a part of a general picture; and every good yard should be a picture.
Along the borders the beds are usually more easily cared for than they are in the center of the lawn. In the latter place they are in danger of being trampled over, and the roots of the grass run underneath the bed and absorb the food and moisture which the flowers need. The beauty of a formal bed in the center of the lawn is destroyed if some of the plants are injured or do not develop. Symmetry is part of its merit. If, however, the bed is along the border, a few vacant places in the bed do not attract great attention. In school grounds it is well to have the beds somewhat near together or continuous, in order that the labor of taking care of them may be less.
It is always well to plant profusely. Much of the beauty of a flower-bed lies in an abundance of color. One must consider, also, that some of the roots, seeds, or bulbs may fail. Some of them may not grow in the first place, and others may be injured by weather or by accidents. It is well to provide for all these contingencies.
One of the best plants to use for the school bulb garden is the crocus, because the bulbs are cheap and very hardy. The mixed bulbs, comprising all the common colors, can be had for forty or fifty cents per hundred at retail, and if one should buy them in considerable quantities, they could be had for less than this. A thousand bulbs of mixed crocuses should be got for three dollars or a little more, and these would make a great display along the fence or walks of any school garden. One of the ways to grow crocuses is to plant the bulbs in the grass, not cutting out the grass where they are planted. That is, they grow right in the sod. By the time the lawn needs to be mown in the spring, the flowers are gone and the crocuses can be cut with the grass. The crocuses will not last so long in a mown sod as they will in beds which are especially prepared for them, but they will ordinarily give good results for two or three years if the land is good; and they are so cheap that they can be renewed from time to time.
Other good, hardy bulbs for fall planting out-of-doors, aside from lilies, are hyacinth, snowdrop, snowflake, tulip, narcissus of various kinds (including daffodils and jonquils), grape hyacinth, squill. All these are early spring bloomers and will delight the children's eyes.
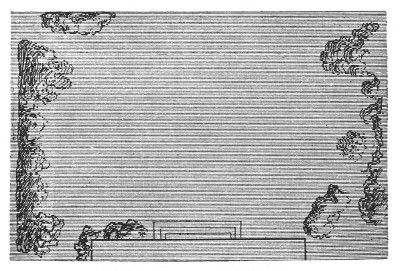
Fig. 373. A good arrangement of shrubbery and flower-beds.
LEAFLET LXXX. HORSES.[101] By ALICE G. McCLOSKEY and I. P. ROBERTS.
A few minutes ago I went into the stable to see Peg and Nan, the two bay horses. On the outside of each stall I found a door-plate, with Nan written in large, black letters on one, Peg on the other. I visited each old friend in turn.
They are quite different in disposition, these two horses. Nan is gentle, affectionate, patient; Peg is spirited, unfriendly, restless. I am very fond of them both and as yet have not been able to decide which I enjoy the more, quiet Nan or spirited Peg.
All horses are interesting to me. As I take my daily walk, I like to look at the different ones I meet along the way. There is the baker's horse and the butcher's; the doctor's horse, sleek and active; the heavy gray horses that haul loads of coal up the hill all through the winter weather; "Old Speckle," the postman's horse; and the friendly bay I so often see feeding in the meadow.
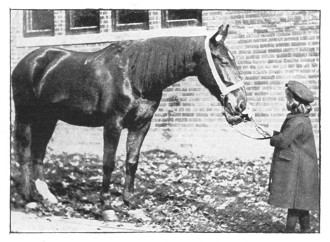
Fig. 374. Nan.
Of all these wayside acquaintances, I like best the one I meet in the meadow. Perhaps I associate him with the meadow-lark's song, the fresh, green grass, and the gay little dandelions that were about when I first crossed his path; or, perhaps our friendship progressed more rapidly than city streets ever will permit. He seems to know when I am approaching and raises his head in welcome. I always pet him and talk to him a bit, and we both know that two friends have met.
There are many things about horses that everyone ought to know. If we were to ask Junior Naturalists how coach horses differ from roadsters and how roadsters differ from draft horses, how many would be able to tell us?
Perhaps you will ask, "What is a draft horse?" The draft horse has short legs, a heavy body, a short, thick neck, broad deep chest and shoulders, strong hocks and moderately large feet. It may be that your father owns a draft horse. Ask him whether it is a Percheron, a Clydesdale, or an English Shire. These are the most familiar breeds of draft horses. The Percherons came from France and at first they were gray. Now they are often black or dark brown. The Shires, commonly bay, brown or sorrel, came from England; and the Clydesdales, similar in appearance to the Shires but smaller and more active, came from Scotland.
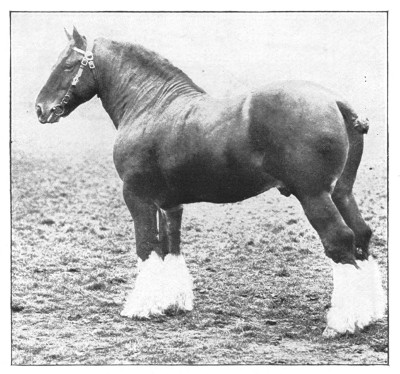
Fig. 375. A typical draft horse.
All boys and girls know coach horses. As you stand by the school-room window, you may see one pass. They have long arched necks and fine heads. Their bodies are rounded and well proportioned.
Roadsters, trotters, and saddle horses are usually not so large as coachers. Their necks are inclined to be longer and their chests narrower than in the coach horse; however, their muscles and tendons are strong.
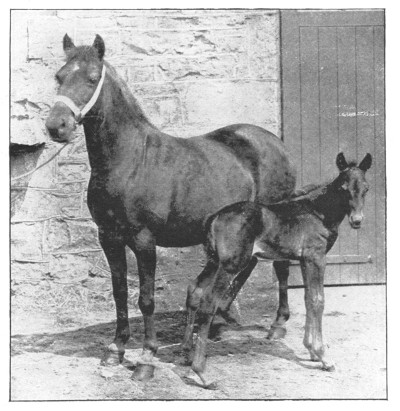
Fig. 376. Welsh pony and its mother.
Now you must not think that just because a horse is drawing a load he is a draft horse; nor because a horse is hitched to a coach he is a coach horse; nor because he is driven on the road he is a roadster. These three names,—draft horses, coach horses, roadsters,—represent types or classes. They mean kinds of horses that are supposed to be best adapted for drawing, or for coaches and carriages, or for fast driving, providing the horse has no other work to do. But the horses that you usually see are just mere common horses of no particular type, and are used for a great variety of purposes. They are "nondescripts," which means "undescribed" or "unclassified." You would not think of putting a true draft horse, like the animal in Fig. 375, on a light carriage; nor of hitching a coacher like that in Fig. 377 to a coal wagon. Do you think there is any real roadster, or coach horse, or draft horse in your neighborhood? If not, perhaps you can tell, as the horses pass you, whether they are nearest like one type or another. Try it.
If you will observe horses closely you will find that some are large, heavy, and strong, and that they are seldom made to move rapidly, while others may be nearly as tall but they are slim, and carry their heads high and their necks arched. You should also notice that the heavy draft horse does not lift his feet high nor walk with a proud and lofty tread, while the coach horse lifts his feet high, carries his head high, and moves very proudly.
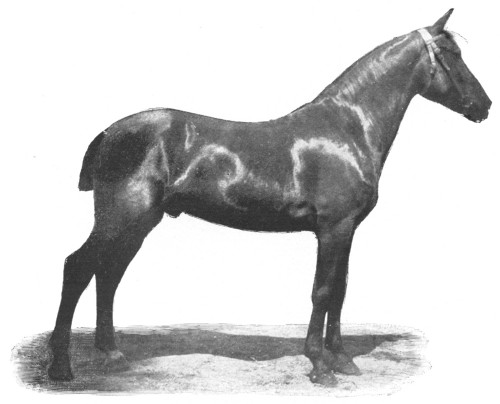
Fig. 377. A good coacher.
There are several breeds of draft or heavy horses. Fig. 375 shows a fine Clydesdale horse imported from Scotland. Notice how nicely he is marked. The horseman would say that he has four "white stockings" and plenty of "feather" on his fetlock; strange, is it not, that this long hair should be called feather?
If you should see a large, smooth gray horse similar to the Clyde, without the "white stockings" or the "feather," you may conclude that he is a Percheron horse. As we have said before, the Percheron breed of horses came from France. It is not always gray in color. It is slightly smaller than the Clydesdale.
After you have learned that a draft horse should be large and strong, study the picture of the coach horse (Fig. 377). Compare him with the draft horse. The coach horse is not a fast trotter nor even a fast roadster, but he is usually very beautiful, strong, and stylish.
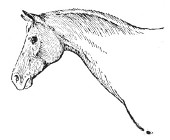
Fig. 378. Arabian horse.
Now I shall ask you to compare the neck shown in Fig. 380 with that shown in Fig. 381. Which do you think is the more beautiful? The horse with the long, slim neck is a noted trotter. If the neck and head were large, would it help or hinder the trotter? Compare the neck of the trotter with that of the draft horse and see whether you can explain why one is heavy and the other light. Can you explain to your parents why the draft horse should weigh more than the coach horse?
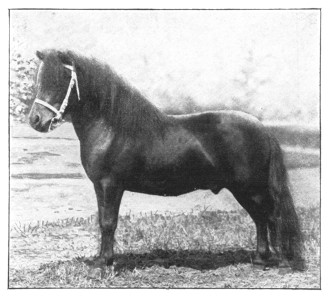
Fig. 379. Shetland pony.
Do you admire the head and neck shown in Fig. 380? Wherein does it differ from the others? This type is called "ewe-neck." Can you tell why? Tell me whether you think this horse would be a safe driver.
What do you think of the head and neck of the Arabian horse (Fig-378)? You like it, do you? Why? Can you imagine what kind of horse belongs to that head and neck? Describe it.
Probably the Arabian horse would be too spirited for you so I shall show you a Shetland pony. (Fig. 379.) Where is Shetland? Why are horses so small in the country where this little fellow came from? How does he differ from the other horses shown in the Leaflet? Note all of the differences.
In Fig. 376 you will see the picture of a Welsh pony, and she has a ponyette, a baby only a few days old. Which is the larger, the Shetland pony or the Welsh pony? Which one would you prefer if the baby were left out? Could you raise a calf until it became a grown cow and then trade it for a pony? Just a plain little pony can be bought for the price of a good cow. It is part of a good education to know how to raise and handle cows and horses.
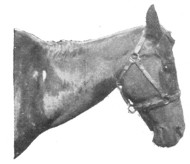
Fig. 380. Ewe-neck, a poor horse.
With this Leaflet in your hand, you should go to the stable, or, better still, out on the street, and see whether you can find as good horses and ponies as the pictures represent. As you study horses try to answer the following questions:
1. Where is the horse's knee joint? Which way does the knee bend?
2. Where is the hock joint? Which way does it bend?
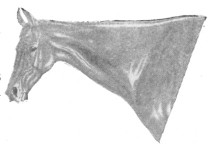
Fig. 381. Neck of a trotter.
3. Can a horse sleep when standing?
4. How are the legs placed when a horse lies down?
5. How does a horse get up,—front legs first or hind legs first? How does a cow get up?
6. When a horse starts, after standing, what foot does he put forward first,—the left or the right? Fore or back? What foot moves next?
7. When a horse trots, do the two feet on one side move together? Or do lefts and rights move together?
8. What does a driver mean when he says that a horse "forges" or "over-reaches?"
9. Name the things that a horse commonly eats. What is a good feed for a day,—how much of each thing, and when given?
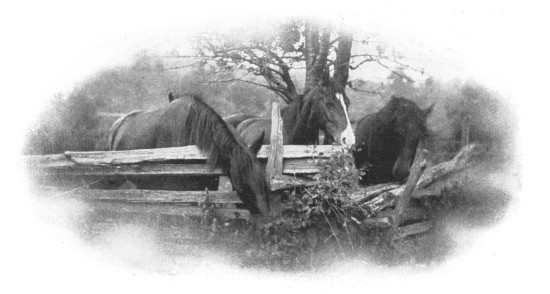
Fig. 382. At pasture.