Watering Troughs and Tanks
Reading edition
All thrifty farmers are building their tanks and troughs of concrete. Such troughs never rot, rust, or leak.
By using concrete, tanks of any size and shape can be made.
Watering Tank for Horses and Cattle
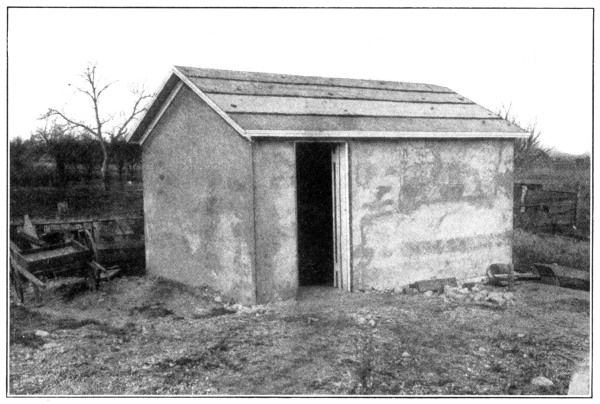
Most stockmen prefer to build their watering tanks oblong in shape. Having decided upon the size, locate the tank in a handy, well drained, wind-sheltered place.
To build a tank like the one shown in the picture, lay out the trough 5 by 16 feet. Make an excavation for a drainage foundation as directed under Sidewalks, page 29. Around the outside dig a 10-inch trench 2 feet 6 inches deep. Lay all in-flow and over-flow pipes (not less than 1½ inches in diameter) so that the ends, fitted for connections, will be even with the finished bottom of the tank.
Build the forms and have the necessary reinforcing on hand before mixing any concrete. The tank is 5 by 16 feet by 2½ feet deep with an 8-inch bottom. The walls are 5 inches thick at the top and 10 inches at the bottom. (The sloping face allows the ice to slip up the sides instead of pushing directly against them.) Consequently the inside forms at the bottom are 5 inches shorter at each end than at the top.
The forms are nothing more than shell boxes made from odd lengths of 1-inch siding nailed to 2 by 4-inch studding spaced not more than 2 feet apart. The sides of the forms may be made separate and put together in place; or, if there is sufficient help, each form may be entirely completed and set up as one piece. The forms are held in position by 2 by 4-inch liners at top and bottom, and if necessary by sloping braces nailed to stakes driven in the ground. Cut strips of heavy woven wire fencing sufficiently long to cover the bottom and to project up into the walls.
With the forms ready, mix a batch of 1: 2: 4 concrete. Beginning at one end, fill the trench, and upon the gravel foundation place a 2-inch layer of concrete in width slightly greater than a width of wire. Upon this concrete lay a section of wire. Tamp in the remaining 6 inches of concrete and bring up the extra length of the wire so that the ends will project up into the future side walls. Continue laying the concrete in sections until the bottom is completed. Finish the surface with a wooden float.
Immediately set the wall forms in place, and set them level by using a carpenter’s level. Fill the wall space with concrete. Half way up the side and 1 inch from the outside, lay a ½-inch iron rod entirely around the tank. Again 2 inches from the top, and 1 inch from both inner and outer edges, lay two rods of the same size. If a tank cover is desired, set bolts in the concrete as directed under Corn Crib Floors, page 53.
To prevent mud holes, surround the tank with a concrete floor. (See Feeding Floors, page 43.) Protect the green tank from drying out according to instructions under Sidewalks, pages 28-34.
Materials Required
Crushed rock or screened gravel 7 cubic yards at $1.10 $7.70
Sand 3½ cubic yards at 1.00 3.50
Portland cement 11½ barrels at 2.50 28.75
$39.95
Watering Troughs for Hogs
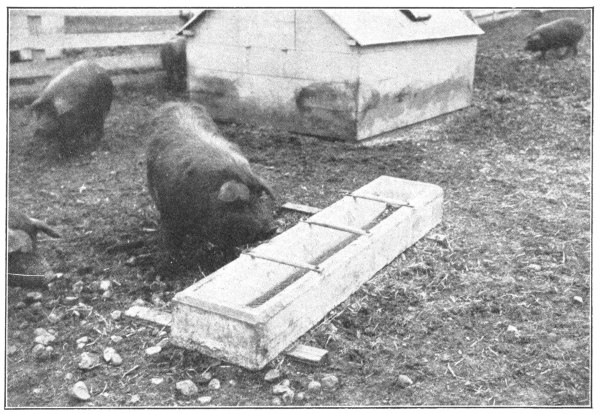
Troughs for hogs are built in two styles—wedge-shaped, like the feed trough shown on page 49, or like troughs for cattle except smaller. Use short lengths of 1-inch pipe crosswise to keep the hogs out of the trough. Set bolts, properly spaced, in the soft concrete sides, so that the pipes will fit between them and can be held firm by a strap iron over the bolts.
Dipping Vats and Tanks
The younger generation have no remembrance of the epidemic of Texas or southern fever which swept over the country about forty years ago, killed thousands of cattle, and left hundreds of bankrupt farmers and ranchmen in its wake. Government experts found that this deadly disease is caused by ticks, which infest cattle in certain localities. They also discovered that the fever can be prevented by dipping the animals in chemical solutions.[2]
Dipping cures not only Texas (known as “splenetic”) fever, but also the lip and leg disease, mange, and scab or scabies of both sheep and cattle. Certain solutions free horses, cattle, sheep, and hogs of lice, mites, fleas, and flies. The only method of applying these chemicals, surely and thoroughly to all parts of the animal, is by giving him a plunge in a tank containing the healing liquid. Since the dip is the most costly part of the process, and since it must be applied once or twice every year, some permanent form of tank is needed—one that will not rot or rust out, leak or heave in during winter. Concrete vats, built ten years ago, without one cent’s worth of repair, are still as good as new and are still giving entire satisfaction.
There are four important points to be considered in the building of a dipping tank:
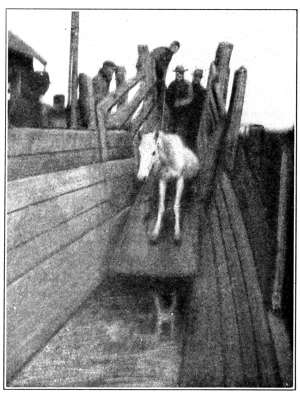
First—An entering slide, steep enough to shoot the animal in, without a direct drop. A direct drop, the entire depth of the tank, is likely to injure the animal.
Second—The tank must be narrow enough to prevent the animal turning around when once in, long enough to keep him in from one to two minutes, and deep enough not only to make him swim, but also that he may disappear entirely when he takes the plunge.
Third—The slope at the leaving end must be gentle and the footing roughened or cleated so that the animal may easily scramble to the dripping pens.
Fourth—As the liquid dip is the most expensive part of dipping, there must be provided two dripping pens draining back into the tank.
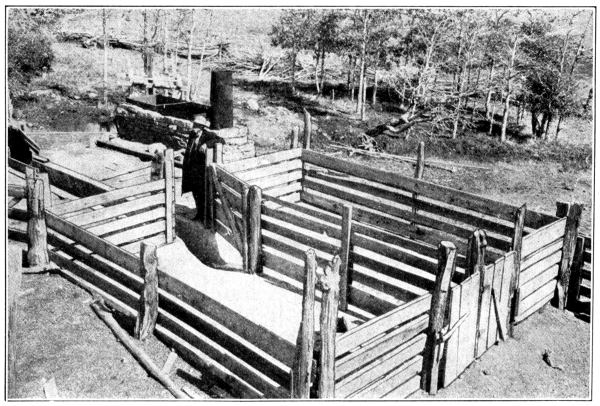
Select a well drained site convenient for a chute leading from a small, well-fenced lot or corral. At the narrow end of the chute and in line with it lay out the dipping tank with the entering slide next to the chute.
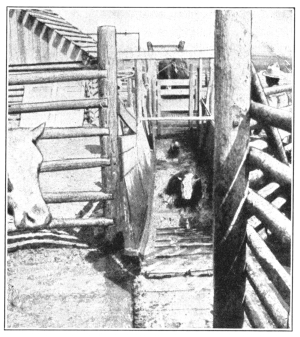
Often the chute is built on a curve, so that the animals cannot see where they are going.
They are generally constructed with a hump in the floor. This prevents the animal from jumping into the dip, and gives the necessary length to the slide, without increasing the depth of the tank. Choose the proper dimensions from the diagrams and table according to whether the tank is to be used for horses, cattle, sheep, or hogs.
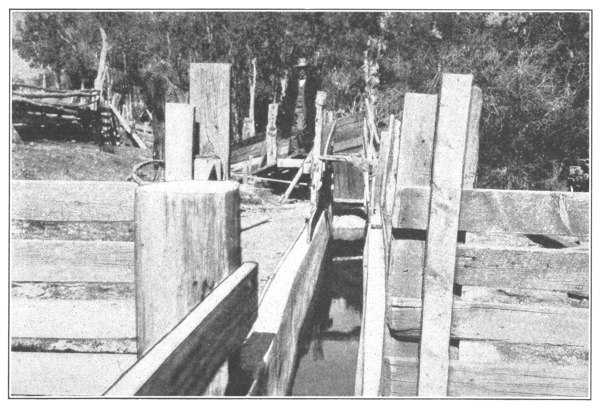
The lengths given will keep the animal in the tank one minute, usually a sufficient time to cure mild forms of disease. Where a longer treatment is desired, most ranchmen, instead of building tanks of greater length, provide a drop gate working in a groove, as shown in the photograph, by means of which the animal is kept in the tank as long as necessary. Likewise, rather than build a separate tank for sheep and hogs, stockmen insert a temporary division fence, running the full length and depth of the cattle and horse tank. This fence should be solid and so spaced as to prevent hogs and sheep from turning around in the tank. In this way a single dipping tank may be used for horses, cattle, sheep, and hogs.
Dig the deep part of the hole first, and then slope the earth for the slide and climb. Lay the outlet drain pipe so that the top of the elbow bend will be even with the surface of the finished concrete bottom. Tamp back the dirt thoroughly about the drain tile before placing concrete.
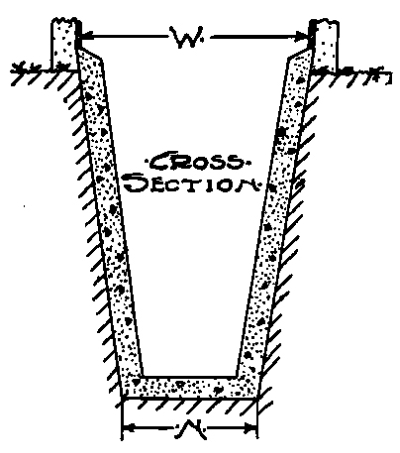
The side walls only will require forms. If the banks stand firm, inside forms alone will be needed. Make these of 1-inch boards on 2 by 4-inch uprights. Steel reinforcing, preferably wire cloth or hog wire, is placed in the forms so that it will be embedded in the center of the concrete wall. Floor, sides, and ends should all be thus reinforced to prevent settlement cracks due to any settlement of earth foundations. Mix the concrete 1: 2: 4 and lay the floor and slopes directly on the solid earth. No fill is necessary. The concrete for the sloping ends should be mixed fairly dry so that it will tamp well and stay in position without the use of forms. With the bottom and slopes built, lower the side wall forms into the pit. Take care to jar no dirt upon the concrete already placed. Space the forms properly and cross-brace them firmly upon each other. Fill the wall space with concrete.
In placing this concrete, be sure that it strikes the wood form instead of the earthen side, as concrete mixed with earth makes a weak, leaky wall. Carry the walls 6 inches above the surrounding ground to prevent flood water from running into the tank.
The entrance slope should be smooth to slide the animals into the tank without skinning them up. Finish this surface with a wooden float and steel trowel. Some ranchmen prefer to cover the entire slide with a polished steel plate, the edges of which are sunk into the concrete when the slide is built. To aid the animals in climbing out, embed in the concrete the turned-up ends of iron cleats bent at right angles similar to a capital “U.” Old wagon tires, cut in lengths not greater than 20 inches and turned up 4 inches at each end, will do. Leave 1 inch clearance between the flat surface of the cleats and the concrete. Space the cleats 18 inches for horses and cattle and 10 inches for sheep and hogs.
At the leaving end of the tank, lay out the two dripping pens with their division fence on a line with the center line of the tank, so that a gate hung to this fence may close either pen, when it is full, and allow the animals from the tank to pass to the empty pen. Use concrete posts for the fences, as they will require no replacing. Excavate for the drainage foundation, set the posts, and build a 6-inch concrete floor according to the directions given under Sidewalks, page 28, and Feeding Floors, page 43. Slope the floors, ¼ inch to each foot in length or width, so that the dip running off the animals will be saved and returned to the tank. Corrugate or groove the floor to the depth of ½ inch, every 8 inches, in one direction. During the construction of the floor, mold around the outside a concrete curb, commonly called a splashboard, 6 inches above the floor and 4 inches wide. Where the dip from the floor empties into the tank, place a removable wire screen or strainer to keep the droppings and wool tags out of the vat. Cure the floors and slopes according to directions under Feeding Floors, page 43. The wall forms may be removed after one week, but the tank should not be used until it is three weeks old.
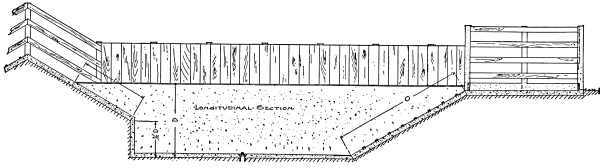
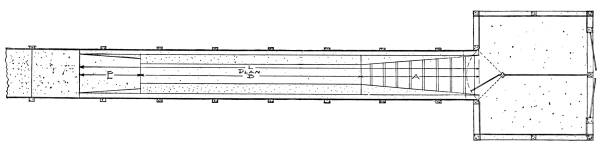
DIMENSIONS OF GROUND PIT FOR DIPPING TANKS
Kind W N D L E B A I O T Cement Sand Rock
Barrels Cu. yds. Cu. yds.
Horses 5′ 10″ 3′ 4″ 8′ 8″ 55′ 0″ 7′ 6″ 31′ 0″ 16′ 6″ 8′ 8″ 18′ 7″ 0′ 8″ 38 11 22
Cattle 5′ 4″ 3′ 4″ 7′ 8″ 51′ 0″ 6′ 8″ 31′ 0″ 13′ 4″ 7′ 8″ 15′ 4″ 0′ 8″ 36 10½ 21
Sheep 3′ 4″ 2′ 4″ 5′ 8″ 46′ 0″ 5′ 0″ 31′ 0″ 10′ 0″ 5′ 8″ 11′ 6″ 0′ 8″ 22 6½ 13
Hogs 3′ 4″ 2′ 4″ 5′ 8″ 36′ 0″ 5′ 0″ 21′ 0″ 10′ 0″ 5′ 8″ 11′ 6″ 0′ 8″ 19 5½ 11
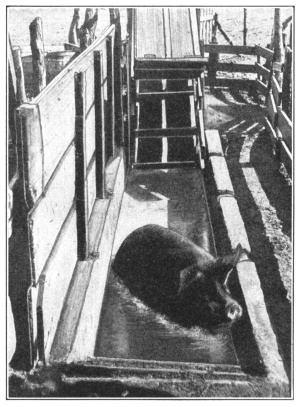
At first state and federal authorities had to force ranchmen to dip, but so beneficial has it proved that compulsion is now seldom necessary. Experienced cattle-men have found by actual tests that dipping increases the market value of their steers $5 per head. The cost of dipping on the farm is only 1½ to 3 cents per head—in the stock yards the charge is 15 to 20 cents. One large ranchman, who lost 28 per cent. of his herd (several thousand) in one winter with the mange, found his first trial of dipping so effective in curing this disease that the following winter he did not lose a single steer. The use of dips has become so general in the South and West that the Government has raised the quarantine in most sections.
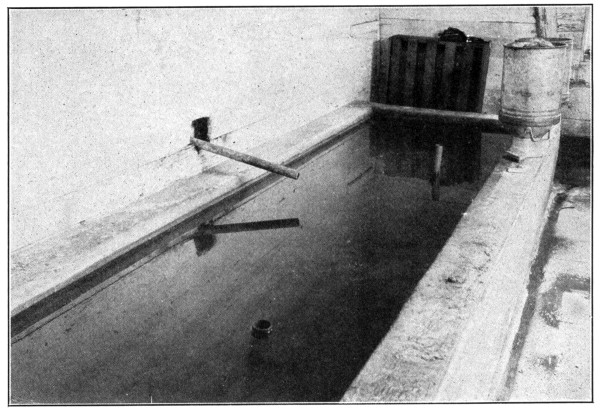
The Construction of a Concrete Milk Vat
Dig a pit to a depth of 1 foot 6 inches and place wooden forms in such a way as to provide for tank walls 6 inches thick and 1 foot 8 inches in height. This will bring the walls only 8 inches above ground level—which makes it easy to lift the milk cans in and out.
Use a wet mixture of concrete, of proportions 1: 2: 4. Place as described on page 74; and be sure to build walls and floor at the same time. The floor should be 6 inches thick.
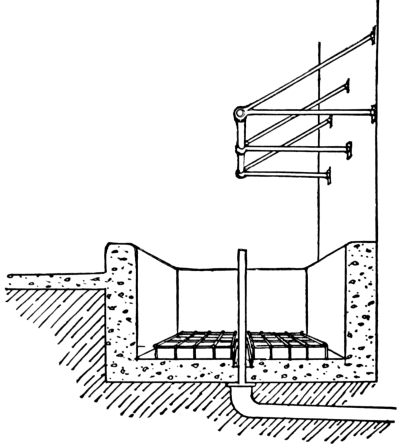
The vat described has a partition 6 inches thick, dividing the tank into two chambers, each chamber being 6 feet 9 inches long. An iron grating is placed in the bottom of the tank to allow free circulation of cooling water around and under the milk cans. Arrangements must be made for inlets and outlets. The inlet pipe can be simply placed above one end of tank.
The pipe rail at back of tank provides a convenient purchase when lifting heavy cans from the tank.
A hole must be provided at the other end of tank, in the bottom, and connecting, by an iron pipe, with the drain tile. Into this hole a removable upright iron pipe is fitted, the length of pipe depending on the depth of water desired for the cans. This allows the water to come only to the top of the pipe and provides an over-flow outlet at the proper height. The pipe must fit tightly into the hole.
Time required to build:—one day with three men on the job.
Approximate cost, at current prices of materials and including labor, $16.00.
The materials required are 2 cubic yards of crushed rock or screened gravel, 1 cubic yard of sand, and 5 barrels of Portland cement.