Concrete in the Cow Barn
Reading edition
With cleanly milk and butter producers, it is no longer a matter of floor or no floor; it is merely a question of which is the best floor for the cow barn. The best dairymen long ago decided in favor of concrete. On account of many epidemics of “catching” diseases, directly traceable to milk, city authorities are forcing the careless dairyman to decide—concrete floors are one of the requirements for certified milk.
The stalls of dairy barns are arranged with the cows in the opposite rows of stalls standing with their heads or their heels toward each other.
The stall plan depends entirely upon the arrangements for bringing in feed and removing manure. The plan below is for a barn with the cows’ heads toward each other. If the dairyman prefers the other arrangement, the same plan can easily be adapted to it. A width of 8 feet 6 inches provides sufficient room for a manure spreader.
How to Build Dairy Barn Floors
Consider a barn planned to have the two rows of cows facing each other.
Remove all manure and other foreign matter together with such humps of earth as may be necessary to give the floor a slight slope in the direction in which the manure will be taken out. Begin the construction of the floors at the two sides of the barn so that the middle and ends may be used as working space.
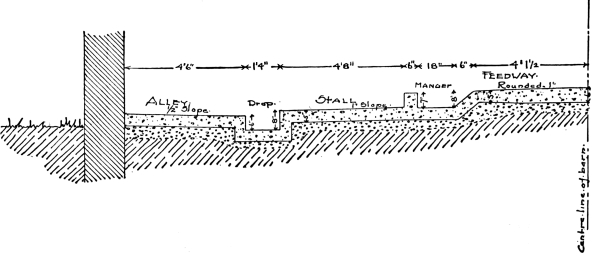
On the earthen floor, at a distance of 4½feet from the side walls of the barn, set on edge a line of 2 by 6-inch boards, extending the entire length of the building. Support these boards by stakes driven firmly in the ground on the side of the board away from the barn wall. By means of a carpenter’s spirit level and a grade line, see that the tops of these boards have an even slope (say ⅛-inch per foot) toward the manure pit. Allowing a clear intervening space of 10 inches, set up in a similar way a line of 2 by 8-inch boards with the supporting stakes inside of the 10-inch space and with the top of this board 2 inches higher than the 6-inch board. In this space the drop gutter will later be constructed.
The Alleyway
Between the wall and the 6-inch board tamp in sufficient gravel to even off all irregularities in the ground surface and to allow the building of a 5-inch thickness of floor, sloping ½ inch from the wall toward the gutter. Mix the concrete 1: 2½: 5, tamp into place, and finish the surface with a wooden float and a wire brush. The roughened surface thus produced gives the cows a good footing.
The Stall Floor
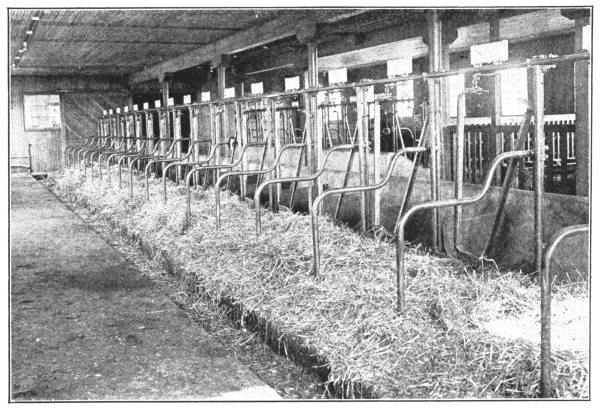
With the alley finished, begin the construction of the floor of the stalls proper. For the average sized cow, the usual length of stall is 4 feet 8 inches from stanchion to drop gutter and the width is 3 feet 6 inches. The stall floor should slope not less than ½ inch toward the drop gutter to provide for drainage. If an adjustable stanchion fastener is to be used, set it in the center of the 6-inch manger wall. The length of the stall is regulated by this device. For a stall 4 feet 8 inches long, set the outside board (2 by 12 inches) of the manger wall 5 feet 2 inches from the drop gutter. The top of this board will be 7 inches above the finished floor. This extra height provides a form for the manger wall. In this space, place the 5-inch floor in the same manner as the alleyway was laid. If gas pipe stall divisions are to be used later, make mortises in the floor at the proper points by tamping the concrete around a core of the right size, removing the core when the concrete has stiffened.
The Manger
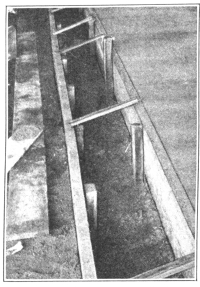
As soon as the floor of three stalls has been concreted and while the concrete is yet green, build the concrete manger wall upon the new stall floor. The projecting 7 inches of the 2 by 12-inch board already in place serves as the outer wall form. “Toe nail” two 1 by 6-inch boards together at their edges, thus providing a 7-inch height for the other manger wall form and a bearing plate to rest on the green stall floor. Set this wall form so as to leave a 6-inch space for the manger wall. Cross-brace these wall forms upon each other and if necessary drive an occasional nail through the bearing plate into the new concrete. Fill the space between the forms with concrete, setting the stanchion fasteners at the same time. Continue in the same manner until the stall floors are finished. If desired, the back wall of the manger may be given a dish shape for a swinging stanchion.
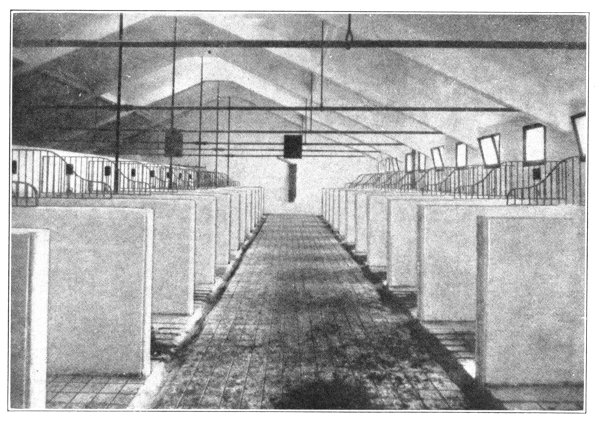
Then commence the work on the other side of the barn, constructing the floor of the alleyway and stall in exactly the same manner.
The Feedway
With the alleys and stalls finished, begin work on the feedway. If possible, this should be at least 8 feet wide.
As the bottom of the manger should be on a level with the stall floor and since the top of the feedway floor must be at least 8 inches above the bottom of the manger, place sufficient gravel fill (well tamped) to bring about this result. To hold in place the 5-inch concrete of the feedway alley floor and to provide for sloping front walls of the mangers, set a 2 by 10-inch board, spaced (from the other wall of the manger) 1 foot 6 inches at the bottom and 1 foot 10 inches at the top. These sloping walls allow all feed to be swept back into the mangers and all trash to be easily removed from them. Build the 5-inch floor of the feedway, crowning it to 6 inches thick in the middle. See Sidewalks, page 31.
Horse Barn Floors
Concrete floors are equally as valuable for the horse barn as for the cow stable. The same principles govern the floor construction. Naturally there must be a few changes in the dimensions. Single stalls are usually 5 feet wide and 9 feet from the front wall of the manger to the drop gutter.
As the gutter is generally covered with a rough cast-iron plate sunk flush with the concrete, carrying liquids alone, it need not be so wide and deep as for the dairy barn. A clear width of 10 and a depth of 3 inches are sufficient.
Concrete Mangers
Many farmers are to-day building their mangers or racks of concrete. “Stump suckers” lose the habit when fed in concrete mangers.
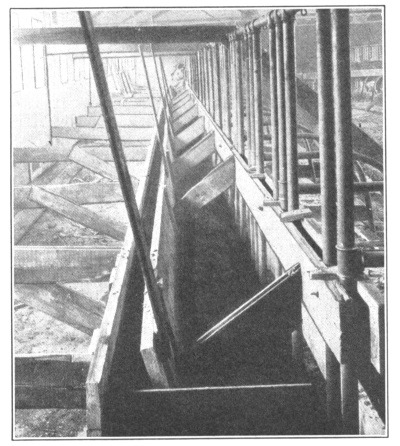
The manger is constructed along the general lines laid down for Outdoor Feeding Troughs, page 48. A form satisfactory for building horse barn mangers is shown in the photograph. The feed trough can be molded as a part of the manger by using a box form like an ordinary wooden feeding trough, but 6 inches wider and without end pieces. Saw out the manger forms so that the box will fit the opening. When the manger forms have been filled with concrete to the feed trough level, place 1 inch of concrete over the bottom of the trough form, lay in a strip of heavy woven wire fencing, and then place the remaining 2 inches of the 3-inch bottom. Immediately set upon this concrete a bottomless box with end pieces, of a size to allow for the 4-inch manger wall and the 3-inch side walls of the trough. Fill both manger and trough forms and embed a ½-inch rod in the side walls of the trough 1 inch from the top. Make holes in the manger wall for the hitching strap by inserting a 2-inch greased peg in the concrete. Imbed a 1-foot length of ½-inch rod in the concrete above this hole.
Scientists have found that rats distribute more disease than any other animal. Recognizing the danger, state and city authorities, the world over, are spending vast sums of money in exterminating this pest. If rats have no nesting place, they cannot stay on the farm. Rats and mice cannot find a home about concrete floors, nor can they climb concrete barn walls.
In a stable floored with concrete, the horses can rest at noontime instead of stamping at flies.
Farmers Build Barn Approaches of Concrete
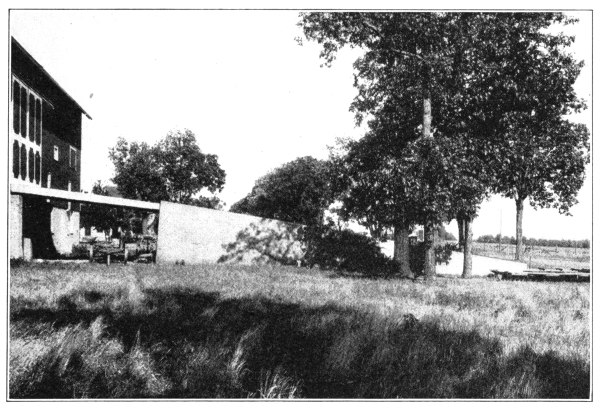
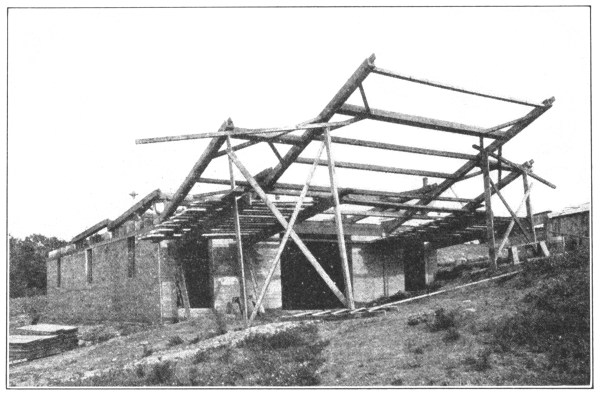
For purposes of drainage, concrete barns are often built on the side of a hill, the lower story being used for the livestock, while the second floor is used as a wagon house and for feed and storage. This arrangement necessitates a “barn approach.” Originally these approaches were simply of earth, piled up in front of the door; and quite often the earth extended beyond the ends of the barn.
By not allowing the approach fill to come right up to the barn, the lower story of the barn receives the full benefit of light and ventilation on all four sides.
The concrete bridge gives a shelter for wagons and tools; while a root cellar may be conveniently built under the barn approach.
Such an approach adds greatly to the appearance of the barn and its surroundings.
Economy of space made it desirable to provide a retaining wall to hold the earth in position—and concrete naturally came into use for the purpose.
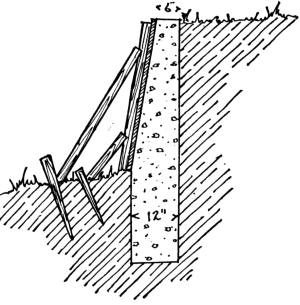
The earth fill already in place in front of the barn door should be cut out to the desired width and a trench dug along both sides below the ground level to a depth of 2½ or 3 feet, and 1 foot wide.
Only outside forms are needed, as the earth fill in the barn approach acts as an inside form. These outside forms may be made up in sections as large as desired, of 1-inch planks, with the necessary upright studding.
Mix concrete 1: 2: 4.
Place the concrete in the foundation, erect the forms, holding these in position by nailing to stakes driven back of the forms in the ground. The concrete can be placed with greatest convenience from the top of the earth fill that forms the approach. In shoveling into the form, be careful that the concrete strikes the wood form instead of the earthen side, as concrete mixed with earth does not give the fullest possible strength.
A Concrete Barn Foundation
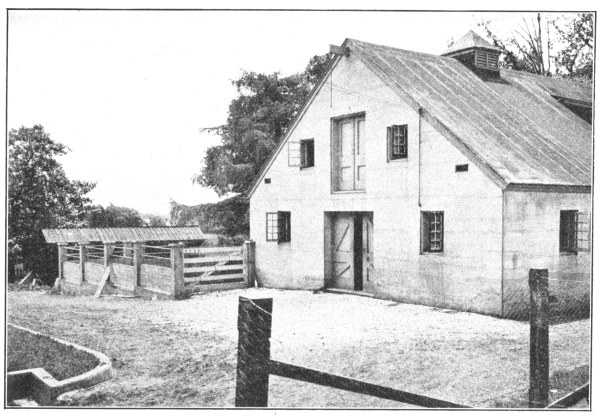
On account of convenient arrangement, economy of space, and protection to the stock, second story barns have become very popular.
At first the use of concrete for the walls of the first story was looked upon with doubt. It might be damp. It might make a cold stable. Yet the character of the material so well fitted the use that it was tried, found entirely satisfactory, and to-day is being used for the lower story of thousands of barns every year. As this arrangement does not give a perfect fire protection to the stock, a ceiling of concrete is provided, furnishing a floor for the carriage house, hay loft and granary, through which rats cannot gnaw. With this floor of concrete, the top of a barn can burn off and the stock be perfectly safe.
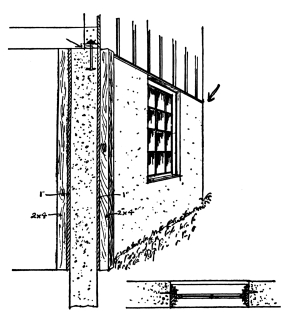
Excavate a foundation trench to a depth below the frost line, twenty inches wide. Fill with concrete mixed 1: 2½: 5. On this foundation erect the forms for the side walls, spaced in such a way as to make the wall 12 inches thick. These forms are made of 1-inch siding, with 2 by 4-inch studs, spaced 18 inches apart. Fasten the forms securely at top and bottom as described in forms for “Small Farm Buildings,” page 82. While erecting the forms, place in position frames for the window and door openings. These frames are removed after the concrete has become hard and the windows and doors placed. If the concrete extends above the windows, place three ½-inch iron rods 3 inches above each opening, and extending 18 inches beyond its sides. Insert bent iron rods in the concrete around the corners, at intervals of every 2 feet of height. Having carried the wall to the desired height, provide for attaching the wooden superstructure to it by placing iron bolts every 5 feet in the concrete while it is yet soft. These should be placed with the head down, allowing the nut end to extend above the wall a sufficient distance to pass through the sill and to afford length for a nut and washer.
If a concrete ceiling is to be placed over the stable, erect forms in the same way as for a cistern cover described on page 69. This ceiling will have to be carefully reinforced, and if there is any doubt about the quantity and position of this reinforcing, a competent engineer should be consulted.
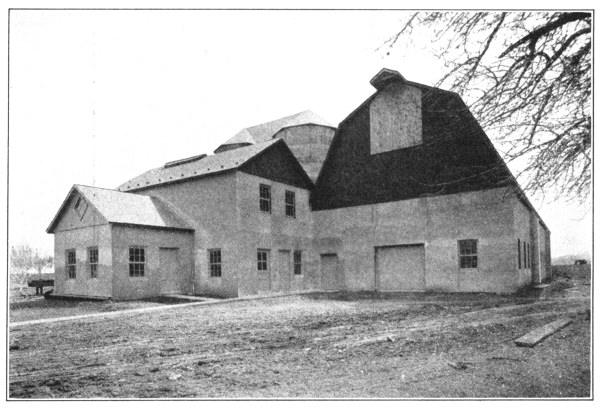
Entire barns of concrete are being built in ever increasing numbers. If so built, the fire danger for that barn is forever removed. A barn of concrete, however, with a wooden roof is not perfectly fireproof. If the hay catches fire in such a barn, the roof is burned up.
Any one who has the ingenuity to build an entire barn of concrete can build a concrete roof as well.