Sketching of Designs for Textile Fabrics to be Executed on the Jacquard Machine.
Reading edition
The first work to be done in making an original design, or in reproducing a design by making an analysis of a woven fabric, is to prepare the “sketch.” This sketch may be arranged the exact size of pattern needed, or it may be proportionally larger or smaller. If the design is a reproduction from a woven fabric, a correct duplicate on the regular drawing paper is required; for this sketch is of the same value to the designer for Jacquard work as the correct picking out of a weave is to the designer for harness loom-work.
In preparing an original sketch, the points to be considered are: The setting of the figure, and the most practical size.
Methods of Setting the Figures.
To give a clear illustration of this, Figs. 69, 70, 71, 72, 73, 74, 75, and 76 are designed, representing a few of the methods most frequently used. A separate explanation of each will familiarize the student with this part of the work.
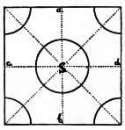
Fig. 69.
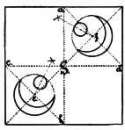
Fig. 70.
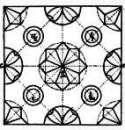
Fig. 71.
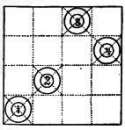
Fig. 72.
Fig. 69 illustrates the setting of a figure in “plain.” The space allowed for one repeat (outline of the square) is shown divided horizontally and vertically into two equal parts each way. [See dotted lines a, b, and c, d, thus giving the centre for the square at S.] The design contains two circles in its repeat; one of these circles is shown with its centre at S, and the other circle is illustrated divided into four quarters, as shown in the four corners of the square.
Fig. 70 represents another “plain” setting, but the figure employed, a half-moon with a small circle near it, is set in two directions.
Fig. 71 illustrates a design having in its repeat two different figures, each set by itself in “plain.” A third figure, ring e, f, g, h, is used four times to break the general prominence of the effect.
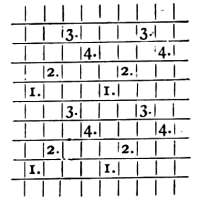
Diagram for Fig. 72.
Fig. 72 shows the setting of a figure in a design similar to a “four-harness broken twill.”
Fig. 73 shows a combination of one figure set in four-harness broken twill style, the other set in plain.
Fig. 74 shows the setting of a figure in the “five-leaf satin” style. [See diagram, p. 109.]
Fig. 75 shows the setting of two figures in the “six-leaf satin” style.
Fig. 76 illustrates the setting of one figure in the “eight-leaf satin” method.
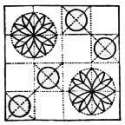
Fig. 73.
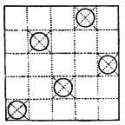
Fig. 74.
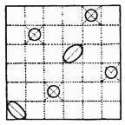
Fig. 75.
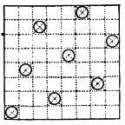
Fig. 76.
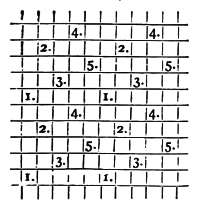
Diagram for Fig. 74.
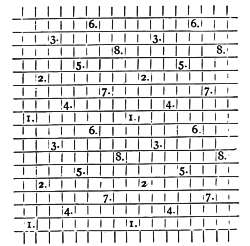
Diagram for Fig. 76.
In setting figures in a sketch the appearance of “streaks” must be avoided. To do this it will be found advantageous to sketch more than one repeat of the pattern; if possible, sketch two each way, that the streaking, if any, may show itself in the sketch, and be corrected there. Nearly all the patterns seen in fabrics which show streaks can be traced to designers who prepare their designs without sketches; for if a sketch had been made, the streaking of the fabric might have been foreseen had the designer exercised proper care in the examination and perfecting of his sketch. Figures taken from plants, or from life, can be set in the same manner as explained for Figs. 69 to 76. For example, Fig. 77, the figure for design. Fig. XXXIV., p. 32, the latter being set after the method illustrated by Fig. 70.
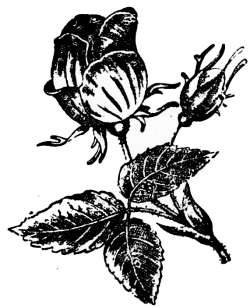
Fig. 77.
Figs. XXV., XXVI., XXXIII., XXXVIII., XLI., XLIV., XLV., XLVII., XLVIII., LI., LV., LVII., LXI., etc., all show sketches for fabrics executed on one or the other methods of construction just explained.
Size of Sketch Required.
This is regulated by the number of harness-cords in one repeat or division, the method of tie-up employed, and the texture of the finished fabric. For example: Take 400 harness-cords for one division. Texture of the fabric when finished 100/90. Tie-up employed, straight-through. Required: The size of one repeat for the sketch.
Answer: 400 ÷ 100 = 4 inches. The figures may be arranged in this sketch to repeat one, two, three, four, or more times in the 4 inches thus available.
Enlarging and Reducing Figures for Sketches.
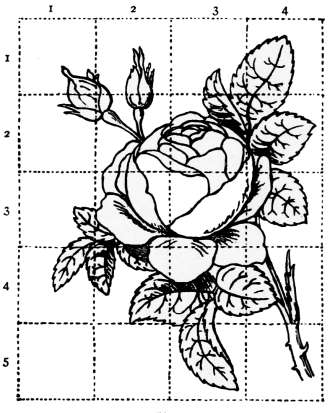
Fig. 79.
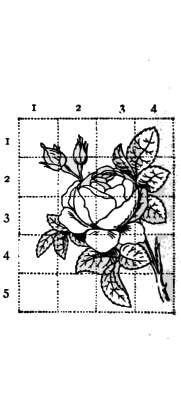
Fig. 78.
Figures are not always enlarged or reduced by free-hand drawing. Some designers always use the “squaring off” process. The latter is clearly illustrated by Figs. 78 and 79. Fig. 79 shows the reduction of Fig. 78, and Fig. 78 the enlargement of Fig. 79.
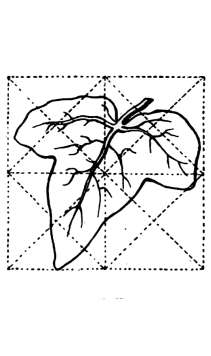
Fig. 80.
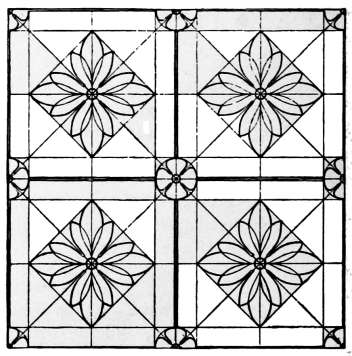
Fig. 81.
The method observed is of different size squares for each design. Each square of Fig. 78 containing the same proportion of the whole design as is shown by the corresponding squares of Fig. 79.
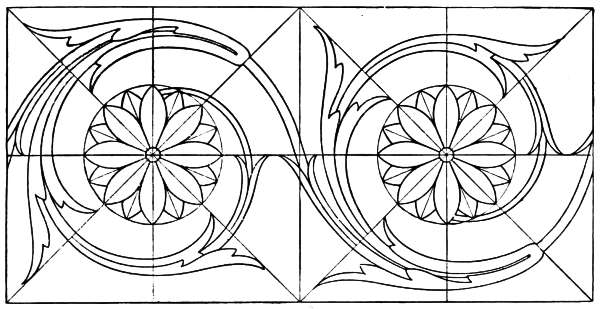
Fig. 82.
Fig. 80 illustrates another method of ruling off a figure preparatory to enlargement, reduction, or duplication.
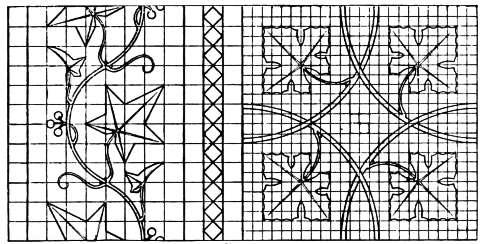
Fig. 83.
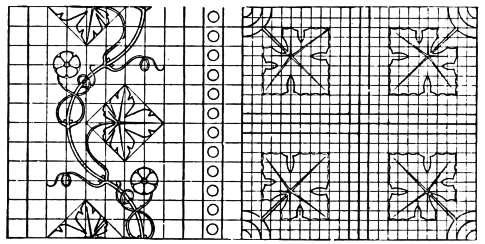
Fig. 84.
This “squaring off” is not always done in a sketch for the reasons just mentioned, it being frequently done to assist the designer in the original construction of his figure. Such an application of its utility may be observed in Fig. 81, centre for Damask; Fig. 82, border for Damask; and Figs. 83 and 84, sketches for Damask table-cover, centre, with side border. The design of a border for a centre, or vice versa, must be selected to correspond (Fig. 85).
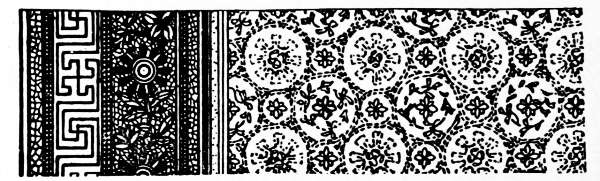
Fig. 85.
Fig. 86 shows a horizontal and vertical border, both of the same design. It is obvious that it would be a very imperfect design if either border should be allowed to form the corner, hence a union must be carefully constructed embodying the same general features as the design.
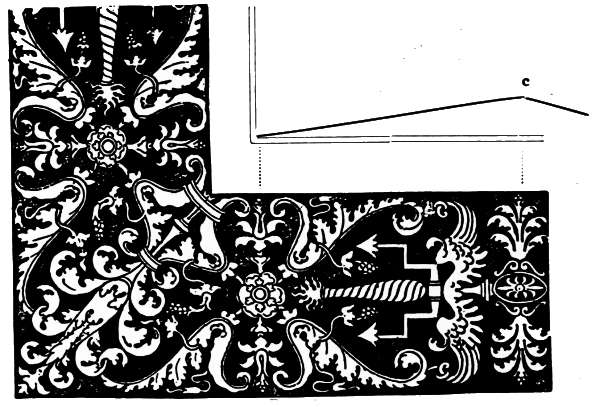
Fig. 86.
Transferring of the Sketch to the Squared Designing Paper.
Having obtained a perfect sketch of the design as it appears in the fabric, or as it is desired to show, the outlines are transferred to the □ designing paper. This always requires an enlargement of the design, and to accomplish this the sketch itself must be ruled proportionally to the heavy squares found on the □ designing paper. If these squares should be too small for the sketch, they may be enlarged by throwing 4, 9, or 12 of the “squares” into one large one; which is indicated by extra ruling off with pencil upon the required heavy lines. In this case the sketch is ruled off corresponding to these pencil lines. The transfer of the sketch to the required □ designing paper is governed by rules already explained for the enlargement of a design on the regular drawing paper. After the design is transferred to the □ designing paper it must be “outlined in squares.”
Outlining in Squares.
This consists in painting the small squares forming the outline of the figure as called for by the outline of the drawing. Two methods are observed: One “outlining in squares” inside the “drawing outline;” the other “outlining in squares” outside the “drawing outline.”
If painting outside the outline, no small squares are taken, in which the drawing outline, taken from inside the figure, encloses more than one-half of their surfaces. If painting the “outline in squares” inside the “drawing outline,” this rule is reversed, thus no small square can be taken which is overrun by the drawing outline more than one-half from the outside of the design. The most difficult part of the outlining in squares is to obtain the nearest possible reproduction of the drawing outline. If circles, curves, etc., are to be made, they must be reproduced as nearly correct as possible; no bunches, cuts, etc., should disturb its symmetry.
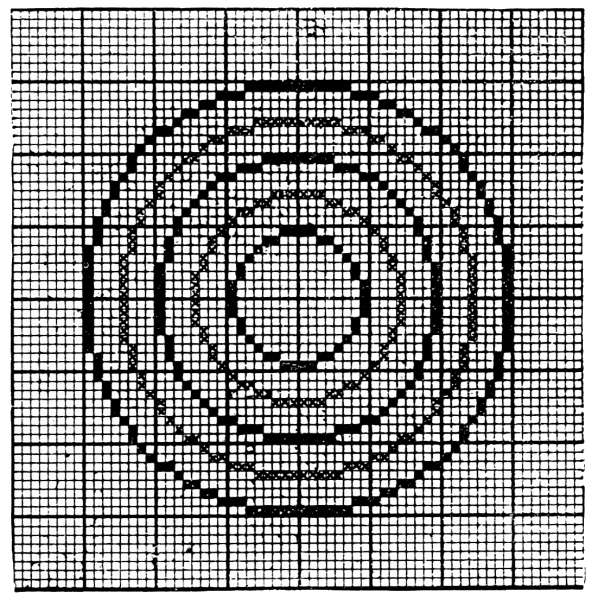
Fig. 87.
Fig. 87 shows the variations and methods to be resorted to in “outlining by squares” the five circles, each of different size.
Fig. 88 shows the formation of projected straight lines varying from a horizontal to a vertical direction. The full changes by 8s, 7s, 6s, 5s, 4s, 3s, 2s, 1s are shown in full black. The half changes between the 2s and 3s are formed of 2s and 3s taken alternately as shown by the shaded line. Another half change between 1s and 2s, also represented by the shaded effect, shows the change to be a repetition of the step 1, 1, 2. Between this last mentioned change and the regular 2s change, we find the direction of a straight line as derived from a repetition of 2, 2, 1, indicated by the [.] Below the regular change by 1s the straight line is formed by using 7 times 1 and once 2 repeated. Above the regular change by 1s as shown by the black diagonal, these same changes will form straight lines running from 45° to 90°.
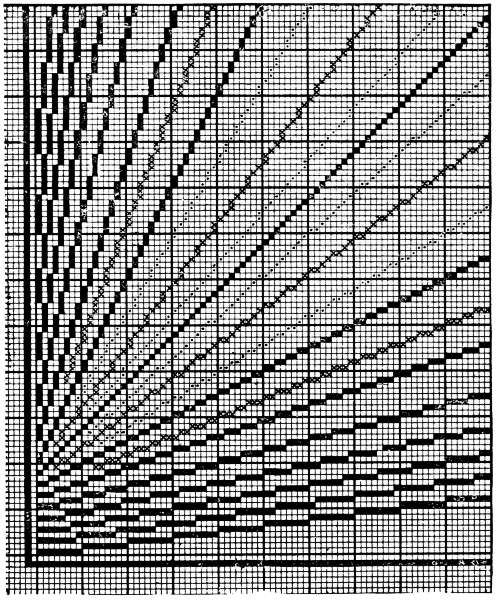
Fig. 88.
Rules for “Outlining in Squares” Inside or Outside the Drawing Outline.
The outlining in squares outside the drawing outline is observed in designs having the figure produced by the filling. The outlining in squares inside the drawing outline is observed in designs having the figure produced by the warp. By reversing these two rules, the figure in the design would be changed from the sketch, for if outlining in squares inside the drawing outline, using filling for figure, the figure would be reduced proportionally to the reduction made or taken away by the outline squares. Thus, also, if the warp formed the figure, and the “outlining being done in squares,” outside the drawing outline, the figure would increase proportionally the size of the squared outline. These rules refer to painting the squares for warp only. Some fabrics require also the painting of the filling squares.
The foregoing explanation may be reduced to the following Rule: If the figure is required to be in white, “outline by squares” outside the drawing outline; if the figure is required to be painted, “outline by squares” inside the drawing outline.
After the design is outlined by full small squares, either the figure or the ground (as required, but generally the figure) is painted all over. The paint required for this work has been previously described. It is only necessary to mention that it must have body enough to be clearly visible, but not sufficient to obscure the black ruled lines of the paper, which must show clearly through the paint. The weave, if necessary, is next put on the required spots, either in white or black paint.
Illustration of a Sketch.
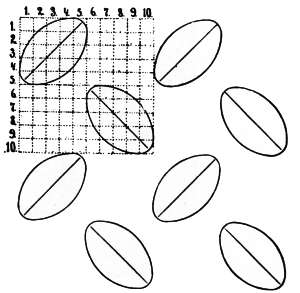
Fig. 89.
Outlining on □ paper—finished design and fabric sample. For single-cloth fabrics, as damasks, dressgoods, etc.
To give a clear illustration of the entire process from sketch to finished design, Figs. 89, 90, and 91 are designed. Fig. 92 showing the effect of the design on the fabric after being woven.
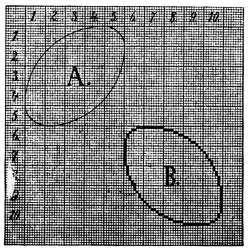
Fig. 90.
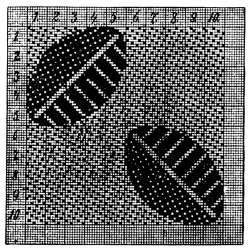
Fig. 91.
Fig. 89 represents a sketch for a fabric supposed to be executed with 80 warp-threads in one repeat; thus, if using 8 by 8 □ designing paper, (texture in this example supposed to be equal in filling and warp), the sketch must be divided and ruled off into eight parts each way.
Fig. 90 illustrates the sketch transferred to the □ designing paper. Fig. A represents the “drawing in outline.” Fig. B, the “outlining in squares.” Fig. 91, the complete design; and Fig. 92, the fabric sample.
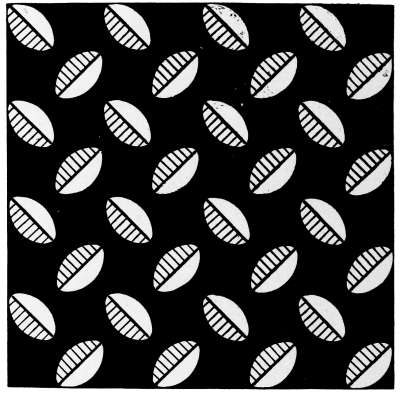
Fig. 92.
Design for Damask Fabrics to be Executed on a Jacquard Loom, with Compound Harness Attached.
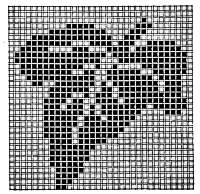
Fig. 93.
These designs require no special weave, as that is taken care of by the compound harness in front of the Jacquard harness, as explained in Chapter XII., page 58. After painting in the design, it is finished, ready for card-stamping. Fig. 93 shows us a leaf, taken from sketch (Fig. 80), which may be used in connection with a larger design, but will clearly illustrate this division of textile work.
Designs for Two-ply Ingrain Carpet.
In these fabrics, when the ground and figure are indicated in the design, the same is considered as finished. As previously stated in the article devoted to these fabrics, a two-ply ingrain carpet is composed of two fabrics, in which the journals introduce the weave, and the double-acting Jacquard machine the exchange of ground and figure effect.
Fig. 94 represents a small portion of a design illustrating the three principal effects of this operation.
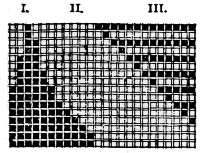
Fig. 94.
I. = figure up.
II. = ground up.
III. = effect technically known as “shot-about,” derived from one pick, figure up; one pick, ground up; and repeated.
In Fig. 95 a detailed description or analysis of the interlacing warp and filling of Fig. 94 is given.
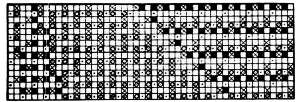
Fig. 95.
= figure up. } Produced by the } Jacquard machine.

= ground up.

= weave for ground. } Produced by } journals.

= weave for figure.

The two-ply ingrain carpet can also be made upon a Jacquard loom, tied up for double sections. [See Chapter VI., page 48.] This is also extensively used in the manufacture of upholstery fabrics; in fact, the latter mentioned method is almost exclusively used in Europe.
In Fig. 95 the weave of the “shot-about” effect calls for two picks face, and two picks back. An examination of this part of the draft shows that the warp-thread represented by the light pick is to be raised, or has been raised in the adjoining heavy pick ; further, we find the two light picks separated by the raising of a different warp-thread in each pick, which is also effected between the two heavy picks by the lowering of another warp-thread. This places the ground-thread below its corresponding figure or mate thread, or the figure thread below its corresponding ground-thread.


If these mate threads introduced in succession are required to show side by side, either on the face or the back of the fabric, these changes must be indicated on the design by different colors. If such effects are to be introduced when using the common ingrain Jacquard machine, the needles of the latter must be operated at each pick; this requires twice as many cards as are used in designs where the mate thread is always placed below or above its corresponding thread.
Designs for Dressgoods Figured with Extra Warp (one end Ground, one end Figure), and Executed on the Double Section Tie-up.
In the article explaining the double section tie-up, [see Chapter VI., p. 48], as well as the one on the selection of the proper squared paper required for these fabrics, the general character of these fabrics has been explained.
As mentioned in Chapter VI., the machine is divided in two parts, figure and ground; the Jacquard harness is leased one end figure, one end ground, and repeated.
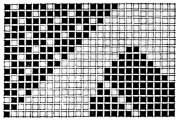
Fig. 96.
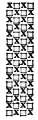
Fig. 97.
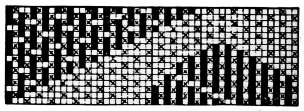
Fig. 98.
Fig. 96 illustrates a part of such a design, and is to be cut for the figure part of the needles.
Fig. 97 shows the plain weave, which is cut without a design in that portion of the card which operates the ground of the Jacquard harness.
Fig. 98 shows the analysis of the woven fabric for the design referred to in Fig. 96.
[N. B.—The plain weave used for explaining the present example may be substituted by other weaves, as a twill, twill, or the four harness broken twill, etc., without changing the figure design.]


Designs for Figured Pile Fabrics.
Designs for figured pile fabrics (terry or velvet), Plushes, Astrakhans, etc., are also executed without introducing a weave in the design. The design is only intended for the pile-threads, which are raised when introducing the wire; the front harness operating the ground-warp. The pile-warp, when raised over the wire, is bound by means of the previous pick, as well as by the pick following by the filling to the ground cloth.
The Shading of Textile Fabrics by the Weave.
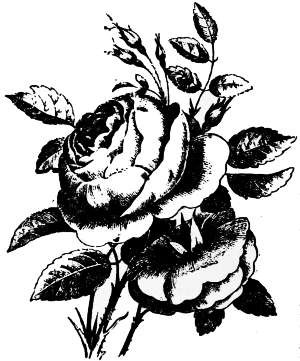
Fig. 99.—Shading of Flowers in Sketches for Damask Fabrics.
This is generally done in the “figure” part (especially in flowers, leaves, etc.), of damasks and similar textile fabrics. The shading can be applied to the satin weaves to the best advantage.
Rule for Shading with Satin Weaves.
Put the ground weave (filling for face) over the entire part of the □ designing paper, which is required to be shaded; afterwards add one, two, three or more horizontal or vertical (connecting) spots to the one spot which forms the foundation or satin filling for face. The heaviness of the shade is regulated by the sketch or the fabric. For example: In an 8-leaf satin the difference between filling for face and warp for face may be made with three or four changes only; or with the entire seven changes.
For shading twill weaves no rule can be given.
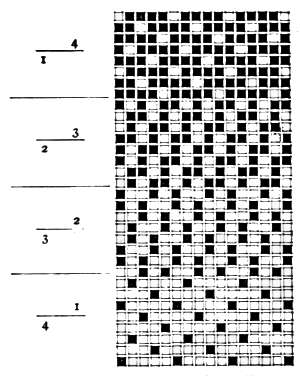
Fig. 100.—5-Leaf Satin.
Fig. 100 shows the shading of the 5-leaf satin, four changes, each eight threads, giving 4 × 8, or 32 threads for the effect.
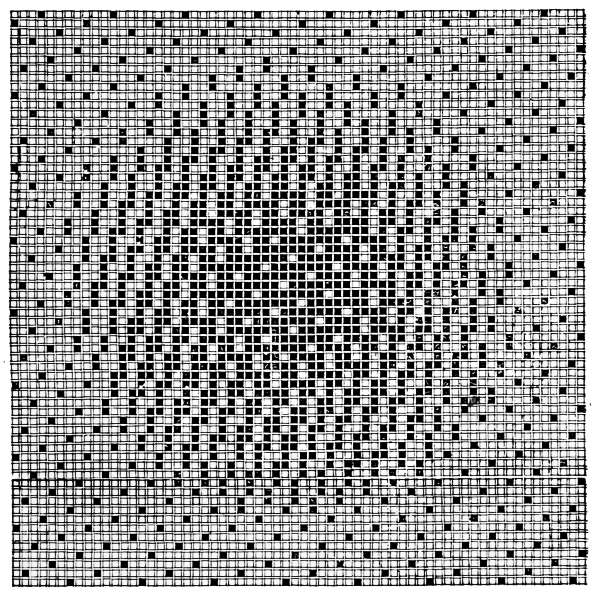
Fig. 101.—8-Leaf Satin.
Fig. 101 illustrates the 8-leaf satin applied for shading a circle, using in rotation every possible change.
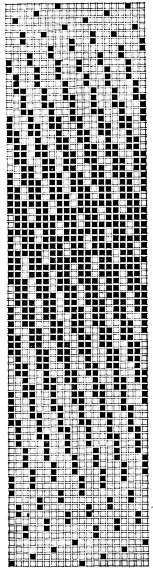
Fig. 102.—10-Leaf Satin.
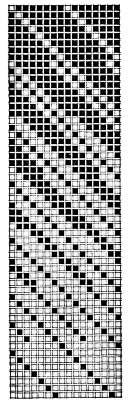
Fig. 103. 8-Harness Twill.
Fig. 102 illustrates the shading of the 10-leaf satin from filling for face , to warp for face , and back again to filling for face.


Fig. 103 represents the eight harness twill, shaded from the filling for face to the warp for face effect; the change occurring every eight picks.
