Part 1 — CHAPTER V THE WORKSHOP
Reading edition
If you have a place where you can build a workshop you will find one described in Part III. If not, try to find a well-lighted shop, both on account of your eyes and your work; one that is dry, or your tools will rust and your work be injured; and one that can be heated, for there will be no time you will wish to use it more than on cold, stormy days.
As a rule, an outbuilding is better than a basement or attic, other things being equal, because a basement is liable to be damp and dark, and an attic is bad about carrying materials and finished work up-and down-stairs. Noise in the top story of a house is usually more disturbing to the occupants than noise in the basement; but all these conditions vary in different places.
Have a lock on the door of your workshop, partly to keep small children from getting cut if they should come in without leave, and partly to prevent your work being interfered with in your absence and the edge-tools used for various domestic purposes by your feminine relatives, who might, in their innocence, mistake your best gouge for a tack-puller or the quarter-inch chisel for a screw-driver.
Of course you will have overalls and jumper or a work-man's apron made of denim, ticking, or some strong cloth. If you use an apron, have a pocket in it. A small slip of a pocket on the outside seam of your overalls above the right knee is also useful for holding a rule. When you have a long job of dirty work before you, a good way is to change your clothes for any "old duds" that you may have. This saves your clothes, and in warm weather is more comfortable and healthful than to wear overalls.
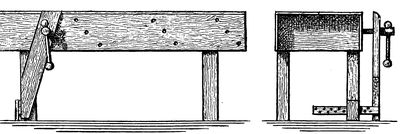
Fig. 37.
Your shop can be all fitted up for you by a carpenter, but it will be better, and better fun, to do it yourself. After the workshop itself is ready the first important thing is the work-bench.
The Work-Bench.—A very simple one (Fig. 37) will answer your purpose for a long time. When you become a pretty good workman and feel the need of something better (for a first-class bench with the best attachments is really a great help toward doing good work), you will still find this first simple affair very useful in some part of your shop.[14] There is no need of a bench being made of stock of exactly the dimensions given, so if you have a pile of boards and joists to draw from without buying, you can, of course, substitute other-sized pieces, provided you use stock heavy enough to make a firm bench. Heavier legs and top (front board) would be better, and in fact there is little danger of making a bench too solid.
Before beginning to work read carefully Marking, Square, Rule, Saw, in Part V., and look up any other references.
The design is for a small bench, 5' 10" long, 2' wide, and 2' 6" high. A larger one can be made on the same principle.[15]
You will require for stock:
1 piece of 3" X 4" joist 10' long.
1board,7/8"thick,planed,12"wide,12'long.
1""""10""12'"
1""""10""6'"
1 plank,1½"or 2" thick,planed,5" or 6"wide,2' 9" long.
1 strip,½"to 7/8" thick,3" or 4"wide,15" long.
Pine is good, and almost any cheap wood can be used. Hemlock is not very suitable, unless for the legs. Spruce is cheaper than pine or whitewood, and can be used for economy, but is prone to warp and twist and should be thoroughly nailed.
First make the legs and fasten them together. To do this, take the joist and lay it on two boxes or old chairs (Fig. 38), which you can use temporarily for horses, until you make a pair. See whether either end is cut off squarely. If neither is, mark a line by the square a short distance (perhaps half an inch, according to the condition of the end of the joist) from one end, on one side of the joist. Carry this line around the joist by applying the square to each side successively, and saw off the waste end with the cross-cutting saw. Having one end square, measure from that end 2' 5" and mark a line around the joist as before. Saw this piece off, and using it as a measure (but not as a square), mark and saw off three more pieces. These are for the legs.
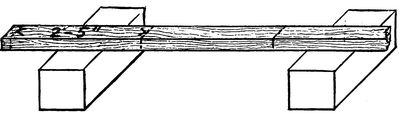
Fig. 38.
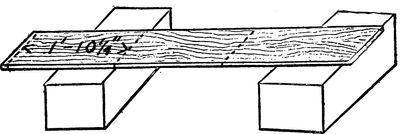
Fig. 39.
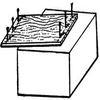
Fig. 40.
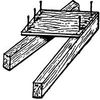
Fig. 41.
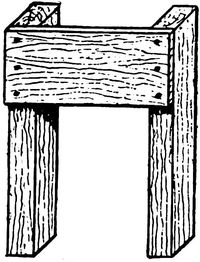
Fig. 42.
Next, from the short 10" board, mark and cut off two pieces 1' 10¼" long in the same manner (Fig. 39), seeing first that the end from which you begin to measure is square. You do not need to mark the under side of the boards, but only the top and the edges. Now square a line 1" from each end of each of these short boards, and start three nails on each of the lines by driving them nearly through the board (Fig. 40). (See Nailing.) Next, place the end of one of these boards on the narrow side of one of the legs, and, holding it firmly in position, nail it securely to the leg. You must take pains to keep the leg and the cross-piece "square." Nail only one nail first and then adjust, testing with the try-square before driving the other nails (Fig. 41). Then nail the other end to another leg, and repeat the process with the other board and the remaining legs. This will give two frames like Fig. 42.
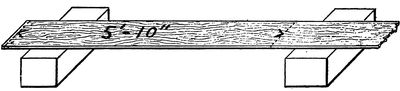
Fig. 43.
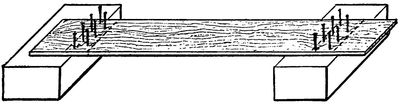
Fig. 44.
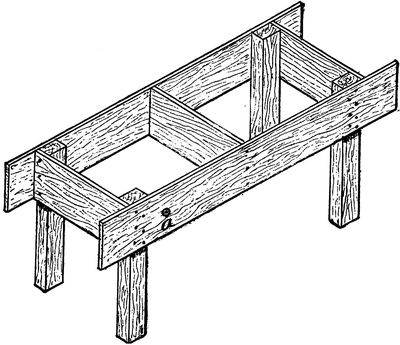
Fig. 45.
Next, fasten the sides to the legs. Take the 10" board and mark and saw off two pieces 5' 10" long in the same way as before (Fig. 43). At distances of 7" and 12" from each end of each board, mark lines across the side with the square and start nails between these lines (Fig. 44). Then, fitting these lines at the outside edges of the legs, nail the sides securely to the legs, as shown in Fig. 45. But drive only one nail through into each leg at first, until you are sure that the frame is coming together square and true throughout. Test the angles with the square. Stand the frame on as level a surface as you can find and sight across the top endways and crossways to see if either corner sticks up or down. If the top is not true, twist the frame enough to make it so, which you can easily do if you have but one nail in each corner. When the top is true and the legs at right angles, drive in the rest of the nails (Fig. 45). Be sure to test the top for winding, as just said (see Part V.), rather than to trust to the way the legs stand on the floor. Floors are often uneven, and the legs may not be cut exactly the same length. Make the top true and the legs can easily be made to fit the floor afterwards. The piece of 10" board left over you can fit to slip in between the sides, as in Fig. 45. If you nail through the sides and top into this piece, it will stiffen the bench. In making a long bench after this pattern, it is well to insert a few pieces of plank or joist between the sides in this manner.
Next, put on the top. Cut two lengths of 5' 10" from the 12" board. Lay them in position, square lines across as guides for the nails (as before), and nail them down to the legs and cross-boards. Also drive carefully a few nails at the edge down into the sides of the bench. Sink all the nail-heads well below the surface (as much as 1/8") with the nail-set (see Nail-Set).
A better bench can be made by using a plank (say a 2" plank, planed) for the front of the top (Figs. 46, 47, 48). This bench with plank front is much better than the common carpenter's bench just described, and the difference in expense is but slight. It is easier to do good work on, as it is stiffer, steadier, and much better to pound on.
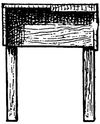
Fig. 46.
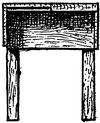
Fig. 47.
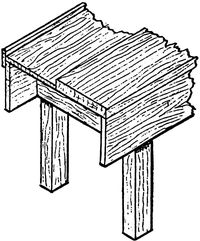
Fig. 48.
Of course a thicker plank can be used if available. Hard wood is best. Maple is excellent for a bench-top. Take particular care to select a good sound plank, from the centre of the tree if you can (see Chapter III.), as straight and free from winding as possible, and have it planed so as to be straight and true. This can easily be done at any properly equipped planing-mill.
To make this bench with a plank in front, you can proceed exactly as with the bench just described, except that the front legs should be as much shorter than those at the back as the plank you have is thicker than the 7/8" board used for the top of the bench just described. That is, if your plank is 17/8" thick the front legs should be 1" shorter than the back ones. Pieces must be cut out of the cross-boards in order that the top may be even (Fig. 46).
The simplest way, however, is to make the bench just like the preceding one until you come to the top. Then, after putting on the front plank, raise the back top-board to be flush with the plank, instead of lowering the plank to be flush with the board. You can do this by putting small pieces of board of the required thickness under the back part of the top (Fig. 47).
Some workmen prefer having the back board of the bench top lower than the front by an inch or so, with a strip fastened on the back, and sometimes at each end, so as to be level with the top of the front plank, thus forming a sort of tray (Fig. 48) where tools, nails, small bits of work, etc., can remain when in use, keeping the front plank clear for the actual operations. The work, if large, can be rested on the back strip as well as the front part, both being on a level.
The bench can be all filled up underneath with shelves, drawers, cupboards, compartments, or in any way that you wish, but at first, and for a simple bench like this, it is as well to have only one shelf, as shown in the frontispiece. You can easily put this shelf in after the bench is put together. You can tell better whether you want drawers and compartments after you have worked for some time and wish to make a more complete bench.
A nice bench should, of course, be built independently of the shop,—that is, be complete in itself, so that it can be readily moved. But a common bench can sometimes be best built against the wall, using the side of the building to support the back. Sometimes one or both of the ends of the bench can be advantageously carried to the walls of the room, thus requiring legs only in the middle or at one end. But such arrangements are not to be advised if you are likely to wish to move the bench before you have used it enough to pay for making it.
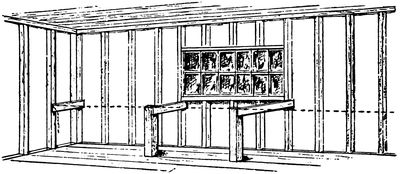
Fig. 49.
Figure 49 is merely suggestive. The process of construction is the same as already shown, except that you omit some of the legs and the back side-board, a saving sufficient to allow you to use a plank for the front of the top. As the floor is likely to be uneven, you can first saw the posts a little too long, stand them in line, stretch a cord or a chalk-line (see Chalk-Line) along the line of the front edge of the bench at the proper height for the tops of the posts, cut the posts off where this line crosses them, nail on one end of the cross-boards at right angles, and then fasten the other end to the wall-studding, sighting and testing to have the top straight and true, as in the case of the bench already described. If instead of vertical studding the joists of the wall run horizontally (as is often the case), you can easily nail cleats on the wall if there is no horizontal timber at the right height to nail to.
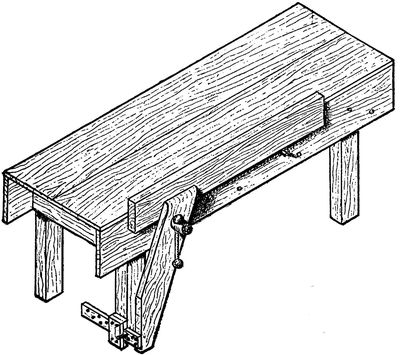
Fig. 50.
Bench-Vise.—The kinds shown in Figs. 50, 56, 57, though not as good as some more improved forms, are in common use by carpenters, and will answer your purpose very well for ordinary work—until you get to the point of building a first-class bench.
At a distance of about 14" from the end of the bench and in the middle of the side board mark the point a (Fig. 45). Bore a hole at this point (see Boring) if you have a bit a trifle larger than the screw of the vise. If not, using this point as a centre, describe a circle (see Compasses) with a diameter a trifle greater than that of the vise screw, and remove the wood within the circle (see Boring and Paring.) Now take the piece of 1½" or 2" plank which is to make the movable jaw of the vise, and mark a line lengthways along the centre of each side (Fig. 51). At a distance of about 8" from one end mark a point upon this centre line and make a hole for the vise screw as before. The nut for the screw must now be fastened in position on the inner side of the bench, the vise screw passed through the movable jaw and the side board, and the handle plate fastened upon the face of the jaw.

Fig. 51.
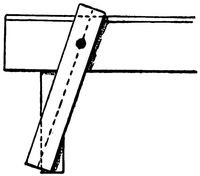
Fig. 52.
You can now open and close the vise by the screw, but the movable jaw needs to be made steady and the end projects above the top of the bench. Screw the vise tight together and slide the movable jaw around until it is in the position shown in Fig. 52, when the centre line on the back side of the jaw will cross the edge of the leg a few inches from the floor, according to the width of the jaw and the degree of slant given it. When the jaw is in this position, mark from the back side the lines indicated in Fig. 52, and saw off the projecting ends of the jaw by these lines, which will give the shape shown in Figs. 37 and 50.
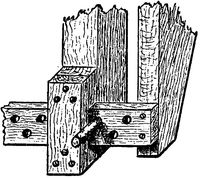
Fig. 53.
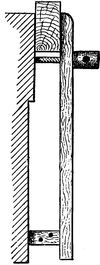
Fig. 54. Right.
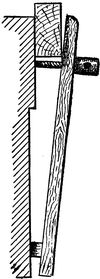
Fig. 55. Wrong.
Next take the small strip, and marking points upon its side as shown in Fig. 53, bore holes with a 3/8" or ½" bit. Screw the end of the strip to the edge of the movable jaw (being careful to get it at right angles with the vertical edge of the jaw), as shown in Figs. 50 and 53 (see Screws). Just above and below where this strip crosses the post of the bench nail small blocks (a trifle thicker than the strip) so that it will pass easily between them. Cover these with a longer piece, making a slot, as shown in Fig. 53, through which the strip can slide freely. If the two blocks are no thicker than the strip, you can put pieces of paste-board between them and the post to make the slot wide enough to let the strip slide through freely. Fit a pin or piece of dowel to the holes in the strip. The use of these holes and the pin is to keep the face of the jaw approximately parallel to the side of the bench. Contrivances for this purpose can be bought. After the jaw is all fitted, bevel or round the edge on the face side at the top (see Bevelling), and you can also bevel or round all the front edges if you wish. The vise is now in working order.[16]
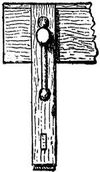
Fig. 56.
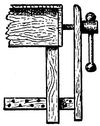
Fig. 57.
The important point with this vise (and in fact with any vise) is to have the inside surface of the jaw parallel with the surface of the side of the bench, so that the wood will be pressed equally at all points, else it will slip just when you wish it to be securely held. Be sure that the vise is not open more at the top than at the bottom (see Figs. 54 and 55).
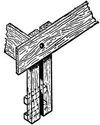
Fig. 58.
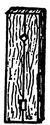
Fig. 59.
The holes bored in the side of the bench are to support the end of a long board (Fig. 50).
If you cannot afford to buy a vise, or have to work where there is none, there are a number of makeshifts with which you can get along quite well, though not as rapidly or conveniently.
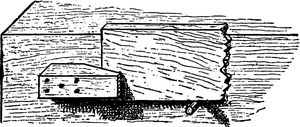
Fig. 60.
Carpenters often nail a piece on the side of the bench (Fig. 60), which holds boards for planing fairly well, for common work, but tends to bruise the ends of the boards a little against the cleat, and requires a knife, or something, driven in at the other end of the boards to hold them with any degree of security. Another cheap substitute is shown in Fig. 61. This holds boards of regular sizes quite well. Thin pieces can be held tighter by wedging, as shown.
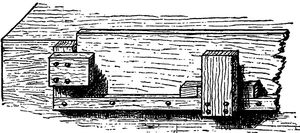
Fig. 61.
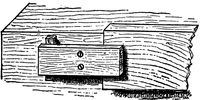
Fig. 62.
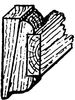
Fig. 63.
Another simple contrivance, and more of a vise, is easily made by boring a couple of holes in a board, say 6" wide and 12" long, and screwing it loosely to the side of the bench (Fig. 62), making the holes in the board larger than the diameter of the screws so that it will be free to play. By inserting the piece to be held in the end and double wedging the opposite end (Fig. 63) the piece will be held fairly well (see Wedges). For thin boards, blocks can be inserted to make the jaw parallel with the side of the bench. An upright vise made on this principle is often used to hold saws for filing.
If you can find an old wooden hand-screw, you can use one jaw (sawing off the ends if necessary) for the nut to go inside of the bench, leaving the other for the movable jaw, using one screw to tighten or loosen the vise and the other to keep the jaw parallel with the side of the bench. You will require no description to contrive something of this sort. Vises on somewhat this principle can be bought, attachable and detachable at will.
The jaw in Fig. 64 can be hinged upon the strip at the bottom and the latter fastened to the side of the bench. The jaw can then be tightened or loosened by the screw. This gives a square grip only when the jaw is vertical (Fig. 65). You can put in blocks, however. The longer the jaw the less objectionable the slanting grip becomes, of course.
Always try to devise some such expedients, which you can think up for yourself, when you are without the regular appliances, for even a poor vise is better than to hold pieces in the hand or to push them against chairs or tables or the wall.
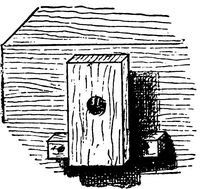
Fig. 64.

Fig. 65.
For nice work by far the best vise of moderate cost is that shown in Fig. 143, which has been in use for a long time by wood-workers of the better class.
There are a number of excellent iron vises (some with jaws of wood, and also with an "instantaneous grip"). Some of them are admirable, but quite costly compared with the common screw.
You can work quite well with a good-sized common iron vise by fitting wooden blocks or leather or rubber to the inside of the jaws, to save marring your wood-work, though a regular vise for wood is much to be preferred.
Bear in mind when doing work that requires to be held at unusual angles, or in fashioning odd-shaped pieces, that you can usually get the angle or position required by a combination of hand-screws or clamps with the bench-vise as suggested in Figs. 66 and 67.
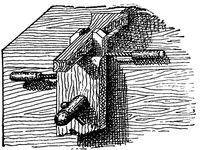
Fig. 66.
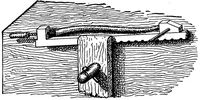
Fig. 67.
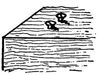
Fig. 68.
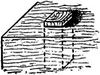
Fig. 69.
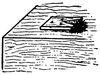
Fig. 70.
Bench-Stop.—You must have something on the forward end of the bench-top to push your work against for planing and other operations. A simple and good way is to use one or two stout screws (Fig. 68). These can be screwed in so as to project about a quarter of an inch, which will answer for the greater part of your work, and the height can be changed when necessary with the screw-driver. The heads of the screws will be sharp enough to hold the work, and a stop of this kind will answer your purpose very well for common work. The wooden stop (Fig. 69) has the advantage of not making any nicks in the end of the wood, which is important in nice work, such as furniture, but for common work screws are just as good, except that, as they are left permanently sticking from the bench, you may dull your tools against them or scar your work. This applies to a common bench. Of course for a really nice bench with a tail-screw the regular stops should be used (Fig. 143).
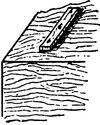
Fig. 71.
Carpenters sometimes nail a small piece of board, with a V-shaped notch at one end, to the top of the bench to hold boards or joist for planing on the edge (Fig. 70). Simply nailing a strip across the end of the bench (Fig. 71), and setting the nails well in, will do to push boards against for planing for common work.
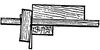
Fig. 72.
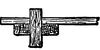
Fig. 73.
Iron contrivances (which can be raised or lowered) can be bought for a small sum and are convenient for common work, especially for thin pieces. Sink them deeply enough in the bench-top so that when lowered nothing will project to injure the tools or the work.
The old-fashioned bench-stop shown in Fig. 69 consists merely of a square stick of hard wood, one or two inches square, fitted quite tightly to a hole in the top of the bench, so that it will slide up or down by a blow from the mallet or hammer. This stop will not damage the work or the tools. To make the mortise for this bench-stop, see Mortising. Take care to keep within the lines, so as not to make the hole too big. You can easily make it larger if too small.
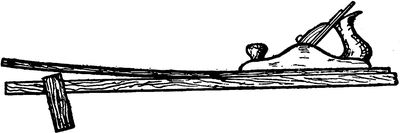
Fig. 74.
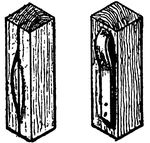
Fig. 75.
The stop should fit tightly and should be set with a very slight slant toward the work (Fig. 72),—that is, the mortise should be cut slightly slanting. The stop should be of hard wood, such as maple. If the top of the bench is only of board thickness, screw cleats of hard wood on the under side to give more bearing surface (Fig. 73), or the continued pushing against the stop will be liable to get the hole out of shape so that the stop will slant the wrong way, when the work will be apt to slip or, in case of a thin board, jump over the stop (Fig. 74). If the stop wears loose in the hole, a saw kerf is sometimes made lengthways in one side and a bent piece of springy wire inserted, or a flat spring fastened on the side (Fig. 75). A loose stop can easily be wedged (preferably from underneath), and it is sometimes made loose on purpose, the wedging tightening the stop and at the same time giving the required slant (Fig. 72). An iron plate with teeth can be screwed on top of a wooden stop (Fig. 76), or a screw can be inserted (Fig. 77).
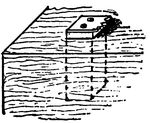
Fig. 76.
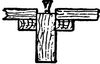
Fig. 77.
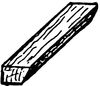
Fig. 78.
Two strips, like Fig. 78, can be nailed or screwed on the top of the bench so as to separate V-fashion (Fig. 79). Two wedges, like Fig. 80, can then be made of such a taper that when fitted between the strips their inner faces will be parallel. By tapping in the wedges on each side of the work to be held (Fig. 79), it will be securely fastened without injury. If the inside edges of the strips and the outside edges of the wedges are slightly bevelled, which you can do with a plane or a knife, the wedges cannot jump out of place. The best way to fit this contrivance is to make the wedges first, place them in position on the bench with the square sides inside (facing each other), and then fasten the fixed strips outside of them. Pushing the work tends to tighten this vise. This is much better for permanent use than the notched board shown in Fig. 70. If you have a good vise you will not often have occasion to use such contrivances, but they are sometimes useful as makeshifts.
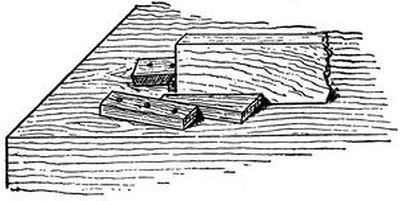
Fig. 79.
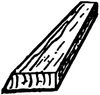
Fig. 80.
The top of a good bench should be as true and as smooth as possible (see Plane and Scraper). Rub it with linseed oil, wipe it off with a rag, and after a few days give it a couple of coats of shellac (see Finishing).
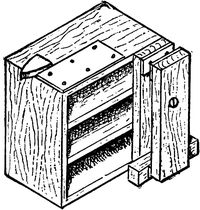
Fig. 81.
You should place your bench so that when you stand at it you will face the light and not have it come from behind you. If it can come from the forward end of the bench and also from behind the bench, as shown in the frontispiece, it will be best, for a cross-light is often very useful, not merely that you may have light enough, but also that when testing your work with the try-square, straight-edge, and the like, any inaccuracy may be detected by the light passing through the crack between the testing tool and the work, and also when sighting by the eye alone. Fasten the bench firmly to the floor (and wall if you can) with screws, cleats, or L irons.[17]
Avoid chopping on the bench top or whittling it or boring holes or marring it by saw-cuts or chisel-marks. Do not use paint, varnish, or glue at the bench if you can help it. If necessary to do so, clean the bench-top carefully when you get through. Lumps of hardened glue will hinder you and deface your work.
Filing-Bench.—You cannot do much of such varied wood-work as you will undertake without having to do a good deal of metal work. It is a poor plan to do such work at the vise you use for your wood-work, or even at the same bench. It scars and defaces the wooden vise and the bench, and the particles of metal are bad for your wood-work and for the tools. It is much better to have another bench—if nothing more than a wide shelf or a box—for such work (Fig. 81). You will find suggestions in the illustrations.
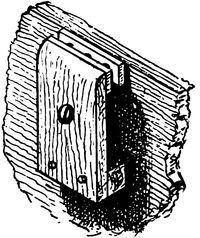
Fig. 82.
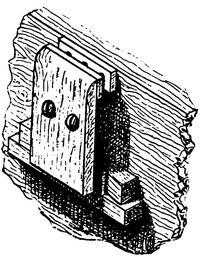
Fig. 83.
An iron vise is the proper thing for holding metal. There are many different kinds at various prices, but one of the simple patterns will probably answer every purpose. If you have room for only one bench this vise can be put at the back part of one end.
A small vise can be made of a hand-screw, the hand-screw itself being held in any desired position in the large bench-vise, but metal jaws are better for working on metal. You can make a rough sort of vise for metal-work with a piece of stout board or plank (Fig. 82). Find a couple of pieces of iron with screw holes, as you can probably do in a pile of waste iron junk, and screw them on the board and the bench to form metal jaws. The vise can be tightened or loosened by means of a big screw or bolt; or the board can be loosely fastened in the middle and tightened by wedging below (Fig. 83). A screw with a handle to turn it by and a nut for the thread is better, of course. Another form, such as you will find in use by leather-workers, can be easily made (Fig. 84), and works with the foot, the connection between the jaw and the treadle being made by a strap or rope. You can make a vise in some of these ways that will answer quite well for most of the metal-work you will have to do for some time, although such contrivances are less reliable and less convenient than a regular iron vise.
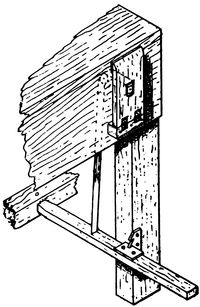
Fig. 84.
An anvil is often useful and is sometimes combined with a vise. It should have a flat steel surface and also a tapering rounded (conical) point. An old flat-iron does quite well. You can easily find some way to keep it in position on the filing-bench. You should have some sort of anvil, even if nothing better than a junk of old iron (which you can of course find somewhere), for you will be continually wanting to straighten nails, bend wire, and pound pieces of metal. Try to find a flat plate of thick sheet iron—¼" thick if you can—to fasten on the top of the filing-bench (Fig. 81). It is very handy for many anvil uses, straightening metal and nails, and for much pounding.
Finishing-Bench.—Have also a finishing-bench (Fig. 91) if possible,—if nothing more than a shelf or box,—to keep the regular work-bench neat and clean for its proper uses, for even a skilful workman can hardly avoid making a mess when it comes to using paint and varnish.
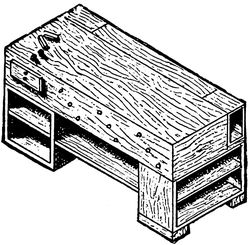
Fig. 85.
Now, while there are many of you who can afford either singly or by two or three clubbing together to fix up a shop in first-rate style, there are also many who cannot afford even so cheap a bench as that just described. What can you do in such a case? Only one thing—patch up a bench out of whatever old stuff you can find. Patched-up makeshifts are not to be recommended, except in case of necessity, but when it comes to the pinch, and a matter of having a bench made of whatever old materials you can find or having no bench at all, by all means make one of boxes and anything that can be worked in. For of course the boats, skis, squirrel-houses, and so on, must be made!
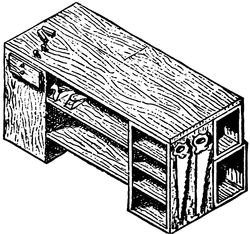
Fig. 86.
But, whatever you patch up, make it solid and strong. Do not try to work at a rickety, shackly apology for a bench that shakes and jumps and sidles all over the room every time you saw or pound or plane. You can probably get all you need in the way of boxes, packing-cases, and such material, at very little or no expense. The illustrations (Figs. 85 and 86) are merely suggestions, for you must use your own ingenuity, according to the materials you can find. Most experienced workmen have often been obliged to work at much worse benches than these, frequently with no bench at all.
Those of the boxes which you do not use whole you should take apart carefully (see Withdrawing Nails). This will add to your supply of nails. Use nails freely in fastening the boxes and boards together and to the wall or floor wherever allowable. A few screws will add much strength.
The bench shown in Fig. 86 calls for one good board for the front of the top.
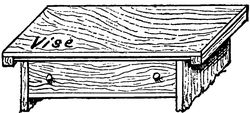
Fig. 87.
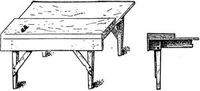
Fig. 88.
Some of you live in the crowded parts of the city, in flats or small houses where there is no possible chance for a shop of any kind. Whatever wood-work you can do must be carried on in the kitchen, or some other living-room, where even a small bench may be out of the question. Still you would like to make such small work—model boats, for instance—as can be carried on in such limited quarters. If you are forced to use the kitchen table for a bench, try, for the first thing, to brace or block or screw it to make it steady, for unsteadiness is the greatest hindrance to doing good work at such a bench.
You can fit a good board to the table-top with cleats, and a stop to hold the work (Fig. 87). If you can now get a common iron vise, you can get along quite well for small work, and the board and attachments can be quickly taken off and put away when the table is needed for domestic purposes. You can easily contrive some way to attach wooden pieces or leather or rubber to the inside of the jaws of the vise, to save marring your wood-work. A fairly good bench can often be made from an old table (as a kitchen table) by screwing a plank on top and a board on the front side, and bracing the legs (Fig. 88). The plank should be screwed on from underneath.
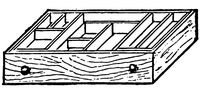
Fig. 89.
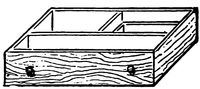
Fig. 90.
If you can get hold of an old bureau or chest of drawers you can arrange a serviceable and compact little "parlour shop" for small work. If you cannot fasten permanent attachments to the bureau, you can fit a removable board (Fig. 87), and you will be equipped for such work as can be suitably done under such circumstances—and that includes quite a long list of small things. The drawers can be fitted with compartments and trays, according to what you have to keep in them and your own ingenuity, but make the arrangement simple. Figs. 89 and 90 are merely suggestions.
The best way to arrange your tools and supplies depends somewhat upon the circumstances, but the main point is to have the most convenient place for each thing and always to keep it in that place when not in use. The first part of this proposition is almost as important as the last. It is nearly as bad as being disorderly to keep the glue-pot in one corner of the shop, the glue in another corner, the glue-brush in the third corner, and the water in the fourth,—which is no exaggeration of the way some very orderly people stow away things, and is about equal to the arrangement of the person, of whom you may have heard, who always kept everything in its place and that place the floor! The workshop interior shown in the frontispiece and in Figs. 91 and 92, and the various other illustrations, furnish suggestions which may help you in the arrangement of your shop.
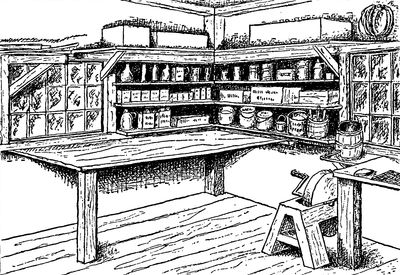
Fig. 91.
Have everything where you can lay your hand on it in the least possible time, the tools used the most the nearest to you, tools that go together, as bit-brace and bits, kept near together. Have all the common tools right within reach, and not put away in chests and out-of-the-way drawers, just because you have seen somebody pack away his tools in a highly polished chest, inlaid with forty kinds of wood, and containing ninety-three separate compartments and trays and seven secret drawers, the whole cornered and strapped and decorated with shining nickel plate! Do not be dazzled by that sort of thing, which is not an evidence of true system and orderliness, but merely shows poor taste and a great lack of appreciation of the value and importance of time. Time may not be exactly money in your case, but it may be even more valuable, and can be spent much better than in running around after tools and supplies, and making ingenious tool-chests. To be practical, five minutes a day saved by having things convenient and in place means about twenty-five hours in a year—which means a boat, a sled, or a lot of Christmas presents. So study out the best arrangement for your particular shop and then keep things in order. When working keep only the tools in actual use lying around on the bench. As soon as you are done with a tool for the operations actually in hand, put it back in place, and so avoid the confused litter seen in so many shops.
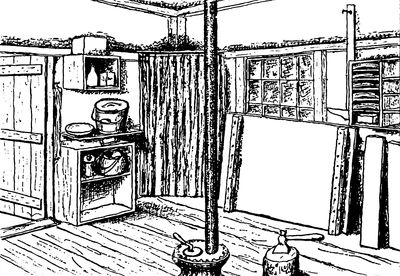
Fig. 92.
Hang saws against the wall on pegs, or nails, or at the end of the bench. Hang all tools which you put on the wall well above the bench, to be out of the way.
Lay planes on their sides or ends, for obvious reasons, or arrange a little block to raise one end of the plane slightly from the surface of the bench or shelf. The last way is usually more convenient than to lay the plane on its side or end. Keep planes either at the back of the bench or against the wall, or on a shelf under the front of the bench.
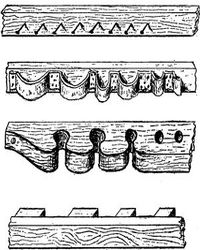
Fig. 93.
Such tools as squares, bit-braces, and the like are usually most accessible on the wall, in some such arrangement as shown in the frontispiece. A convenient way to arrange such tools as chisels, gouges, and the like, is to keep them in racks either against the wall or fastened to the back edge of the bench, according to circumstances. Keep each tool in a particular place in the rack and you will soon learn to reach for it instinctively without any waste of time.
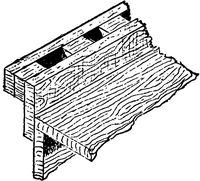
Fig. 94.
Bits can be kept in a drawer or box, care being taken to arrange them in racks or between partitions, or they can be stuck on end in the racks at the back of the bench. A good way is to stick each bit point downwards in a hole bored by itself. Various forms of tool-racks, which you can easily arrange for yourself, are suggested in Fig. 93.
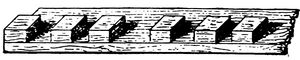
Fig. 95.

Fig. 96.
Fig. 94 shows a rack to fit on the back of the bench, an excellent way, in common use with movable benches. Get a board, say 3" or 4" wide and the length of the bench, a strip from ¼" to ½" thick, perhaps 1" wide, and the length of the bench, and a strip ½" thick, perhaps 1" wide, and perhaps two thirds of the length of the bench. Saw from this last strip a number of blocks from 1" to 2" long. Arrange these along the top edge of the board, according to the kinds and sizes of the tools, as shown in Fig. 95. Then lay the long strip on them (Fig. 96) and nail it through each block with wire nails long enough to reach perhaps two thirds through the large strip. You can put this rack together by first nailing at each end. Then all the intermediate blocks can easily be fitted in place and nailed one at a time. The whole can then be screwed to the back of the bench so that the tools will be at the back (Fig. 94). You can make part of this rack solid and bore small holes of various sizes for bits, gimlets, nail-sets, and such tools, which would drop through the larger spaces. Good metal tool-racks and-holders can be bought, but the home-made ones answer every purpose.
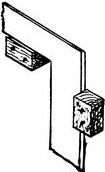
Fig. 97.
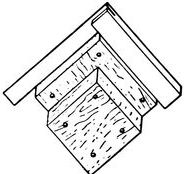
Fig. 98.
The large steel square can be hung very well with nails or small blocks of wood bevelled toward the wall (Fig. 97). For the try-square nail a rectangular block against the wall (Fig. 98). A smaller block nailed in front will hold another smaller square. Slanting saw-kerfs in another block will hold scrapers (Fig. 99). Always keep your oil-stones in shallow boxes for protection from dirt. You can easily make one, or cut a depression in a block to fit the stone, with another for a cover. Fasten one end of your strop to a strip of thin board (Fig. 100) with a hole by which to hang it. You can then use the strop lying flat on the board or loose in your hand for curved edges.
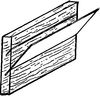
Fig. 99.
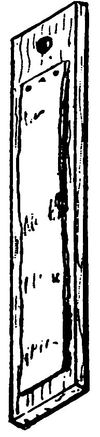
Fig. 100.
Do not keep nails and screws after the usual domestic fashion,—all sizes, shapes, and kinds mixed up promiscuously with a lot of metal rubbish and carpet tacks in some old box or pail. You will waste twice as much time trying to find what you want as it takes to keep them in separate boxes, or trays with divisions. A good way is to use either small open boxes or flat open boxes with divisions, so that they can be reached as conveniently as possible. Tin boxes or canisters or pails (of various sizes), such as cocoa, coffee, lard, and such substances come in, are good. Put labels on them and arrange them neatly in some accessible place, as on a shelf over or at the end of your bench, or in a cupboard or a drawer.
Keep scrap boxes for old pieces of metal (iron, brass, etc., in separate boxes), so that you will know just where to look for what you want. Keep a brush for cleaning off the bench and the work, a broom for the floor, and a box for shavings, sawdust, and chips.
Any workman is liable to cut or pound his fingers, so have a small box in a handy place with some neatly rolled bandages of cloth, some surgeon's plaster, and a bottle of witch-hazel (hamamelis) or some other preparation for cuts or bruises. In case of a bruise, or if you pound your nail, put your finger at once in as hot water as you can bear. Do not, as is often done, put glue on a cut, because of danger of infection, for the glue is made, as you know, from animal refuse and is not always in a pure state.
Do not leave oily rags lying around in your shop to get wadded into a pile in some corner and catch fire by spontaneous combustion. Either put them in the stove at once, or, if you want to keep a few, put them in a stone jar or covered tin box. Matches should always be kept in a covered metal box in a wood-working shop.
Lay in a supply of strips, waste junks, and odd pieces of wood, which you can usually get at any shop at little or no expense. They will be very useful until you accumulate a stock from your own work.
Chopping-Block.—A good solid chopping-block is a great convenience, so watch for a chance to get a section of a tree, which you can often do when one is felled.
Straight-Edge.—You should have at least one; two are very useful—one two or three feet long and another five or six feet long. Making them is simply a matter of skill in planing. When you can plane well enough make some yourself of well seasoned, straight-grained white pine or mahogany, or other wood which holds its shape well. Until you can do it accurately, however, get some good workman to make one, for a straight-edge that cannot be relied on is really worse than none at all. (See Straight-edge.)
Bench-Hook.—The bench-hook (Fig. 101) is very useful to hold work firmly for sawing, planing, etc., and also saves some marring of the bench-top. Before beginning work read carefully Marking, Rule, Square, Saw, and Plane, in Part V., and look up any other references.
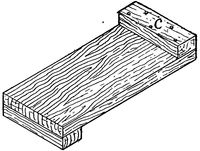
Fig. 101.
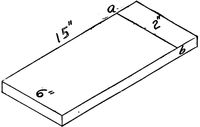
Fig. 102.
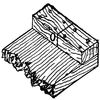
Fig. 103.
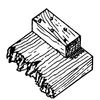
Fig. 104.
Take a board, say 15" long x 6" wide, of some good wood like white pine, making both ends square. The surface should be planed true (see Truing Surfaces). With the square mark the line a b (Fig. 102) accurately, say 2" (or the width of any blocks you may already have for the end cleats) from each end, but on opposite sides. The cleats c (Fig. 101) must be true and the edges square. Bore the holes in the cleats with a bit a little larger than the screws (see Boring). Hold the cleats exactly in place at the cross-line a b and start holes in the board with a gimlet or bit a little smaller than the screws. Countersink the holes (see Countersink). Use screws long enough to get a good hold on the board but not long enough to go through it. If board and cleat are each 7/8" thick, 1½" screws will be suitable. Screw one of the middle screws in each cleat firmly to a bearing (see Screws), keeping the cleat as nearly on the line as possible. Adjust each cleat exactly in place, in case it has slipped, hold it firmly, and drive the remaining screws. Before screwing on one of the cleats mark a line around it in the middle with the square, as shown in Fig. 103, marking first across the edge o (against which the work is to be pressed), from that line squaring across the top, and then across the outer edge. After this cleat is screwed on, carefully saw it in two exactly on the line. By letting the saw run in the kerf thus made, you can cut pieces off square. Sometimes one cleat is made shorter, so that you can saw clear through a piece without damage to the bench (Fig. 104). See Mitre-board, page 92. Two bench-hooks are useful for long work.
Horses or Trestles.—These are to lay stock on for marking and sawing, to put large work together on, and are convenient for various uses (Fig. 105).
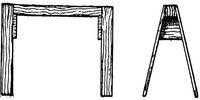
Fig. 105.
Before beginning work read carefully Marking, Rule, Square, and Saw, in Part V., and look up any other references.
The proper height for your horses, as for the bench, depends somewhat on your own height, and may be anywhere from 18" to 2' 3". Experiment with boxes to find the most convenient height. If too low, you will have to stoop over too much. If too high, it will be awkward to rest your knee on a board, to saw, and to fit work together.
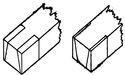
Fig. 106.
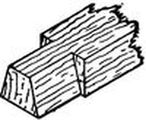
Fig. 107.
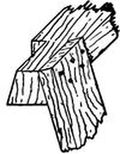
Fig. 108.
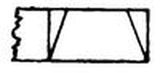
Fig. 109.
If you have a piece of fairly good joist, from 1½" × 3" to 3" × 6", you can use it for the tops of your horses. Saw off two pieces from 2' to 3' long. Mark the best sides for the top. Mark each end like Fig. 106 (showing top and bottom) with the pencil, measuring carefully so that the bevel or slant will be the same for both legs (see Bevel). Holding the work in the vise, with saw alone or saw and chisel remove the pieces marked, so that the end will have the shape shown in Fig. 107. If you use the chisel, look out for the direction of the grain at each corner and cut well outside of the line, until you find which way to push the tool in each case (see Paring, etc.). Trim these cuts as accurately to the lines as you can. Get out eight pieces for legs, of such a length that the horses will be of the height decided on. First make them all of a width, then saw one piece off the right length and mark the others by it—not each new piece by the one last marked. Nail or screw these legs in place with 2" nails or 1¾" screws, keeping the inner edges of the tops of the legs even with the tops of the horses (Fig. 108). See Nailing and Screws, and look out for splitting. Get out the cross-braces of board and saw the ends at a bevel to correspond with the slant intended for the legs. See that the ends of these cross-braces are cut at the same bevel. Use the bevel if you have one. If not, first square each end with the square and pencil, and then measure carefully equal distances on one edge before drawing the slanting lines (Fig. 109). Nail or screw these on (Fig. 110), adjusting the legs to the bevels just cut. Saw or plane off the projecting ends of the legs on top. If you plane, do so both ways to avoid splintering (see Plane).
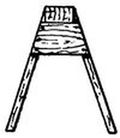
Fig. 110.
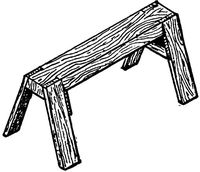
Fig. 111.
Now stand the horses on their legs (Fig. 111). If they should happen to stand firmly and evenly, see first if it is not due to unevenness of the floor. If the floor is true, and they stand steadily in different positions, you can throw up your caps, for you will have beaten the average workman. To make them stand evenly, see Scribing, Winding-sticks, etc., in Part V. Make the tops of the horses as smooth as you can. Scrape them and keep them scraped (see Scraper), for you will be continually dropping glue or varnish on them, to harden and deface your nice, smooth work. Wipe them off as carefully as the bench-top. These easily made horses will answer your purpose for a long time.[18]
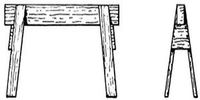
Fig. 112.
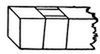
Fig. 113.
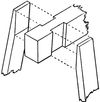
Fig. 114.
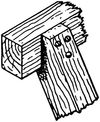
Fig. 115.
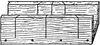
Fig. 116.
Mitre-Box.—Great care is necessary to make an accurate wooden mitre-box (Fig. 116), although the process is simple. Do not make it of spruce or any wood liable to warp or twist. Pine or mahogany is good. Use stock from a middle board if you can (see Chapter III.). A mitre-box can be of any desired size.
Before beginning work read carefully Marking, Rule, Square, Saw, and Plane, and look up any other references.
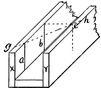
Fig. 117.

Fig. 118.
A good size is from 1' to 2' long and from 3" to 6" square (inside), according to the work for which it is to be used, and of stock 7/8" thick. The pieces must be prepared with care, so that the edges shall be square and the surfaces true, particularly on the inside, for when the box is put together the sides must be parallel and square throughout with the bottom, on the inside. Test each piece with the square. Use care in screwing the sides to the bottom to keep them exactly in place (see Screws). Nails can be used, but screws are better. Lay out the lines for the sawing from the inside, with the steel square if you have one, or with the end of the tongue of the try-square. Mark the line a on the inside of the side x (Fig. 117), squaring from the bottom. Mark the point b at a distance from a just equal to the distance between the sides. Square a line at this point from the bottom, on the inside as before. Carry this line across to the side y, squaring from the inner surface of the side x, and mark the point c on the inner side of the side y. Also from the point c draw a vertical line on the inside of y corresponding to the line a. Carefully mark the line g h, which will give the mitre. The lines should be laid out from the inside, because it is against the inside surfaces that the pieces to be cut in the mitre-box will bear.
Another way is to square a line m n (Fig. 118) across the top side of the bottom piece, before putting together, and to lay off from one end of this line a point o on the edge, at a distance equal to the width of the bottom, thus fixing the points m, n, and o. Next fasten on the sides, square upright lines on the inside of one side from the point m and on the inside of the other side from the point o. The diagonal line pq (Fig. 119) will represent the mitre.
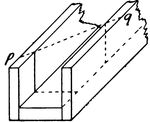
Fig. 119.
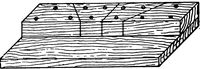
Fig. 120.
The cuts for the saw to run in should be made with a back-saw or a panel-saw. In a similar manner square on the inside two upright lines opposite each other, draw a line across the tops of the sides to meet these lines (squaring from the inside as before), and make a saw-cut, as shown by the middle line in Fig. 116. This will be very useful to saw strips squarely across. You can put buttons on the outside near the lower edge to catch against the front edge of the bench-top if you wish, or use the mitre-box on the bench-hooks when necessary to hold it firmly.
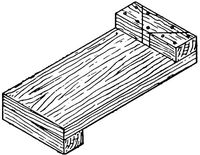
Fig. 121.
A very useful mitre-board for sawing strips, mouldings, and the like, can be made with two short boards, one wider than the other, being sure that the surfaces and edges are true and square (Fig. 120). This can be of any size. A good size is from 1' to 2' long, 6" wide (in all), and of stock 7/8" thick, but it is better to make the narrow piece thicker, perhaps 1¼" or 1¾". Mark the lines first on the bottom of the narrow piece, then on the edges, and lastly on the top, as with the mitre-box just shown, to ensure the lines being at the correct angles with the surfaces against which the wood to be sawed will rest. An excellent plan is to make saw-kerfs for mitres in the cleat of a bench-hook (Fig. 121), in the way just shown.
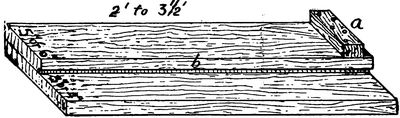
Fig. 122.
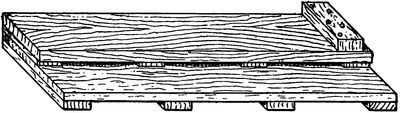
Fig. 123.
Shooting-Board.—This is useful for squaring edges and small surfaces and ends with the plane, and for jointing edges, the plane being pushed forward on its side (see Shooting-board, in Part V.). It can be of any wood which holds its shape well. Clear white pine or mahogany is good. If carelessly made it will be of but little use. The stock must be planed free from winding. Several forms are shown in Figs. 122, 123, and 124.
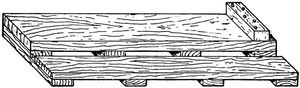
Fig. 124.
Before beginning work read carefully Marking, Rule, Square, Saw, Plane, in Part V., and look up any other references. The construction is plain (Fig. 122). Approximate dimensions are given, Fig. 122 being made of 7/8" stock, Fig. 123 of ½" and ¼" stock, and Fig. 124 of 7/8" stock. Screw the pieces together from the under side (see Screws). See that the stop or cleat a is put on at right angles to the edge b. Mark the lines for this accurately with knife or chisel. A groove is sometimes cut for this stop, but this is a refinement that is not at all necessary if you do your work well. This board must have a rabbet or groove cut out of the upper piece, as shown, to give room for shavings. In Fig. 123 the top board overlaps the ends of the cleats a trifle, which (with the spaces between the cleats) allows the escape of the shavings. Arrange some way to hold the board firmly on the bench. Care is necessary in using the shooting-board not to plane slices from your left hand. Guides, to attach to the plane to ensure square edges, can be bought and used instead of the shooting-board. Some of them are serviceable, particularly those adjustable at various angles.
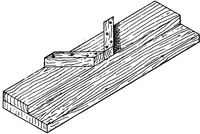
Fig. 125.
A mitre shooting-board (Fig. 125) is also useful. It requires to be made with even more care than the board just given, but on the same principle. The angular stop or stops must be fitted to make the angles exactly 45°. A sawed mitre holds glue better than a planed mitre, but sawed mitres often require trimming with the plane to get a perfect fit.
Form for Rounding Sticks.—You will be continually wanting to make sticks eight-sided or round. A form to hold the pieces for planing is a great convenience.
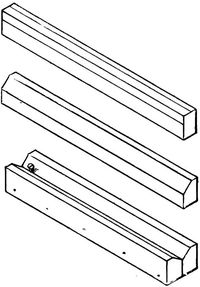
Fig. 126.
Before beginning work read carefully Marking, Gauge, Plane, and Nailing, in Part V., and look up any other references.

Fig. 127.

Fig. 128.
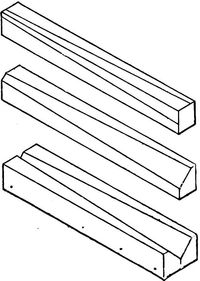
Fig. 129.
Take two strips and plane off (or even chisel or whittle) one corner of each, first gauging lines equidistant from the corner for a guide. Then nail the two strips together, with the bevels facing each other, to make a trough as shown in Fig. 126. Put a screw in one end to push the work against, push the form against the bench-stop or screw it in the vise, put the piece to be "cornered" or rounded in the V-shaped trough, and it will be firmly held with the angle upward. Two or three of these for larger and smaller pieces will be very useful. They are quickly made of waste strips. If you think 2' the right length for one of these forms, for instance, make it a foot or so longer, and after it is made saw off the extra length in one or two pieces, which will serve as an extension for holding a long stick (Fig. 127). If your bench has wooden bench-stops you can make some stops with notches in the top (Fig. 128) for this purpose.
For making pieces tapering, as well as eight-sided or rounding, you have only to modify this idea by planing off the corners in a tapering way (Fig. 129). See Rounding Sticks.

Fig. 130.
Level and Plumb.—Before beginning work read carefully Marking, Rule, Square, Gauge, Saw, and Plane, in Part V.
To make a plumb like Fig. 130, take a piece of straight wood from 3" to 5" wide and 4' or 5' long with the edges straight and parallel. Gauge a line down the middle of the side, exactly parallel to the edges, and cut the notch shown at the bottom. Make a saw-kerf at the upper end of the line and another beside it in which to catch the end of the line, or fasten the line around a nail. (See Plumb.)
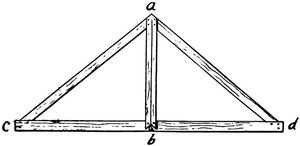
Fig. 131.
To make the level shown in Fig. 131, it is essential that the bottom board c d be straight on the lower edge. The two braces a c and a d should be of the same length. The strut a b should be nailed across at the middle of c d and at right angles to it. The essential thing is to have the line a b exactly at right angles to c d, the object of the braces a c and a d being to stiffen the board c d, and to keep the lines a b and c d at right angles to each other. The plumb-line is hung and used as in the case just given, the board c d being used for horizontal work. (See Level.)
Cabinets, etc., for Tools and Supplies.—A tool-chest, though a very convenient (and in fact necessary) thing for a workman who is moving around from place to place or who needs a safe receptacle in which to lock his tools in a factory, is not at all necessary in a private shop, nor half as convenient as to have the tools where they can be more readily reached. It is quite a piece of work to make a good one, and it will be better to defer such a job until you feel the need.
An old case of drawers, or bureau, or cupboard, or some such receptacle, if you can find one, will be useful in your shop. A bureau, in fact, makes a good tool-cabinet or substitute for a tool-chest, but if you keep tools in drawers make compartments, trays, or divisions, else the edge-tools may be damaged, not to speak of the inevitable confusion.
You do not need a tool-cabinet for half a dozen tools, but when they begin to accumulate it is a good thing to have and a good thing to make, if there is occasion to keep your tools locked up or if you have limited room. Otherwise it is just as well to keep the common tools as already shown. A cabinet is fully as useful for miscellaneous articles like brads, hinges, etc., as for tools.
Before beginning work read carefully Marking, Rule, Square, Saw, Plane, Nailing, and Screws, and look up any other references.
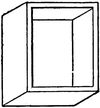
Fig. 132.
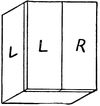
Fig. 133.
Perhaps you can find a good box, wide and shallow, all made, or if deep you can saw off part to make it shallow (Fig. 132). This will answer perfectly for a shop. For the house you would of course make a cupboard of new wood. The size must depend on circumstances. Get two boards for doors that will just cover the open side of the box, unless the box cover will do, which is unlikely. If the edges are not good you must allow extra width for jointing. Lay these boards in position and mark the lengths (on the side next the box) by the box itself, not with the square, for the box may not be square. From the lines just made mark the edges with the square, and, with the straight-edge, connect these edge marks by lines on the face sides. Saw off by these lines. Mark the box and each door in some way (Fig. 133), as "top," and "R" (for right) and "L" (for left), or by marks, as X, O, #, etc., to prevent finally putting them on wrong side out or wrong end up, as is very likely to happen if you neglect to mark them.
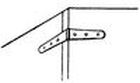
Fig. 134.
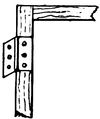
Fig. 135.
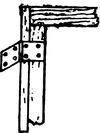
Fig. 136.
Now for hinges. The best thing, on account of the weight to be hung on the doors and the poor quality of the wood generally used for boxes, will be iron strap-hinges made for work of this sort, screwed on the outside (Fig. 134). Two will do for each door. Next to this come the common iron hinges. If the sides of the box are thick and firm, three of the common long and narrow kind (Fig. 135) will do for each door. If the sides are thin and flimsy, nail or screw a strip inside of each edge and use wider and shorter hinges (Fig. 136). To fit the hinges, see Hinges. The doors being hung, take them off while fitting up the case. Gauge a pencil line around the outer edge and each end of the inside surface of each door, where it fits against the edge of the box, as a limit beyond which racks or tools must not project or the door will not shut (Fig. 137).
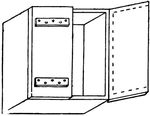
Fig. 137.
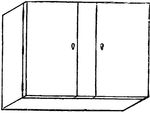
Fig. 138.
The fitting up of the cupboard must depend on its size and what and how many tools or supplies are to be kept in it. Shelves you can simply make of the right size and nail into place from the outside, using the rule and square to get them in the right positions. The illustrations are merely suggestions which you can alter or improve upon to suit your particular case. Fig. 138 shows another form, and Fig. 139 a small cabinet with one door, with suggestions for the arrangement of the tools, but the matter of fitting up you must, of course, contrive for yourselves, according to the circumstances. Do not attempt to put full-width drawers into these wide, shallow cabinets, as is often done. It takes an expert to fit drawers that are wide and short (from front to back) and they are not always satisfactory even then. If you wish drawers, either put in a row of narrow ones, or use the simple device described below (Figs. 141 and 142), and shown in Fig. 139. (See Drawers in Part V.)
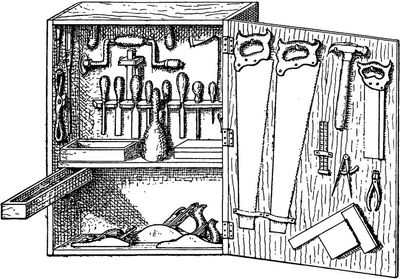
Fig. 139.
To fasten the doors you can hook one on the inside and put a button (which you can whittle out) on the outside to hold the other. If you wish to lock, hook one door inside and lock the other to it (see Locks). A padlock with staples and iron strap is easier to put on. To make a cupboard of boards instead of using a box, you simply make a box yourself (see Box-making in Part II.) and then proceed as above.
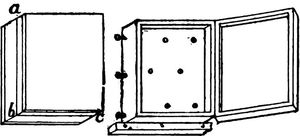
Fig. 140.
Fig. 140 shows a good form of cabinet. Make a tight box, perhaps 2' × 3' × 6" to 9", the sides and ends of 7/8" stock, and the top and bottom (i.e., the front and back of the cabinet) of ½" stock. Saw it open carefully on the line a b c about 2" or 3" from the top or face, according to the thickness of the box, first marking the ends or the sides so that you can finally put them together again in the same positions. When nailing the box together omit all nails which could interfere with the sawing. They can easily be put in afterwards. (See Box-making, in Part II.) Carefully smooth the edges after the saw. Reckless and hasty planing will spoil the joint. Fit two strap-hinges, or three of the common kind. Fit up inside as you wish, and fasten with hasp, padlock, or a lock working on the principle of a chest lock.
All these cabinets must be firmly fastened to the wall, for they will be very heavy when filled. Do not trust to a couple of nails or screws, the way amateurs so often put up shelves and cabinets in the house. A ledge of some sort below is a great help (Fig. 140) to relieve the screws or nails of the weight. If the back is not very strong, do not trust wholly to it, but add cleats outside or inside. If in the house, stout screw-eyes of heavy wire in the sides of the cabinet, through which you can screw to the wall, are good (Fig. 140).
Good shelves can be made by arranging empty boxes one on top of another, or by taking a wide, thin (flat) box and fitting shelves across it, like a bookcase, and then fastening the whole to the wall.
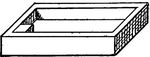
Fig. 141.
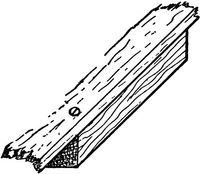
Fig. 142.
A small drawer can be fixed under a shelf, anywhere in your shop, on the principle often used in sewing-machine tables and the like, by taking a small box of suitable shape, strengthening one corner if necessary (Fig. 141), and pivoting it with a screw at that corner (Fig. 142).
First-class Bench.—You can do all the work you will be equal to for a long time on such a bench as has been shown, but some day you will want a first-class bench, such as Fig. 143. Do not attempt anything of the sort at first, however, though if you can afford it, such a bench is good to begin with. A few details are given in the Appendix.
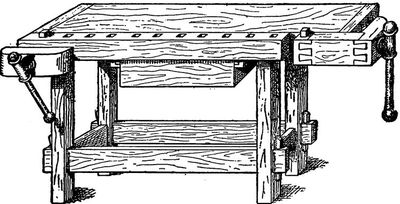
Fig. 143.
Other Appliances.—A number of other appliances and contrivances will be found, under their respective headings, in Part V.
A FEW ESSENTIALS TO SUCCESSFUL WORK
Do one thing at a time. Finish one job before you start two or three others.
First learn to work well, then ability to work quickly will come of itself.
Plan your work to the end before beginning to use your tools.
Make drawings carefully to scale before beginning any but the simplest work.
Lay out the work carefully on the wood with sharp, accurate lines, according to the drawings, measuring everything with exactness at least twice.
Cut the work accurately with sharp tools to the lines you have laid out.
Keep testing the accuracy of the work with the square, straight-edge, rule, level, or plumb.
Keep your tools sharp and in good order.
Have the most convenient place for each tool and always keep it in that place when not in use.
Do your work thoroughly and strongly. Do not half make it. Do not half fasten it together. The only time you will regret thorough work is when you have to take it apart again.
"The labor is small, the pastime is great."—Goethe.