DOLLS' HOUSES AND DOLLS OF CARDBOARD AND PAPER
Reading edition
A cardboard house, furnished with paper furniture and occupied by paper dolls, is a very good substitute for an ordinary dolls' house, and the making of it is hardly less interesting. The simplest way to make a cardboard house is to cut it all (with the exception of the partition and the roof) in one piece.
The plan given here is for a two-roomed cottage, the measurements for which can be multiplied to whatever size you like (or whatever is the utmost that your sheet of cardboard will permit). The actual model from which this plan was made (the house was built from a royal sheet of Bristol board) had a total floor measurement of 8 inches by 14. The end walls were 5 inches high, the side walls 5 inches, sloping up to 7 in the middle, and the partition was 7 inches. The roof was slightly wider than the floor, in order to make wide eaves, and as much longer as was needful not only for the eaves but also to allow for the angle.
The first thing to do is to rule the outline of the cottage. All the measurements must be most accurately made, as the slightest incorrectness will keep the house from fitting together properly. Then cut it out. When this is done, draw the windows and doors. Then lay your cardboard on a board, and run your knife along each side of the windows and the three free sides of the doors until the card is cut through. A ruler held close to the penciled line will make your knife cut straight. The bars across the windows can be made of strips of paper glued on afterward. If the doors have a tiny piece shaved off each of the cut sides, they will open and shut easily.
To make the front door open well, outward, the hinge line of the door (KK) should be half cut through on the inside. The hinge can be strengthened by gluing a narrow strip of paper or linen along it. At the three points marked H make small slits through which to put the tags, marked G, of the partition wall.
All drawing and painting must be done on both sides while the house is still flat. The doors inside will need handles and keyholes. Small pieces of mica can be glued over the windows instead of glass.
Little curtains of crinkly tissue-paper can also be made, and, if you like, the walls can easily be papered with colored paper pasted on. This will cause some delay, however, for it must be well pressed. Instead, wall-paper patterns could be painted on.
Outside—that is, on the underside of the cardboard—there is a great deal to do. Both walls and roof can be painted, and tiles, bricks, and creepers imitated. The front door should have a knocker and a letterbox, and around both the door and the windows should be imitation framework. As the upright joints of the four walls will be made of linen painted to imitate brick-work or stone-work, you need not carry the painting of the walls quite to the edges, because these will be covered by the joints. It is best to paint the joints before you stick them on.
Before turning the card over again, run your knife along the four sides of the floor to assist the bending up of the walls. Do not on any account cut through; merely make a half cut.
Cardboard Doll's House
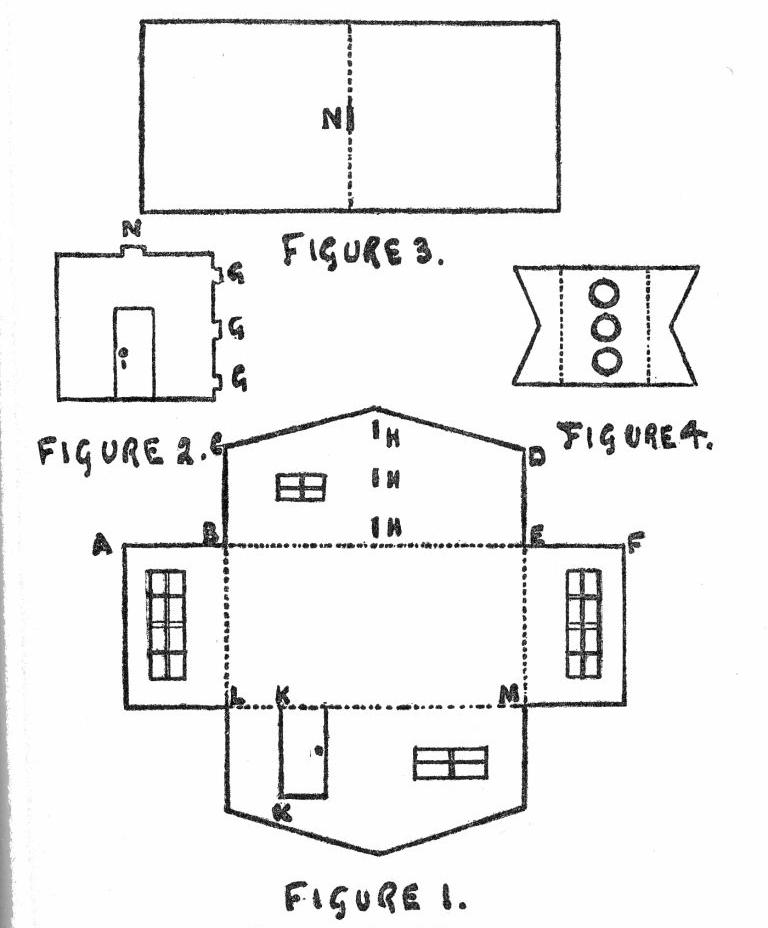
When you have drawn and painted all you can think of to make the house complete and pretty, take your strips of linen, for the fastening of the walls, crease them in half, lengthwise, and glue one half to the outside of the edge of the walls marked CB and DE in the plan. When this is quite dry, bend the back wall and the two side walls up, and glue the free sides of the strips to the wall marked AB and EF, holding the walls firmly together until well stuck. Strengthen the fold LM, which has to serve as a hinge for the front of the house, with a strip of linen glued underneath. The sides of the front wall must remain unattached, as that forms the opening. It can be kept closed by a strong pin slipped through the roof.
Appearance of House When Complete
The Partition
Now for the partition. Put the three tags G G G through the slits H H H and glue them firmly down on the outside. (These will have to be touched up with paint.) The roof must then be put on. Cut out a slit N an inch long to fit the tag on the partition, also marked N. Run your knife along the dotted line underneath, and fold it to the necessary angle to fit the sloping walls. Where the roof touches the end walls it must be fastened on with strips of linen or paper, which have been folded in the same way as before and one half fastened securely to the walls. It is important to let it get quite dry before gluing the other half to the roof.
Dog Kennel
The Chimney
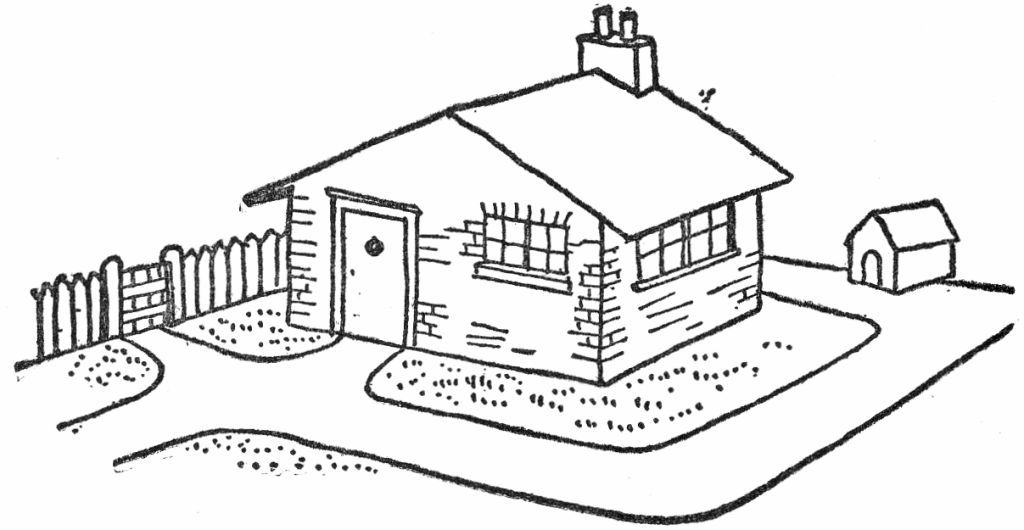
The chimney, of which the illustration is the actual size, is the last thing to be made. First paint, and then fold the two side pieces downward, cut out the three little holes and put into them three chimneys, made by folding small pieces of paper, painted red, round a penholder, and gluing their edges together. The chimney is fixed to the sloping roof with very small pieces of glued paper. Remember that all the pieces of paper used as fastening ought to be touched up with paint. The chimney in the drawing of the complete house on page 240 is put at the side of the roof, but it may even better go in the middle.
The Garden
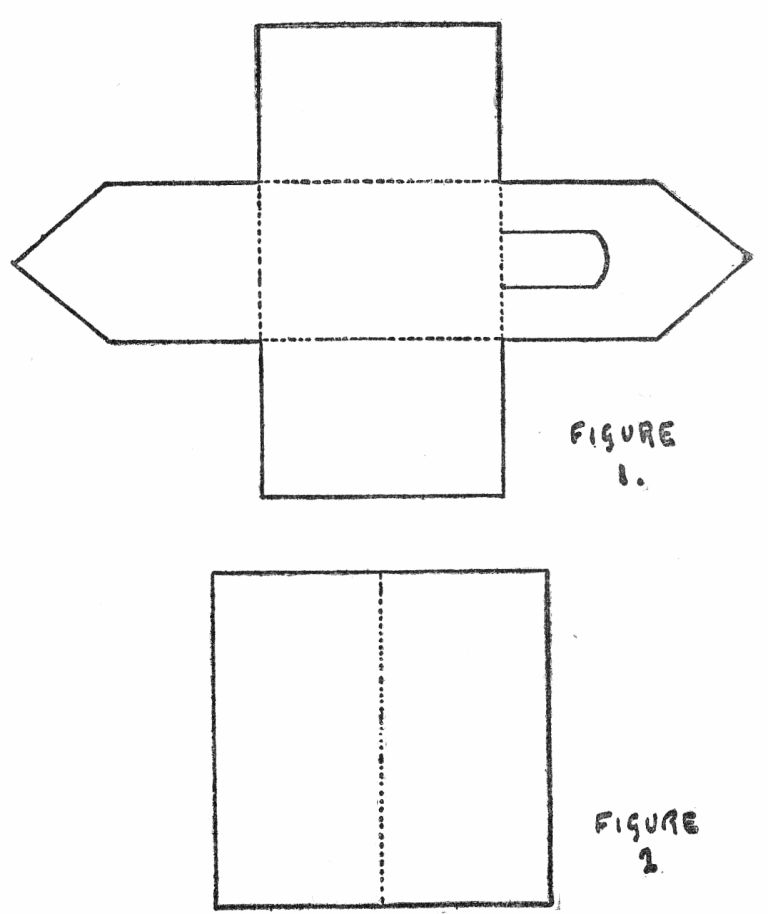
The cottage can then be fixed to a piece of wood or paste-board, to form its garden and add to convenience in moving it about. A cardboard fence and gate can be cut out and painted green. A path to the front door is made by covering a narrow space of the cardboard with very thin glue over which, while it is wet, sand is sprinkled to imitate gravel. Moss will do for evergreens, and grass plots can be made of green cloth. A summer-house, garden chairs and tables are easily cut out of cardboard. So also are a rabbit-hutch, pump, dove-cot, and dog-kennel. A plan of a dog-kennel, actual size, is given.
Another Way
It is, of course, possible to make a house of several pieces instead of one. The walls and floors can be made separately and joined with linen strips; but this adds to the difficulty of the work and causes the houses to be less steady. Cardboard houses can also be made with two floors.
"The House That Glue Built"
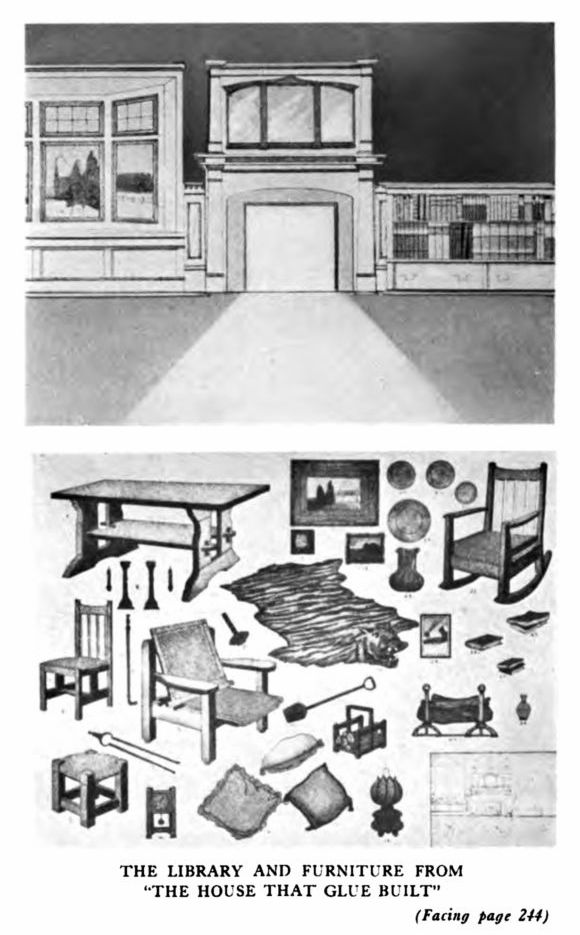
A novel kind of paper house has been gotten out in book form. It is called The House That Glue Built, and consists of pictures of rooms, without furniture, which is shown on separate sheets. The object is to cut out the furniture, arrange it and paste it in its proper place. The illustration shows the library, and the furniture for it. There is also a sheet of dolls to be cut out, who represent the owners of the house. Two other books on the same order are The Fun That Glue Made and Stories That Glue Told. They are all easily put together, and are lots of fun.
Paper Furniture
Everything required for the furnishing and peopling of a cardboard dolls' house can be made of paper; and if colored at all cleverly the furniture will appear to be as solid as that of wood. After cutting out and joining together one or two of the models given in the pages that follow, and thus learning the principle on which paper furniture is made, you will be able to add all kinds of things to those mentioned here or to devise new patterns for old articles, such as chairs and desks.
Glue and Adhesive Tape
Two recent inventions of the greatest possible use to the maker of paper furniture are fish-glue which gets dry very quickly and is more than ordinarily strong, and adhesive tape. Glue can be bought for very little, and adhesive tape, which is sold principally for mending music and the torn pages of books, is put up in inexpensive spools.
Home-Made Compasses
A pair of compasses is a good thing to have; but you can make a perfectly serviceable tool by cutting out a narrow strip of cardboard about four inches long and boring holes at intervals, of a quarter of an inch, through which the point of a pencil can be placed. If one end of the strip is fastened to the paper with a pin you can draw a circle of what size you want, up to eight inches across.
Materials
These are the materials needed when making paper furniture:—
A few sheets of stiff note-paper or drawing-paper. Scissors. A penknife. A ruler (a flat one). A mapping-pen. A box of paints. A board to cut out on. Adhesive tape or stamp-paper. Glue.
Tracing
If the drawings are to be traced, tracing-paper, or transparent note-paper, and a sheet of carbon-paper, will also be needed. To trace a drawing, cover it with paper and draw it exactly. Then cover the paper or cardboard from which you wish to cut out the furniture with a piece of carbon-paper, black side down, and over that place your tracing. Draw over this again with a very sharply pointed pencil or pointed stick, and the lines will be repeated by the carbon-paper on the under sheet of paper.
The furniture, for which designs are given in this chapter, can be made of stiff note-paper, Whatman's drawing-paper, or thin Bristol board. The drawings can be copied or traced. In either case the greatest care must be taken that the measurements are minutely correct and the lines perfectly straight. A slip of paper is a very good thing to measure with.
Enough designs have been given to show how most different kinds of furniture can be made. These can, of course, be varied and increased by copying from good furniture lists; while many little things such as saucepans, dishes, clocks, and so forth, can be copied from stores lists and added to the few that are given on p. 248.
THE LIBRARY AND FURNITURE FROM "THE HOUSE THAT GLUE BUILT"
(Facing page 244)
These small articles are cut out flat, but an extra piece of paper is left under each, which, when bent back, makes a stand.
General Instructions
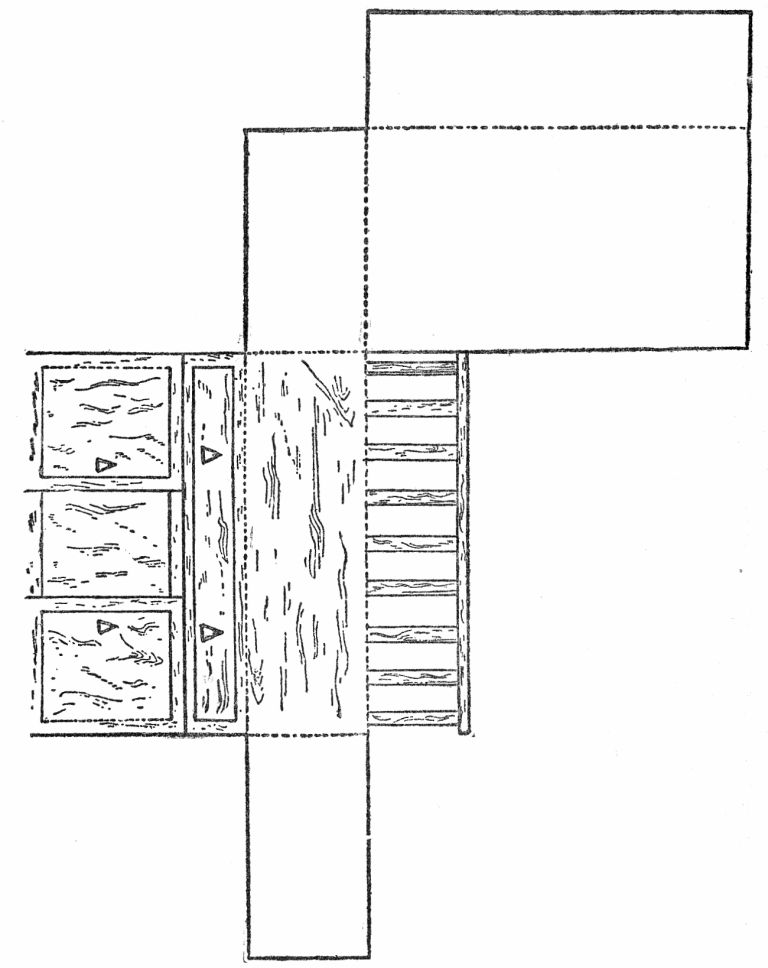
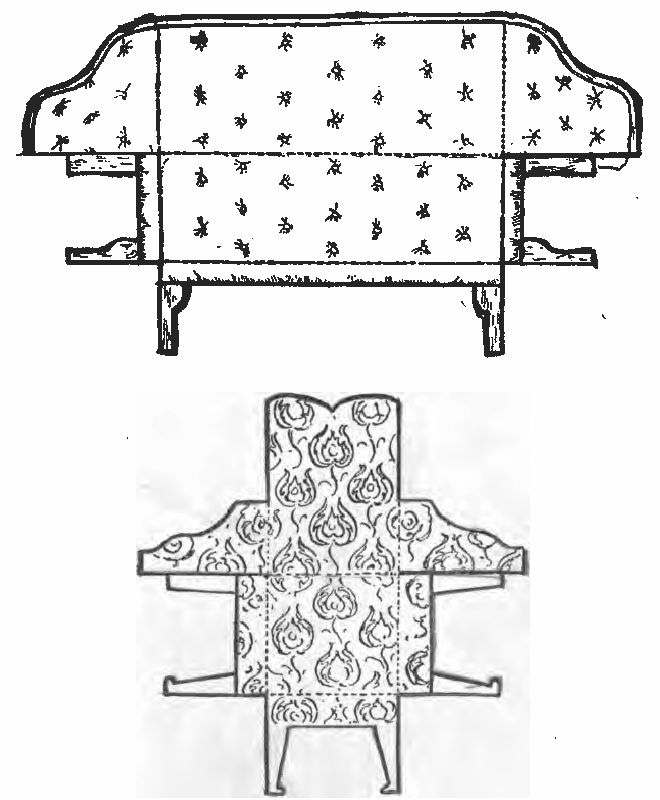
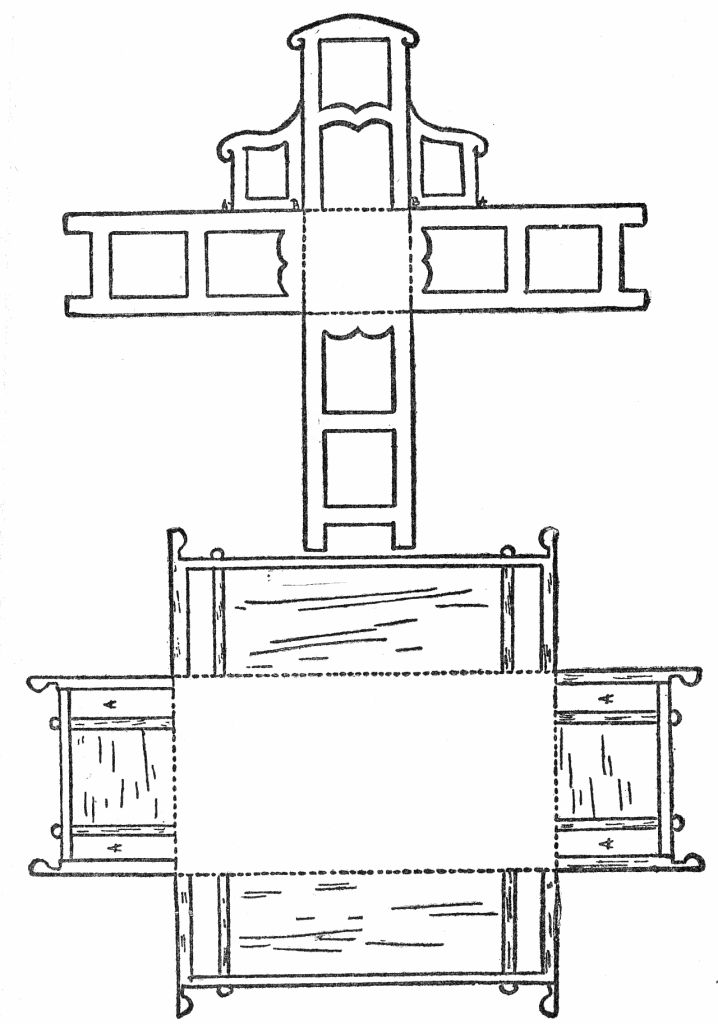
The front legs of chairs, the legs of tables, and the backs of furniture must be neatly joined together by narrow strips of stamp-paper or adhesive tape. To do this, cut a strip of the right size, crease it down the middle, and stick one side. Allow this to dry, before you fix the other.
Wherever in the pictures there is a dotted line, it means that the paper is to be folded there. It will be easily seen whether it is to be folded up or down.
Before the furniture is folded it should be painted. Wood, iron, brass, and silk can all be imitated in color.
In cutting out small spaces of cardboard—as between the bars of a chair—lay the card on a board, and keeping your knife, which should be sharp at the point, against a flat ruler, run it again and again along the lines you want to cut, until you have cut through. If your furniture is made of paper, the spaces can be cut out with finely pointed scissors, taking care to start in the middle of the space, for the first incision is seldom a clean one.
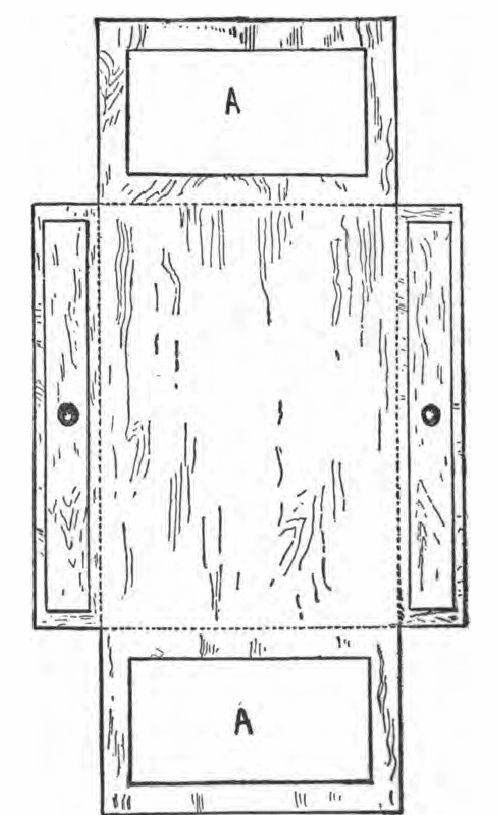
Kitchen Table (Cut out the oblong parts marked AA.)
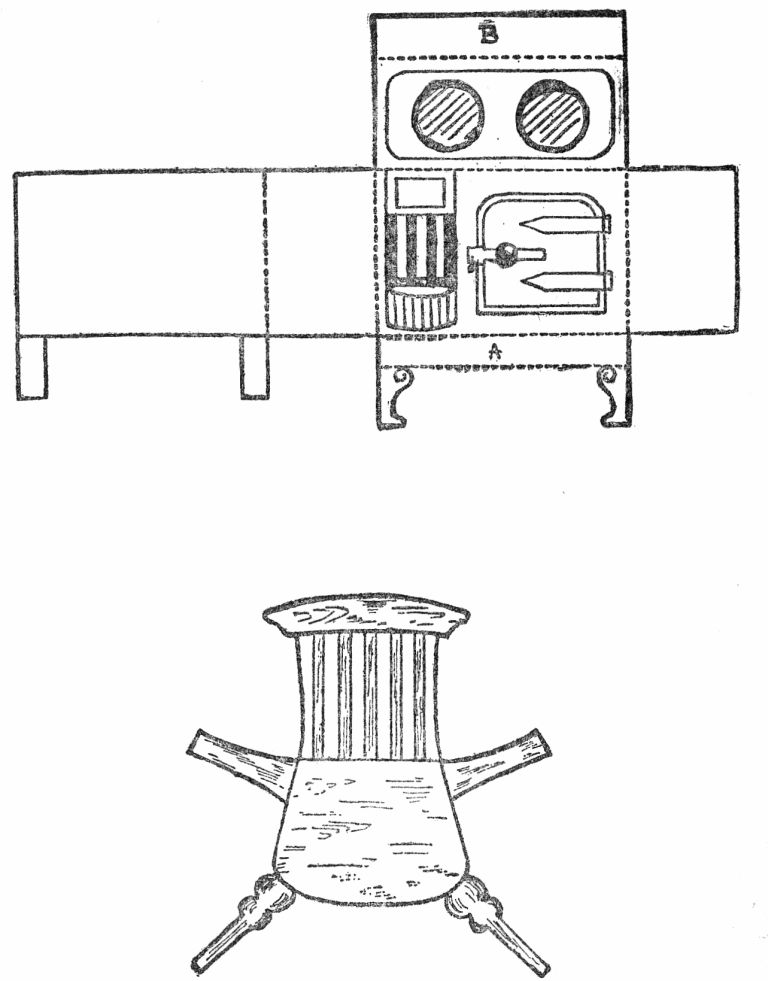
Kitchen Range and Kitchen Chair (A is turned up to form a shelf for saucepans; B is glued down over the back.)
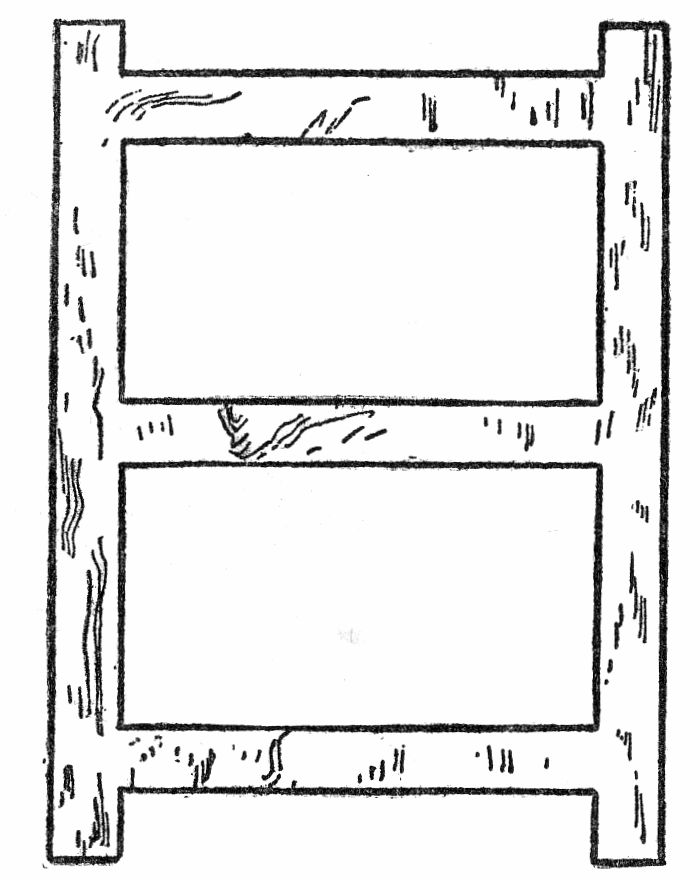
Screen (To be made of one piece of paper folded into three equal parts and cut out in accordance with the illustration.)
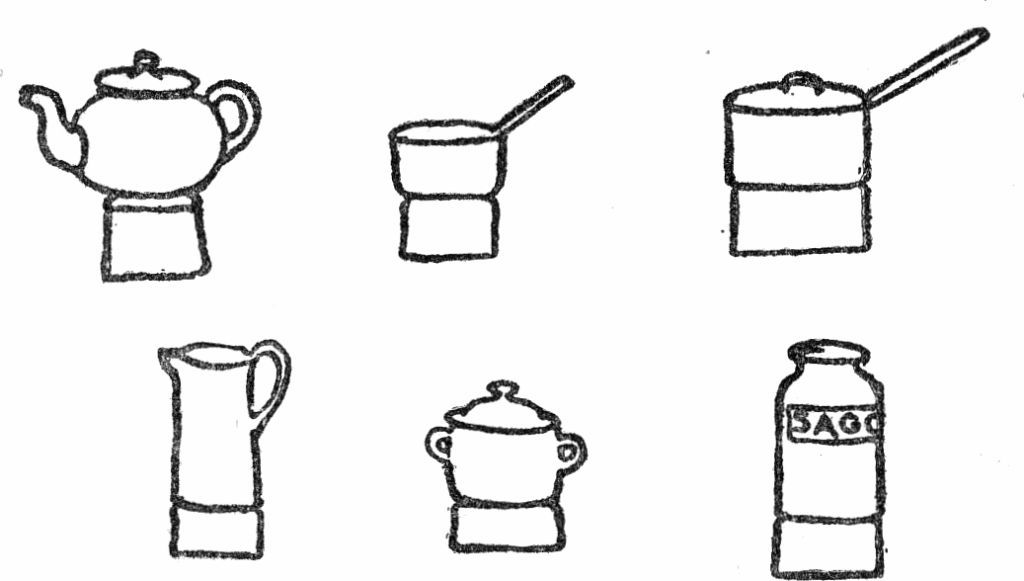
Various Pots and Pans (Under part to be folded back for a stand.)
Dining-Room Table and Cloth
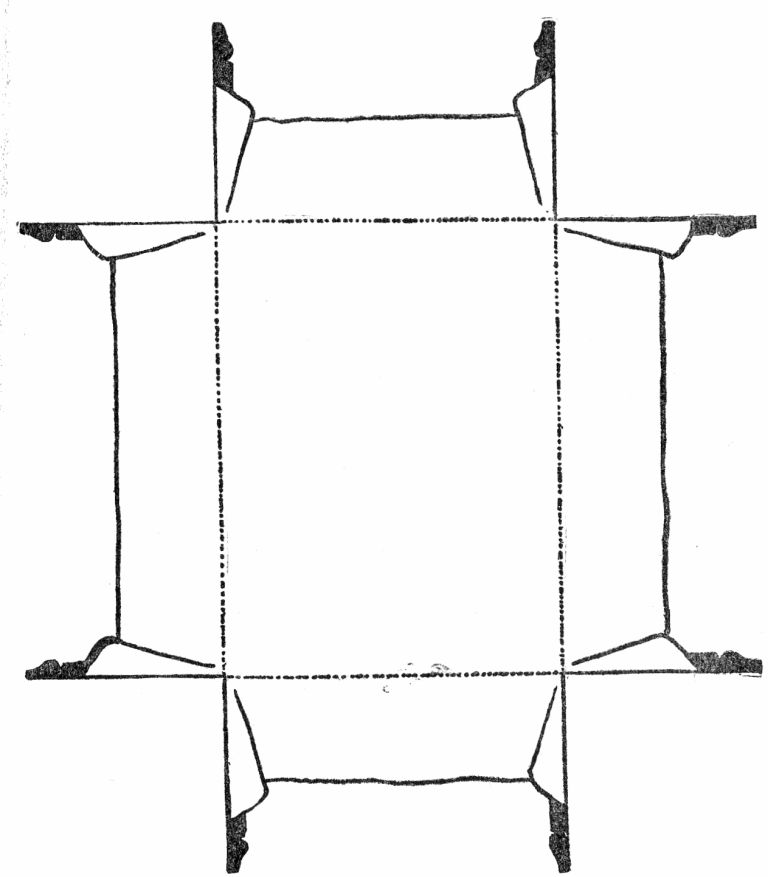
Sideboard
Sofa and Arm-Chair (The corners must be fastened to the sheet by very narrow strips of paper.)
Wooden Bedstead
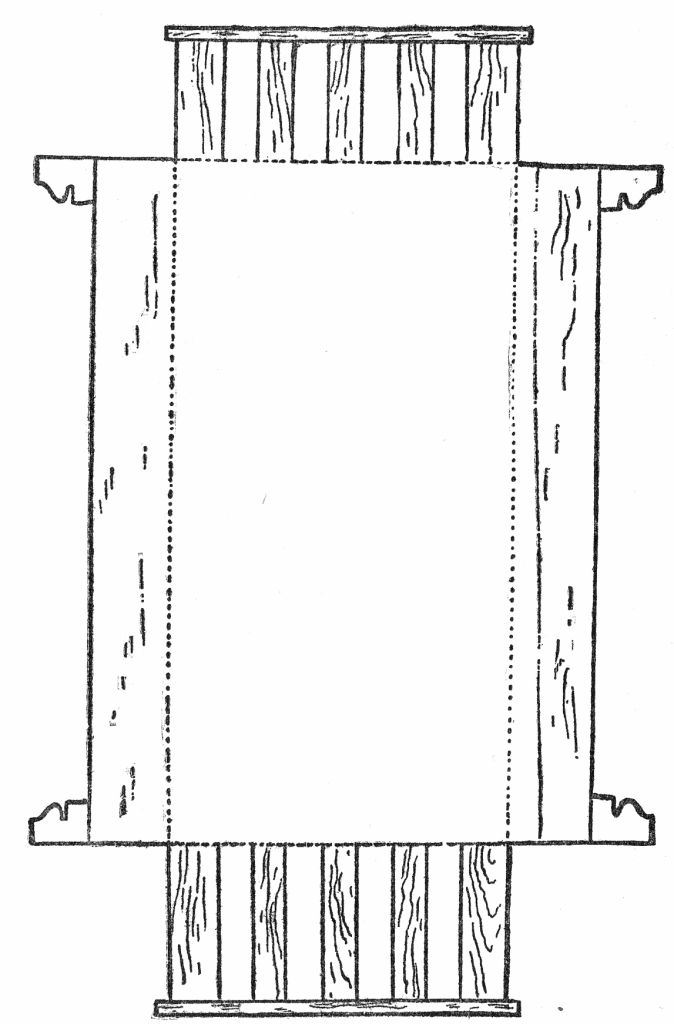
Wardrobe (Join the sides AB and AB, and then bend the top down, glueing the flap C to the back of the wardrobe.)
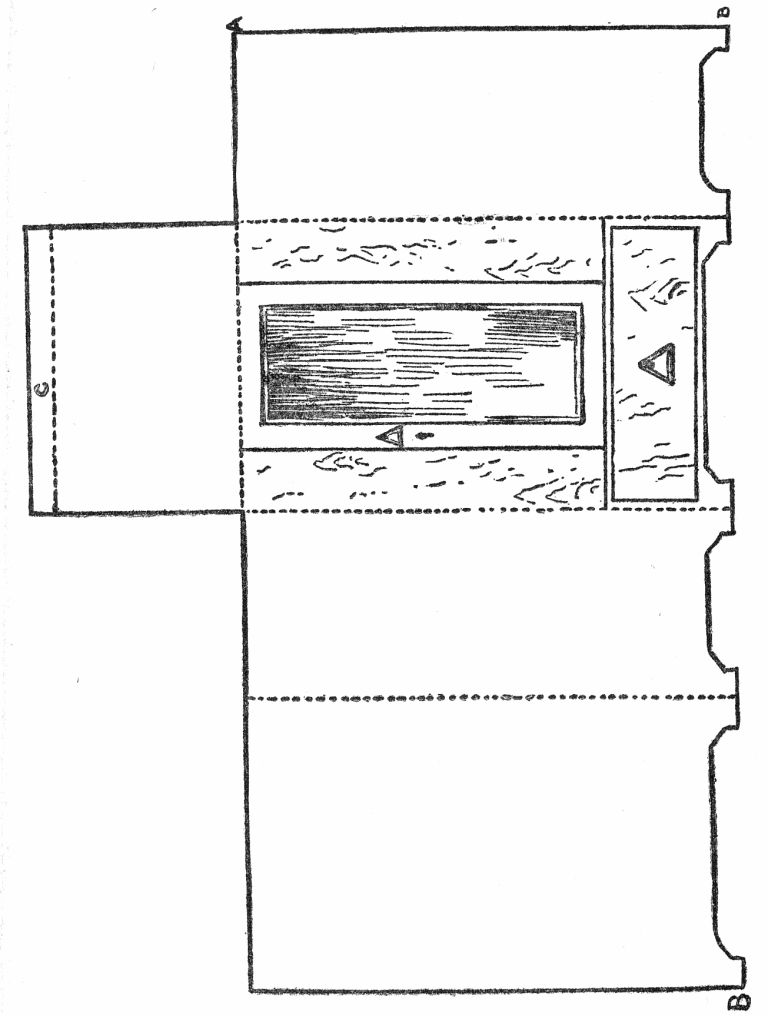
Dressing Table
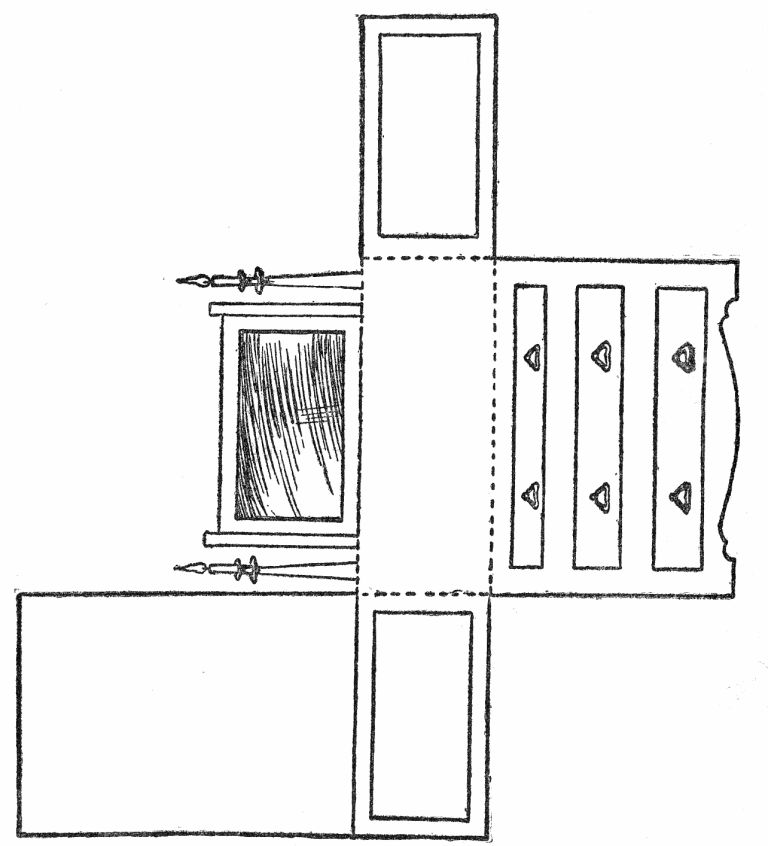
Washstand
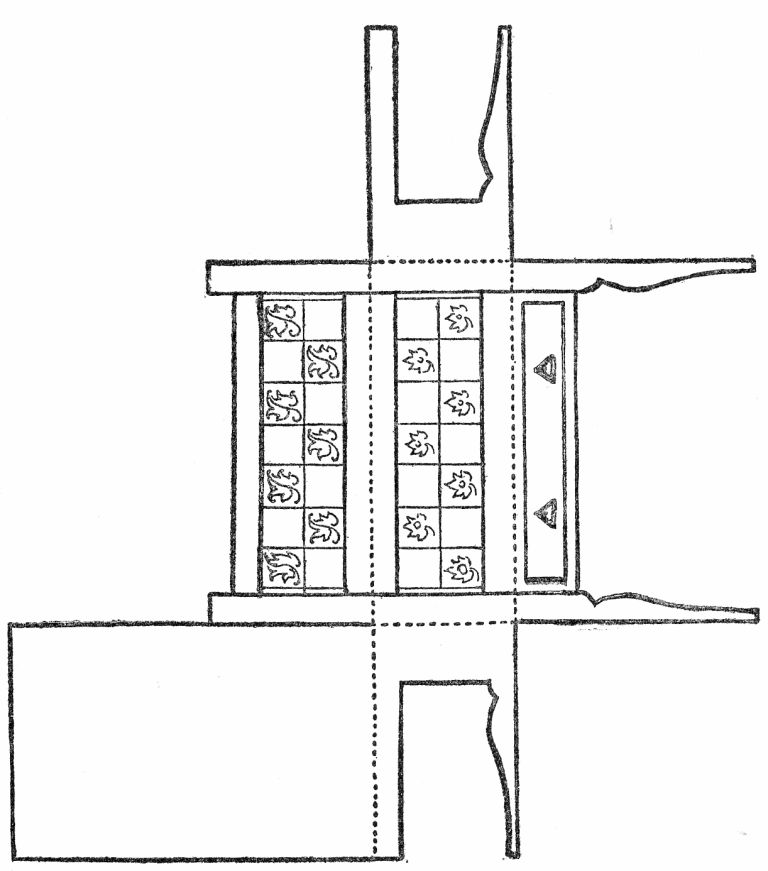
Rocking-Chair, Towel Rack, and Chair
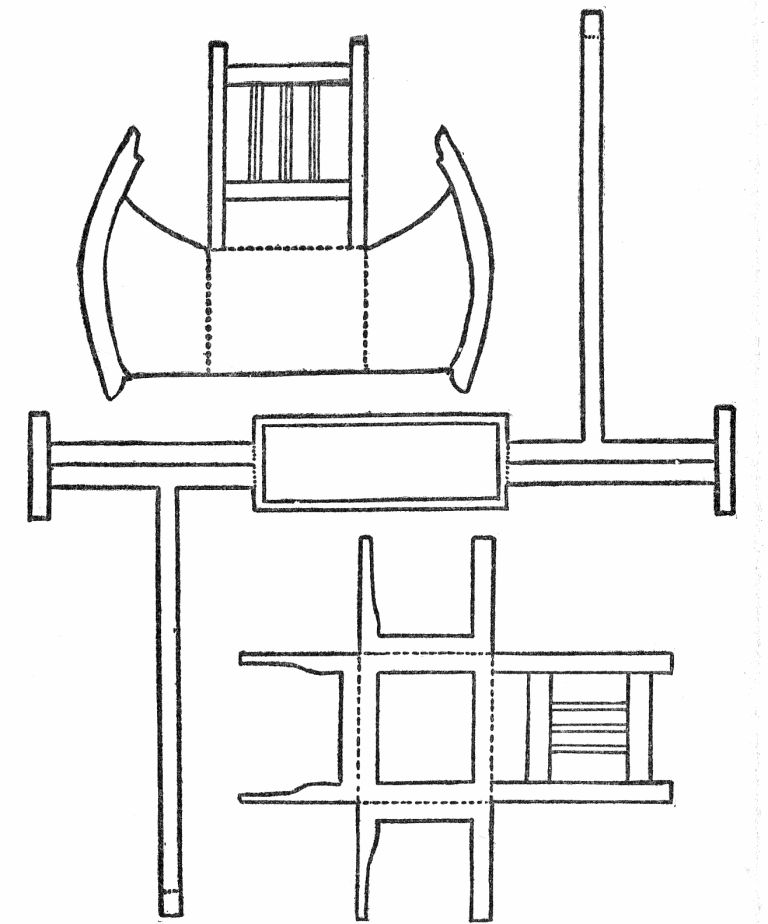
Child's High Chair and Cot (In the chair the lines AB and BA must be cut. In the cot the four pieces marked A are cut out on their sides and bent down to form legs.)
Paper Dolls
Paper dolls are not as good to play with as proper dolls. One can do much less with them because they cannot be washed, have no hair to be brushed, and should not sit down. But they can be exceedingly pretty, and the keeping of their wardrobes in touch with the fashion is an absorbing occupation. Paper dolls are more interesting to those who like painting than to others. The pleasure of coloring them and their dresses is to many of us quite as interesting as cutting out and sewing the clothes of ordinary dolls.
Making Paper Dolls
The first thing to do is to draw the doll in pencil on the cardboard or paper which it is to be cut from. If you are not good at drawing, the best way is to trace a figure in a book or newspaper, and then, slipping a piece of carbon-paper (which can be bought for a penny or less at any stationer's) between your tracing-paper and the cardboard, to go over the outline again with a pencil or a pointed stick. On uncovering the cardboard you will find the doll there all ready to cut out. It should then be colored on both sides, partly flesh color and partly underclothes.
The Dresses
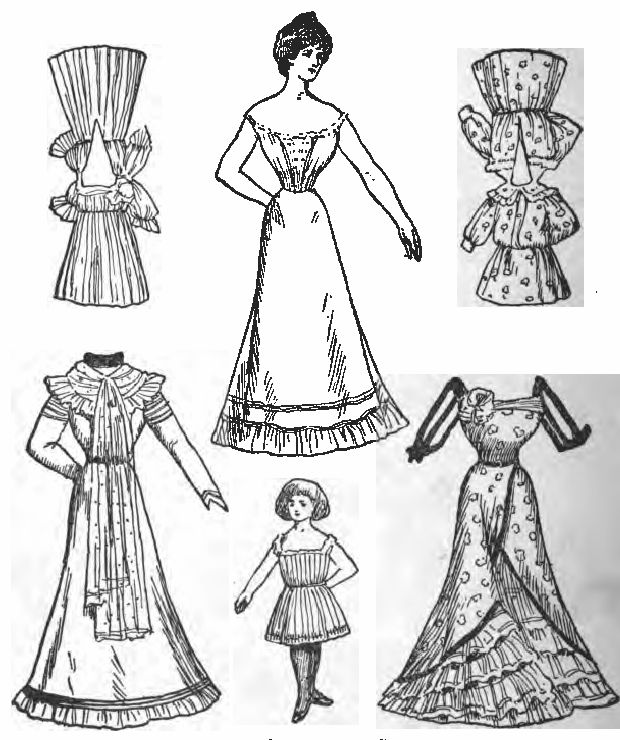
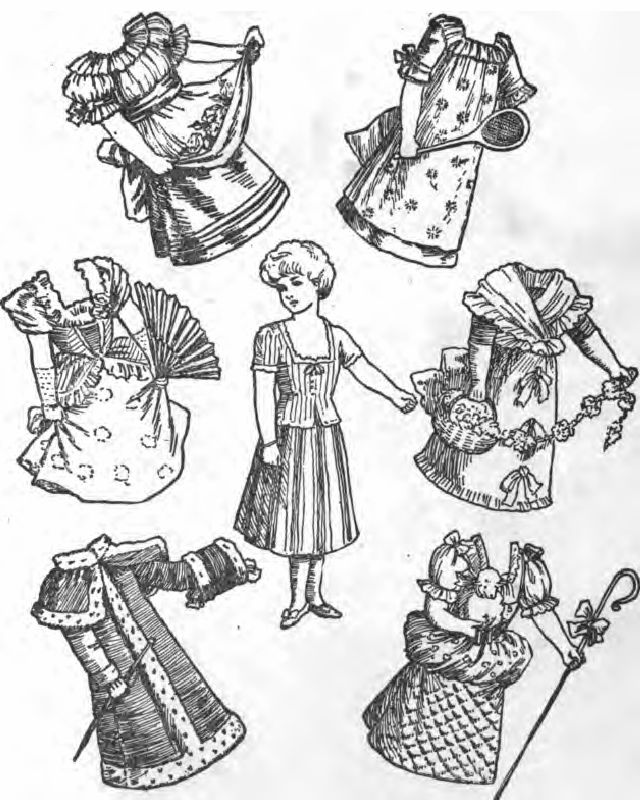
The dresses are made of sheets of note-paper, the fold of which forms the shoulder pieces. The doll is laid on the paper, with head and neck lapping over the fold, and the line of the dress is then drawn a little larger than the doll. A small round nick to form the collar is cut between the shoulders of the dress, and a slit is made down the back through which the doll's head can be passed. After the head is through it is turned round. (Of course, if the dress is for evening the place which you cut for the neck must be larger, and in this case no slit will be needed.) All the details of the dresses, which can be of original design, or copied from advertisements and fashion plates, must be drawn in in pencil and afterward painted. Hats, trimmed with tissue-paper feathers or ribbons, are made of round pieces of note-paper with a slit in them just big enough for the tip of the doll's head to go through. The illustrations on pp. 260 and 261 should make everything clear.
Other Paper Dolls
Simpler and absolutely symmetrical paper dolls are made by cutting them out of folded paper, so that the fold runs right down the middle of the doll. By folding many pieces of paper together, one can cut out many dolls at once.
Walking Dolls
Walking Paper Dolls
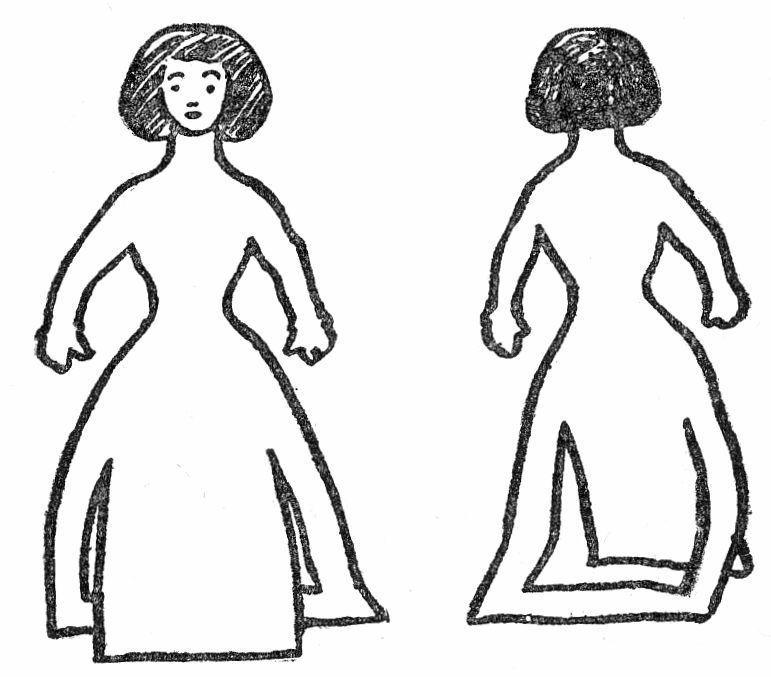
Walking ladies are made in that way; but they must have long skirts and no feet, and when finished a cut is made in the skirt—as in the picture—and the framework thus produced is bent back. When the doll is placed on the table and gently blown it will move gracefully along.
Paper Mother and Child, with Clothes for Each
A Paper Girl with Six Changes
Tissue-Paper Dresses
Dresses can also be made of crinkly tissue-paper glued to a foundation of plain note-paper. Frills, flounces, and sashes are easily imitated in this material, and if the colors are well chosen the result is very pretty.
Rows of Paper Dolls
To make a row of paper dolls, take a piece of paper the height that the dolls are to be, and fold it alternately backward and forward (first one side and then the other) leaving about an inch between each fold. Press the folds together tightly and cut out the half of a doll, being careful that the arms are continued to the edge of the fold and are not cut off. Open out and you will have a string of paper dolls.
Other articles to be made from paper and cardboard will be found on pp. 284-291.