MODELLING IN CLAY.
Reading edition
BY J. HARRY ADAMS.
The boy or girl on whom nature has bestowed the natural talent and liking for art and art-work, will find clay-modelling a fascinating and pleasing branch to follow.
FIG. 1.
To become a perfect modeller, and finally a sculptor, requires years of patience and perseverance to accomplish the highest degree that can be aimed at; and to successfully carry out the most minute detail accurately, necessitates a great deal of patient study and close application to the work.
To copy simple objects in clay, carrying out the detail and general line in quite a satisfactory manner, is not a difficult matter, and with some clay, a few tools, and the skeletons or supports, the amateur should not meet with any great obstacle if the following descriptions and instructions are accepted and practised.
It is not possible to give the young modeller the complete demonstration, but the primary helps can be suggested, so that, if carried out in the right manner and by the worker with brains, minute features in the detail can be accomplished that only the inventive brain of the young artist would grasp and use to good advantage.
FIG. 2.
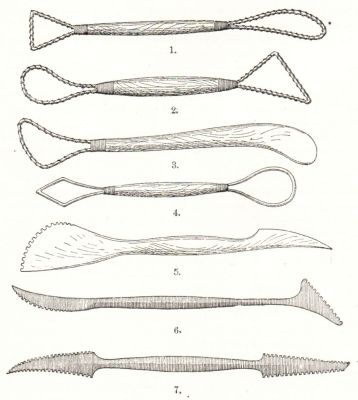
Very few tools are necessary at the beginning, and those shown in Nos. 1, 2, 3, 4, 5, 6, and 7, Fig. 5, are a full complement for any beginner. The first four are wire tools, made of spring steel or brass wire, about which fine wire is wrapped; the ends of the wires are securely bound to the end of a round wooden handle, and sometimes for convenience two ends are made fast to a single handle; and these tools are called double-enders, and are used in roughing out the clay in the first stages of the work. No. 5 is a boxwood tool with one serrated edge, and is used for finishing. The tools shown in Nos. 6 and 7 are of steel, and are of use on plaster, where others would not be sufficiently durable. Any of these tools can be purchased at an art-material store for a few cents each, except the steel tools, which are more expensive.
A stand or pedestal will be necessary on which to place the clay model, unless perhaps it should be a medallion, which may be worked over on a table.
FIG. 3.
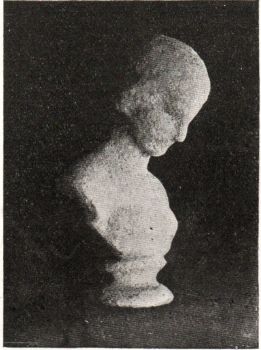
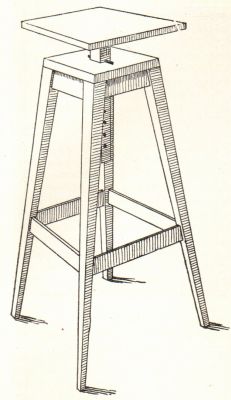
Fig. 6 is a stand that can be made by any boy from a few pieces of pine two inches square, and a top board one inch and a half in thickness, and arranged with a central shaft that may be raised or lowered, and to the top of which a platform is securely attached.
The movable shaft can have some holes bored through it from side to side, through which a small iron pin may be adjusted to hold the platform at a desired height. Clay can be purchased at the art stores by the pound, or in the country a very good quality of light slate-colored clay may sometimes be found along the edges of brooks, or in swampy places where running water has washed away the dirt and gravel, leaving the clear deposit of clay in the consistency of putty.
FIG. 4.
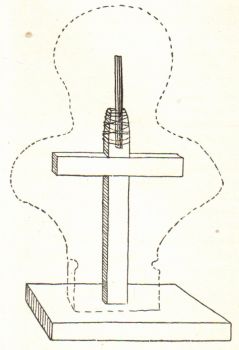
Supports which the clay models are built upon can be made of wood and wire, as the requirements necessitate. That for the head is shown in Fig. 1. Nearly every clay model of any size will need some support, as clay is heavy and settles, and if not properly supported will soon become distorted, and the composition spoiled. Add to the paraphernalia some old soft cloths that can be applied wet to the clay, a pair of calipers, and a small trowel or spatula.
To model well, the art of drawing is constantly used, the idea of form is continually brought into play, so the knowledge of drawing is essential to the good modeller. To begin with, choose some simple object to copy, such as a vase or some small ornament, then when a satisfactory result has been obtained, select something a trifle more difficult, such as a hand or foot.
Plaster heads, hands, feet, and all parts of the human body, as well as animals and flower pieces, can be purchased at the art stores, but if they are not available something that may be at hand in which artistic merit is evident may be chosen as a model.
When copying a head obtain a bust support on which to work the clay, and a very simple and strong one can be made from a piece of board, two sticks, and a short piece of pipe wired to the top end of the upright stick, Fig. 1.
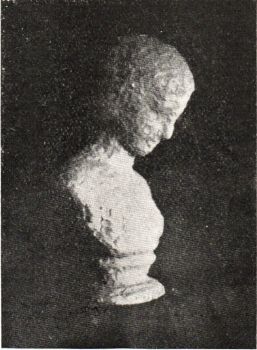
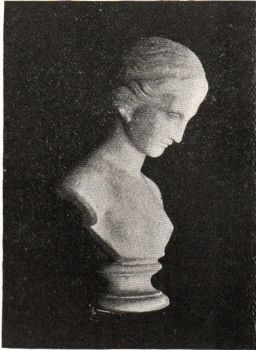
To carry out the proportions of a bust similar to Fig. 4, the clay can be packed about the support much after the manner shown in Fig. 2. This will be the support for the clay.
With a lump of clay and the fingers form the general outline as shown in Fig. 2 for the head, then with the wire tools begin to work away the clay in places so as to follow the lines of the model. With the calipers measurements can be taken from the plaster head and used advantageously in carrying out the accuracy of the clay model. Turn the plaster model and clay copy occasionally, so that all sides may be presented and closely followed in line and detail.
Modelling differs from drawing and painting in that every side of the model is visible, while only the face of the painting is presented to the eye, where the impression of form and outline is worked out on a flat surface.
The contour of proportion is the most difficult part of modelling, and for this reason it is to the student and amateur one of the most beneficial branches of the fine arts. Having successfully mastered the head, next attempt a foot from a plaster cast. Select a simple foot, and afterwards a more elaborate subject, such as a whole figure, can be tried.
FIG. 5.
With the wire modelling-tools and the fingers begin to work away the clay to obtain the general outline and form; continue this in a rough manner, until a perfect composition is obtained that compares favorably with the original model; the finishing-touches may then be applied, and the detail worked up more carefully.
Never complete one part and leave the remaining ones until later; always work up the model uniformly, adding a little here and there, or taking away, as may be necessary, and so developing the total composition gradually.
Always turn both model and copy frequently, that comparison may be frequently made, and thus training the eye to detect any little miscalculation in proportions and lines, and by the addition or removal of small masses the clay will finally take the form and accurate outline and detail of the original.
Moisten the clay occasionally with water sprayed on with a small watering-pot or a green-house sprinkler, to keep it soft and ductile, and when not being worked upon it should be covered with wet cloths to keep it moist.
FIG. 6.
As the work progresses the clay may be allowed to harden and consolidate, but not to dry; if allowed to dry entirely the model may be considered ruined, as the shrinkage of the clay around the support results in fissures and fractures that cannot be repaired.
By the time the amateur has acquired the knowledge to attempt a full-size figure he will invent the devices to support it.
The support or skeleton must of course be adapted to line with the pose of the figure, and should be of pipe and heavy wire or rods securely anchored to the base-plate.
The composition of flowers, fruit, foliage, animal life, and landscape is an inexhaustible one, and some beautiful effects can be had in flat-work. Good examples of this character of work can be found on all sides, and to the genius the field of modelling is a broad one, without limit.
For the help and assistance of those who desire to make a deeper study there are many hand-books and treatises on the subject by masters and sculptors, but the boy or girl adopting the work as a pleasant pastime will find this description very beneficial in the selection of tools and materials, as well as the primary steps to the great art of sculpture.
When casting from hands, feet, or ornaments where undercut predominates, the most successful mode is in the use of gelatine or glue.
To cast a head similar to the one shown in Fig. 4, it will be necessary to make a box frame large enough to place the head in.
The cast is to be well oiled, and down the front and back, running around under and back over the base block, strong linen threads are to be stuck on with oil. Warm glue or gelatine is then poured in the box, and left to chill and solidify.
When sufficiently cold the frame may be removed, leaving the solid block of glue like hard jelly; the ends of the threads are to be grasped and torn through the gelatine, thus separating it in two or three parts. The plaster head may then be removed, and the mould put together again and surrounded by the frame to hold it in place.
To make a plaster head this plaster of Paris may be poured into the mould and left for a while, when, on removing the frame and taking the glue mould away, a perfect reproduction of the original head will be found.
When very large objects that would require a great deal of plaster are cast, they are generally made hollow in the following manner:
Obtain the glue mould by the process described, and into it pour a quantity of thin plaster, having first oiled the surfaces that come in contact with it. Turn the mould about and upside down, so the plaster will enter every part and adhere to the glue form. Allow it to "set," and again pour some plaster into the mould, which will adhere to the first coating, and after this has set repeat the operation several times, until a deposit or coating an inch or more in thickness has been made.
The glue mould on being removed will reveal a perfect plaster casting that, instead of being solid, is hollow, and in consequence is much lighter.