Photograph Frames.
Reading edition
Directions for Mounting and Framing.
Embroidered frames are now always mounted under glass. This preserves both the needlework and the picture, besides greatly enhancing the beauty of both. After carefully examining all ready made frames in the market we recommend the "Imperial Passepartout Frame" as the best. It is strongly and yet neatly made, having a white leather binding, holding the glass firmly in place. It has a sliding back, with strong gilt wire easel, and suitable cardboard mounts with die cut openings for pictures. It is self-contained and absolutely dust proof. The embroidered linen can be removed at any time and a new design substituted. These frames are made in two sizes, viz.: 8 x 10 inches and 10 x 13 inches; the former has an opening for one photograph; the latter, openings for two pictures. Square or oval openings are used according to the design of the stamped linen. See page 92.
After the embroidery is finished, proceed to complete the frame as follows: cover the face of the frame with cotton wadding, and lay the embroidered linen on top, being careful to see that the design is in proper position, the plain part being over the opening in the frame. Draw the linen tightly and tack with pins on each corner. Now place the frame on its face, stretch the linen over its edges and fasten it on the back with good, strong glue or mucilage,—glue is preferable. Be careful to draw tightly and avoid creases. Allow plenty of time to dry; then with a sharp penknife, cut the opening, if it be a square one, making four cuts from the center to each of the four sides of the opening, thus: X. Draw the four pieces cut through the opening and paste them on the back. If the opening is an oval, begin at the center and cut the linen in slits toward edge; draw tightly and evenly and glue down. Place the photograph in position over the opening; over this put the cardboard, which will hold the picture in place. Clean the glass and slip the linen, cardboard and all, into the frame. Now slide the back into place and the frame is complete.
If you do not want to purchase a ready made frame, any good stationer will mount your embroidered linen, or you can do it yourself and then have it framed by a stationer. A small gilt beading made to order will increase the beauty of the frame. In mounting follow these instructions: cut a frame from heavy cardboard, the stiffer the better, about 7 x 9 inches, noting the size of the linen and allowing an inch margin on sides, top, and bottom. Cut a hole in the cardboard for opening for picture, and proceed to mount as per directions for "Imperial" frames. If the embroidery is not to be put under glass, cut out another piece of thin cardboard, size of first, cover with silk, sateen, or linen, and then sew front and back together on sides and bottom, leaving enough space at top to slip in the picture. Use white silk and make stitches as fine as possible. If you cannot obtain a ready made easel to put on the back, make one from stiff cardboard, covered with linen.
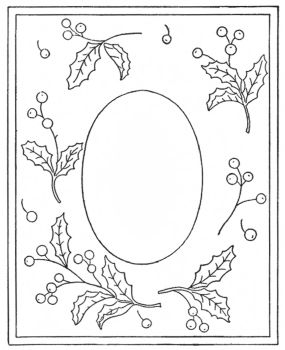
Holly Photograph Frame Design No. 1.
By Amalia Smith.
Materials—8 x 10 inch Frame: Corticelli Filo Silk, 1 skein each 582, 583, 584, 586, 754, 767, 768, 781, 785. Dealers can furnish stamped linen of this design 10 x 12 inches. See page 92.
Holly Photograph Frame Design No. 1.
It would be impossible to find a more appropriate Christmas present than this pretty Holly design, embroidered and neatly framed ready for inserting the picture.
Berries.—Work in satin stitch similar to working jewels (see page 62), with Corticelli Filo Silk, Red, 767, 768, using only one shade in each berry.
Leaves.—Work solid, using Green, 781, for the edge. Shade darker toward the midvein with 754, 582, 583, 785, 586. Make some leaves darker than others. Work the stems and veins in 584 and 785. For directions for mounting and framing see page 69.
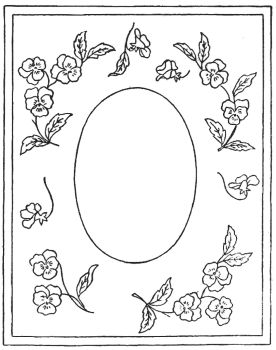
Pansy Photograph Frame Design No. 5.
Instructions by Elizabeth Moore Hallowell.
Materials—8 x 10 inch Frame: Corticelli Filo Silk, 1 skein each 504, 672, 674, 676, 726, 727, 729.5, 743, 783, 785. Dealers can furnish stamped linen of this design 10 x 12 inches. See page 92.
"Pansies for thoughts" are always pleasant to associate with tokens of friendship; and the needlewoman who selects this subject for her skill may be sure that her choice will prove a welcome gift to a friend.
Pansies.—Use Corticelli Filo Silk, Purple, 726, 727, 729.5. For another shade of purple, which will give variety, yet will combine well with the above, take 672, 674, and 676.
Flowers.—In working the flowers use the ordinary long and short stitch, keeping each petal with the stitches tending towards the center of the flower; let the darkest shading be at the edge of the petal, shading gradually to light at the base; and in several of the flowers let the two upper petals be quite dark. More than this will give too heavy an effect; therefore work the other blossoms in the lighter shades, letting the veinings only, be dark. One large French knot of Yellow, 504, will be needed in the center of each pansy.
Pansy Photograph Frame Design No. 5.
Leaves.—The leaves may be worked in long and short stitch, with 783 and 785, keeping the direction of the stitches toward the central vein, but inclining downward to the base of the leaf. A careful study of Colored Plate I (Frontispiece) will give one suggestions as to the proper shading, and will be found as helpful as more elaborate directions would be, although the colors are not identical with those for this design.
Before mounting the embroidery be sure that it is well pressed; if it has become in any way soiled, it should be carefully washed according to the directions given on page 6. Rules for mounting and framing will be found on page 69.
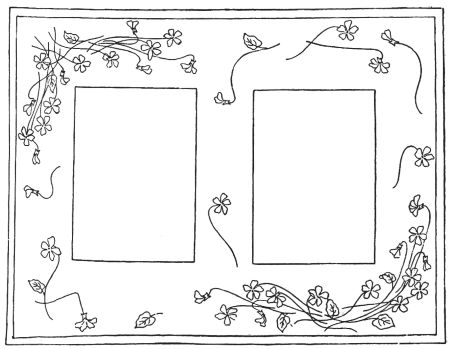
Violet Photograph Frame Design No. 3.
Double Frame for Two Pictures.
Materials—10 × 13 inch Frame: Corticelli Filo Silk, 1 skein each 506, 726, 727, 728, 729, 781, 782, 783. Dealers can furnish stamped linen of this design 12 × 15 inches. See page 92.
Violet Photograph Frame Design No. 3.—(Double Frame.)
Violets.—Use same instructions as given for working Violet Design No. 402 A, page 40. Directions for mounting and framing will be found on page 69.
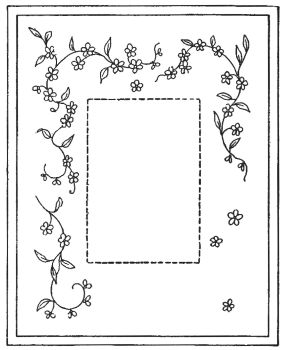
Forget-me-not Frame Design No. 60.
By Emma Haywood.
Materials—8 × 10 inch Frame: Corticelli Filo Silk, 1 skein each 115, 623, 624, 678, 780, 781, 782. Dealers can furnish stamped linen of this design, 10 × 12 inches, which allows ample margin for mounting. See page 92.
Forget-me-not Frame Design No. 60.
The simple Forget-me-not design for a photograph frame for a cabinet sized photograph should be very popular. To present one's picture thus framed to a valued friend carries with it a pretty sentiment, the favorite little flower of heavenly blue pleading for us that we may be remembered. The treatment is of the simplest kind. Both blossoms, buds, and leaves are worked in satin stitch, with French knots for the centers. The stems are in outline or stem stitch. For such small flowers Corticelli Filo Silk should be used in preference to any other kind of silk. Work the blossoms with 623, 624; the leaves and stems with 780, 781, 782. A very artistic effect can also be gained by working the blossoms with 699, 700, putting in the leaves and stems with 107, 108, 109. Make the French knots for the centers with 115. The buds may be of a delicate Pink, 678. Rules for mounting and framing will be found on page 69. (Easy.)
Jewel Photograph Frame Design No. 61.
By Emma Haywood.
Materials—8 × 10 inch Frame: Corticelli Filo Silk, 1 skein each 105, 138, 139, 141, 142, 501, 624, 646, 647, 656, 657, 701, 702. Dealers can furnish stamped linen of this design, 10 × 12 inches. See page 92.
There has always been a great demand for embroidered photograph frames, and recently those in simulated jewels have been among the most popular patterns. When worked the color effect will be found very rich and pleasing.
Leaves and Stems.—Work the leaves and stems in Olive Green Corticelli Filo Silk. For the leaves take 138, 139, 141, and 142, shading the spray from light to dark, working in satin stitch. Make one leaf in one shade and the next one in another.
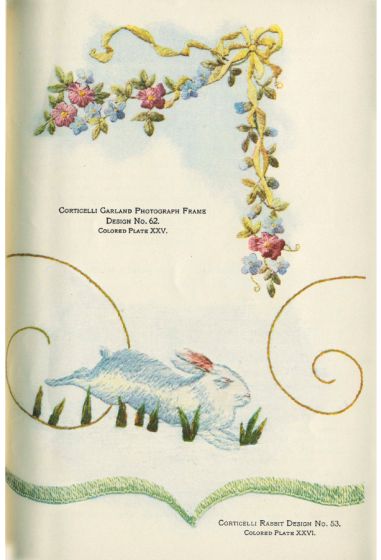
Corticelli Garland Photograph Frame
Design No. 62.
Colored Plate XXV.
Corticelli Rabbit Design No. 53.
Colored Plate XXVI.
[See larger version]
Jewels.—Work the three jewels at each corner to represent rubies, using 656, 657, the darker shade for the one in the middle. Working horizontally toward the center at top and bottom, the next group of three jewels should represent the topaz, and for this choose Yellow, 501. Still following the scroll toward the center, work the next three to represent the turquoise, using 701, 702; the darker shade for the jewel in the middle of the group, the lighter shade for the one on each side. We now come to the center of the frame. Work this group of three jewels in Salmon Pink, 105.
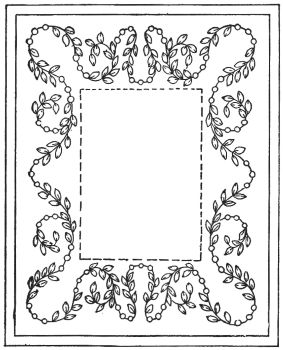
Jewel Frame Design No. 61.
For the side scrolls, begin at the center, using 701, 702. The three jewels on each side of these work in 105, and the remaining group between those in 105 and the corner, should be made in 624. All jewels must be outlined with 646 or 647. Full directions for working jewels are given in the instructions for the Jewel Centerpiece Design No. 50, page 61. Rules for mounting and framing will be found on page 69. (Somewhat Difficult.)
Garland Photograph Frame Design No. 62.
Colored Plate XXV.
By Alice C. Morse.
Materials—8 x 10 inch Frame: Corticelli Filo Silk, 1 skein each 124, 125, 126, 127, 503, 504, 505, 623, 624, 625, 636, 637, 638, 639. This quantity is more than enough. Dealers can furnish stamped linen of this design, 10 x 12 inches. See page 92.
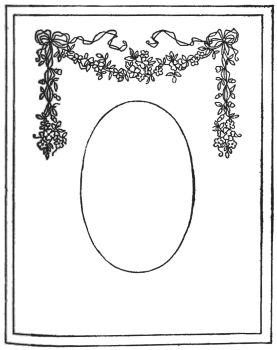
Garland Photograph Frame Design No. 62.
Wild Roses.—Work the petals solid with Corticelli Filo Silk, beginning at the edge with 639, shading towards the center with 638, 637, 636. Work the petals that seem to be in the background darker than those that overlap them. Vary the shading in some of the flowers. In the center work a few French knots with 505. See Colored Plate XXV.
Forget-me-nots.—Work in satin stitch each petal or all petals in one flower in one shade of Blue, 623, 624, 625. Place one French knot in the center of the open flowers, using Yellow, 503.
Ribbon.—Work in satin stitch, in Yellow, 503, 504, slanting the stitches across the ribbon. Be careful to preserve the correct effect of the twisted part by working one side of the fold in 503, the next fold in 504, and so on. See Colored Plate XXV.
Leaves.—Work in satin stitch, using Green, 124, 125, 126, 127, making half of each leaf in one shade. Outline the stems with 127. Rules for mounting and framing will be found on page 69. (Somewhat Difficult.)
Jonquil Photograph Frame Design No. 63.
By Elizabeth Moore Hallowell.
Materials—8 x 10 inch Frame: Corticelli Filo Silk, 1 skein each 502, 503, 504, 506, 507, 750, 751, 752, 781, 782, 783, 783.5, 784. Dealers can furnish stamped linen of this design, 10 x 12 inches. See page 92.
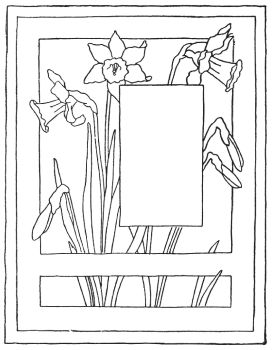
Jonquil Photograph Frame Design No. 63.
For an Easter greeting, or a birthday present in early spring, a frame worked in this design will prove a welcome offering. This design may also be used for a magazine or book cover.
Flowers.—These may be worked in long and short stitch, or half solid Kensington, in which case somewhat less than the quantity of silk named above will be sufficient. However, we strongly advise working the whole design in solid embroidery, as the effect is very handsome and will repay one for the extra labor. Begin working the edge of the cup with Yellow, 504, gradually shading darker to the base with 506, 507, keeping the stitches perfectly straight. Work the edge of petals in Yellow, 502, and shade darker with 503, 504, to the cup. That part of the flower between cup and stem should be worked in 506 and 507. The curious paper-like shell which surrounds the flower at the point of attachment to the stem, work with 750, 751, 752, using 750 for the point, and shading darker to the stem.
Leaves.—Work solid, beginning at the point with 781, shading gradually darker to the base, using 782, 783, 783.5, 784. Work the stems solid in Olive Green, 782, 783, 783.5, 784, shading from dark near the bottom to light nearest the flowers. A little of 782 should be worked at one side of some of the stems.
Opening.—Outline the opening for the picture and the other straight lines in the design with Yellow, 507. Rules for mounting and framing will be found on page 69. (Not Difficult.)