WORK IN COPPER (continued 2)
Reading edition
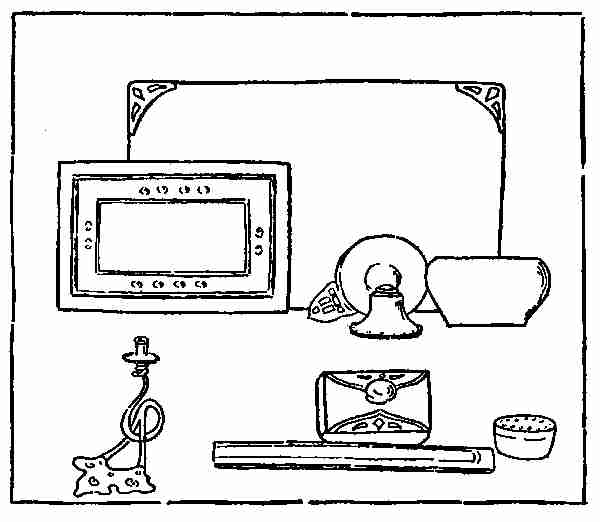
Directions: Tray: You will notice, in the design of the tray given, a 3⁄8-in. ledge all around. The inside of the tray is lowered 1⁄4 in. except a square place in the centre toward the back large enough for the box to set upon. The depression in the tray is made in the same way as described before in making the small square tray. You put it into the vise and with a round wooden peg drive it in according to the design. The ledge must remain parallel to the bottom of the tray. Round it off by placing the tray on the anvil stake and driving the proper curve in it with the wooden mallet.
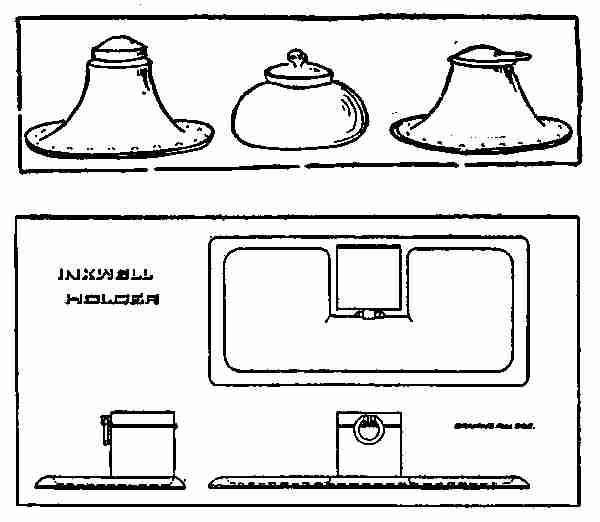
Box or holder—Sides: Take the copper piece, 8 × 11⁄2 ins. and divide it into 2-in. spaces. Bend these at right angles to form a square box, the open ends meeting at one side. Solder with hard solder. Lid: Take the 3-in. square piece. Over a square block the exact size of the inside of the box drive the piece for the lid. The corners must be driven down even so that the lid will fit on the top of the box; otherwise the ink will evaporate. The hinge on the lid is made with a drawn tube in the same way as was described in the article on the making of hinges. The box is now ready to be put on the tray. File the surface of the projecting square flat, so that the box will set level. Bind it down with binding wire, and solder in the usual way.
Ring and ring post fastened to the box: The post is made of a piece of 3⁄8-in. square copper. At a distance of 5⁄16 in. from the end a shoulder is filed on it, with the stem long enough to go through the thickness of the lid. A hole, too, is drilled through one end of this post large enough for a 1⁄8-in. copper ring to be pushed through. This copper ring is made by turning a piece of copper wire around a 1⁄2-in. round rod in a spiral shape. Cut off the ring or rings as you need them. This ring is opened out, pushed into the hole, and squeezed together. It acts as a little handle to lift up the lid. A piece of blotting paper the exact size of the lid is pushed into the inside of it. This helps to keep the ink from evaporating. If the piece of work has been carefully done there will be little finishing and filing to do. You can readily see that the beauty of metal work depends as much upon the finish as upon the design.
BOOK-RACK
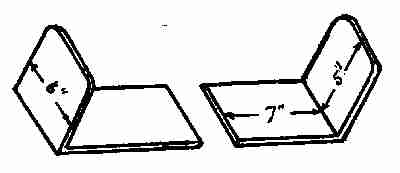
Book-racks are most useful for holding choice books on one's desk. They are made of heavy copper. This design is made so that one can place any number of books between them, by pushing the side pieces out. All book-racks are made in the same way. The design on the side pieces can be sawed out (or pierced) or embossed, or the facets left by the hammer will make a beautiful decoration. Any design work, however, must be done while the copper is in a straight piece, otherwise the bending is apt to spoil the work.
Material: Two pieces of copper, No. 14, 12 × 6 ins.
Directions: In the design shown here the edge of the upright ends are rounded. Some have just the corners rounded off. Decide upon the design you wish. Cut it out, and file the copper sheet accordingly. Make the edges of the whole rack perfectly smooth and rounded. Mark off 6 ins. from one end. Bend this at the 6-in. line at right angles to the 8-in. piece. It is well to do the bending over a wooden block in the vise, using a mallet so as not to mar the metal. Polish and finish as before.
METAL CORNERS FOR A DESK PAD
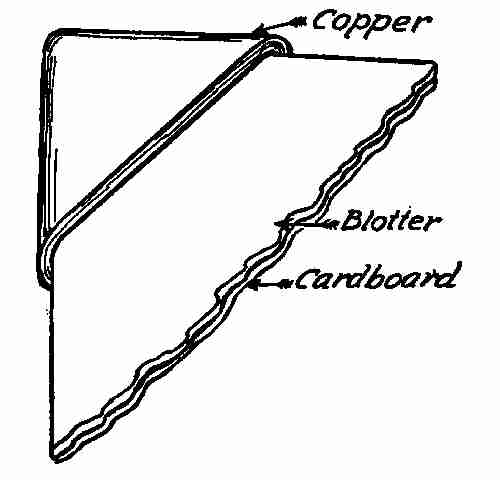
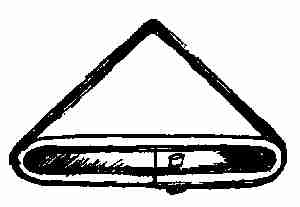
Metal corners made of brass, copper, or silver are found very useful for protecting the corners of blotters upon desks. They keep the corners from curling up and add much to the general appearance of any desk. The designs are many, but for all practical purposes the plain corners seem best, as they are more sanitary.
Material: The pieces of metal 6 × 21⁄2 ins. No. 22.
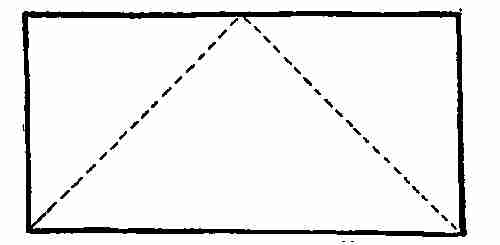
Fold on dotted lines. Corners for blotter
Directions: Mark your copper sheet off like this pattern. Now get a piece of wood, iron, or copper about 3⁄16 in. thick and just the shape of one of these corner designs. This 3⁄16 in. thickness will be about equal to the thickness of your blotter and the thickness of the card-board. Take your copper sheet and bend the ends along the lines marked on the pattern, over the iron or wood form, driving them down to fit the shape well. You now have a triangular piece with an opening on one side. This piece would slide over the corner of a card-board pad usually cut about 24 × 18 ins. Solder the edges together. It is necessary to rivet these corners to the card-board to prevent their slipping off easily. To do this drill a small hole down through the under side close to the edge, slip these corners on the card-board, push the iron form in, and drive the rivet through the hole, through the card-board against the iron plate, thus riveting the corners to the card-board. Take out the iron plate and repeat on the four corners. If designs are to be made on metal, they must be sawed out or pierced while the metal is in the straight piece. Polish free from all roughness. A piece of soft flannel or woollen cloth is glued on the under side of these corners, so that the metal cannot scratch the desk, or any polished surface it rests upon.
BILL FILE
This is a useful article for filing notes or memoranda of things that need immediate attention. There is very little variety in design. The base can be made square, circular, six-sided, etc., and decorated in many ways. It looks well either in copper or brass. Only heavy copper should be used, in order to give weight to the base.
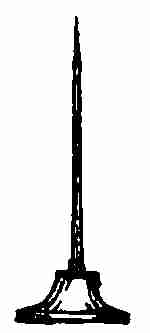
Material: A 31⁄2-in. square of No. 10 copper. Rod of sharpened steel.
Directions: Take a piece of iron 1⁄2 × 21⁄2 × 21⁄2 ins. Go to any scrap heap for this. Place the copper sheet over this block of iron, letting the surplus metal extend evenly all around. Put it into the vise with the corner vertical. Tighten it up and drive the metal over the corner till it touches the sides of the iron. Do this on all the corners. Make the outside of the metal fit tightly over this iron, acting as a shape or form. If the metal should feel springy before driving it up close, anneal it. Notice that in driving these corners down they are longer than the four sides, and they suggest feet. If filed flat and smoothed up you have a square box with a foot on each corner. Take it off the iron form and make the top rounding by driving it over the hollow block. Now drill a 1⁄8-in. hole through the middle. Place the copper rod in the hole and solder with hard solder.