Part 2 — Chapter 14. Information and Reports
Reading edition
It is necessary that patrol leaders and all patrol members be trained in observing and reporting their observations accurately. The leader of a patrol should have all members of the patrol immediately signal or report any information obtained. These reports should not be restricted to information about the enemy, but should also include information about the terrain, such as newly discovered roads, trails, swamps, and streams. The leader includes all information in the report to the officer dispatching the patrol. (Refer to MCRP 2-15.3, Reconnaissance Reports Guide, for detailed report formats.)
14001. REPORTING
The officer dispatching the patrol instructs the patrol leader on whether and when messages are to be sent back during the patrol and what communication means to use. Messages may be oral or written. They must be accurate, clear, and complete. Every message should answer the question what, where, and when. For a detailed discussion on reporting, see paragraph 6002.
Verbal Messages
A patrol leader sending a verbal message should make it simple, brief, and avoid using numbers and names. The messenger should accurately repeat the message back to the patrol leader before leaving.
Written Messages
In preparing written messages, the patrol leader must distinguish between fact and opinion. Information about the enemy should include: strength; armament and equipment; actions; location and direction of movement; unit destination, if known; time enemy was observed; and the patrol’s location when the observation was made. Use of an overlay or sketch may often simplify the message.
Messengers
A messenger team is given exact instructions as to where to deliver the message and the route to take. Any information obtained along the route should be reported at the time the message is delivered. Messengers must be given all practical assistance. If in danger of capture, the messenger immediately destroys the message.
Radio and Signals
If the patrol is provided with a radio, a definite radio schedule for checking in must be arranged before departure of the patrol. The patrol leader takes every precaution to ensure that codes and copies of messages are not captured by the enemy. If a close reconnaissance of enemy lines is required, the radio should be left in a concealed location at a safe distance from the enemy. Once a report is sent by radio, the patrol should immediately leave the area to avoid the possibility of detection by enemy locating devices. Pyrotechnics (flares, colored smoke, grenades) and air-ground panels may also be used by patrols for reporting information by a prearranged signal.
SALUTE Report
Information must be reported as quickly, accurately, and as completely as possible. An established method to remember how and what to report about the enemy is to use the acronym SALUTE:
Size
Activity
Location
Unit
Time
Equipment
An example of such a report is: “Seven enemy soldiers, unit unknown, traveling SW, crossed road junction on BLACK RIDGE at 211300 August carrying one machine gun and one rocket launcher.”
14002. CAPTURED ITEMS
Every patrol should make a practice of searching enemy casualties, prisoners, and installations first for booby traps, then for equipment, papers, maps, messages, orders, diaries, and codes. Search techniques should be practiced often in order to reduce the time exposed to potentially dangerous situations. Items found are collected by the patrol leader and turned in with the patrol report. The items found are marked as to time and place of capture. When possible, captured items should be linked to a specific prisoner who possessed the items or to the place where the items were found. When this is done, the enemy prisoner of war tag and item tag are marked accordingly. The patrol leader must impress upon the members of the patrol the importance of turning in all documents and equipment. Furthermore, the patrol leader must ensure all information gathered by the patrol is quickly disseminated.
14003. PRISONERS
A patrol normally does not capture prisoners unless required by the mission. If prisoners are taken, the “5S and T” rule applies. This memory aid stands for: search, segregate, silence, speed, safeguard, and tag.
Search. Prisoners are body-searched thoroughly for weapons and documents as soon as they have been captured. This search must include the helmet, body armor, and gas mask. These items are left with the prisoner for protection until the patrol is completed. Weapons, equipment, and documents are tagged and immediately sent to the patrol leader.
Segregate. Prisoners are segregated into isolated groups: officers, noncommissioned officers (NCOs), privates, deserters, and civilians. By segregating prisoners, it makes it more difficult for leaders to organize escapes and issue orders to subordinates.
Silence. Silence is essential. Do not allow prisoners to talk to each other.
Speed. Speed is required in getting prisoners to the commander who dispatched the patrol. Timely information secured from prisoners is essential.
Safeguard. Prisoners are safeguarded as they are moved. They are restrained, but not abused. If the patrol will soon reach friendly positions, prisoners are not given cigarettes, food or water until they have been questioned by interrogators. If the patrol will not return to a friendly position for a lengthy time, the prisoners are given food, water and medical aid.
Tag. Equipment and personal effects recovered from prisoners are tagged so that they may later be matched back to specific individuals.
14004. PATROL REPORT
Every patrol leader makes a report when the patrol returns. Unless otherwise directed, the report is made to the person ordering the patrol. If the situation permits, the report is written and supported by overlays and/or sketches. The patrol leader’s report should be a complete account of everything of military importance observed or encountered by the patrol while on the assigned mission. It should include the following information:
• Size and composition of patrol.
• Tasks and purpose (mission).
• Time of departure.
• Time of return.
• Routes, out and back (show by sketch, azimuth, trace on map).
• Terrain (general description to include any man-made or natural obstacles and critical terrain features which, if occupied by either enemy or friendly forces, would allow them to control the surrounding area).
• Enemy (size, activity, location, unit, time, equipment).
• Any map corrections (show on map).
• Miscellaneous information not covered elsewhere in report.
• Results of enemy encounters.
• Condition of patrol, including disposition of any dead or wounded.
• Conclusion and recommendations.
14005. PATROL CRITIQUE
After the patrol has rested and eaten, the patrol leader should hold a critique. Constructive criticism is made. It is an excellent time to prepare for future patrols by going over lessons learned as a result of the patrol.
Appendix A. Patrol Warning Order
The warning order is issued as soon as practical with all available information included to assist patrol members in preparation.
1. Situation. Friendly and enemy situation information necessary for initial preparation.
2. Mission. Statement of what the patrol is to accomplish, and the purpose for accomplishing it. When, how, and where will be discussed in the patrol order.
3. Execution
a. Task Organization. General patrol organization and assignment of responsibilities if known; otherwise, promulgate in the patrol order.
b. Tasks. Alert subordinate leaders to patrol tasks (e.g., stream crossing, helicopter rappelling, demolitions) requiring preparation prior to departure.
c. Coordinating Instructions
(1) Time schedule and location for individual preparation, rest, briefings, inspection, rehearsal, and departure.
(2) Time, place, uniform, and equipment for receiving the patrol order.
(3) Tasks for subordinate leaders to direct and supervise the initial preparation which may include drawing ammunition, rations, and special equipment; conducting immediate action drills or other necessary individual or unit training; meeting and briefing attachment personnel; reconnoitering the area for passage of lines; and coordinating with the necessary unit leaders.
(4) Preliminary guidance to specialists and key individuals regarding their roles and organization within the patrol.
4. Administration and Logistics
a. Individual uniform, equipment, weapons, and prescribed load of rations, water, and ammunition.
b. Crew-served weapons (if required) and guidance regarding distribution of weapons and ammunition during movement.
c. Special equipment requirements (wire cutters, demolitions, radios, flashlights, infrared equipment, mines, binoculars) and their distribution during movement.
d. Restricted or prohibited items.
5. Command and Signal
a. Designation of assistant patrol leader and his role in preparation.
b. Designation of navigators and radio operators (if required).
c. Brief outline of patrol leader’s schedule for preparation, and where he can be reached.
Appendix B. Patrol Order
A patrol order follows a warning order. Any of the following subjects that have been addressed in the warning order may be omitted with the exception of the mission statement. A patrol order is more detailed than a 5-paragraph squad order in that a great deal of attention is given to individual duties.
The patrol order also provides orientation information, both enemy and friendly, that impacts the patrol and enemy forces. This information can include, but is not limited to, weather, terrain, visibility, NBC considerations, local population situation, terrain model and/or map orientation, and behavior.
1. Situation
a. Enemy Forces
(1) Composition, disposition, and strength are based on size, activity, location, unit, time, and equipment (SALUTE).
(2) Capabilities and limitations to defend, reinforce, attack, withdraw, and delay (DRAW-D).
(3) Enemy’s most probable course of action.
b. Friendly Forces
(1) Mission of next higher unit (task and commander’s intent).
(2) Adjacent unit missions (task and intent). Also identify left, front, right, and rear.
c. Attachments and Detachments. (date and time effective).
2. Mission. The mission is the task to be accomplished, and its purpose (who, what, where, when, and why). For patrols, specify if the mission or time has priority.
3. Execution
a. Commander’s Intent and Concept of Operations
(1) Commander’s intent.
(2) The concept of operations tells the where, how, and who and lays out the patrol leader’s general scheme of maneuver and fire support plan. It outlines the following:
(a) Task organization of the patrol.
(b) Movement to the objective area, to include navigation method.
(c) Actions in the objective area.
(d) The return movement, to include navigation method.
(e) Use of supporting forces (including illumination, if required).
b. Subordinate Element Missions. Subordinate element missions (task and purpose) are assigned to elements, teams, and individuals, as required.
c. Coordinating Instructions. This paragraph contains instructions common to two or more elements, coordinating details, and control measures applicable to the patrol as a whole. At a minimum, it includes—
(1) Time of assembly in the assembly area.
(2) Time of inspections and rehearsals (if not already conducted).
(3) Time of departure and estimated time of return.
(4) Location of departure and reentry of friendly lines and the actions associated with departure and reentry.
(5) Details on the primary and alternate routes to and from the objective area.
(6) Details on formations and order of movement.
(7) Rally points and actions at rally points.
(8) Final preparation position and actions at this position.
(9) Objective rally point and actions at this point.
(10) Actions at danger areas.
(11) Actions in the event of enemy contact.
(12) Details on actions in the objective area not covered elsewhere.
(13) Estimated time of patrol debriefing upon return.
4. Administration and Logistics
a. Changes/additions to uniform, equipment, and prescribed loads from that given in the warning order.
b. Instructions for handling wounded and prisoners.
5. Command and Signal
a. Command Relationships. Identify key leaders and chain of command.
b. Signal. Challenge and password, arm and hand signals, special signals, and radio frequencies and call signs.
Appendix C. Patrol Evaluation Checklist
This appendix provides a comprehensive checklist of critical patrolling steps, techniques, and procedures to aid unit leaders to critique patrol performance during training. Unit leaders may use the list as they observe the performance of a patrol to provide the patrol leader with a detailed analysis of the performance.
Warning Order Yes No
Did the PL ensure all patrol members were present before issuing the warning order?
Did the PL issue a brief statement on the enemy situation?
Did the PL issue a brief statement on the friendly situation?
Did the PL state the mission in a clear, positive manner?
Did the PL list all members of the patrol including attachments?
Was the chain of command for the patrol covered fully?
Were all members of the patrol assigned positions and duties in particular squads and teams?
Were all the necessary individual duties assigned?
Did the PL follow established principles in organizing the patrol into squads and teams?
Was each patrol member assigned a particular weapon to carry on patrol?
Did the PL list all special equipment needed to accomplish the mission?
Was required special equipment assigned to the proper element to carry?
Did the PL select uniform and equipment common to all based on METT-T?
Coordination with Adjacent Units
Did the PL coordinate with other patrols operating to the right and left?
Was the route out and back coordinated?
Was the time of departure and return coordinated?
Were call signs and frequencies coordinated?
Was a signal for the FPF coordinated so as not to approach friendly lines during this time?
Coordination With Front Line Units
Did the coordinator pass the size of the patrol?
Was the time of departure and return coordinated?
Did the coordinator give a general area of operations for the patrol?
Did the coordinator ask for information on known or suspected enemy positions and/or obstacles?
Did the coordinator ask about information on the latest enemy activity?
Did the coordinator ask for detailed information on friendly fire support available and the unit’s barrier plan?
Was the location of the IRP established and coordinated?
Did the coordinator ask the forward unit to monitor their patrol frequency?
Was the current challenge and password confirmed?
Did the coordinator request that all information coordinated be passed on to any relieving unit?
Patrol Order
General
Did the PL check to ensure all patrol members were present before issuing the patrol order?
Did the PL issue the patrol order in a forceful, confident manner?
Did the PL make maximum use of available visual aids in issuing the patrol order (i.e., terrain model, sand table, map board, chalkboard)?
Did the PL issue the patrol order in correct sequence?
Did the PL issue the entire patrol order without allowing interruptions by patrol members?
Did the PL adequately answer all questions asked by patrol members?
Did paragraph 1a (Enemy Situation) include—
A weather forecast for the period of operation?
A description of the terrain over which the patrol was to operate?
Identification or description of enemy units known to be in the area of operations?
Known locations of enemy units?
Recent activity of enemy units?
Strength of enemy units in the operating area?
Did paragraph 1b (Friendly Situation) include—
Mission of the next higher unit?
Locations, missions, and planned actions of units on right and left?
Fire support available to support the patrol (as per the coordination)?
Missions and routes of other patrols operating in the immediate area?
Did paragraph 1c (Commander’s Intent) include—
All views and ideas of what the commander wants to be accomplished?
The final result desired by the commander?
Did paragraph 1c (Attachments and Detachments) include—
All attachments to patrol and effective time of attachment?
All detachments from patrol and effective time of detachment?
Did paragraph 2 (Mission) include, at a minimum—
Who was to conduct the patrol?
What the patrol was tasked to do (i.e., conduct a point recon patrol)?
Where the action was to take place?
Why the action was to take place (i.e., the purpose)?
Did paragraph 3a (Commander’s Intent and Concept of Operations) include—
A complete concept of operations?
A detailed description of the mission of elements?
A detailed description of the mission of teams?
A detailed description of the duties of specific individuals (i.e., navigator, compass man, pace man, corpsman, APL)?
Time of departure and time of return?
Type of formations and order of movement to be used?
Description of the route and alternate routes(s) to include azimuths and distances between checkpoints as a minimum?
Techniques to be used in the departure from friendly areas?
Techniques to be used for the reentry into friendly areas?
Location of the IRP and a tentative ORP, to include grid coordinates and recognizable terrain features?
Method for designating and passing rally points?
Actions to be taken at rally points if their use became necessary?
Actions to be taken in the event of enemy contact?
Actions to be taken at danger areas?
Complete, detailed description of actions to be taken at the objective?
Times and locations for rehearsals and the order of priority for rehearsals?
Times and locations for inspections and the methods of conduct (to include uniform and equipment to be worn and/or carried)?
Where, when, and by whom the debriefing is to be conducted?
Did paragraph 4 (Administration and Logistics) include—
Rations to be carried or reference to the warning order if there is no change?
Arms and ammunition to be carried or reference to the warning order if there is no change?
Uniform and equipment to be worn and carried or reference to the warning order if there is no change?
Method for handling wounded or dead?
Method for handling prisoners?
Did paragraph 5a (Signal) include—
Complete description of all signals, code words, frequencies, and call signs to be used within the patrol?
Were signals adequate?
Radio call signs to be used?
Primary and alternate frequencies to be used?
Call signs and frequencies to be used with other units in the area of operations (if applicable)?
Required reports to be transmitted to higher headquarters, along with occasions for reporting?
Code words and brevity codes to be used between the patrol and higher headquarters?
Current challenge and password to be used in friendly held areas?
Current challenge and password to be used forward of FEBA?
Did paragraph 5b (Command) include—
Chain of command or reference to the warning order if there is no change?
Location of the PL during all stages of operation?
Location of the APL during all stages of operation?
Inspection Rehearsal
General
Did the PL adequately use the allotted inspection time?
Was the inspection conducted in an orderly manner?
During the inspection, did the PL check the following:
Completeness and correctness of uniform?
Completeness of all equipment necessary to accomplish the mission?
Operational condition of equipment?
Did the PL question members to ensure they knew—
The mission of the patrol?
The concept of operations?
Their individual duties and responsibilities?
Chain of command and succession?
Duties and responsibilities of key personnel?
Did the PL utilize the rehearsal area to conform as much as possible to area of operations?
Were the following major actions rehearsed:
Actions at the objective?
Actions at danger areas?
Actions on enemy contacts?
Departure and reentry of friendly lines?
Did the PL critique each action after it had been rehearsed?
Were interpatrol communications and control measures checked at rehearsal?
Did the PL maintain control of the patrol during the rehearsal?
Movement
Did the PL use proper formations for movement?
Did the PL adequately control the point team?
Did the PL check the compass men?
Was the PL aware of his position at all times?
Was light and noise discipline enforced?
Was the rate of movement appropriate for the mission?
Did the PL make full use of pace?
Did the PL make full use of count?
Was proper security maintained during movement?
Did the PL select and pass proper rallying points?
Did the PL ensure that all members knew location of rallying points?
Did the PL properly use arm and hand signals?
Did the PL recognize and halt the patrol a safe distance from a danger area?
If the PL conducted a map check, did he conduct it properly (light discipline, security, etc.)
Did designated individuals reconnoiter the far side of a danger area properly?
Were support teams emplaced properly?
Did the PL use a proper formation in crossing the danger area?
Were reports made on enemy contact and at checkpoints?
Actions on Enemy Contact
Did the PL halt patrol a safe distance from a tentative ORP?
Did the PL issue an adequate frag order before departing to look for a tentative ORP?
Did the PL take appropriate personnel to look for the ORP?
Did the PL select a suitable ORP?
Did the PL secure the site adequately?
Did the patrol occupy the ORP as stated in the patrol order or subsequent frag order?
Did the patrol occupy the ORP in an orderly manner?
Did the PL maintain control of the patrol during occupation of the ORP?
Did the PL issue a satisfactory contingency plan to the APL before departing on a leader’s recon?
Did the PL take appropriate personnel on a leader’s recon?
Did the PL maintain or ensure that the patrol leader had communications with the patrol?
Did the patrol avoid being detected by the enemy during the leader’s recon?
If contact was made, did the PL take appropriate action?
Was security maintained during the leader’s recon?
Did the PL ensure the objective was kept under surveillance?
Were appropriate orders given to surveillance teams?
If a leader recon proved a tentative ORP unsuitable, did the PL move the ORP?
Was a satisfactory leader’s recon conducted?
Was the ORP move conducted in a satisfactory and orderly manner?
On return to the ORP, did the PL issue appropriate frag order and allow enough time for dissemination?
Actions at Objective
Did the PL issue a frag order for action at the objective?
Was security emplaced prior to the teams departing from the ORP?
Did the PL employ the terrain at the objective to the best advantage?
Was stealth maintained while moving into the objective?
Did the PL exercise positive control of squads, teams, and individuals at the objective?
Were actions at the objective in accordance with the details outlined in the patrol order?
Did the PL make use of supporting arms at the objective?
Was the action at the objective successful?
Was withdrawal from the objective accomplished quickly and orderly?
Did units withdraw according to the details reflected in the patrol order?
Was reorganization at the ORP completed in an expeditious and orderly manner?
Did the patrol withdraw from the ORP quickly and quietly?
Appendix D. Ambush Formations
Formations discussed here are identified by names which correspond to the general pattern formed on the ground by deployment of the assault element.
Line Formation
The assault element is deployed generally parallel to the route of movement of the enemy. This positions the assault element parallel to the long axis of the killing zone and subjects the target to heavy flanking fire. The size of the force which can be trapped in the killing zone is limited by the area the assault element can effectively cover. The enemy is trapped in the killing zone by natural obstacles, mines, demolitions, and direct fires. (See fig. D-1.)
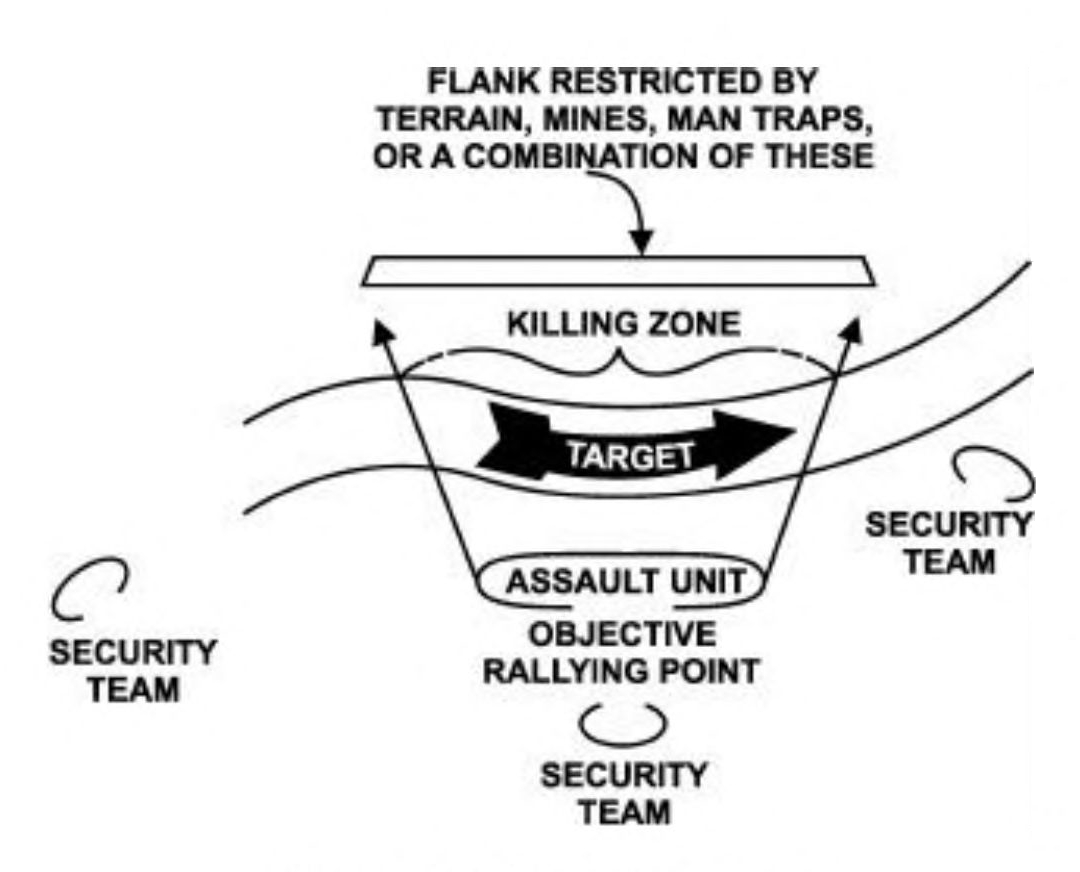
Figure D-1. Line Formation
(Harassing or Destruction Ambush).
A disadvantage of the line formation is the chance that lateral dispersion of the target may be too great for effective coverage. The line formation is appropriate in close terrain that restricts enemy maneuver, and in open terrain where one flank is protected by natural obstacles or can be protected by mines and demolitions. Similar obstacles can be placed between the attack force and the killing zone to provide protection from possible enemy counter attack. When an ambush is deployed in this manner, access lanes are left so that the enemy can be assaulted. (See fig. D-2.)
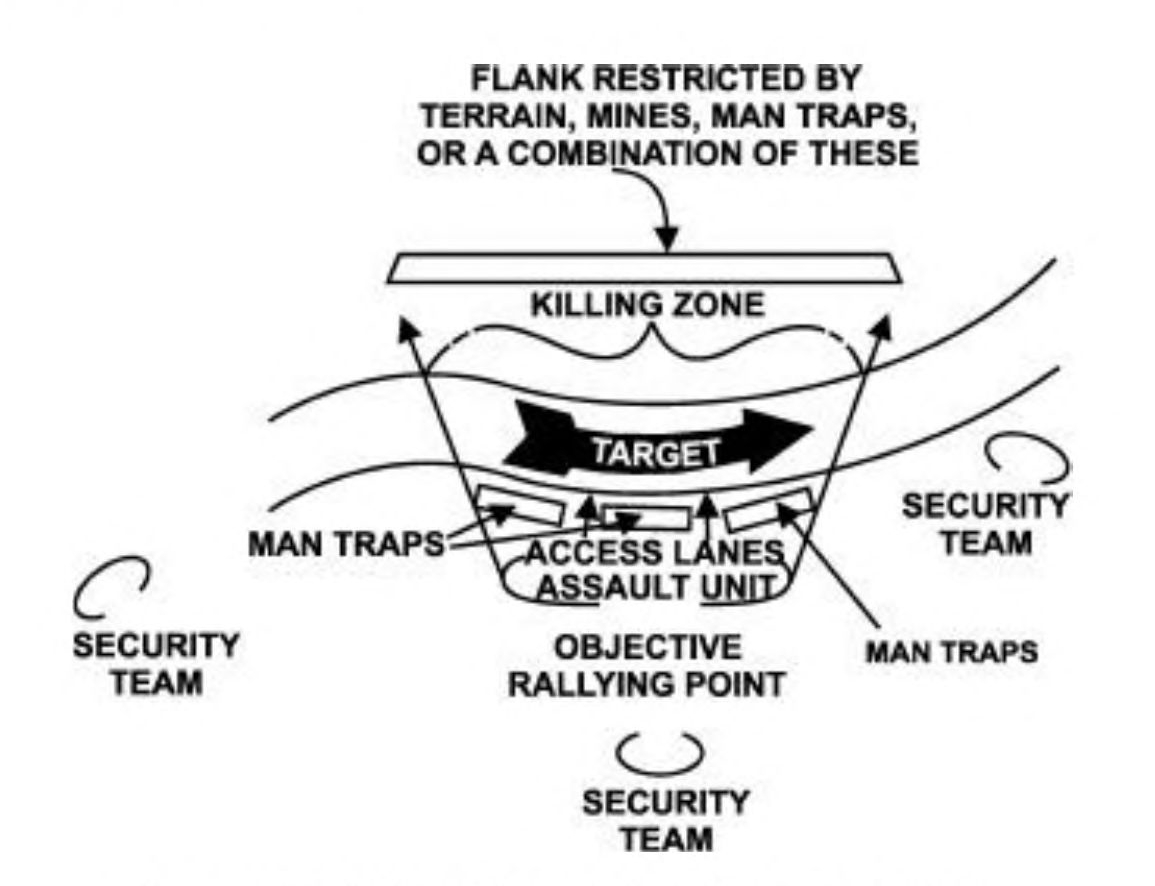
Figure D-2. Line Formation (Access Lanes for Assault of Target).
The main advantage of the line formation is its relative ease of control under all conditions of visibility.
L Formation
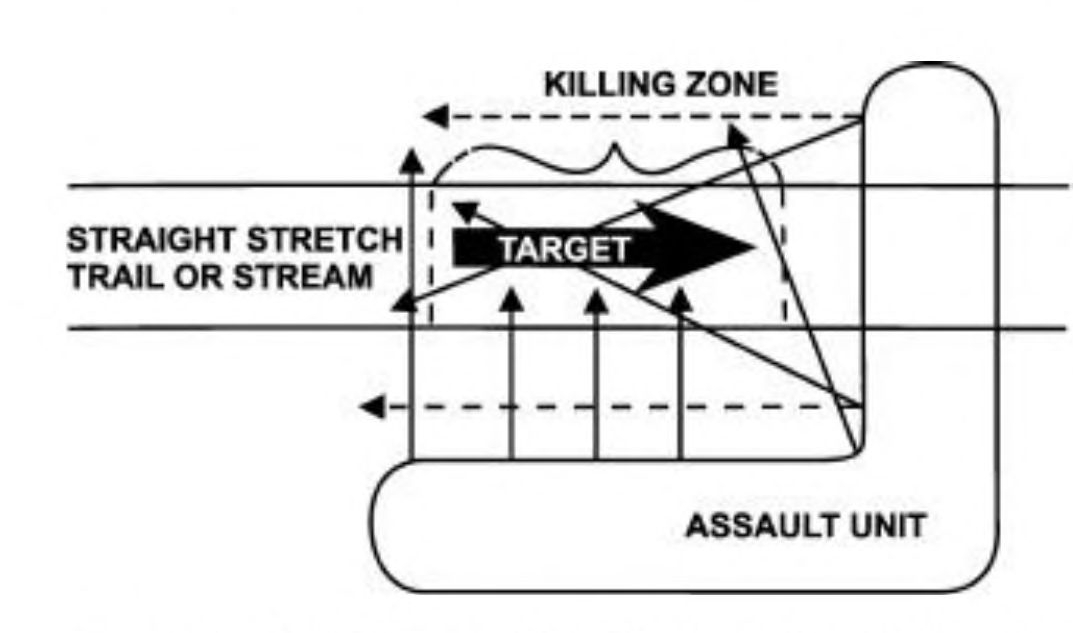
Figure D-3. “L” Formation (Destruction Ambush).
The “L” shaped formation is a variation of the line formation. This formation is very flexible because it can be established on a straight stretch of a trail or road (see fig. D-3) or at a sharp bend in a trail or a road (See fig. D-4 on page D-2). The long side of the assault element is parallel to the killing zone and delivers flanking fire. The short side of the attack force is at the end of, and at right angles to, the killing zone and delivers enfilading fire that interlocks with fire from the long side. When appropriate, fire from the short side can be shifted to parallel the long side if the enemy attempts to assault or escape in the opposite direction. In addition, the short side prevents escape and reinforcement. (See fig. D-5.)
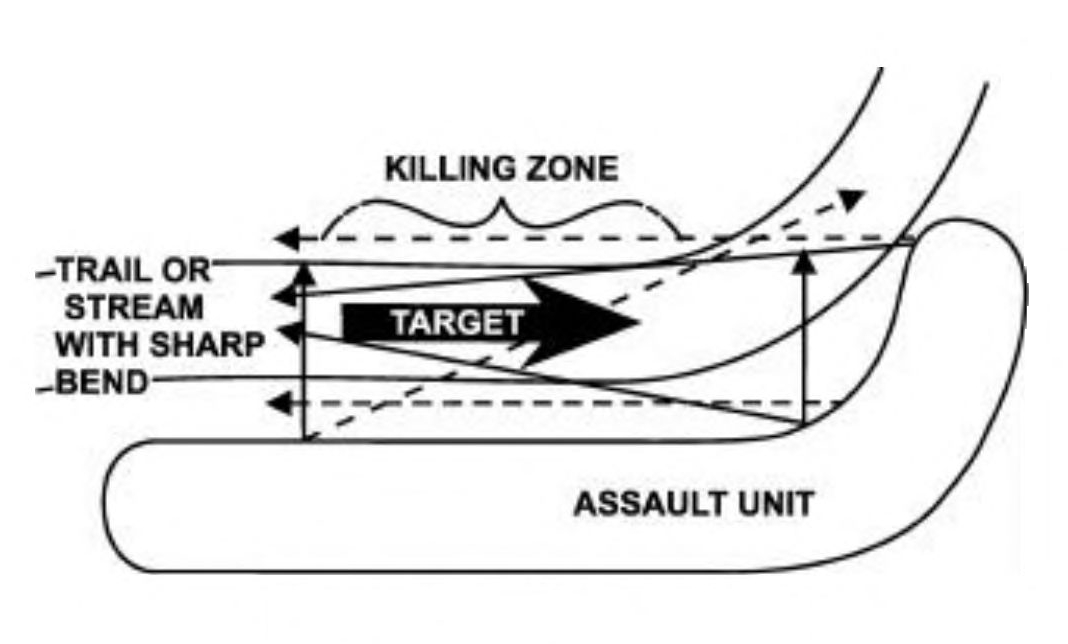
Figure D-4. “L” Formation
(Bend of Trail or Stream).
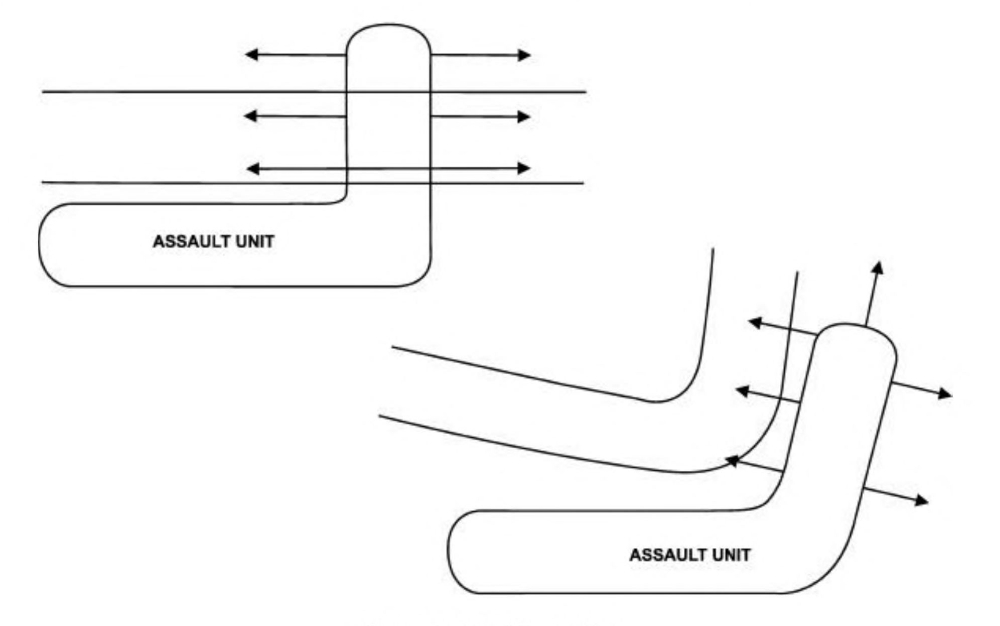
Figure D-5. “L” Formation.
“Z” Formation
The “Z” shaped formation is another variation of the line formation.
The assault element is deployed as in the “L” formation, but with an additional side so that the formation resembles a “Z”. (See fig. D-6).
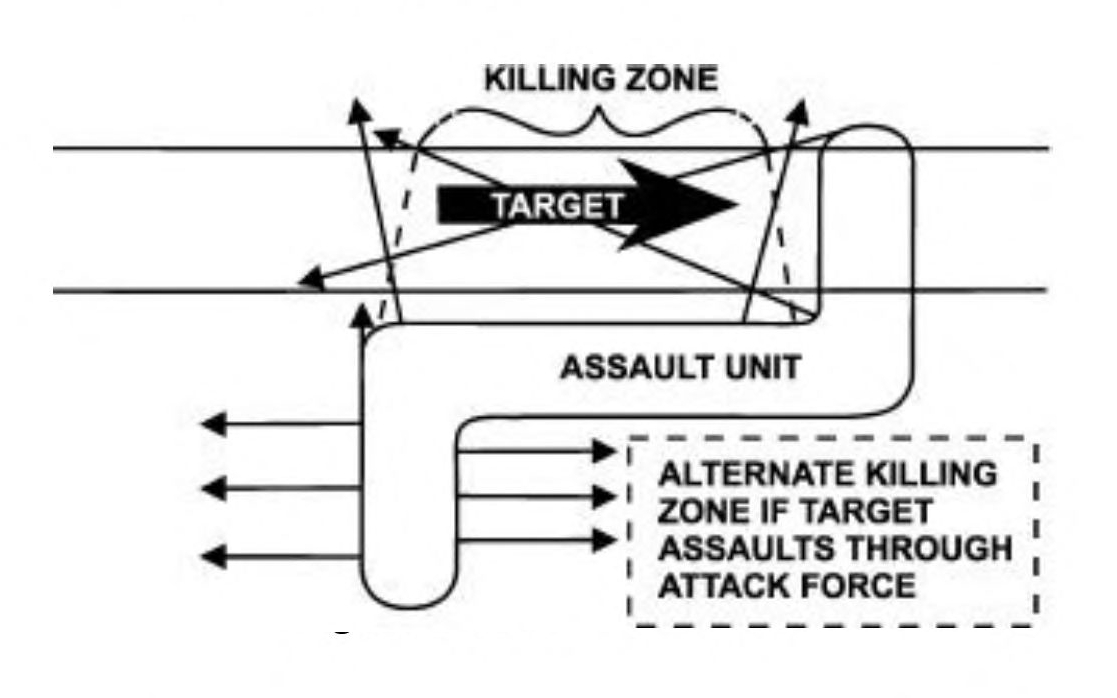
Figure D-6. “Z” Formation.
The additional wing may serve any of the following purposes:
• To engage an enemy force attempting to relieve or reinforce the enemy unit engaged in the kill zone.
• To seal the end of the killing zone.
• To restrict a flank.
• To prevent an envelopment.
“T” Formation
In the “T” shaped formation, the assault element is deployed across (perpendicular to) the enemy’s route of movement so that its position forms the crossing of a “T” at the top. (See fig. D-7.)
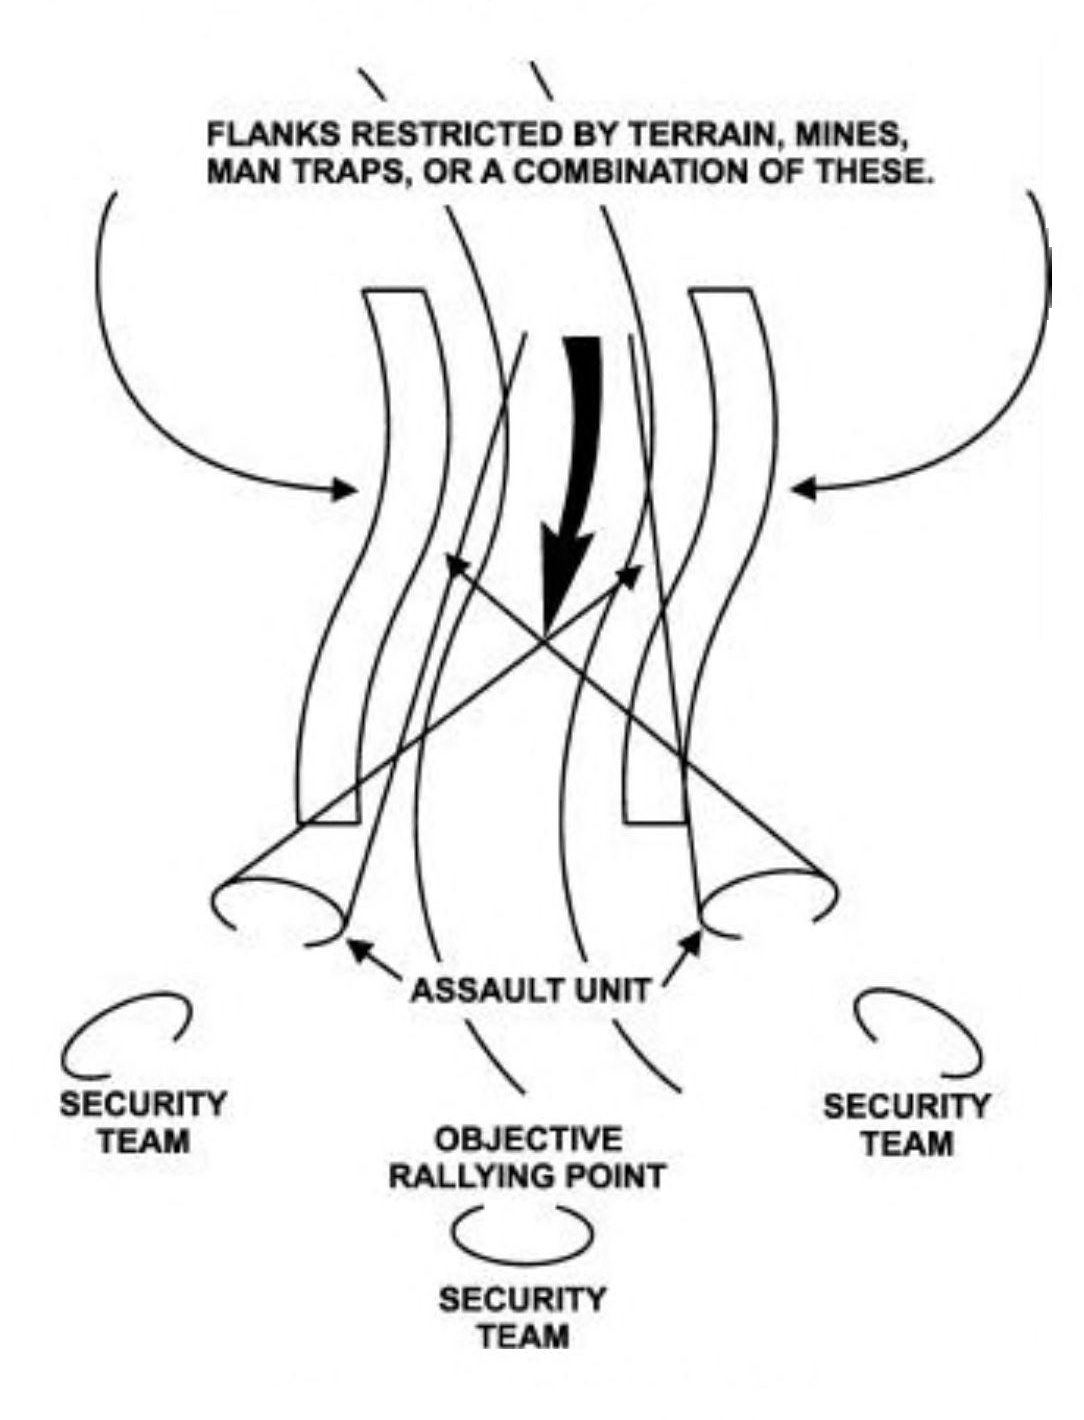
Figure D-7. “T” Formation.
This formation can be used day or night to establish an ambush to interdict movement through open areas that are hard to seal off.
A small force can use the “T” formation to harass, slow, and disorganize a larger force. When the lead elements of the enemy are engaged, they will normally attempt to maneuver right or left to close with the ambush. Mines and other obstacles placed to the flanks of the killing zones slow the enemy’s movements and permit the ambush force to deliver heavy fire and withdraw without becoming decisively engaged.
The “T” formation can be used to interdict small groups attempting night movement across open areas. For example, the assault element is deployed along an avenue of approach with every second man facing the opposite direction. The attack of the enemy approaching from either direction requires only that every second man may shift to the opposite side of the formation. Each man fires only to his front and only when the enemy is at a very close range. Attack is by fire only and each man keeps the enemy under fire as long as it remains to his front.
If the enemy attempts to escape in either direction along the killing zone, each Marine takes the enemy under fire as the enemy comes into the Marine’s sector of fire. The “T” formation is very effective at halting infiltration. But it has one chief disadvantage; there is a possibility that the ambush will engage a superior force at night while spread out. (See fig. D-8.)
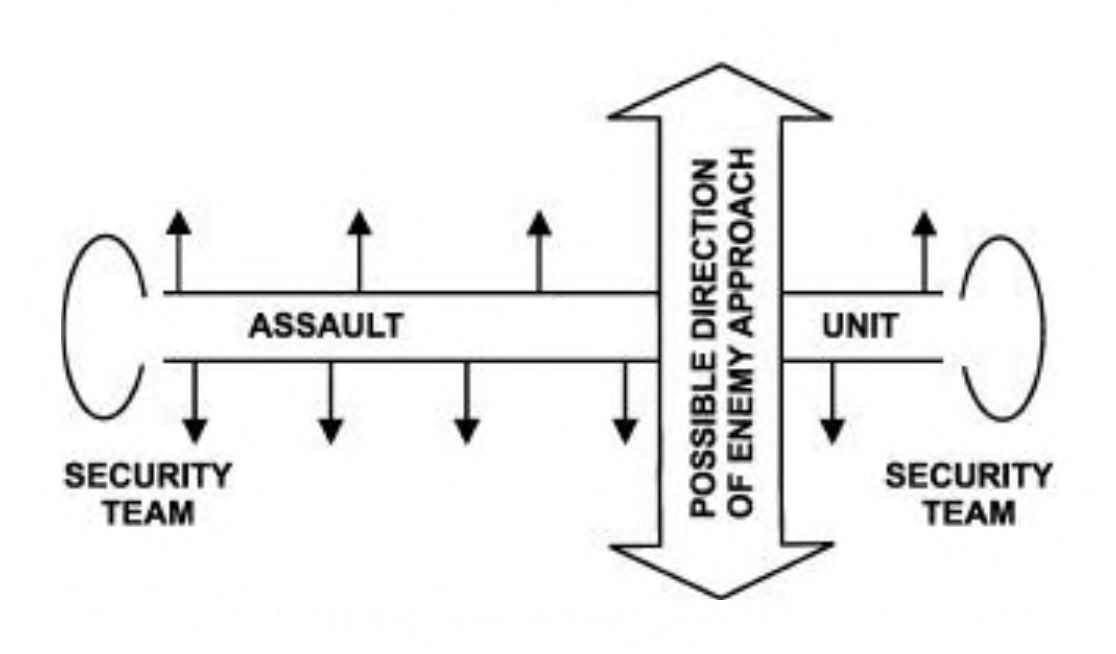
Figure D-8. “T” Formation (Target Approaching from Either Direction).
The “V” Formation
The “V” shaped formation is deployed along both sides of the enemy’s route of movement so that it forms a “V”; care is taken to ensure that neither group (within the “V”) fires into the other.
This formation subjects the enemy to both enfilading and interlocking fire. The “V” formation is best suited for fairly open terrain but can also be used in close terrain. When established in close terrain, the legs of the “V” close in as the lead element of the enemy force approaches the apex of the “V”, and opens fire at a close range.
Here, even more than in open terrain, all movement and fire must be carefully coordinated and controlled to ensure that the fire of one wing does not endanger the other wing. The wider separation of forces makes this formation difficult to control, and there are few sites that favor its use. Its main advantage is that it is difficult for the enemy to detect the ambush until it is well into the killing zone. (See figs. D-9 and D-10.)
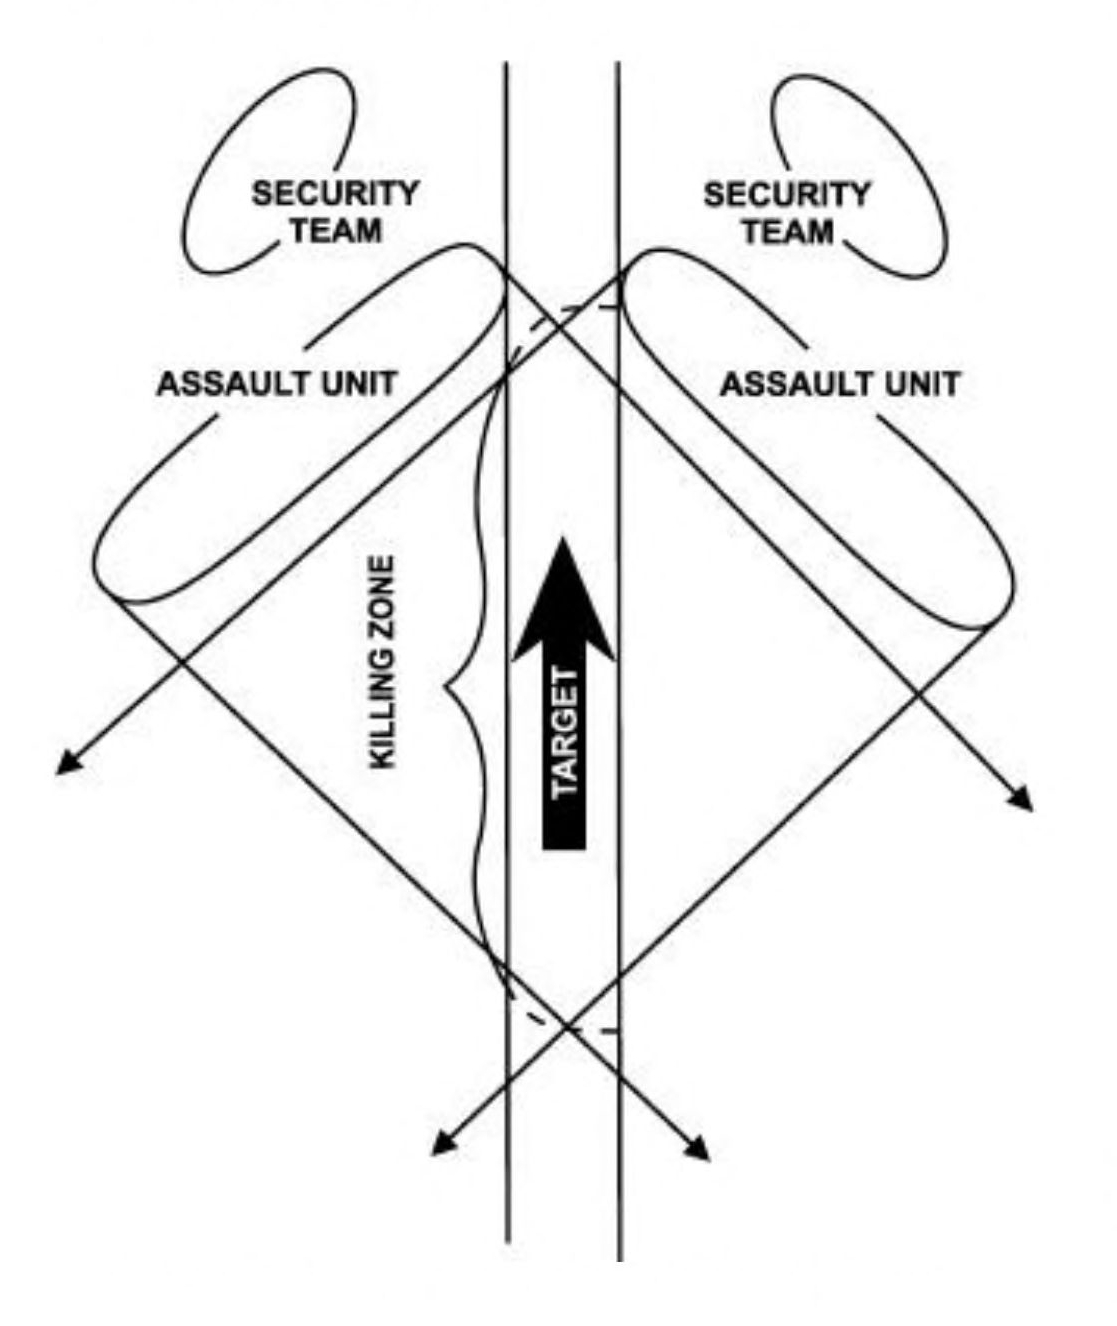
Figure D-9. “V” Formation (Open Terrain).
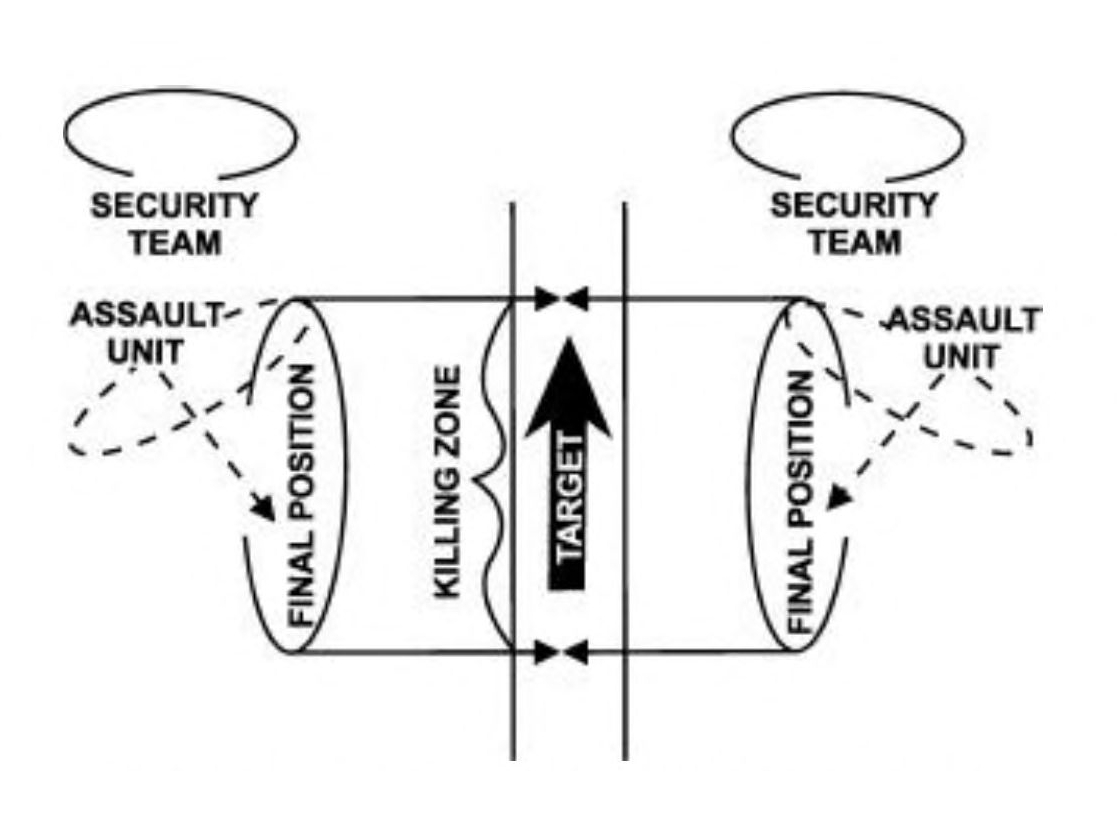
Figure D-10. “V” Formation (Close Terrain).
Triangle Formation
The triangle is a variation of the “V” formation and can be varied in three ways:
Closed Triangle Formation
(See fig. D-11.) The assault element is deployed in three teams, positioned so that they form a triangle (or closed “V”). An automatic weapon is placed at each point of the triangle and positioned so that it can be shifted quickly to interlock with either of the others. Men are positioned so that their sectors of fire overlap. Mortars may be positioned inside the triangle.
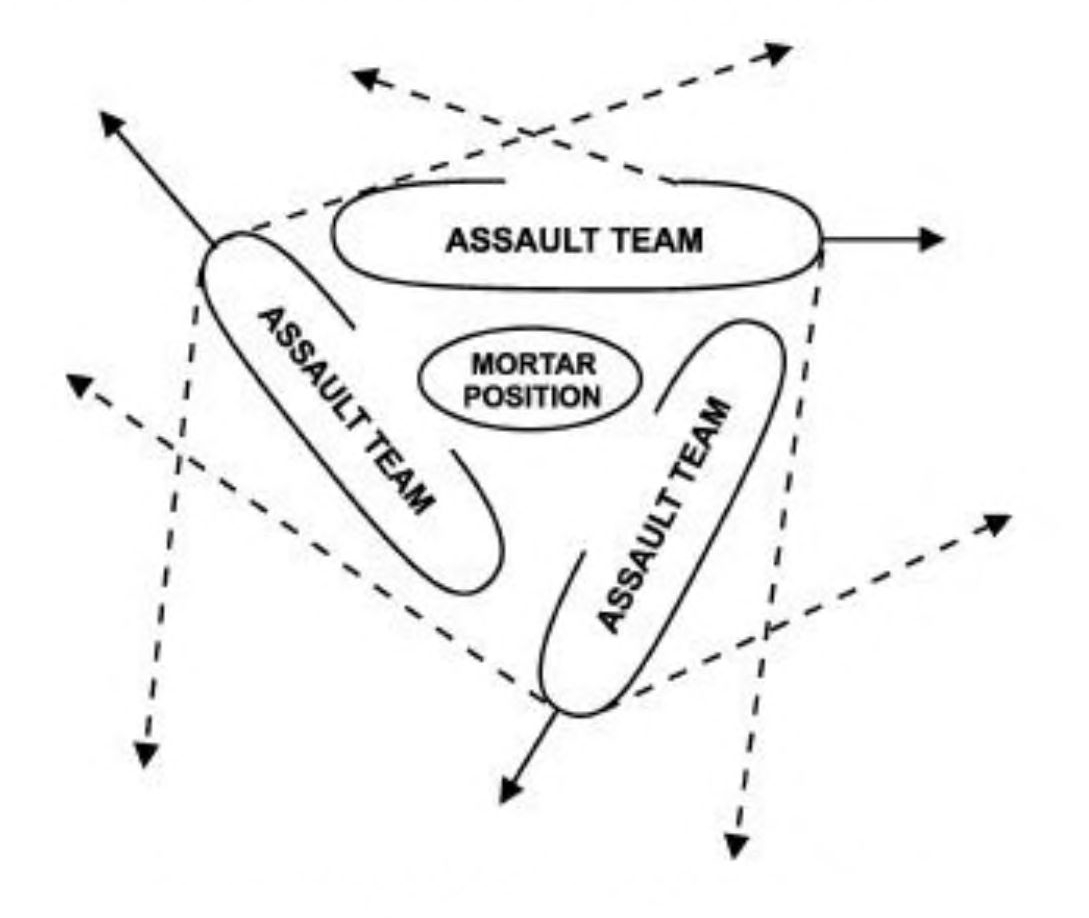
Figure D-11. Closed Triangle Formation (Night Ambush).
When deployed in this manner, the triangle ambush is used to interdict night movement through open areas. When enemy approach is likely to be from any direction, this formation provides all-around security, and security forces are deployed only when they can be positioned so that if detected by an approaching enemy, they will not compromise the ambush. Attack is by fire only, and the enemy is allowed to approach within close range before fire is initiated.
The advantages of the closed triangle formation are ease of control, all-around security, and the enemy can be brought under the fire of at least two automatic weapons, regardless of the direction they approach.
Disadvantages are that it requires a force of platoon size or larger to reduce the danger of being overrun by an unexpectedly large force and that one or more sides of the triangle may come under enfilade fire. The lack of dispersion, particularly at the points, increases the danger from enemy mortar fire.
Open Triangle Harassing Formation
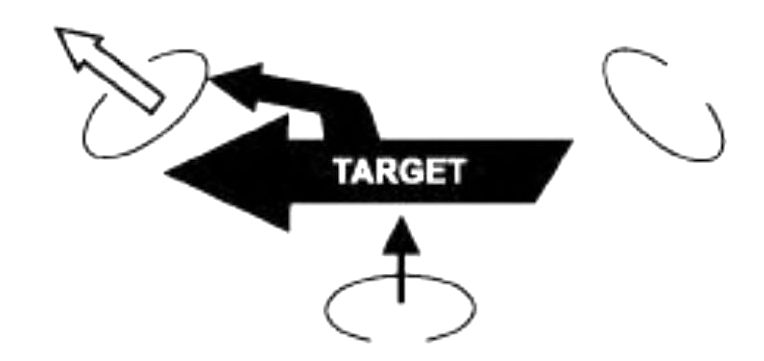
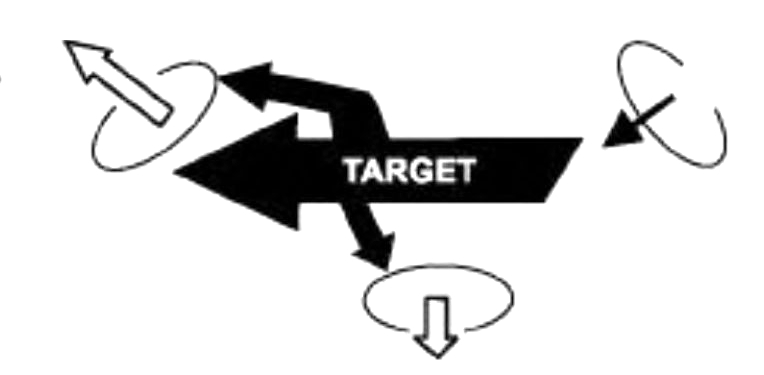
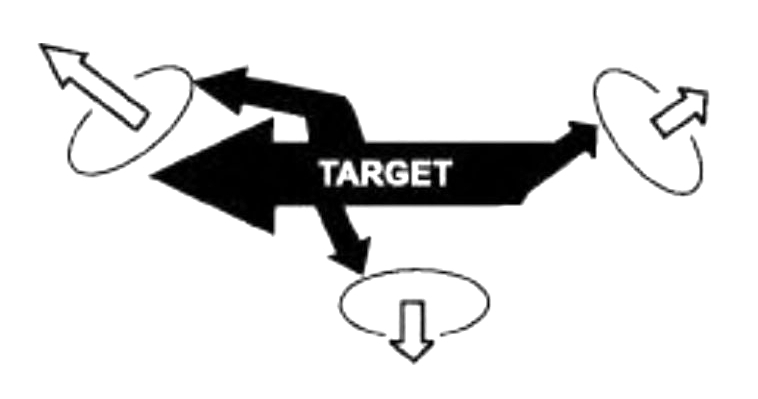
This variation of the triangle ambush enables a small force to harass, slow, and inflict heavy casualties upon a large force without itself being decisively engaged. The assault element is deployed in three teams, positioned so that each team becomes a corner of a triangle containing the killing zone. (See fig. D-12.)
TARGET IS THINLY SURROUNDED. FIRST TEAM OPENS FIRE.
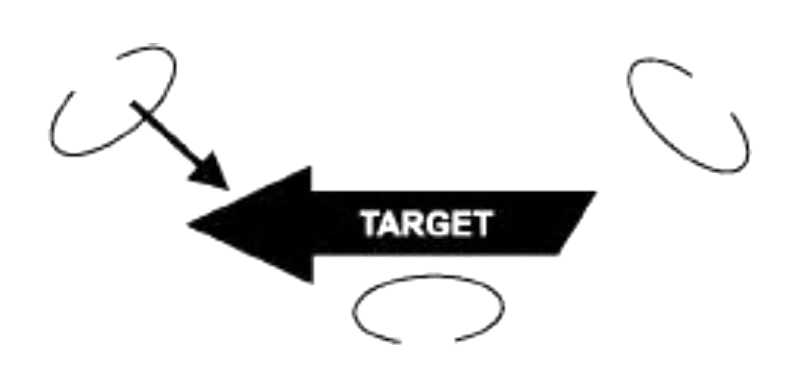
TARGET ATTACKS. TEAM WITHDRAWS. SECOND GROUP OPENS FIRE.
TARGET SHIFTS ATTACK. SECOND GROUP WITHDRAWS. THIRD TEAM OPENS FIRE.
TARGET SHIFTS ATTACK. THIRD TEAM WITHDRAWS.
TARGET IS PULLED APART. SUFFERS LOSSES, BUT AMBUSH FORCES NOT DECISIVELY ENGAGED.
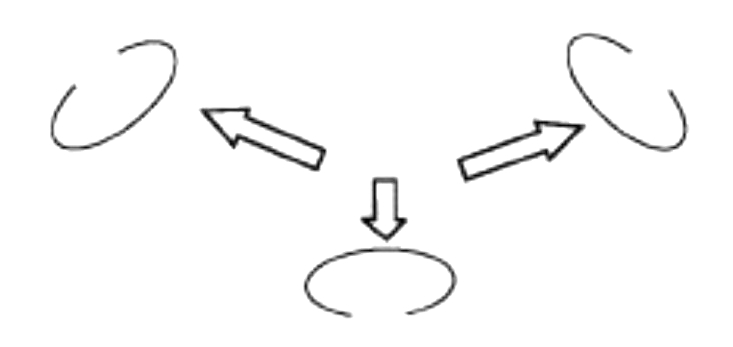
Figure D-12. Open Triangle Formation.
When the enemy enters the killing zone, the team to the enemy’s front opens fire on the leading element. When the enemy counterattacks, the group withdraws and the team on the enemy’s flank opens fire. When this team is attacked, the team to the opposite flank opens fire. This process is repeated until the enemy is pulled apart. Each team reoccupies its position, if possible, and continues to inflict the maximum damage possible without becoming decisively engaged.
Open Triangle Destruction Formation
The assault element is again deployed in three teams, positioned so that each team is a point of the triangle, 200 to 300 meters apart. The killing zone is the area within the triangle. The enemy is allowed to enter the killing zone; the nearest team attacks by fire. As the enemy attempts to maneuver or withdraw, the other teams open fire. One or more teams, as directed, assault or maneuver to envelop or destroy the enemy. (See fig. D-13 on page D-6.)
200–300 METERS BETWEEN TEAMS.
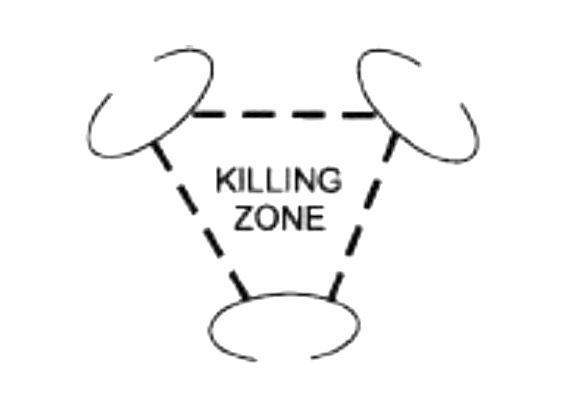
TARGET ENTERS KILLING ZONE. NEAREST TEAM OPENS FIRE.
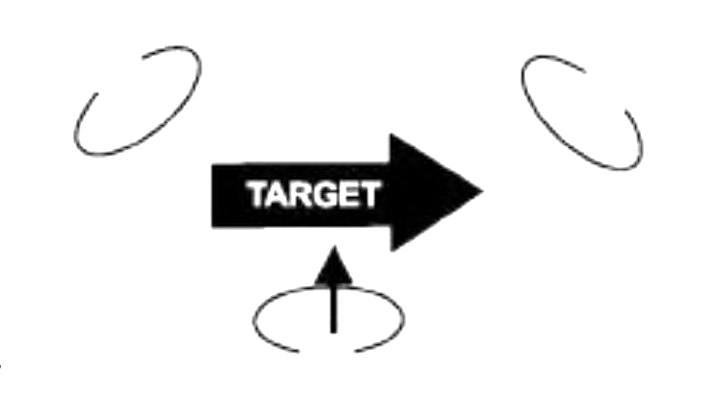
TARGET ATTEMPTS TO MANEUVER OR ESCAPE. NEAREST TEAM OPENS FIRE.
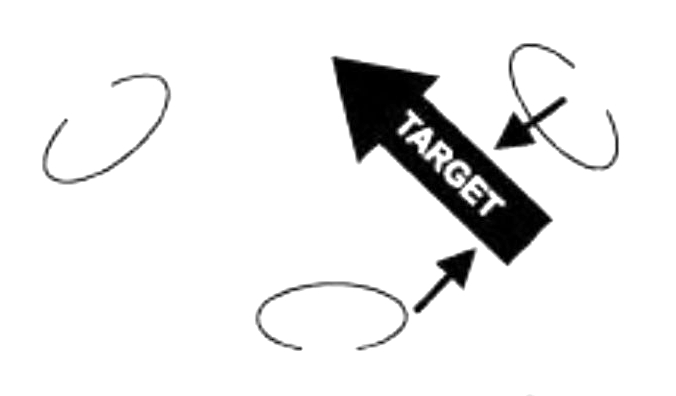
EACH TEAM ATTACKS AS THE TARGET ATTEMPTS TO MANEUVER OR ESCAPES.
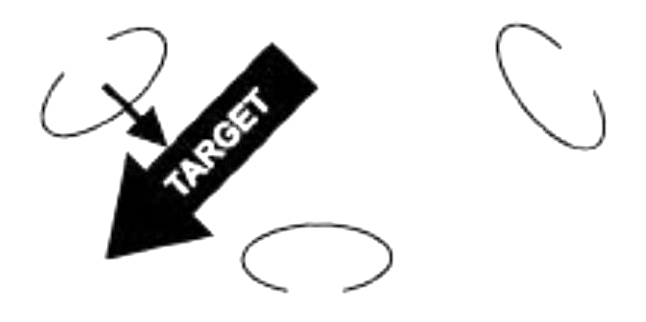
ONE OR MORE TEAMS MAY ASSAULT TO ENVELOP OR DESTROY THE TARGET.
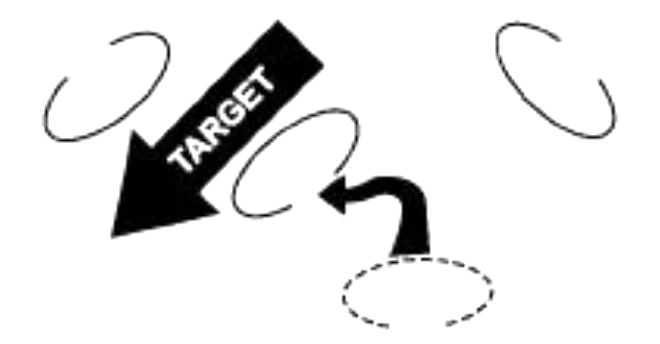
Figure D-13. Open Triangle Formation (Destruction Ambush).
This formation is suitable for platoon-size or larger ambush forces. A smaller force would be in too great a danger of being overrun. Another disadvantage is that control, in assaulting or maneuvering, is very difficult. Very close coordination and control are necessary to ensure that assaulting or maneuvering teams are not fired on by another team. The ambush site must be a fairly level open area that provides concealment around its border for the ambush force.
The Box Formation
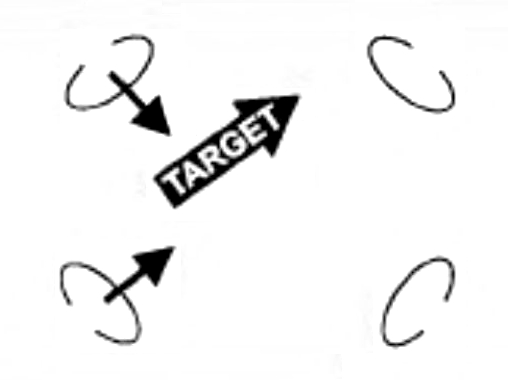
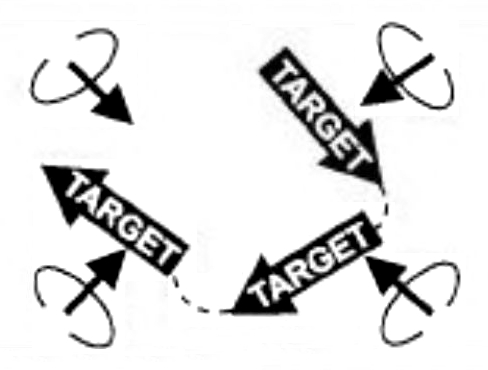
The “box” formation is similar in purpose to the open triangle ambush. The assault element is deployed in four teams, positioned so that each team becomes a corner of a square or rectangle containing the killing zone. It can be used for a harassing or destruction ambush in the same manner as the variations of the open triangle formation. (See figs. D-14 on page D-7 and D-15 on page D-8.)
TARGET IS THINLY SURROUNDED, ONE TEAM OPENS FIRE.
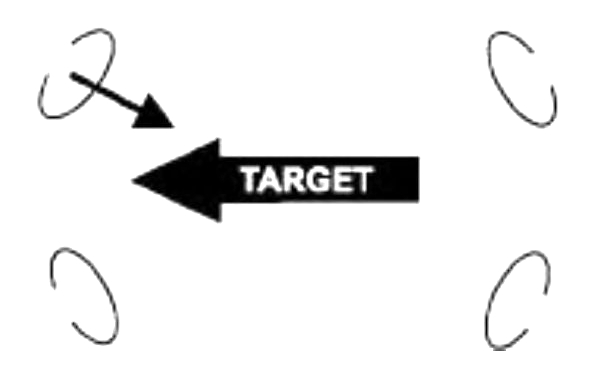
TARGET ATTACKS, TEAM WITHDRAWS. A REAR TEAM OPENS FIRE.
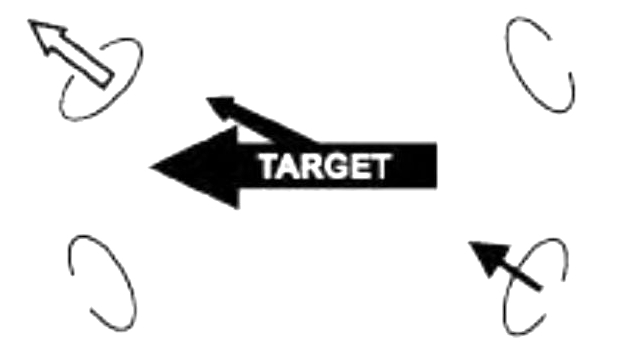
TARGET SHIFTS ATTACK. TEAM WITHDRAWS. SECOND FORWARD TEAM OPENS FIRE.
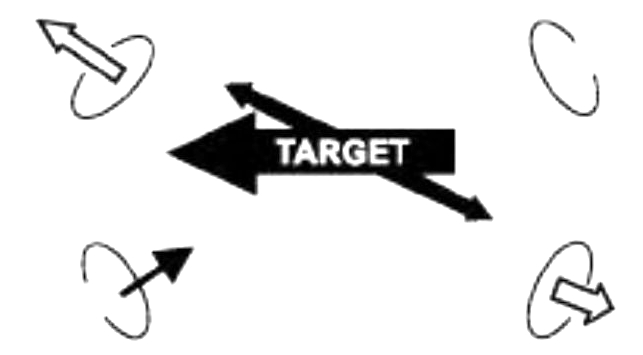
TARGET AGAIN SHIFTS ATTACK. TEAM WITHDRAWS. SECOND REAR TEAM OPENS FIRE.
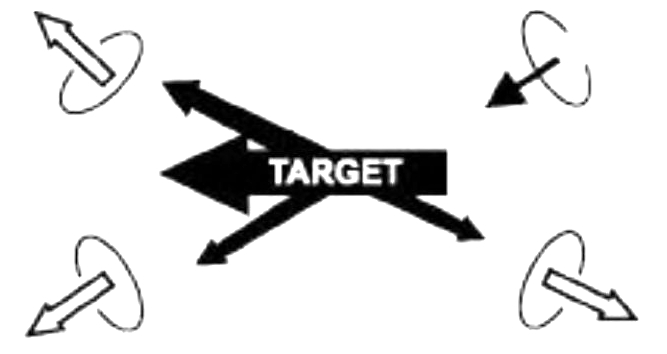
TARGET ATTACKS AND IS PULLED APART. SUFFERS LOSSES. AMBUSH FORCES NOT DECISIVELY ENGAGED.
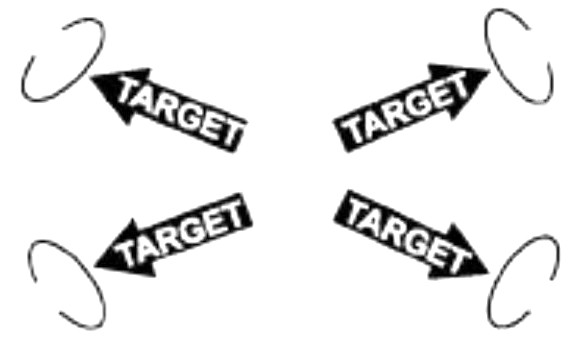
Figure D-14. Box Formation (Harassing Ambush).
200-300 METERS BETWEEN TEAMS.
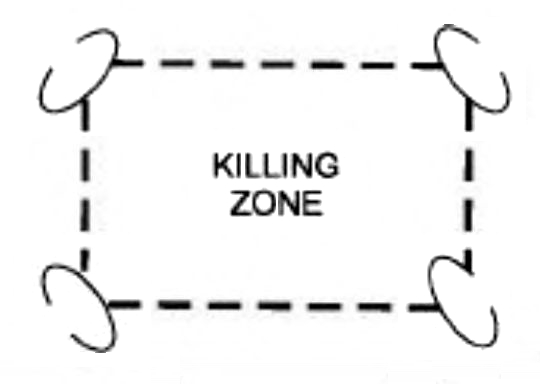
TARGET ENTERS KILLING ZONE. NEAREST TEAM OPENS FIRE.
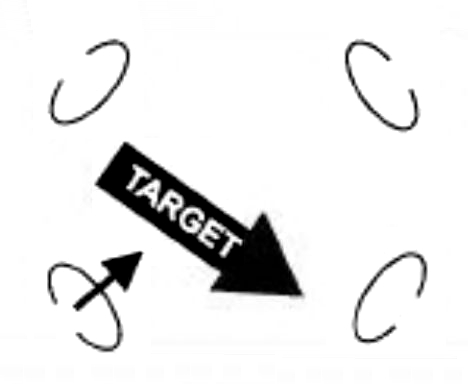
TARGET ATTEMPTS TO MANEUVER OR ESCAPE. NEAREST TEAM OPENS FIRE.
SUCCESSIVE TEAMS ATTACK AS TARGET ATTEMPTS TO MANEUVER OR ESCAPE.
ONE OR MORE TEAMS MAY ASSAULT TO ENVELOP OR DESTROY THE TARGET.
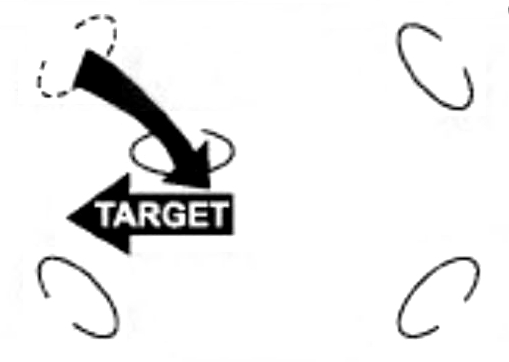
Figure D-15. Box Formation (Destruction Ambush).
Appendix E. Acronyms
A&S assault and security
CIT counterintelligence team
EOD explosive ordnance disposal
ITT interrogator-translator team
MAGTF Marine air-ground task force
MEDEVAC medical evacuation
METT-T mission, enemy, terrain and weather, troops and support available
NBC nuclear, biological, chemical
NCO noncommissioned officer
OTL overserver-target line
RCA riot control agents
ROE rules of engagement
SMAW shoulder-launched multipurpose assault weapon
SMEAC situation, mission, execution, administration and logistics, and command and signal
SOP standing operating procedures
SPOTREP spot report
TTP tactics, techniques, and procedures
Appendix F. References
Joint Publication (JP)
1-02 DOD Dictionary of Military and Associated Terms
Fleet Marine Force Manual (FMFM)
6-5 Marine Rifle Squad (proposed MCWP 3-11.2)
Marine Corps Warfighting Publications (MCWP)
3-15.3 Scout Sniping (under development)
3-35.3 Military Operations on Urbanized Terrain (MOUT)
3-41.2 Raids (under development)
Marine Corps Reference Publications (MCRP)
2-15.3A Reconnaissance Patrol Leader’s Planning Handbook (under development)
2-15.3B Reconnaissance Reports Guide
3-02C Water Survival Handbook (under development, currently exists as Fleet Marine Force Manual 0-13)
5-12A Operational Terms and Graphics
5-12C Marine Corps Supplement to the DOD Dictionary of Military and Associated Terms