PART II.
Reading edition
How to Decorate Furniture with Stencilling.
The idea of decorating your own furniture seems to be an extraordinary thing to many readers, and yet I hope to show you that this much to be desired consummation is quite within your reach. In the former article I gave as an illustration a portion of a chiffonier I decorated with stencilling, as can be seen by referring to it, which, by the way, is reproduced from a full-size design which was actually stencilled with the same stencils as I used on the chiffonier. Stencilling is a very simple business indeed if you will take ordinary care. Indeed the mere getting of an impression is a mechanical matter, as can be seen by the way packers mark boxes with stencils of letters. The art is seen in the way you colour the patterns and the use you make of your stencils, for with some four or five stencil plates, as I shall hope to show later, many combinations are possible; you can evolve new patterns as it were by taking a portion of one and combining it with a portion of another.
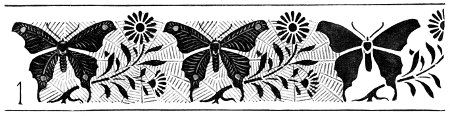
Fig. 1. Stencilled border of butterflies and sprigs with background, suggested by a spider's web. For details see Figs. 1B and 1C.
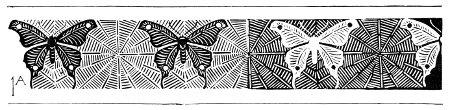
Fig. 1A. The right-hand half is white on black ground, the reverse of the left-hand half. For details see Figs. 1B and 1C.
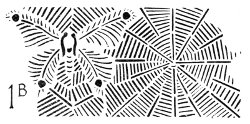
Fig. 1B.
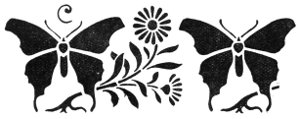
Fig. 1C.
Some years ago, I forget how many, I described in these pages how to cut a stencil, but I had better for the sake of the newer readers very briefly explain the method. Good drawing paper I generally use from which to cut my stencils. Draw out your design upon the paper, and with a sharp penknife cut on a sheet of glass, so that the knife travels over the smooth surface and enables you to cut a quite intricate design with ease. Have a small oil-stone at hand to keep the knife in condition, for you ought to be able to cut clean without pressure.
If you refer to the designs accompanying these articles you will notice that each form where it comes against another seems outlined in white. This effect is caused by the "ties" as they are termed. If we consider a moment we can realise that as our design is formed by the pieces we cut away an intricate design must be tied together, or the whole thing would fall to pieces. Take a simple case, the letter B. We must not cut out the letter without adopting some plan to keep the two pieces forming the loops in their place, so we tie them in so
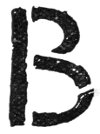
We put a second tie in the lower loop to strengthen it as I have done in several cases among those designs given. Take another case, the flower in Fig. 1C. By cutting each petal separate and the centre as a circle we get a very effective stencil, for the "ties" give form to the design. Take them away, and instead of a daisy we should only have a circular open space of no interest. One of the arts of successful stencil cutting is to make the "ties" form part of the design, and by a little management this can be done. I don't wish to point to my own work more than to say you can learn the method of stencil cutting by referring to the designs I have given to illustrate the subject.
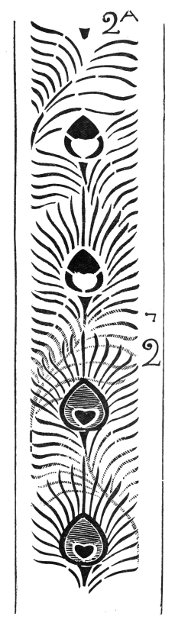
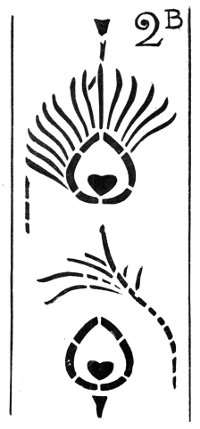
Peacock-feather border. The complete impression is given at 2, and requires the plates 2A and 2B to produce it.
"Ties" which are left to merely strengthen a design, and which therefore do not help the effect, can be put in with a brush while the colour is wet if it be thought desirable.
If by chance you cut through a "tie" while cutting your stencil or break one when using it mend it with gummed paper or stamp edging. By keeping your stencils in repair they will last you years and do any amount of work. When the stencils are cut give them a good coat of varnish back and front, and allow it to dry hard. This makes the paper waterproof and greatly toughens it. "Knotting," which you can procure at a good oil shop, does very well for this purpose, as it dries quickly.
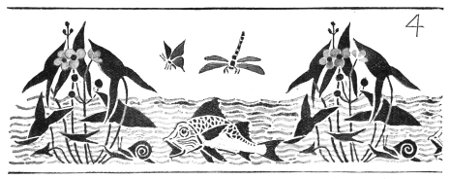
Repeating stencil of fish and arrow-head, with insects and water lines. For cutting this stencil, see Figs. 4A and 4B.
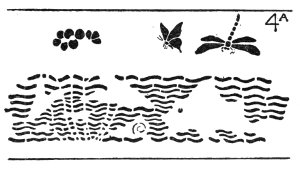
Detail of Fig. 4.
Those readers who prefer it can enlarge some of my designs and cut them, but others may like to try and originate them for themselves, so a word or two to them. Make your designs simple, and you mustn't attempt foreshortening (that is, drawing in perspective), as you cannot render such an effect in a stencil. A flat treatment is necessary, as though the plant you take to found your design upon were pressed between blotting-paper, like a dried specimen. You must not attempt to be too natural. An ornamental treatment is more effective, and you want to develop the decorative features in the plant you take, for you must not think of drawing a flower or plant so much as making a design based upon the particular plant.
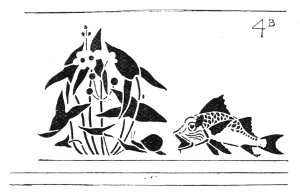
Detail of Fig. 4.
Birds, insects, fish, can all be cut as stencils if you attend to this ornamentalising which is necessary. The two flying birds, Figs. 5 and 6, are modelled on Japanese designs, and by a little management very excellent effects can be produced. Butterflies too can be made into very effective stencils, and in one case I have introduced a background suggested by a spider's web, Fig. 1. By only using the butterfly out of one plate and the web background out of the other we obtain a third combination as in Fig. 1A.
In the case of the large butterfly, Fig. 1A, it will be noticed that a pattern is stencilled on the wings, and to do this it is necessary to have a second stencil, Fig. 1B. I give impressions of these two stencils, Figs. 1A and 1B, so that you may see what is cut out in each plate and how the two fit together. You cut some one or two details out of both plates as a guide in placing them when in use, see Figs. 2, which requires the two Plates A and B to produce it.
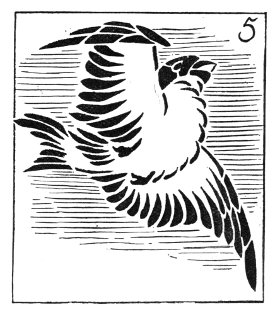
Flying bird in stencil, after the Japanese.
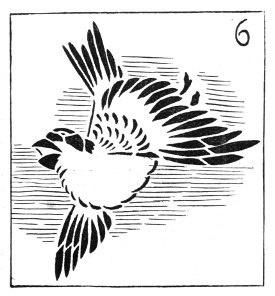
Flying bird in stencil, after the Japanese.
In cases of stencils which repeat so that spaces of any length may be covered, it is necessary to cut a small portion of the next impression out of the stencil and put this in, so that when you shift the stencil on to take the next impression, the left side of your stencil is placed over the right-hand side of the impression first taken. In the butterfly referred to in Fig. 1, the tip of the left wing is cut on the right-hand side of stencil, which is a guide for placing the stencil when we shift it for our next impression. In Fig. 4 it will be noticed that the nose of the fish is stencilled on the right-hand side to show you, when you shift the stencil along, exactly where to place it. In stencils requiring two plates to produce them, you draw out the design and then arrange in your mind the portions you will cut out of the first plate. When you have cut them stencil them on to the piece of paper to form the second plate, and having drawn or transferred the rest of the design to this second piece of paper you cut out the rest of the pattern. By stencilling the first plate on to the second plate you see how far to cut, for it is obvious that the two plates should fit together like a puzzle and form one design. The object of having two plates is that you can obtain an impression in two or more colours. Thus in the butterfly design having stencilled the insects in the first colour you can put on the markings and web-background in much lighter colours. If the sprig is to be put in and you want it against the web-background, you stencil this latter in first, and when dry the sprigs upon it.
By cutting a design out of two plates you can get a much more elaborate design and scheme of colour. The water in the arrow-head and fish frieze, Fig. 4, is a case in point, for the water lines and flowers can be in light tones of colour, while the fish and foliage are in darker ones, and by this means relief is obtained.
Were the water lines cut out of the same plate as the foliage, it would be impossible to keep them in a distinct colour and the design would look confused. The stencil too would be very weak, as the "ties" would have to be so numerous. This is a practical disadvantage, for if a stencil is very weak it is apt to break all up while you are using it. By the use of the two plates, Figs. 4A and 4B, we get two fairly strong stencils.
(To be continued.)