REMOVAL OF THE HYALOID MEMBRANE WITH CONTENTS AND ATTACHMENTS INTACT[1][2]
Reading edition
One of the easiest and most satisfactory dissections to attempt is the isolating of the hyaloid membrane with its contents and its attachments. The success one meets with in making this dissection will surely prove a strong incentive for making all the rest. For these reasons this has been placed first in this arrangement.
In eye dissections it is quite customary, in giving directions for dissections, merely to mention the hyaloid membrane and its relations with other parts of the eye. Rarely is there any attempt made to isolate it. Often, too, the retina is mistaken for the hyaloid, and the retina then wrongly demonstrated as being attached to the choroid. Of course, it is impossible to separate the hyaloid from the vitreous; but a dissection can be made which, when placed in a glass of some kind, will show the hyaloid. If the following simple technique is carefully observed, the membrane, with all its connections, can be easily separated from certain other parts of the eye. Opportunity for thorough study and observation will then be made extremely easy.
Procure the eye of either a sheep or a bullock. Instead of following the usual procedure of hardening in any one of the several solutions used for the purpose of toughening the ocular tissues, place the eye in a cool place and permit it to collapse a trifle. Usually two or three days is a sufficient length of time to accomplish the result.
Experiments have shown that if an eye is too fresh the ciliary processes will not be easily detached from the hyaloid (zonular processes), and if the eye has been in a preserving fluid, the same result will follow. A sheep’s eye will make a better specimen even if it is small, because the ciliary processes are more easily separated from the zonular processes. If a bullock’s eye is used, it must be left in a cool place a day or two longer than in the case of a sheep’s eye, in order to permit a long enough time to elapse to allow disintegration of the eye to take place sufficient to have the two processes separate easily and cleanly.
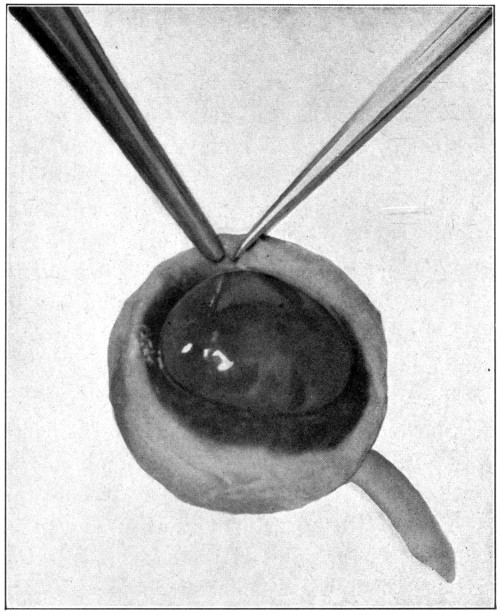
Fig. 2—Making the first cut. (Page 27.)
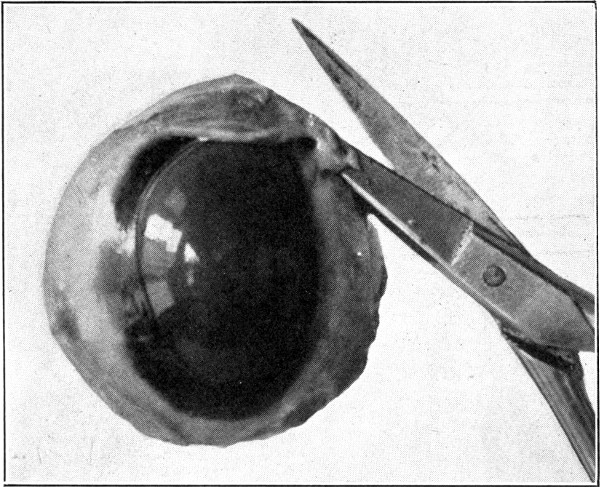
Fig. 3—Showing how the point of the lower jaw of the scissors is to be kept away from the underlying tissues. (Page 27.)
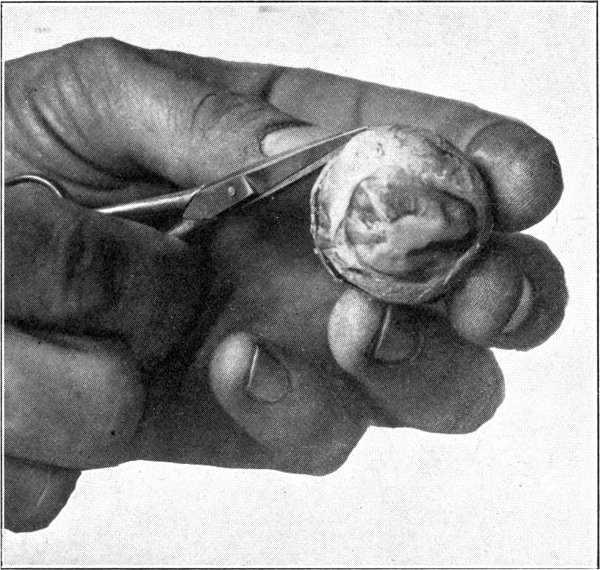
Fig. 4—Showing about half of the sclerotic separated. (Page 29.)
With a pair of dissecting forceps pinch up the sclerotic about 5 mm. anterior to the equator. With a pair of small, fine-pointed scissors, make an incision. (Fig. 2.) Next hold the eye in the left hand without exerting any pressure. Insert the point of the scissors into the incision which has been made, and cut. Be careful to keep the point of the scissors close to the sclerotic or an untimely puncturing of the choroid will occur. (Fig. 3.) Continue the cutting on a line parallel to the equatorial meridian and about 5 mm. anterior to it until about half the sclerotic has been separated. In cutting, always move the point of the scissors forward with a slight oscillating lateral movement. (Fig. 4.) While doing this, partly suspend the eyeball from the point of the scissors. Doing these things will tend to loosen the choroid from the sclerotic and prevent puncturing too soon the former mentioned membrane. Now apply pressure in such a manner that the lips of the cut sclerotic will gap. Into this put the point of the scissors and very carefully pick up the choroid and the retina with the point of the scissors and cut them. (Fig. 5.) If the choroid alone has been picked up and separated, the retina will show milky white or yellowish white underneath. The retina must then also be separated. Care must be taken not to go deeper than the retina or the hyaloid may be damaged. Continue the cutting of the choroid and the retina for a distance of about 20 mm. Apply enough pressure occasionally so that the vitreous will be forced upward and above the cut choroid and the retina. This will show whether any strands of the two membranes have been left uncut. If the separation is complete for the distance specified above, invert the eyeball, squeeze and shake gently over some receptacle, such as a Stender dish, three-fourths filled with a 2½ or 5 per cent. solution of formaldehyde, and the hyaloid membrane containing the vitreous, its attachments, suspensory ligament to the lens capsule, and lens, will drop out intact, as when one empties the contents of an egg. (Fig. 6.)
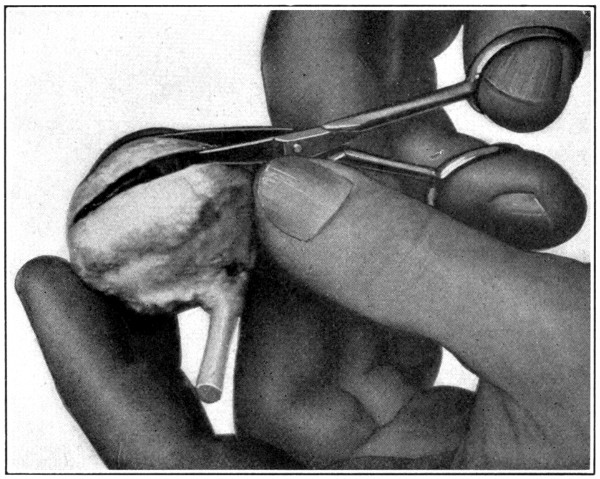
Fig. 5—Picking up the choroid with the point of the scissors.
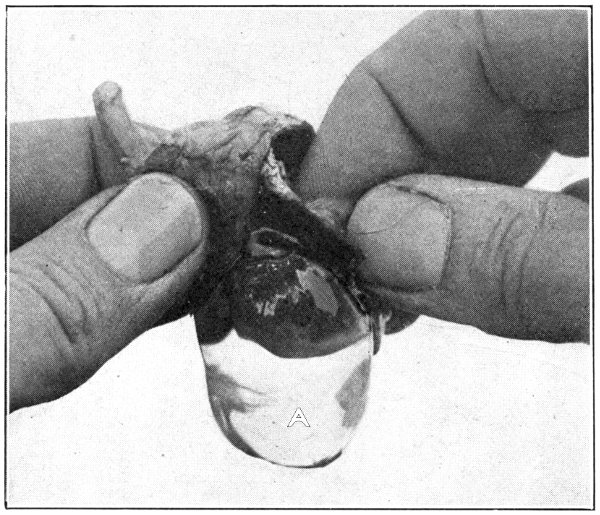
Fig. 6—A. Hyaloid, vitreous, and lens ready to drop out of the eyeball.
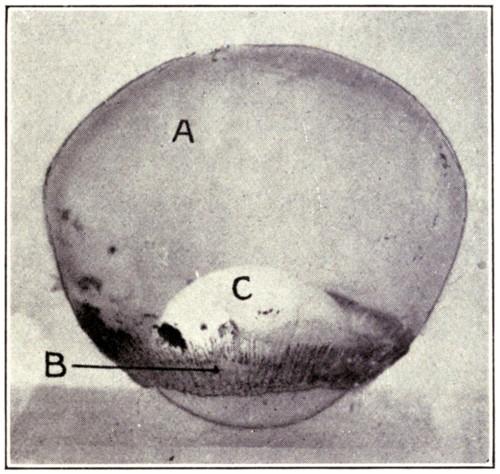
Fig. 7—Photograph of dissected hyaloid membrane (A), with pigmented indentations of the ciliary processes, the suspensory ligament (B), and the crystalline lens in its capsule (C). (Page 34.)
Many times a considerable amount of pigment from the second tunic will remain attached to the processus zonuloe. This pigment may be easily removed by scraping it off with the sharp edge of the scalpel or by brushing it off with a soft, wet tooth-brush.
It is unwise to use alcohol as a preservative because it produces an almost immediate opaqueness and hardness which spoils the specimen for further study.
This description may give the impression that the dissection is a lengthy one; however, it can be done by an expert in two or three minutes; by a beginner in five or six minutes.
For purposes of demonstration or study the specimen should be placed in a small bottle or a vial containing a 5 per cent. solution of formaldehyde. It can then be examined with hand lens or microscope. (Fig. 7.)