WHAT TO GROW.
Reading edition
ASPARAGUS.
This is the earliest vegetable to be ready for use in the spring, excepting those that have been forwarded under glass. While it is quite hardy and withstands much ill treatment, nothing will better repay careful culture and generous feeding. One row across the kitchen garden would make a liberal supply for an average family. The seed should be sown where the row is to stand, and the young plants thinned out until they stand one foot apart in the row. This should be done as soon as they are three or four inches high and well started; if left longer it will be a very troublesome job. These young plants should have every encouragement of manure and cultivation, to make as strong a growth as possible; the stronger and faster they grow the better will be the size and quality of the shoots when old enough to cut. No shoots should be cut until the third spring after sowing, and then should not be cut too long the first season. The fourth and succeeding seasons it may be cut from the time the first shoots appear until the first peas and lettuce are ready to take its place on the table. Then it should be well worked and allowed to attain its full growth, that strength may be stored in the crowns to furnish the shoots for the next season’s cutting. As soon as the tops begin to yellow, and the berries to ripen in the fall, it should be mowed off close to the ground and the tops burnt, taking care that all the seeds are consumed; if left on the plants all winter the seed becomes scattered, and, owing to its capacity for sending up shoots, it is a very difficult weed to exterminate. If you do not wish the labor of sowing the seed and tending the young plants, a year can be gained by purchasing the plants. The one-year old plants are preferable unless the older ones have been transplanted each year, as they are gross feeders, and become stunted if allowed to crowd each other while young. To produce the large, fat shoots, it is necessary that the seed shall have been saved from the strongest shoots obtainable, and the plants fed constantly. The best way is to cover the crowns, after the ground is frozen in the fall, with as much manure as can be spared, and work it down to the roots in the spring as soon as it can be forked in; or, if there are several rows, the manure could be placed on them thickly and the soil ridged over it for the winter by throwing up a couple of shallow furrows with the plow; this to be worked down with a sharp harrow in the spring. As soon as it is dry enough in the spring, the soil and manure of the bed should be lightly forked over with a manure fork and the surface raked fine; the reason for using the stable fork is that the tines are slightly curved, and if the handle is held in a nearly horizontal position the bed can be dug down to the roots, and the fork will slide right over the tops of the crowns without injuring them. Where more than one row is desired they should be planted about three feet apart, to admit of cultivation and free access to the beds for cutting. An advantage in sowing the seed is that the crowns are naturally established at a proper depth. In planting the crowns obtained from the nursery-man they should be set at a depth of three or four inches at the most; not one foot under the surface, as is the common practice of truckers. Market gardeners cut the shoots as soon as the tips appear above the surface, so that their shoots are blanched for their whole length; but they do this at the expense of the table quality, as only the tips are edible in this way, and even these taste very much like old hay to any one who has been accustomed to the richness and delicate flavor of shoots cut at the surface when they are from three to four inches in height; this method has also the advantage of not destroying the young shoots just coming up, as the stalks are only cut an inch or so underground, and the knife only reaches the one intended to be cut. If the appearance of the blanched asparagus is desired, it can be much better obtained (that is, with less sacrifice of quality) by placing four or five inches of hay, straw or other litter over the crowns, which can be pushed away from the stalk when cutting and easily replaced. There is another strong reason for not following the deep planting, as usually practiced, and that is, in having your crowns so much nearer the surface they feel the warming and growing influence of the sun sooner in the season, and you are able to have your asparagus for cutting a full week earlier than your neighbor who plants deep.
VARIETIES OF ASPARAGUS.
As mentioned above, this succulent is capable of great improvement by careful selection of seed from the best stalks. The old Purple Top variety is no longer grown, its place having been taken by the larger shoots and better quality of the variety known as Conover’s Colossal. This latter, however, has been propagated so extensively and with so little care that it is now almost impossible to obtain seed or plants that will produce the splendid shoots of the original stock. Of the new varieties Barr’s Mammoth seems to be the most promising, and as grown in some fields in the vicinity of Philadelphia produces shoots which will average nearly an inch in diameter.
BEANS.
The first planting of snaps or dwarf bush beans can be made when the first planting of peas and beets are sown, but will not do as well nor produce beans of as fine quality as those planted about two weeks later, when the weather has become warmer and more settled. These yield very abundantly, and a drill fifty feet long will produce as many as can be used in a large family. While planting in a drill, for the sake of convenience and quickness in planting, the seed should be dropped in hills about ten inches apart and five seeds to a hill. If the beans are kept picked closely, the plants will continue longer in bearing, and they may be had throughout the season if successive plantings are made, though the pole snaps are to be preferred through the summer and fall, for their greater bearing qualities and the ease of gathering them. In both the bush and pole snaps, care should be taken to secure varieties that are entirely stringless, as they are not only much easier to prepare for use, but are much more tender. The different “Wax” varieties are very fine, but the bush beans of this class have not done well in this locality for the last three seasons, the pods being covered with a species of black spot or rot that spoils fully two-thirds of them.[1]
The pole beans should not be planted until the ground is thoroughly warmed in the spring, or until the thermometer stands over 60° all night. It is quite common to plant these with poles 8 to 9 feet in height. I think this is a mistake, as no ordinary picker can reach higher than about six feet to advantage, and as the vines grow to the tops of the poles before commencing to fruit, both beans and time are lost. The poles should be set in rows four and one-half feet apart and two and one-half to three feet apart in the rows. Two hundred poles of Limas will furnish an ample supply throughout the season, and will ripen a bushel of dried beans for winter use as well. Twenty-five poles will furnish an ample supply of snaps, though we allowed one row across the garden in the diagram given, the surplus being allowed to ripen for winter use. Where the saving of room is an object and the ground has been well manured, these pole snaps can be planted in the hills of corn, and allowed to use the stalks as poles; they will produce a good crop, but not nearly so many, nor are they as easy to pick as when grown on the poles. For this purpose they should be planted with some strong growing variety of corn, such as Stowell’s Evergreen or other late variety.
The white soup bean, that is dried for winter use in various ways, including the famous “Boston Baked Beans,” is generally grown by dropping one or two hills between each hill of corn, and instead of picking them, the whole plant is pulled up in the fall, and the beans thrashed out with a flail when dry. For Limas and pole snaps, the poles should be set by the aid of the garden line, and where any pole is bowed or crooked it should be planted so as to bring it in line with the row, lengthwise, as nearly as possible, that they may present an orderly appearance. In setting the poles, make a hole from one to two feet deep by driving the sharp end of a crowbar into the ground, place the butt end of the pole in this hole and ram it firmly in its place; then put one or two shovelfuls of compost around the base of the pole, and with a sharp steel rake make a hill of fine dirt over the compost. Five or six beans should be planted to each hill, but if all grow should be thinned out to two or three. If the young plants do not climb the poles readily at the first start, they should be trained up and tied till they begin to take hold for themselves. Be careful, in planting Lima beans, to push them into the soil with the eye down, for, as the first leaves are quite large and heavy, it assists them materially in breaking through the soil to plant them in this manner.[2]
The Limas may be brought into bearing somewhat earlier in the season by placing pieces of sod, cut four inches square and about three inches thick, grass side down, in the hotbed, and planting four or five beans in each piece; if this is done in the latter part of March they will be of good size by the time it is warm enough to plant them out, which is done by planting the piece of sod at the base of the pole, in hills, as prepared for the seed. If the end of the vine is pinched off when it is about four or five feet up the pole, it will assist the lateral shoots in blooming early, and consequently produce beans earlier, though, like all forcing methods, it will, to some extent, lessen the vigor of the vine, and most likely, to some extent, the amount of the crop.
Bush Beans—Golden Wax.—This is one of the best bush beans; it matures early; the pods are of very handsome appearance, brittle and entirely stringless; it is a good bearer and makes an excellent shelled bean for winter use.
Best of All Dwarf Bean.—This is a green-podded bean, and is probably the best for the first planting, as it is not only very early but also very productive; the pods are six inches long, entirely stringless, very fleshy and rich flavored.
Champion Bush Bean.—This is a strong grower, attaining about fifteen to eighteen inches in height, and an immense cropper. The beans can be used as string beans in the green state, but its chief quality lies in the superiority of the beans when dried, and the large crops which it produces when grown for winter use.
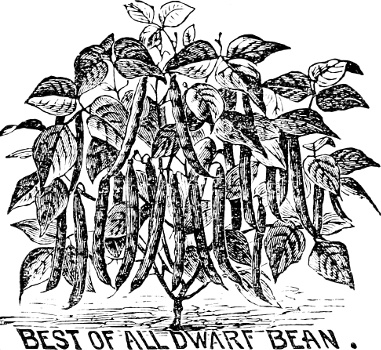
BEST OF ALL DWARF BEAN.
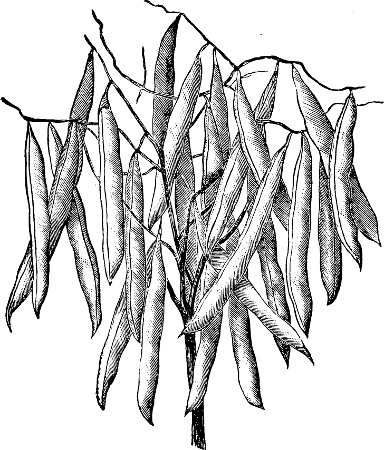
CHAMPION BUSH BEAN.
Pole Beans, Snap Varieties—Golden Wax Flageolet.—This bean is of recent introduction, and is worthy of all the praise that has been bestowed upon it; it is a tremendous bearer, and is almost as early as the dwarf wax varieties, the pods are much larger, being seven to eight inches long, round and very fleshy; they are entirely free from strings and of the finest quality. Unlike the other pole beans, it begins to produce beans at the bottom of the pole as soon as it starts to climb; and if these are used as they mature, it will continue in bearing the entire season.[3]
White Creaseback, or Best of All.—These for early and the Lazy Wife’s for late are the best of the green-podded pole beans. The pods are about six inches in length, thick fleshed, and of very fine quality. The Creaseback is very early and matures its crop in a short time, thus making it a very profitable variety for market. Both varieties are very productive, entirely stringless, and of superior flavor.
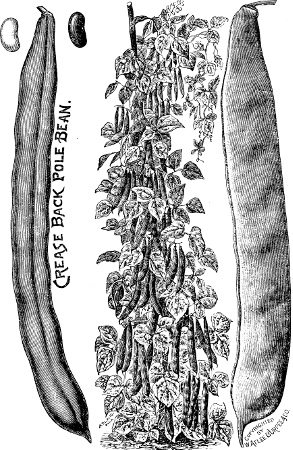
Crease Back Pole Bean.
LAZY WIFE’S POLE BEAN.
Limas—Extra Early Lima.—This variety matures very nearly as early as the Small Lima, while the beans are more nearly the size of the late Lima; the quality is very fine and the quantity large, as it bears the pods in clusters of four, with four to six beans in a pod.
Dreer’s Improved Lima.—This variety is early and very productive if measured in the green state; the pods are smaller than in the ordinary Lima, but the beans are very plump, and are so close together in the pods as to crowd against each other. As a green bean it is very early, and shells out more quarts to the basket of pods than the larger varieties; but the quality is not as fine, and in the dry state the beans shrivel up till they are only about the size of dry bush beans, and are not nearly so good as the other varieties.
King of the Garden.—This is a new variety, in which the green beans are of unusual size and very fine quality. I have seen half an acre planted with this variety which I am sure had at that time more than twice the quantity of beans that could be grown on the same ground of the ordinary kinds; vines were loaded with clusters of pods seven to eight inches in length, and it was no rarity to see them with five very large beans in a pod. From its great productiveness and the fine quality of the beans, it deserves the first place among the Limas.
BEETS.
Seed of these should be sown when the first planting is done in the spring. They may be had still earlier by planting the seed in a hotbed while the ground is still frozen, and transplanting them to the garden a week or so after the cabbage and lettuce have been planted out. Care must be taken in transplanting the young beets, that the tap-root does not get broken, or it will make a number of fibrous roots instead of the large, smooth globe desired for the table. When the seed is well up, the plants should be thinned out until they stand six or ten inches apart, as the size of the variety demands. A second sowing should be made about June 1st, and the main sowing about the 15th of July or 1st of August, to raise roots for winter use. These frequent sowings are necessary to have the beets of fine quality; as the roots get older and larger they become “woody,” or hard and fibrous, and exceedingly tasteless. Where the season is short, or there are prospects of a dry fall, the second sowing should be large enough to produce the winter crop, as the later one may fail to mature in time. The beets may be stored and the flavor retained by the method described for pitting turnips, and will keep in good order until spring.
The Bassano and other light beets are of quick growth and are tender and palatable while young, but are of coarse texture and not nearly so fine in appearance when cooked as the blood beets. The blood beets retain their deep, rich color, while all the light-leaved or light-stemmed varieties are colorless, or nearly so, when cooked. It certainly adds to the attractiveness of a dish for the vegetable to have a handsome appearance when cooked.
The seed should be sown in drills, from twelve to eighteen inches apart, if to be worked with the wheel hoe; if for horse culture, two and a half to three feet will have to be allowed between the rows. The ground should be raked clear of clods and made as fine as possible. A drill is made by drawing the rake or hoe handle along the line. The drill should be about an inch in depth and the seed should be dropped about two inches apart, thinning out to six or eight inches apart when well started, and if it is desired, the thinnings can be transplanted to another row. If no small roller is at hand, the drill can be covered and packed by the same operation, by removing the line and shuffling along the row with the feet placed in a V, the forepart of the foot drawing in the fine soil while the heels at the point cover and press the dirt down upon the row; the foot, of course, is only moved a few inches at a time, but with a little practice the rows can be covered in this manner quite rapidly.
VARIETIES OF BEETS.
Eclipse.—This is a very early beet, of quick growth and very fine quality. As the leaves of this variety are small and the stems short, they can be grown quite closely together. The roots are perfectly smooth, regular, globe shape, blood-red skin and flesh, fine grained and very sweet when cooked.
Edmand’s Early Turnip.—This variety is turnip-shaped, that is, tapering more gradually below the shoulder than the Eclipse; the foliage is short and stocky, enabling a heavy crop to be grown, as they can be grown as closely as six inches apart; the flesh, of a deep blood red, is of the finest quality.
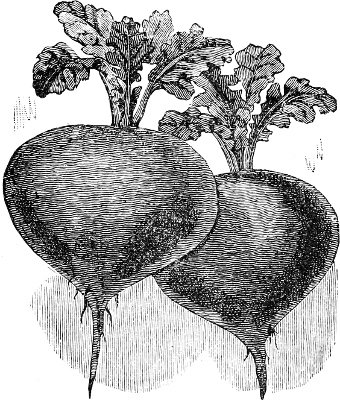
EDMAND’S EARLY TURNIP BEET.
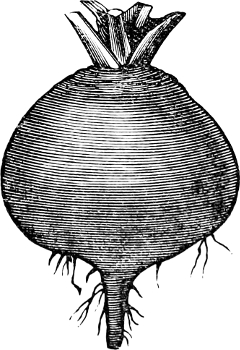
BURPEE’S IMPROVED BLOOD TURNIP BEET.
Burpee’s Improved Blood Turnip.—This beet attains quite a large size and is very smooth and regular in appearance; the flesh is deep blood red and of fine quality, whether eaten in summer or stored for winter use; it is one of the best varieties for the latter purpose, and should be sown as described for the winter crop.
CABBAGES.
Of this vegetable two distinct crops are raised in every garden, while many gardeners, by successive sowings and the use of several varieties, have them fit for use constantly from early spring until fall, and throughout the entire winter by storage. In the ordinary garden the same result may be obtained by planting larger quantities of the early and summer varieties, and cutting them as wanted for use, as most of them will stand the whole summer without bursting or going to seed, and by early fall some of the winter cabbage will be large enough for use.
Early or Summer Cabbages.—The seed for these should be sown in a hotbed from the 1st to the 15th of February. As soon as the plants are large enough to set out they should be given plenty of air, and should be gradually hardened off until they are able to stand the cool nights without protection; but they should not be allowed to freeze. Treated in this way they will be ready for planting out as soon as the ground can be worked. In making this sowing I would have it of two kinds—some of a small, hard-heading, early variety, and about twice as many of a larger-heading summer kind. These latter are described as second early in the seed catalogues.
These early cabbages need very little care except to have frequent and thorough cultivation, as they are comparatively free from insect pests as long as they make a healthy growth. If attacked by the black fly or green worm, they should be dusted with land plaster or slug shot early in the morning, while the dew is still on them. The soil around these and all other crops that depend on quick growth for their superior qualities, must not only be cultivated, to kill the weeds, but must be kept loose and well stirred, to admit the air to the roots of the plants; it must not be allowed to lie heavy and packed after dashing rains, but should be stirred up as soon as dry enough. The rows may be as close as can be worked with the cultivator, say about three feet, and the plants about one and a half feet apart in the row, or even closer, if the variety grown makes but small heads.
Late or Winter Cabbage.—As soon as the ground becomes warm in the spring, or early in May, a seed bed should be made and sown with the late varieties of cabbage and celery, or the seed may be sown in drills in the garden; the seed being sown in very thinly, so as to produce plants standing about half an inch apart in the row. Where it can be done, it is best to sow the seed in a special bed or cold frame, where they can be watered and nursed to a good size by the time they are wanted for planting. The Flat Dutch and Drumhead types are the best for this planting, though many prefer the Savoys, claiming a superior delicacy of flavor, on account of their having more leaf surface to the number of ribs or veins; they are not, however, nearly such sure headers, nor are they as good keepers when buried.
It is important to get the seed sown early, that the plants may be had of good size by the middle of June, though they will make a partial crop if planted as late as the middle of August. As these varieties make larger heads than the summer cabbages, they cannot be planted so closely; the rows should be 3 to 3½ feet apart, and the plants 2 to 2½ feet apart in the rows. These can be planted and grown between the rows of early peas, corn or potatoes; but I would prefer to wait until the first crop of corn be cleared off the ground, as it can then be brought into much better condition. It adds greatly to the labor of harvesting the first crop when the ground is so closely planted, and the soil is apt to become hard and packed before it can be cultivated again.
When possible, the young cabbage plants should be set out directly before or after a good rain, but if there is no prospect of rain, they should be planted in the evening and a tincupful of water should be poured in each hole before the plant is set in; then draw the dry earth up around the stem and pack firmly around the plant; this will enable them to withstand at least a week of dry weather. If the drought should continue longer, or they do not come up fresh in the morning after a flagging day, they must be watered in the cool of the evening, when the plant will have the benefit of the water all night. It is waste of time to water them while the hot sun is shining, unless they can be shaded with papers, old pans, etc.
As soon as they become well established, the soil around them must be carefully loosened and cultivation begun. To obtain the best results they must be cultivated frequently and deeply. It is a common sight in some gardens to see the cabbage with stems two feet high and a small bunch of wormy leaves at the top; a closer examination will show that the soil is hard and trampled, and that the plants have been left to grow as best they may, while in the well-cultivated garden the stems are short and the heads are large and solid.
The young plants of late cabbages are generally infested, while in the seed bed, with a small black fly, which greatly checks their growth, and sometimes entirely destroys them. These can be gotten rid of, or better, entirely avoided, by the application of dry road dust, soot, slug shot, or land plaster, dusted on the young leaves early in the morning, while the dew is still on them; this should be repeated every two or three mornings until the fly is exterminated and the plants have grown to good size. When the plants have been set out and are nearly ready to head, the green cabbage worm makes its appearance, and if fine marketable heads are desired this pest must be destroyed. Many remedies for this are given, most of which are ineffectual. It is best to sprinkle well with tar water or alum water, taking care to get it well down into the centre of the loose leaves, using an ordinary watering pot for the purpose; if a garden syringe is at hand, it can be thrown into the plant much better than by sprinkling. To make the tar water, the tar is put in a barrel of water and well stirred; then, when it has been allowed to settle, the water from the top is dipped off and used. It should be strong enough to have quite a decided taste. The alum maybe dissolved in the watering pot, about one tablespoonful to the gallon, and stirred till dissolved. See that the solution gets well into the centre of the loose leaves just below the head, as this is the favorite place of attack by the worms.
The cabbage is quite hardy and will stand considerable frost in the fall without damage, being rather improved in quality by it. By the third week in November they should be put in pits or the vegetable cellar; or, where these conveniences are not at hand, they should be pulled up, root and all, the outside leaves wrapped closely around the head and stood side by side, on their heads, on a well-drained piece of ground; they should be placed in a long row two or three heads wide, and where a good many are to be buried or gotten out at once, two additional rows may be placed on top of these, as shown in the illustration.
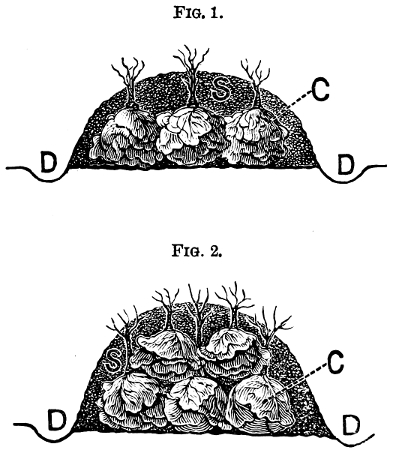
Illustrations showing the manner of storing cabbage for winter use. Figure 1 showing three rows of heads and Figure 2, five rows. C. Heads of cabbage. S. Soil banked over the heads. D. Drainage ditches to carry off the water.
Dry soil is then thrown on these heads to the thickness of five or six inches and the roots left sticking out of the top; this covering should be firmly packed, to prevent the entrance of water, and a small gutter should be dug round the heap to carry it off. If, after the cold weather has set in and the ground is slightly frozen, the heap is covered with three to four inches of corn fodder or litter, it will prevent the covering from freezing so hard, and will greatly lessen the work of getting out the heads when wanted for use. When heads are wanted, one end of the bank is opened and as many taken out as are desired; the open end is then carefully covered over with soil. Too many should not be taken out at once, as they retain their flavor better when buried in this manner than when kept where they are exposed to the open air. If it is desired to save some of the best heads for seed, the roots of the plant must be buried as well as the top; they can then be replanted early in the spring and a cross cut made in the top of the head to assist the flower stalks in bursting through, as the heads are sometimes so tight that they will rot before bursting.
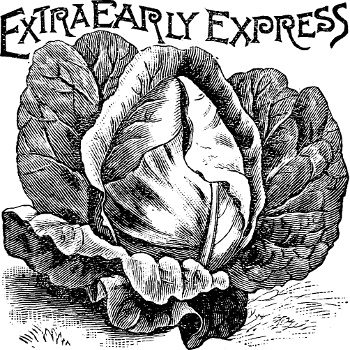
EXTRA EARLY EXPRESS CABBAGE.
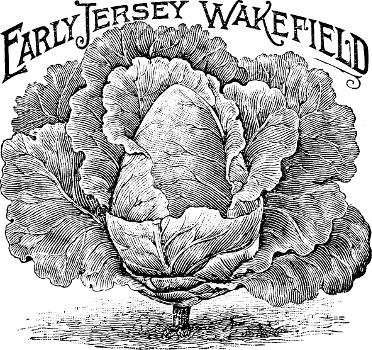
EARLY JERSEY WAKEFIELD CABBAGE.
Early Varieties—Extra Early Etampes.—This cabbage is the earliest heading variety that I have ever grown. The heads are small but round and very solid, and it is ready for use nearly two weeks ahead of the other early varieties.[4]
Early Jersey Wakefield.—This has long been the chief favorite for the general crop of early cabbage, and is deservedly popular, as it is sure to head when the seed is good; the heads are of good size and shape, and the quality is fine.
Early Summer.—This succeeds the Wakefield, and has heads about twice the size of the latter; they are round, very solid and slightly flattened on top; it has few outside leaves and can be planted closely; this variety matures about two weeks later than the Wakefield, and a month after the Etampes.[5]
VARIETIES OF LATE CABBAGES.
At the head of these I would place Burpee’s Surehead, which has done so well for me since I began planting it, never failing a single season, that I now plant my whole crop of it, instead of planting two or three kinds as formerly, to guard against poor seed or a bad season. It is an improved type of the Premium Flat Dutch, to which it is superior in the evenness and regularity of its heads and the “sureness” of every plant to form a fine head. With me the heads average larger than the Flat Dutch, are rather more rounding in shape and are of the finest quality.
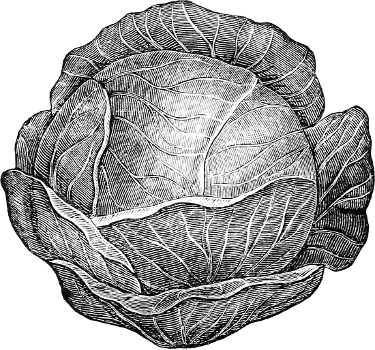
EARLY SUMMER CABBAGE.
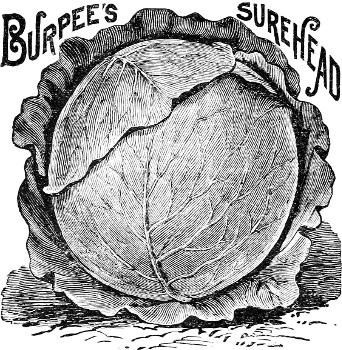
BURPEE’S SUREHEAD CABBAGE.
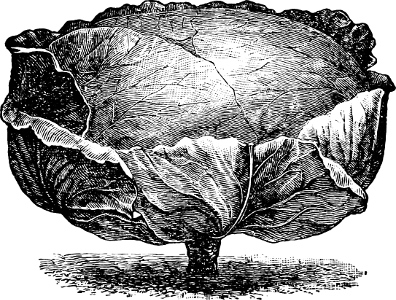
BURPEE’S SHORT-STEM DRUMHEAD CABBAGE.
Short-Stem Drumhead.—This variety produces on extra short stems, only a few inches in height, very large solid heads, often twenty-five pounds in weight. It is from this kind that the very large heads seen at the county fairs in the fall are grown, and where the ground is heavily manured and well cultivated enormous crops of this variety can be grown; it is of fine quality, very solid and an excellent keeper.
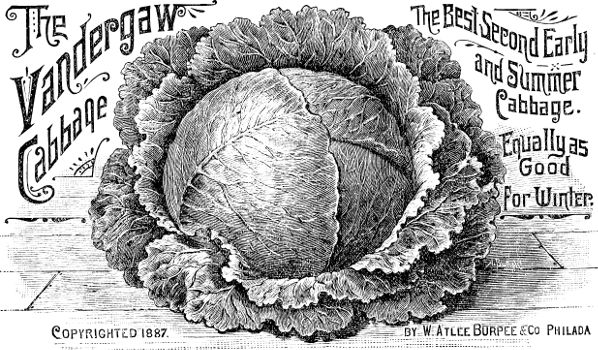
The Vandergaw Cabbage
The Best Second Early and Summer Cabbage.
Equally as Good For Winter.
Copyrighted 1887.
by W. Atlee Burpee & Co Philada
Danish Ball Head.—This variety has only been recently introduced, but bids fair to take a leading place as a winter variety; the heads are quite round and very solid; they are of medium size and very handsome appearance, which make it a good market variety, while the quality fully equals its good looks.
CAULIFLOWER.
The culture of this vegetable is the same as that for cabbage, in most respects, but it is not a certain crop in our changeable climate and hot, dry summers. It likes plenty of moisture, and if placed in a rather wet location or in a bed where it can be frequently watered, it will be much more certain to produce fine heads. Its superior quality and the high price that good heads command make it a most desirable crop to grow wherever it will do well. I have always found the short-stemmed, extra early varieties the best ones to grow, and as in the ordinary season but about half of them produce heads under ordinary garden culture, the rest of them maturing throughout the summer and fall, it is almost a continuous crop. The seed should be sown as early as possible, in the hotbed, and great care should be taken that the plants do not become either stunted or drawn, as none but the strong, healthy plants will produce good heads. It will greatly improve the appearance of the heads if some of the broad outside leaves are broken half through the stems and the tops bent over the heads while forming. This will blanch and keep them of that pure whiteness so attractive in this vegetable as grown by the market gardeners. The heads should be cut for use or sale as soon as they have reached their full size and before the buds begin to uncurl, as this spoils both the appearance and quality of this, the finest and most delicately flavored of the cabbage family.
VARIETIES OF CAULIFLOWER.
Extra Early Dwarf Erfurt.—This is the best strain for general use; there are usually two or more grades of this offered in seed catalogues, but the best should always be purchased, even if you can only buy a single packet; by taking extra care of it you can make every seed count. This variety is quite early, has short stems, and makes good-sized heads of the best quality.
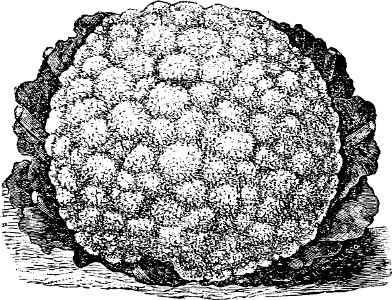
BURPEE’S BEST EARLY CAULIFLOWER.
Early Snowball.—This variety is quite early and makes fine large heads, of handsome appearance.
Burpee’s Best Early.—I have only grown this one season, but found it all that it was represented in earliness and good heading quality. Owing to a drouth early in the spring, the heads were not of large size; the quality was fine, and I think it bids fair to be one of the leading varieties.
CARROTS.
These are ordinarily little used as table vegetables, but will be found very palatable as an ingredient of soups and stews. They are very easily grown, the seed being planted in drills and the plants thinned to six or eight inches apart. The seed should be sown in April or May, and they will be ready for use early in the summer. For winter use they should be stored in the manner described for beets and turnips; they will retain their quality throughout the winter, and form a pleasant variety in the winter supply of vegetables. The rich yellow and red-fleshed varieties are the most popular, and retaining their bright colors when cooked, lend an attractive appearance to the dish of which they form a part.
VARIETIES OF CARROTS.
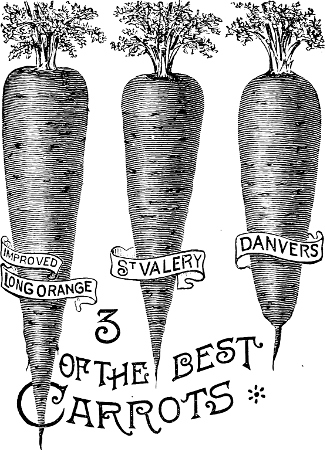
Danvers Half-long Orange.—This is claimed to have the greatest bulk with the shortest length of root, and is a remarkably heavy cropper. The root is of a rich, dark orange color, and grows very smooth and succeeds in all soils. It is quite a favorite market sort.
Short Horn.—The flesh of this variety is very fine grained, of deep orange color and superior quality. The roots do not penetrate deeply, and the top is small, which allows of their being planted quite closely.
IMPROVED LONG ORANGE
ST VALERY
DANVERS
3 of the best Carrots
Early Very Short Horn, or Golden Ball.—The earliest variety; the roots are round, turnip shaped, of small size, deep color, and the quality is of the best.
Ox Heart.—This variety is of large size, the roots being seven to eight inches in length and three to four inches in diameter at the top; it tapers gradually down to one and one-half to two inches at the bottom, making very little waste in preparing it for the table. It is of fine quality, while its size will render any surplus valuable for feeding to the stock.
Red Saint Vallery.—This is a large late variety and makes a good kind to raise for winter use; the roots grow ten to twelve inches in length and measure two to two and one-half inches in diameter at the top, tapering gradually to a point at the base. It should have deep cultivation to produce the finest roots. The color is a deep orange red and the quality is very fine.
CANTALOUPE, OR MUSK MELON.
These are universal favorites, and too frequently are not grown by the kitchen gardener, who labors under the idea that they must have a sandy soil in some particularly favored section, and that they require great skill to grow them. If a variety suited to your soil is planted and given the same amount of attention and careful cultivation as the rest of the garden receives, melons may be had in abundance from the first of August till frost comes in the fall, though when the first cool nights come they lose their fine flavor. If the garden has a southern slope, that will be the place for the melons and other warmth-loving vegetables; but they will do almost as well in the level field. The rows of hills should be five feet apart and the hills at least four feet apart in the row, to allow the vines plenty of room to run. It is a good plan to make the hills break joint, as they will then cover the ground to better advantage. When the line is set, a hole should be scraped with the hoe or shovel where the hill is to stand; this should be six inches deep and about twelve inches in diameter. Compost is then shoveled in, two rows being done at once; two or three shovelsful are put in each hill. The dirt thrown out in making the hole is then carefully made into a hill over the compost by using a sharp steel rake, care being taken to remove all stones and hard lumps of dirt. The seed is then scattered on the top of the hill, generally from twenty to thirty seeds being planted in each hill, that there may be an ample supply for the insects and yet leave a good stand. They should be thinned out gradually, extra ones being left in until they are at least a foot in length, as the insect pests are both numerous and destructive.
The hills should not be made until it is time to plant the seed, or they will get packed and too hard for the young roots to penetrate. When the seed has been planted on the hill it should be covered with about half an inch of fine soil, sifted and crumbled on with the fingers, and the whole top patted down with the palm of the hand. The seed should be planted as soon as the ground is thoroughly warm in the spring and when the temperature does not fall below sixty degrees at night. The melons will commence ripening about August 1st, and two rows across the garden should yield from one half-bushel to one bushel daily if the variety planted is of the small Netted Gem or Jenny Lind type. These small, round melons, of the size of a croquet ball, are very prolific, and if carefully grown, the quality is very fine. Some prefer the larger melons, which fill the basket more quickly, but in my experience the small ones have been so much more prolific that the yield has been almost double in bulk on the same amount of ground. The melon rows should be gone over early every morning while ripening, as they should not be allowed to become yellow on the vines. The quality deteriorates very rapidly when allowed to ripen in the hot sun, so that they should be picked while still green. The right stage for picking can readily be told by examining the point where the stem joins the melon; as soon as the stem begins to crack away from the melon slightly, or when the little drops of red juice form round the base of the stem, it is time to pick the melon. When picked, they should be put in a cool cellar or spring house until wanted for the table.
Seed may be saved from the largest and finest-flavored melons; but if your garden is on heavy soil, or if two or three varieties are grown near together, it is best to procure fresh seed from some melon-growing district every year.
The ground between the hills should be cultivated frequently, as long as it can be done without interfering with the vine; the soil in the hills should be kept loose and drawn up around the vines with the hoe. When the vines have grown too long to allow the passage of the cultivator, the patch can be kept clean by pulling out the large weeds by hand, which can be done very quickly after a good rain. The dense shade caused by the luxuriant vines will cause the small and low-growing weeds to rot off. While the vines are still small, it will be necessary to dust them every few mornings with road dust, soot, plaster or slug shot, to destroy the flies and striped bugs that infest them. When healthy young vines suddenly wilt and droop in the hot sun without apparent cause, dig around the root of the plant with the fingers or a stick until the grub is found which has cut the plant off underground. He should be searched for and “made an example of” as soon as the first vine is discovered to be flagging, or he will proceed to eat the whole hill.
VARIETIES OF MUSK MELONS.
Burpee’s Netted Gem.—The finest as well as the earliest of all the small-fruited varieties that I have tried, and where a variety of melons is not particularly desired, it will furnish a generous supply of fine-flavored fruit from the first ripening until killed by frost. It is a very good keeper, retaining its good quality for nearly a week after picking, if kept in a cool cellar. This is often a valuable characteristic in the latter part of summer, as several warm days furnish two or three baskets in the cellar, which keep up the supply if the warm spell is followed by cool or cloudy days, when the melons on the vines do not ripen readily. This variety is thickly netted, the meat is thick and solid, and they run as even in shape and symmetry as a set of croquet balls, which they also resemble in point of size.
Copyrighted 1886.
By W. ATLEE Burpee & Co
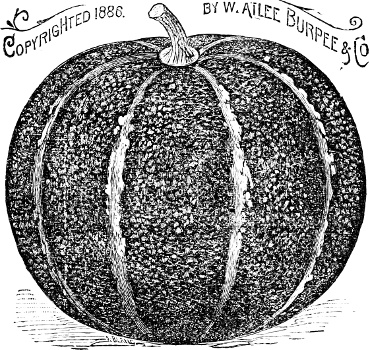
EMERALD GEM CANTALOUPE.
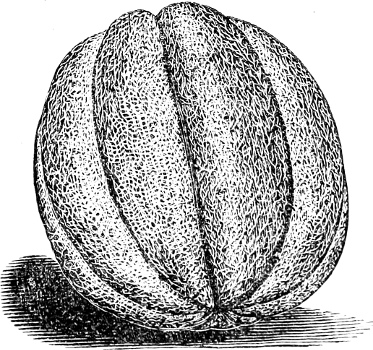
16¼-lb MONTREAL NUTMEG MELON—ENGRAVED FROM A PHOTOGRAPH.
Emerald Gem.—This variety has the small size and prolific bearing qualities, with the handsome salmon-colored flesh, that originated in the Surprise Melon some years ago. Too much cannot be said of the quality of this melon, as I do not think there is another variety that approaches it in flavor. The vines are strong and healthy in growth and well set with melons near the hills, and the fruit is early in ripening. The melon has a thin, green rind and very small seed cavity, almost the entire body of the fruit consisting of the rich and luscious meat.
Montreal Green Nutmeg.—A handsome variety, in which large size, regular shape and fine appearance are combined with thick flesh of the finest flavor. In shape they are nearly round, slightly flattened at the ends, very deeply ribbed and heavily netted. These melons have been grown to over thirty pounds in weight, and will average ten to twelve pounds in ordinary culture.
CELERY.
While one of the most troublesome vegetables to bring to perfection in the ordinary garden, this is one of the most desirable, as well as one of the most profitable, when well grown. The Michigan celery that is being shipped to our eastern cities in such large quantities does not seem to have lowered the price materially, but has crowded all the inferior and less finely-grown plants out of the markets, and the high express charges still guarantee a good profit to the near-by grower. When the ground has become fairly warm in the spring, a bed should be made in some shady corner for the seed; if such situation is not to be had, the seed can be sown in a spent hotbed, cold frame or other convenient place, and can be artificially shaded with fresh brush or lath shades through the hottest part of the day. Celery is naturally a swamp plant, and to make a rapid growth should have the ground as rich as possible, and also as much water as possible, without making the ground heavy and sour. The soil should not be allowed to become dry or baked, and the weeds should be pulled out as soon as they appear. This bed, and, indeed, all other seed beds, should be made very rich with well-rotted manure; not with horse-stable manure or phosphate, as both of them are dry and heating, and in dry weather would stunt or entirely burn up the young plants. The seed should be sown in drills about six inches apart, to admit of working the soil with a narrow hoe, as the continued watering will harden the surface of the bed and check the growth of the young plants. When the plants are well up they should be thinned out so as to stand an inch apart in the drills, and if the plants are ready some little time before they are wanted for setting out, they can be made more stocky and stronger by shearing off about half of the tops.
When ready to set out, I run a double furrow where the row is to be—that is, the plow is run both ways in the same furrow, casting up a ridge of dirt on either side of a shallow trench; then in the bottom of this trench fine compost or well-rotted manure is placed to the depth of one to two inches, and some of the fine soil from the sides is drawn down over the manure with a fine rake until the manure is covered about three inches. This will still leave a depth of about two inches below the surface, which will serve to draw and retain the rain water, or, in a dry time, can be flooded with a hydrant hose or irrigating ditch. Where the ground has been heavily enriched or the celery is planted as the first crop—that is, when no early vegetable precedes it on the same ground—no manure is used in the trench or furrow, which is plowed out in the same way, the additional depth assisting in the labor of earthing up for blanching. To obtain fine quality and appearance the plant should be pushed to as rapid a growth as possible from the time the seed is sown until the stalks are ready for use; if allowed to become stunted, the stalks will be knotty in appearance and bitter in taste.
For my own use and marketing I usually sow seed of two or three varieties, so that if one kind fails for any reason, I may still have a crop sufficient for the table from the other varieties, while if it is all good I have no difficulty in disposing of the surplus; this is the more easily done, as it occupies ground that has been cleared of early peas, corn, etc. Another point in not confining your planting to the one variety is that the handsome “Self-blanching” varieties are not good keepers, and as the older kinds take a long time to whiten, and a good deal of cold weather to develop the fine flavor, they are about ready for use when the early kinds are gone.
While celery is raised as a second crop and has always been considered to require frost to develop the fine nutty flavor, at least one row in the garden should be planted with a “Self-blanching” variety as early in the spring as the plants can be procured. For this it is a good plan to sow two or three drills of celery in the hotbed at the same time with tomatoes, peppers, etc., that they may be ready for planting out early in the spring. These will grow quickly before the very hot weather sets in, and in a favorable season will be ready for use by the latter part of August; if kept earthed up they will be of as handsome appearance and as crisp and fine flavored as are the older varieties in December.
For the main crop the young plants should be ready to set out by the 1st of July, though in a favorable locality they can be planted as late as the middle of August, as they spend the summer largely in making roots and do not grow much until the cool weather. As soon as the plants attain eight to ten inches in height, or, rather, length of leaf stalk as they lie spread out, the earthing up should begin on all kinds of celery, although the seed catalogues will tell you that it is unnecessary in self-bleaching kinds. These latter may be bleached easily by tying the stalks together with straw or soft twine, but the earthing-up process is much more satisfactory both to produce a compact bunch of stalks and an even whiteness in color; otherwise, the outside stalks will remain green.
My plan in earthing for the first time, or “handling,” as it is called, is to have the dirt loose and fine on each side of the row, then to stand astride the row, gather all the leaves up and hold them closely in the left hand, and with a short-handled hoe draw the loose dirt in and pack it firmly around the stalks, leaving about two inches of the tips stick out at the top. It is important to hold the stalks closely, that the dirt may not sift down among the stalks, which would either rot the heart or cause the inner stalks to become twisted and crooked. The second and succeeding bankings are done by a boy standing over the row, clasping the stems in his hand closely, while a man on each side banks up the loose dirt with a shovel; as they raise the bank the boy slides his hand further up the stalks, until, as before, all but two inches of the tips are covered. The boy moves along the row backward, facing the two men who are using the shovels; as they finish one plant he grasps and bunches another, always having a plant in each hand. This method is a great time saver, and also enables the work to be done more neatly than where the plant has to be held while the dirt is drawn from a distance with the hoe. This earthing up should be repeated every two or three weeks until it is time to store the celery for the winter. Immediately before banking, I run the light plow or the cultivator on each side of the row, which furnishes plenty of fine, loose dirt ready for use. The soil will pack better and remain in the banked form better if it is moist when handled, but must not be so wet as to be sticky, for it would then “rust” or spot the stalk. The plants should be set in rows five or six feet apart, so that there may be plenty of soil for the earthing up and room to pass between the rows when banked; the taller growing varieties will require full six feet between the rows.
About the third week in November the celery should be dug and stored; for if it is left out longer, there is danger of its being spoiled by hard freezing. If it is to go in the cellar it should be stood upright in barrels or in boxes, the sides of which are as high as the stalks are tall, so as to keep them straight and white; the roots are left on and packed in moist soil, in order to keep the plants fresh and crisp; but the soil must not be allowed to come up among the stalks, or it might cause them to rot. The root cellar must be kept cool and have plenty of air whenever it can be admitted without freezing the contents of the cellar.
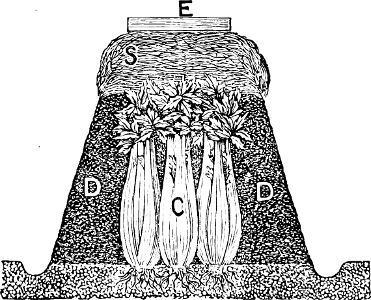
Illustration showing the manner of storing celery in the field for early use. C. Plants of celery. D. Banks of soil. S. Straw covering. E. Board laid on top of the straw to keep it in place.
Another plan is to set the plants on a well-drained plot, side by side in a long row, three or four plants wide and as closely together as possible; earth banks are then raised on each side of the row about four to six inches thick at the top, and the ends closed in the same manner. The roots are packed solidly in the soil, and the banks are carried up level with the longest tops; when the very cold weather sets in the whole top, banks and leaves, is covered with straw, leaves or corn fodder, to keep the frost out. I would not recommend this method of storing unless it is expected to have the supply all used or marketed by the 1st of January. The best way to store celery is in a hotbed or cold frame, which is built two or three feet deep in the ground, as already described. The celery plants are set side by side in this, as in the boxes or barrels, and the roots tightly packed in moist soil; then the sash can be put on at nights and in the daytime can be entirely removed or slightly raised to admit air, according to the temperature. On very cold nights the sash can have an extra covering of straw or old carpet, and if there is a heavy fall of snow it can be left on a few days, until the weather again becomes warmer. Stored in this manner, it is no trouble to get the celery when wanted; it can be given plenty of air, without which it will not keep, and the late kinds, if packed closely together, will complete their bleaching. If the kinds which require blanching are not kept earthed up as the growth advances, it will be almost impossible to blanch them.
VARIETIES OF CELERY.
The dwarf and half-dwarf kinds are the best, as they are superior both in quality and appearance and are much easier grown. Of these the Dwarf Golden Heart is one of the best varieties; the stalks are very thick and solid, fine flavored, and blanch to a fine white, excepting the centre, which is of a fine golden yellow.
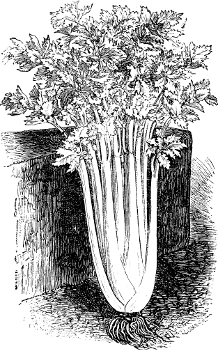
NEW GOLDEN SELF-BLANCHING CELERY.
Golden Self-Blanching.—The handsomest and most generally satisfactory kind that I have ever planted. I know of none that can equal it in appearance or quality; the stalks are large, straight, crisp and very solid; it is very vigorous in growth, attaining a height of one to one and a half feet, and I have had single plants of three inches in diameter. The leaves of this variety are of a beautiful golden yellow after the plant has been bleached, which adds greatly to its handsome appearance when prepared for the table. The young plants should be earthed up as soon as they are large enough to handle, and in two weeks the celery will be in the finest order for the table, thus gaining from one to two months over the ordinary kinds. The quality is the finest and the stalks are crisp, brittle and delicious.
White Plume.—This is also a self-blanching variety, but not to the same extent as the preceding kind. In this sort the inside stalks are naturally white, and the leaves of these white stalks are variegated in the most striking and beautiful manner, which gives it the name and renders it the most ornamental variety grown. To bleach the outer stalks the plant should be kept earthed up, and it will then be ready for use at any time. It is not, however, so fine in the small state as the Golden Self-Blanching, which is of fine eating quality even when growing in the seed bed; the stalks are not so thick and meaty in the White Plume, but have a strong “nutty” flavor.
Crimson or Red Celery.—The red celery is very handsome and fine flavored when bleached, and after the self-blanching varieties is the most desirable one to grow. It grows tall and straight, is crisp and brittle, and when well blanched is a beautiful golden yellow, the ribs and ridges being tinged with crimson.
SWEET CORN.
The first sweet corn should be planted early in April, and should be of some small-growing, very early variety, such as the Cory or Minnesota. This corn will have to struggle with the frost and chilling nights, but with the aid of the ever-present worm, which inhabits each ear, will be ready for use long before any of the really fine kinds can be had. There is only one good thing that I have been able to discover in the worm’s favor in connection with his labors in horticulture, and that is the way in which he assists in ripening all the earliest specimens of the different fruits. To be sure, his efforts in this line are not always appreciated, but he is always there when you find a fruit ripening before its regular time. About the third week in April a second sowing of this early corn should be made, and at the same time should be planted some early large-eared variety, such as Crosby’s Twelve-rowed, and an equal amount of a late variety, such as Stowell’s Evergreen. Thereafter a planting should be made every ten days or two weeks, of a favorite sort, which, with me, is Stowell’s Evergreen, although I plant other kinds throughout the season, for the sake of variety. These plantings should be kept up until the 10th of July, after which the late kinds will hardly mature; but if the ground can be spared, I would keep on planting until the 10th of August, as, if the fall should be late, it will come in very acceptably. Most gardeners exhaust their supply about the middle of September, as they do not continue to plant late enough. If there is danger of heavy frost early in the fall, the corn that has well-set ears that have not yet ripened should be cut off at the ground and stacked against the south side of a fence or building; it should be stood up nearly two feet in thickness, to prevent freezing, but should not be thicker, as it will heat too much and will be awkward to handle when sorting over for the good ears. Treated in this way it will provide ears for use well into November, but of course they will not be of as fine a quality as those matured in the ordinary way.
As the earliest varieties only grow about three feet high and have the ears set close to the ground, the best way of planting them is to drop the seed ten inches to one foot apart, in drills. Sow plenty of seed, and if it comes up too thickly it can easily be thinned out when hoeing; all suckers should be broken off at the same time, so as to throw the strength of the plants into the ears.
If two rows are planted across the garden at each planting they will furnish an ample supply for the average family. If it is needed for canning or drying, an extra large planting should be made early in May, which will mature after the heavy harvest work is over and before the fall fruit is ready to preserve.
If some fine compost is placed in the drills or hills, it will help greatly to give the young plants a good start until they can reach the manure with which the garden has been dressed; where this compost is put in it should be covered with an inch of soil before the seed is sown.
The climbing snap beans may be planted in the hill with the tall-growing corn, or hills of pumpkins; squashes or cucumbers may be made in every fourth hill and every third row, although the vines will be very much in the way of continued cultivation if the ground is inclined to be weedy. Sweet corn should not be planted within one hundred yards of field or pop-corn, as the pollen will be sure to mix and spoil the quality of the table corn. It will sometimes mix at greater distances, but this distance would be safe in most cases.
VARIETIES OF SWEET CORN.
The Cory.—This is the earliest variety known, and is at the same time superior in size and quality to the varieties which have been grown as extra early, before its introduction. It ripens nearly a week in advance of any other variety, while the ears are much larger than either the Minnesota or Marblehead. The grains are well formed to the tip of the cob, making a much handsomer ear than the other early varieties, while in sweetness and quality it is also superior.
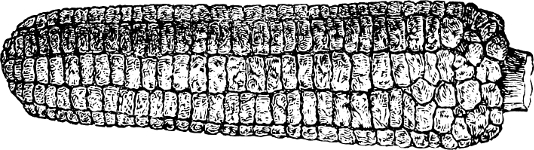
A RIPENED EAR OF THE CORY CORN.
Amber Cream.—This is a medium early variety; it is a strong, vigorous grower, reaching six to seven feet in height; the ears are about ten inches in length and the quality is rich and sugary. When used on the table the grains are milky white; the “Amber” of its name coming from the ripe seed, while the “Cream” is evidently an attempt to describe its excellent quality. In planting and picking for the table, the size of the ears of this variety and of Stowell’s Evergreen should be taken into account; a dozen ears being nearly equal to two dozen of some of the smaller-eared kinds.
Crosby’s Early Twelve-rowed does not grow quite so tall as the Amber Cream, nor are the ears as large; although called “twelve-rowed,” it frequently has only ten rows. The great merit of this kind is in its excellent quality, it being very sweet and juicy, and fully equal to any variety that I have ever eaten. It is one of the best sorts to plant after the very early kinds.
Potter’s Excelsior.—An excellent medium early variety; the ears are of good size, with twelve rows of deep grains. It is remarkably sweet and juicy, and quite productive, averaging two good ears to a stalk.
Stowell’s Evergreen.—This is, in my opinion, the finest variety for late and general planting. It is strong-growing and prolific, while the ears are of large size and handsome appearance. The quality is rich and sweet, while the grains are juicy and luscious, when picked at the right stage. To have the finest corn of any variety it should be picked in just the right condition; that is, when the skin of the grain breaks at the slightest puncture, and plantings should be made frequently enough always to have a supply at this stage. The quality is inferior if it is a few days too old or too young.
CUCUMBERS.
In raising cucumbers care should be taken to procure seed that is perfectly pure, as it mixes readily with other varieties and deteriorates rapidly. The seed should be planted in hills, prepared in the manner described for cantaloupes, three feet apart in the row, and the rows 4½ to 5 feet apart. If there is not enough compost at hand to manure them, as directed in the manner of making them, the hills can be raked up a few inches above the surface and the young plants allowed to feed on the general dressing which has been applied to the whole garden; the elevation serving to give the young plants a better start than on the level surface. While the cucumber is a lover of heat and moisture, it is apt to damp off in its early stages if it should be cold and wet; the hills tending to lift the young plants up into a drier and warmer soil. A liberal quantity of seed should be sown in each hill, say twenty to forty seeds, that there may be enough young plants to survive the depredations of the striped cucumber bug and of the borers. The young plants should be dusted every few mornings with ashes, plaster or slug shot, to destroy these pests, and as soon as the plants are sufficiently large to take care of themselves they should be thinned out to only three or four plants in a hill. The first planting should not be made before the middle of May, for they will not stand cold. The cucumbers should be picked as soon as they attain sufficient size and before the seeds become developed or hard; this should be done every morning while it is still cool, and the cucumbers placed in a cool cellar. The very best way is to put them in the water in a cool spring-house; there is no place where melons, squashes and cucumbers retain their freshness and crisp, fine flavor so fully as in such a spring. If the picking is carefully attended to and all the fruit picked off as soon as large enough, the vines will continue to grow and bear all summer, especially if they are in a rather shady situation, such as among the sweet corn. A few fine specimens may be allowed to ripen for seed, but if many are left the vines will dry up and die as soon as they have ripened a crop. Where a quantity of small pickles are wanted, the best way is to make a planting about the first week in August or latter part of July. These will produce large quantities if the ground is rich, and will continue to bear until killed by frost. Like the summer crop, they should be picked every day or two, and as soon as they are of the size desired, as they will bear a great many more if not allowed to grow large; also the smaller the pickle the more attractive it is, and the more readily it sells.
VARIETIES OF CUCUMBERS.
Early Russian.—The earliest variety grown, and is of very good quality for table use, but only grows about three inches in length; it is very solid and has but few seeds. Its small size and earliness render it a very good variety for pickles.
Early Green Prolific.—This is largely grown for pickling, and is immensely productive. The shape, quality and great bearing make it a very valuable kind.
Improved Early White Spine.—This variety is more generally grown than any other, and is deservedly popular for both table use and for pickling. It is of medium length, and from 1½ to 2 inches in diameter; when not too old the flesh is very crisp and fine flavored.
London Long Green.—Grows from twelve to sixteen inches in length, is a very dark green in color, and presents a fine appearance, while the flesh is firm and crisp, and the quality excellent.
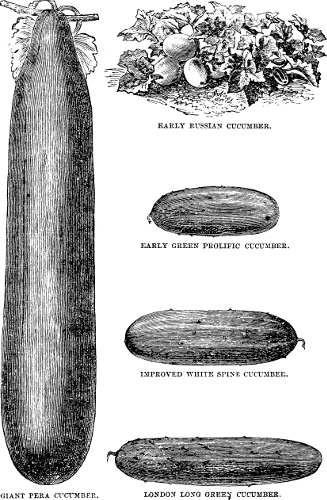
GIANT PERA CUCUMBER.
EARLY RUSSIAN CUCUMBER.
EARLY GREEN PROLIFIC CUCUMBER.
IMPROVED WHITE SPINE CUCUMBER.
LONDON LONG GREEN CUCUMBER.
Burpee’s Giant Pera Cucumber.—This wonderful new variety differs in almost every respect from the cucumber as generally grown, and in size and quality far surpasses the ordinary kinds. The vines are very vigorous in growth, with dark green, luxuriant foliage, which enables it to bear large crops of cucumbers of extraordinary size, as they are nearly three inches in diameter and are from 15 to 22 inches in length. The fruit is uniformly round, smooth and straight, the skin being of a pale green and entirely free from spines; when ripe the skin is a russet brown. The green cucumbers are fit to eat at any stage of their growth. The flesh is entirely white, not tinged with green, as in the ordinary kinds, and is crisp, tender and brittle. It has none of the cucumber taste of the older kinds, and is not always relished at first by those who are fond of the strong-flavored varieties, but after becoming accustomed to it for a short time, it is preferred to all others. In its native home it forms one of the staple foods of the inhabitants, being eaten in the natural state without any dressing whatever, in the same manner that we would eat an apple or a pear. It is certainly one of the most remarkable vegetables of recent introduction.
EGG PLANT.
Since the advent of the potato bug in our Eastern States the labor of raising this fine fruit is almost trebled, the bug regarding it as a delicacy superior even to the potato vines, and from its manner of bearing the fruit it is dangerous to apply Paris green or other poisons for their destruction. Where there is time to attend to it I prefer to have the bugs picked off by hand every day, but this is slow work, as we frequently get as many as a pint from two dozen of plants, and they do considerable damage by eating the young shoots and buds, even between such frequent pickings. The best way is to dust with Paris green or other poison, until the plants are of sufficient size to bear fruit, and then to keep the bugs off as thoroughly as possible by hand picking. In preference to Paris green or other strong poisons, I use Hammond’s Slug Shot, an insecticide that is sold in all seed and implement stores, and which is said not to be injurious to man or beast, though poison is present in the impalpable powder; it is also claimed that it is an excellent fertilizer, as well as being sure death to insects. Having used it three seasons, I have found it very satisfactory for the preservation of all small plants, excepting in one case of young seedlings just coming through the soil, in which case a too heavy application burned them up.
The egg plant is a strong, rank grower and a great lover of rich soil and of heat. The seed should be started in a warm hotbed or greenhouse about the last of March, and the soil should be as rich and light as possible. If the plants grow rapidly, they will be improved by transplanting in the hotbeds, as it will help them to form a good bunch of fibrous roots, so that they will sustain no check when planted out. They should not be set out in the garden until warm weather is assured, and then should be planted in hills enriched as for melons. These hills need not be higher than the surface of the garden, but if strong growth and large fruits are desired, a hole should be scraped out where each plant is to stand, and two or three shovelsful of well-rotted manure or compost put in, and the soil leveled off again before the plant is set. If the ground is dry when the plants are set out, water should be poured in the holes dug to receive them, and the dry soil drawn up around the stems when the plant has been set. The roots of the freshly set plants should not come in contact with the manure, but should have two or three inches of soil through which to seek it as they become established. The fruit should be cut as soon as it is of sufficient size and before the seeds become hard, as it soon loses its fine quality when it begins to ripen. The plants will also continue longer in bearing if this course is pursued, as it takes greatly from the strength of any plant to ripen its seed. When there is danger of frost in the fall all the fruits large enough to use, from the size of an egg up, should be picked off and stored in the cellar, as they will remain fresh and fit for use for over a month at this cool season of the year; by so doing I have frequently enjoyed this fine fruit long after it has disappeared from the tables of my neighbors.
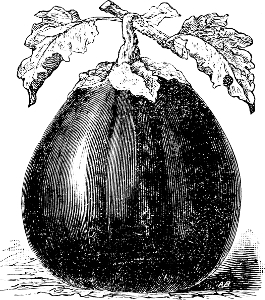
NEW YORK IMPROVED EGG PLANT.
The hills for the plants should be about two feet apart in the row, and the rows four feet apart. Three dozen plants, which will occupy hardly a third of one of our kitchen garden rows, will furnish an ample supply for a large family. The small early variety matures three or even four weeks before the ordinary kinds, but as they are hardly larger than a good-sized goose egg, it is not worth while to bother with them unless you are especially fond of the fruit and wish to have it as early as possible.
VARIETIES OF EGG PLANT.
Extra Early Dwarf Round Purple.—This variety is in every respect similar to the New York Purple, excepting in size and time of ripening; the fully developed fruit being about two inches in length and being ready for use a few weeks after planting out in the garden.
New York Improved Large Purple.—This is the best and most popular variety. It is of large size, very handsome color and appearance, and the largest in diameter of any variety, yielding large slices for frying. The quality is of the finest.
HORSE RADISH.
This pungent root is a great favorite as a relish in the early spring, and is credited with tonic properties; at any rate it is a very pleasant appetizer at a season when we have been almost without fresh vegetables for several months. It can be raised in almost any soil, though preferring a moist situation, and is most at home where it is constantly moistened or occasionally overflowed by some stream. It is raised from pieces of root, three or four inches in length and from ¼ to ½ inch in diameter. These slips are made from the tails or rootlets cut off in trimming the roots for grating, they should be cut off square at the top and sloping at the bottom, that you may readily know which end goes up when you plant them. The slips should be kept in a box of moist earth, in a cool cellar, after they have been trimmed, until planting time. The slips can be planted with a long trowel; but the best and quickest way is to drive a spade, full depth, into the soil, flatways with the garden line, move it slightly back and forward, to widen the hole, and slip a piece of root down each side of the cut made by the spade, which will make them six or seven inches apart; the spade should then be driven in about one inch back of its previous position and the handle pressed forward, which will pack the dirt solidly against the planted roots, the tops of which should be placed about one inch under the surface. Where it is desired to increase the supply as fast as possible, and where the roots have been used at home, the crowns or tops, with an inch or so of root adhering, can be planted again, but they will not make long, smooth roots, like the slips, but will have a tendency to make several small roots.
HOPS.
At the end of one of the berry rows, or in some corner where they will be out of the way of the plow, there should be a few poles of hops. These are grown from pieces of root, and after being once planted will not need further attention except to be kept clear of weeds and grass, to be supplied with a good topdressing of manure in the fall, and suitable poles to climb upon. These poles should be good strong ones, at least 8 to 10 feet in height. About the last of August or first of September the vines should be cut off near the ground and the poles pulled up, so that the crop may be gathered. There is an old saying that “the September winds should never be allowed to blow on the hops.” The hops should be spread on sheets and placed in some cool, airy garret or loft, to dry. It will take five or six good poles to make a bushel of hops.
LETTUCE.
This is generally known as salad, which is a misnomer, as salad means anything that is served in a green state; it may be onions, tomatoes, cabbage, lettuce, or anything of that kind. By general usage the word salad has been appropriated to the lettuce, as the latter is the plant most frequently grown in this country for salad. But call it whichever you like, it is one of the greatest additions to our tables, and in our kitchen garden it should not be made a side issue of a week or two in the spring, but should be raised in the finest condition possible throughout the season, and by using the hotbeds and cold frames it is possible to have it the whole year round.
To raise head lettuce in perfection the greatest care must be taken to reserve the very best and tightest heads for seed, or if the seed is to be purchased select the hardest-heading varieties. For the earliest planting the seed should be sown in the hotbed and have the same treatment as its associate, the cabbage; the young plants should not be allowed to stand too thickly; they should be at least an inch apart in the seed bed, or be transplanted to that distance when half an inch high. When the cabbage is set out, one or two lettuce plants may be set between each pair of cabbages in the row, according to the distance the cabbages are apart. There must be space enough between the plants to give the soil a good stirring with the hoe around each plant, as thorough cultivation is essential to the best development of both cabbage and lettuce. A second lot of seed should be planted when the tomatoes and egg plants are sown; these can be set out in the garden as soon as they are large enough to handle. The third sowing should be made in the open garden when the first planting is done, and the young seedlings should be transplanted as soon as the plants are large enough and before they begin to be crowded in the row, as this last sowing will not form heads without it receives the best of care. These three sowings are about all that can be depended upon to make hard heads, unless it can be planted in some rich, shady corner, and carefully nursed with the watering pot.
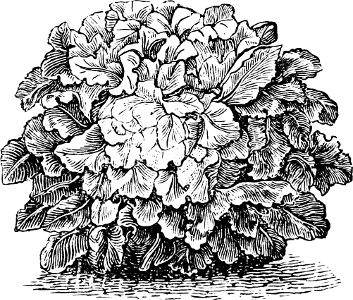
PERPETUAL LETTUCE.
About the first or middle of May a sowing should be made of the “Perpetual Lettuce,” and the plants, when large enough, should be transplanted and treated the same as the head lettuce; it will not form tight heads, but produces a fine bunch of broad, yellowish-green leaves, which are very crisp and delicate, not being strong and bitter, as most lettuces are in hot weather. This lettuce will stand from four to six weeks without running to seed, so that if plantings are made about once a month it can be had in perfection throughout the balance of the season. If the head lettuce is more particularly desired, a sowing should be made about the first of August, and another about the fifteenth; the young plants should be transplanted and treated in the same manner for heading as is followed in the spring; the first sowing will not produce heads unless the latter part of August and the first part of September be cool and moist; but you are almost sure to have fine heads from the second sowing. Personally, I prefer the Perpetual, both for its fine qualities and the ease of growing it.
Another way, and the easiest, to have a constant succession of lettuce for the table throughout the season, is to sow the seed thickly in drills and to cut the loose leaves close to the ground when it is three or four inches high; this produces rather narrow leaves, which are very tender and juicy, but which have not the substance of those grown as separate plants or heads, and are not so easily prepared for the table. These sowings can be made every few weeks, and a constant succession of young leaves be had for use throughout the entire season. It should be the object in sowing lettuce to plant small lots frequently, that it may always be had in the best condition.
About the second week in September a sowing of some early hard-heading variety should be made, and a succeeding one about the first of October; from these two sowings the cold frames should be planted, about one-third from the first and two-thirds from the second; the plants should be set about six inches apart each way, which will allow about fifty plants to each sash. When cold weather comes the sash should be put on, and the outsides of the frames banked around with long stable manure. The plants must be treated to plenty of fresh air whenever the weather will permit of it, and on very cold nights the sash should be reinforced with a covering of straw, old mats, or carpet. The lettuce grown in these frames is apt to be infested with the small insect known as the “Green Fly;” to prevent or to get rid of the presence of this pest, tobacco refuse and sweepings from a cigar-maker’s shop should be strewn on the soil under the leaves; this will destroy the fly and act as a fertilizer, but if too much is applied it will spoil the delicate flavor of the lettuce.
If a few very early cabbages are desired, the seed should be sown about the first of October and transplanted with the lettuce into the cold frames; planting them about two inches apart each way; if these are in good condition and the spring favorable, they can be planted out about the 15th of March, and will produce heads one to two weeks earlier than those raised in the hotbeds.
VARIETIES OF LETTUCE.
Burpee’s Hard-Head.—This is the fastest growing and the best heading kind that I have ever grown. With this variety the ordinary gardener is able to grow as fine, large, solid heads as those grown by the professional market gardener. In shape it very much resembles a cabbage, as even the outer leaves tend to curl in over the head, instead of spreading outward, as in most lettuces. In appearance it is quite novel and striking, the edges of the leaves being tinged with a deep brownish-red, while in the centre of its hard heads the leaves are blanched to a beautiful creamy white. In quality it is remarkably tender, rich, juicy, and never bitter.
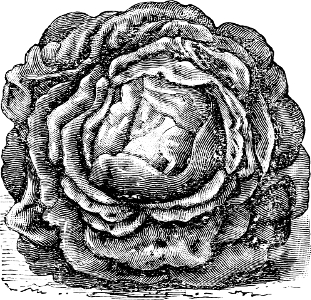
BURPEE’S HARD-HEAD LETTUCE.
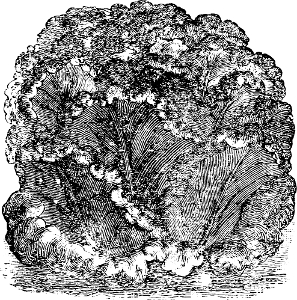
BURPEE’S TOMHANNOCK LETTUCE.
Burpee’s Tomhannock.—This is the finest of all the cutting lettuces, as it is of large size, handsome appearance, and the very choicest quality. It grows very quickly, is soon ready to cut, and stands a long time without running to seed, retaining throughout the season its delicate and delicious flavor. The growth is erect; a fully developed plant is ten to twelve inches in height, and nearly as great in diameter across the top; the outer edges of the leaves curl outward. The outer leaves are shaded with reddish-brown, while the inner leaves are almost white. It is entirely free from any bitter taste throughout the entire summer.
Stonehead Golden Yellow.—This is a new variety, which makes very solid heads, of handsome appearance and the finest quality. Its earliness, large, tight heads and superior quality render it one of the best kinds for forwarding under glass.
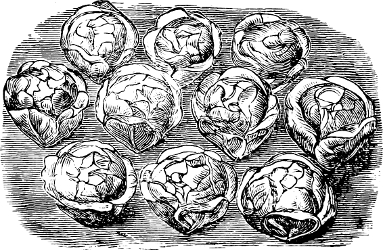
GOLDEN STONEHEAD LETTUCE.
Burpee’s Silver Ball.—This, next to the Hard Head, is the best heading variety for general purposes, and where the brown markings in the latter kind are an objection, the gardener will find in this kind all the good qualities that go to make a desirable lettuce. It produces a beautiful head, very firm and solid, with handsomely curled leaves. The head is of a silvery white color, very rich and buttery in flavor, and stands for some time before running to seed. Other excellent varieties of cabbage lettuces are Philadelphia White Cabbage, The Hanson and The Deacon, while The Tennis Ball is a great favorite with market gardeners for forcing.
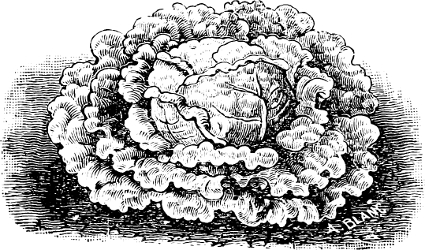
BURPEE’S SILVER BALL LETTUCE.
OKRA.
This plant, like the carrot, is too little grown, as its green pods impart a fine flavor and consistency to soups and mixed stews; besides being very palatable when stewed and served as is a dish of asparagus; the pods can also be dried for winter use. The seeds should be planted in drills, and if the dwarf variety be used, which I think is preferable, as it produces an abundance of pods and does not take up nearly so much room, the plants may be allowed to stand about one and a half feet apart in the row, the rows being three feet apart, though a quarter or half a row in the kitchen garden, as here described, will furnish an ample supply, both for use and drying. For either purpose, they should be cut before the pods attain their full size or they will be hard and woody. For drying, the best way is to string them on a fine wire or thread and suspend them to the rafters of a cool loft or garret until wanted for use. The culture of this vegetable is very simple, as the seeds are planted in drills about two inches deep, and the after treatment is the same as for corn.
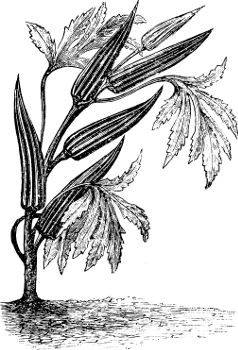
OKRA.
ONIONS.
In raising onions in quantities the practice of late years has been to grow the crop from seed in one season, instead of the method formerly almost universally practiced in this section, of raising and keeping over sets to form the next year’s crop. This latter method is now only practiced to save labor in small gardens and to bring a few onions in for use early in the season.
To raise a satisfactory crop the ground must be free from weed seeds; it must be made as rich as possible and have constant cultivation from the time the seedlings break through the ground until the bulbs begin to ripen. The soil must be plowed, harrowed and raked, until it is in the finest possible condition to receive the seed, and it is important to select a plot for this purpose that has been kept free from weeds the preceding season. Root crops are the best to precede onions, as they not only leave the ground free from litter, but also, if they have been properly cultivated, leave the soil in fine tilth.
In our kitchen garden I would sow the seed in drills, twelve to fourteen inches apart, and cultivate with the wheel hoe; in field culture, or raised more extensively in the garden, plant in rows as closely as they can be worked with the cultivator, which, if it is provided with very narrow-bladed teeth, can be run through any rows where the horse can walk. For the kitchen garden, make the surface fine with a sharp steel rake, and if no drill is at hand, take a rake handle or blunt stick, and, drawing it along the garden line, scratch a drill about an inch deep. Sow the seed thinly, say an inch apart, but if there is reason to doubt the freshness of the seed, sow it thicker, so that a good stand may be assured. When the onions are an inch high, they should have their first working. Follow the wheel hoe or cultivator with a narrow-bladed hoe, not wider than an inch and a half at the cutting part of the blade; it must be sharp and lightly handled, just loosening the ground and cutting off any stray weeds. If there are no weeds the soil can be quickly loosened with a sharp steel rake. They should be worked every eight or ten days from this point until they begin to ripen; if it is neglected for longer periods than these, the gardener will rue it in days of back-breaking labor on hands and knees. When the young onions have made leaves two or three inches in height, they should be thinned out to from four to six inches apart in the rows, according to the size of the bulb made by the particular variety planted. The seed for onions grown in this way should be sown as early in the spring as the soil can be gotten into the proper fine condition, so that they may make as strong a growth as possible before the hot summer weather ripens them off. As they begin to ripen, all those with thick necks should be pulled and used upon the table, as they will not ripen properly, and if put away with the good bulbs will start all to rotting. There is a theory common with old gardeners that, by bending the tops over when they begin to ripen, the bulbs will be increased in size and will ripen more quickly; personally, I have tried it frequently, and have never been able to observe any difference in those bent and the ones left to ripen in the natural way. As soon as the bulbs are well matured, take them up at once, as a few rainy days might start them to growing again if left in the ground; pull off all the tops and roots which adhere to the dry bulbs and spread them thinly on the barn floor or on the floor of a cool loft. When it becomes too cold to let them remain longer in this position without danger of freezing, I put them in peach baskets, the stripped sides of which allow a free circulation of air, and store them in a cool, well-ventilated cellar, where we try to keep the temperature just above freezing by admitting air whenever possible, as it takes but very little warmth to start them to growing, and then they soon become unfit for use. If the gardener saves his own seed, the finest and best-shaped onions should be laid aside for planting out in the spring, for this purpose.
Where the crop is raised from sets it is not necessary, though quite desirable, to have the soil made as fine as for the seed bed. As the small onions are set in, planting at the proper distances apart, almost all the cultivation can be done with the narrow onion hoe, and if it is regularly attended to at proper intervals no hand work is necessary. The onion is a hardy bulb, and the sets can be planted as soon in the spring as the ground can be gotten into proper condition; this makes an important feature in the earliness of the crop, as the sets have several weeks the start over the onions raised from seed. For the very earliest onions, or those used when the bulb and neck are about of equal thickness early in the spring, and which go by the name of scallions, the sets are planted in October and allowed to remain in the ground all winter, so that they are ready for use almost as soon as the spring opens, two weeks’ growth sufficing to bring them to a proper size. Where the main garden crop of these fragrant bulbs is raised from seed, enough sets should be planted to make an early supply for the table; if no sets are at hand in the fall, to plant for the spring crop of scallions, they could be grown by sowing the seed about a month earlier than you would plant the sets for the same purpose.
In sowing seeds for sets the same directions apply as given for the crop of bulbs, excepting that the seed is sown much more thickly, so that the bulbs will touch each other and stand two or three wide in the row. If they do not seem to be making the proper growth as the season advances, they should be thinned to the proper extent to enable them to grow to the right size, one-half inch in diameter, though my own trouble is that they usually grow too large; to remedy this when they are nearly the proper size I allow them to become choked with grass and weeds, which checks their growth, but when this is done they must be watched that this mass of stuff does not rot them off when ripe. I think a better way would be to go along the row with a straight-edged hoe or spade and cut off some of the roots. The main object in having the sets of this small size is that they shall not run to seed when planted out in the spring. Any sets which exceed three-quarters of an inch in diameter should be used for pickling or cooking. When the sets begin to ripen it will sometimes facilitate the process to bend all the green tops over close to the bulbs, as it helps to dry and shrivel the tops more quickly. When thoroughly ripe they should be gathered at once, the tops and roots pulled off, and should be spread out and stored for winter in the same manner described for the large onions. Any of the sets that persist in growing and not drying properly, should be thrown out, or they will spoil the whole crop. If a suitable cellar or loft is not available for storing the bulbs where they will be sure not to start into growth, they may be wintered on the barn or loft floor, covering with hay as the cold weather advances. The hay should be only two inches thick at first, but should be increased to one foot in thickness as the season advances, and in the spring should be removed by the same graded process.
VARIETIES OF ONIONS.
Yellow Globe Danvers.—This is a splendid variety, and is the most popular and profitable kind to grow for market. It is similar to the Yellow Danvers as ordinarily grown, excepting in shape, which is much finer, in my opinion. No one can fail to be pleased with this fine variety when well grown. It is quite early, and is one of the very best keeping kinds.
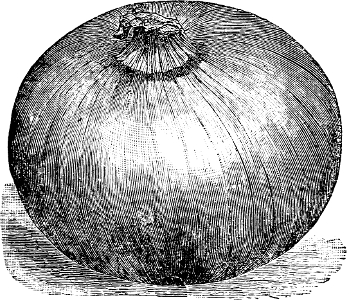
YELLOW GLOBE DANVERS ONION.
Large Red Wethersfield.—A strong grower and produces immense crops of large, fine bulbs. It is rather flat in form, deep purplish red on the outside and a much lighter shade inside. It has a strong flavor, and is very solid, making an excellent keeping and shipping sort.
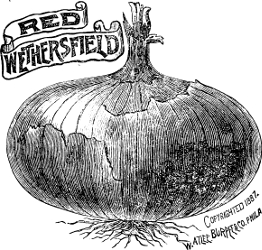
RED WETHERSFIELD
Copyrighted 1887.
W. ATLEE. BURPEE & CO. PHILA
LARGE RED WETHERSFIELD ONION.
White Globe.—One of the handsomest onions grown, beautiful in shape and color, having a clear, white skin; the flesh is fine grained, of mild flavor, and the bulbs are of good keeping quality.
White Silverskin, or White Portugal.—This is an old and favorite variety, being very desirable for planting in the family garden; the flavor is the mildest of the American varieties; the small onions are very fine for pickling. I think this variety should be marketed as early as possible, as with me it is not a good keeper.[6]
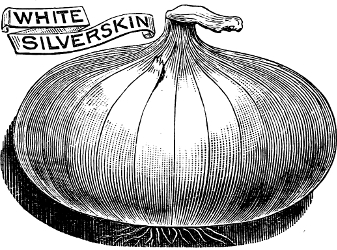
WHITE SILVERSKIN
SILVERSKIN, OR WHITE PORTUGAL ONION.
ITALIAN VARIETIES OF ONIONS.
Giant Red Rocca.—These onions are of large size, handsome appearance and mild, delicate flavor. In this variety we have an onion which attains a weight of from one to two pounds under ordinarily good culture, and of most handsome shape and appearance, the outer skin being always bright red, while the flesh is white, mild and pleasant.
Earliest White Queen.—This variety does not grow to the large size of the other Italian kinds, more resembling our American Silverskin in size and appearance, but has the great advantage over the latter variety (which takes two seasons to attain the same size), of remarkably quick growth, while the flavor is equally, if not more, delicate. The bulbs are flat, pure white and about two inches in diameter. It is the finest variety for pickling grown. Sown in February, they will produce onions early in the summer, while if sown in July, they will be ready to harvest in the fall, and will then keep in splendid condition throughout the winter.