OUR PRACTICAL DRESS INSTRUCTOR
Reading edition
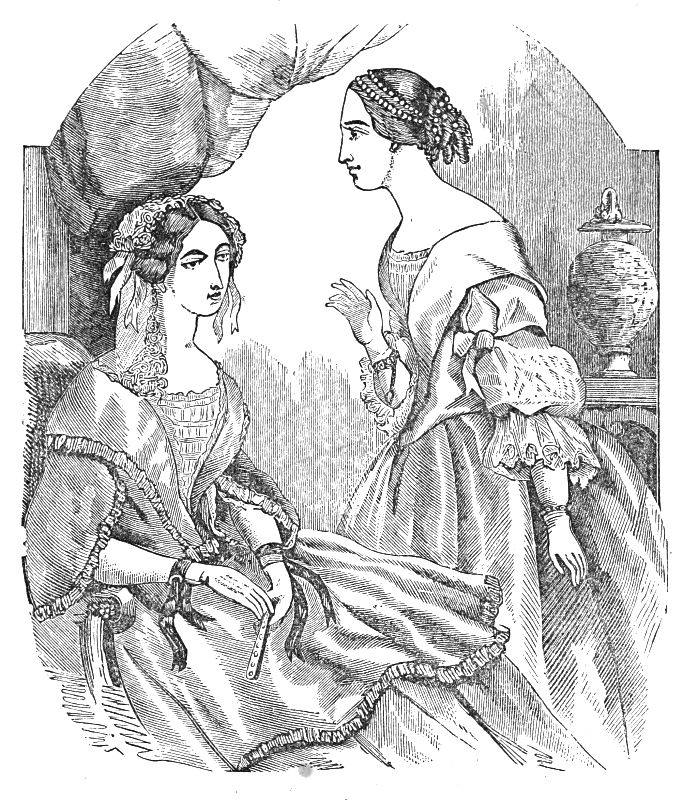
DESCRIPTION OF THE ENGRAVING.
Headdress of the Lady on the Right.—Hair in bandeaux à la Niobe; torsade of pearls. Moire dress, low body, with progressive revers opening over a modestie of embroidered muslin edged with lace; short open sleeves à la Watteau; undersleeves of embroidered muslin; half-long gloves; bracelets of pearls, or more often worn different, according to choice.
The other Figure (Lady seated).—Cap of tulle trimmed with lace and ribbon. Low body, with revers open to waist; loose bell-shaped sleeves, edged with a bouillonne; two skirts trimmed with the same; modestie of embroidered muslin, edged with point de Venise; black velvet bracelets, half-long gloves, and Venetian fan.
DESCRIPTION OF DIAGRAMS.
(See next page.)
Fig. 1.—Front of body as shown in the engraving.
Fig. 2.—Back of body, by placing the letters a a.
Fig. 3.—The cape sommet worn for evening dress. Place the letters b b, the upper part of the cape forming an epaulette over the shoulder.
Fig. 4.—The sleeve, showing the muslin sleeve underneath, as in the engraving, à Watteau shape, fastened by a bow of ribbon. We have given the pattern of the whole sleeve.
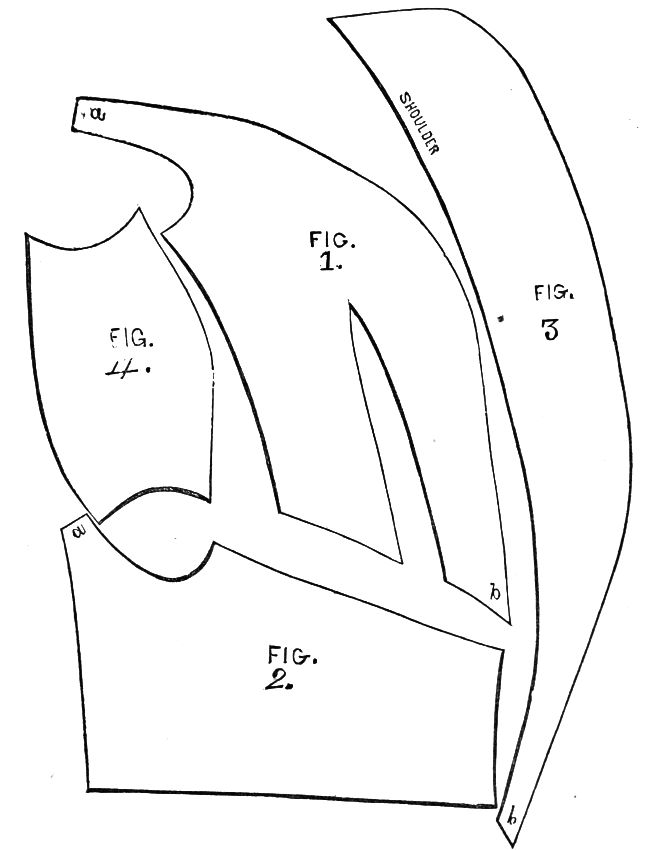
DIAGRAMS OF THE DRESS SHOWN ON PAGE 453.

COTTAGE FURNITURE.
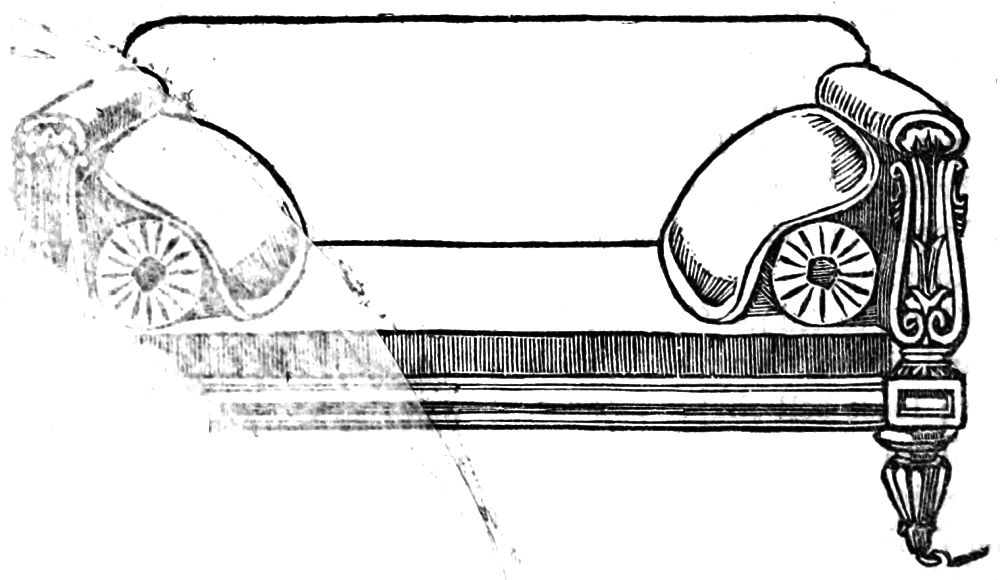
The above figure is a handsome pattern for a sofa. The castors are sunk in the legs.
WORK-TABLE FOR JUVENILES;
OR,
LITTLE MARY'S HALF-HOLIDAY.
"WELL, my dear, I am glad to see you ready for work again."
"Here are six yards of pink satin ribbon, about an inch wide, some pink sarsnet, some card-board, black net, and plaited straw. What kind of straw is it, mamma?"
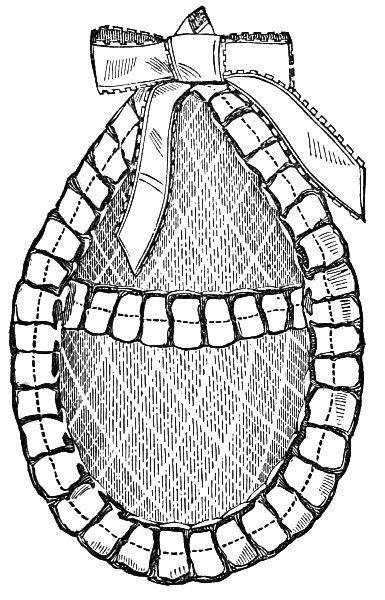
BACK OF A WATCH-POCKET.
"It is called straw-beading, and is employed in the same way that split straw was once used; but as it is flexible, and to be had in any length, it is much more easily worked. Besides the things you have mentioned, there is some pink sewing silk, and a little stiff muslin. Now you have all your materials complete, and I have only to show you how to use them. Begin by cutting out the shape for the back of the watch-pocket. Here is a drawing of it. It is 7 inches long, and 4½ in the widest part. Mark the depth of three inches from the bottom, and form this into a half round, then cut it into a point from the widest part to the top. The lower part, which is for the pocket, is thus three inches deep, and the top four inches. You will require two pieces of card-board of this shape and size, which must be covered on both sides with pink silk. Tack them together round the edges."
"These pieces are for the backs. Are the fronts of the pockets made of card-board, too?"
"No; you will use the stiff muslin for them. They must be in the half circle form, 3 inches deep, but 5½ inches wide at the top. They must also be covered with silk on both sides. Now cut out two pieces of black net, rather larger than the backs, and two more (also allowing for turnings in) for the fronts. Do you remark anything peculiar in the net?"
"It is like the imitation netting you brought from Paris, mamma; is it not? The holes are perfect diamonds, and much larger than in any English net."
"Yes, it is part of that I brought with me. Being so open, it is easy to slip the straw through it. Take the end of the straw, pass it under two threads, and over three, in one line. Cut it off close to the edge of the net. Run in as many lines as you can in the same direction, but with intervals of four holes, five threads between them. Cross them with others in the same way, both straws passing under the same hole when they cross. All the four pieces of net must be worked in the same way, and then tacked on, to cover the silk on one side. Now sew the fronts to the backs. The ribbon trimming must now be prepared. It is to be quilled in the centre, in the way called box quilling; that is, one plait must be to the right, and the next to the left. Do enough for the top of each pocket separately, and put it on, then a length to go completely round. Finish each pocket with a knot of ribbon at the point, and a small loop to pin it to the bed."
"Do you know, mamma, I was inclined to think you had not matched the sarsnet and ribbon well? The sarsnet looked so much the darker. Now they correspond perfectly. How is that?"
"You forget that the sarsnet is covered with net, which softens the depth of the tint considerably. Had the covering been muslin, it must have been still deeper, to correspond with the uncovered ribbon. It is for want of the consideration of these small points that there is so frequently a want of harmony in the tints of amateur needlewomen."
"And now, mamma, what next? For I have a good deal of spare time still."
"You said you would like to work papa a pair of slippers, so I have contrived a design for you, which will use up all your remnants of wool. We will call it the dice pattern. Of each color you may use, you will require two shades with black and white. You can mark on your canvas the outline of the slippers with a soft pen and ink; then work from the drawing I have made, beginning at the toe. You may use any number of colors, only let them be well chosen, and falling in stripes. Do not put green and blue, or any other two colors which do not blend well, close together. You may try the effect with shades in the following order: violet, orange, green, crimson, blue. That part which is quite white in the drawing is done in white wool, and there are two spotted squares which are to be black. Then the upper side of each die is in the darker shade of whatever color may be used, and the under light. Fill it up with black. If you work on Penelope canvas, you will find it much easier."
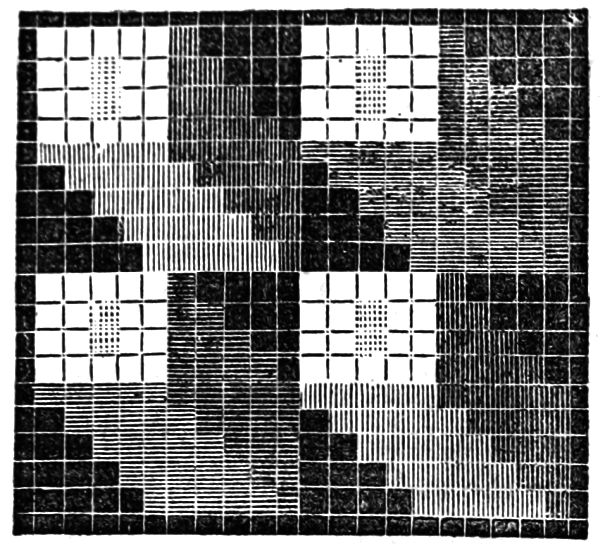
DICE PATTERN FOR SLIPPERS.

EMBROIDERY.—DRESS UNDERSLEEVE.
(See Brown Cut in front of Book.)
Materials.—Half a yard of fine Swiss muslin; embroidery cotton, No. 100.
TRACE the pattern upon the muslin with a quill pen and blue mixed with gum-water; make the leaves, stems, and flowers in raised satin stitch; the circles in button-hole stitch, either making them close or open, as may be preferred; if close, a raised spot must be worked in the centre of each. Work the edge in button-hole stitch.
