Volume 1 — CHAPTER XIII. SPION KOP. (continued 2)
Reading edition
J. Greig.]
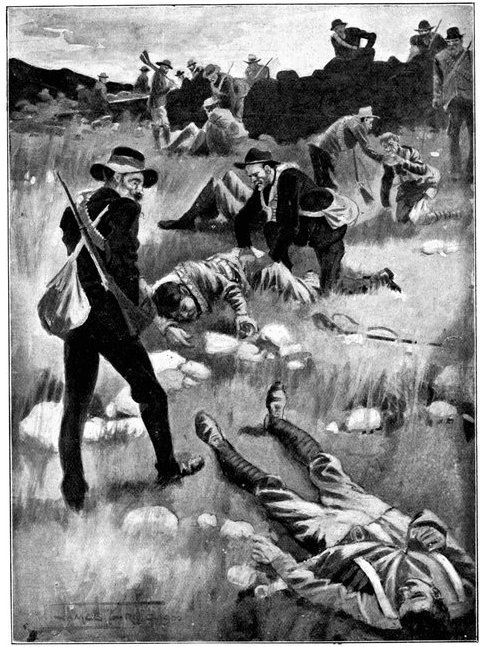
AFTER THE BATTLE OF SPION KOP.
Whilst the Boers treated our wounded with tenderness they did not hesitate to turn out the pockets of the dead and dying.
[Jan. 25, 1900.
There were many striking instances of gallantry. Captain Murray, of the Scottish Rifles, though wounded in four places, essayed to lead a charge on the Boer trenches, and so doing was shot dead. Captain the Hon. J. H. Petre, of Thorneycroft's, displayed throughout the most determined valour; twice wounded, he remained in his place and was killed. Sergeant Mason, of Thorneycroft's, a crack shot, engaged in a terrible contest with three Boers. One he knocked over at his first shot, the second he mortally wounded, the third saw him and took cover before he could fire again. Five bullets passed through his helmet; others tore his clothes; one at last struck his right shoulder. He changed his rifle to his left shoulder and finally hit his adversary. The Boer fell forward with his head over a boulder, and Mason crawled away to have his wound dressed. In the dressing station on the brow of the hill the army doctors displayed their wonted bravery under fire. One man at least was killed in the surgeon's hands; others were wounded afresh while they were being bandaged.
Among the strange incidents of the day was this, which is vouched for by Mr. Burleigh. While the Boers were attacking the Lancashire Fusiliers, a man in khaki, who looked like an officer, suddenly appeared in one of the British trenches and ordered those holding it to move out of it, as they were of no use where they were. Several obeyed, when they found that he was leading them towards a strong force of Boers among the rocks. "They are friends," said the supposed officer, as the men hesitated. But, fortunately, a private, who had his suspicions aroused, challenged the man in khaki, and, when he could give no satisfactory explanation of his presence, bayonetted him. Nearly all the British party were thereupon shot down.
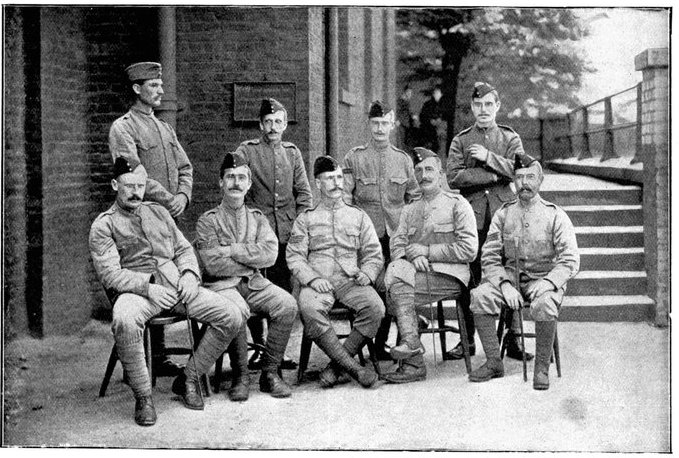
[Photo by Colour-Sergeant Morris.
SURVIVORS OF THE
2nd
MIDDLESEX WHO FOUGHT AT SPION KOP.
Non commissioned officers transferred to the new 3rd Battalion Middlesex Regiment at Woolwich.
The retreat.
When morning came, Generals Buller and Warren learnt to their surprise and consternation that the position had been abandoned. General Buller's first intimation of the true situation was when a naval officer on Mount Alice gazed through the naval telescope and saw that there were only Boers and ambulance men upon the summit. The general seemed to have grown suddenly older; he looked wearied and depressed. Forthwith he rode out to Trichardt's Drift and at last assumed command. A general retreat was ordered upon the spot; all the troops were to withdraw to the south of the Tugela as soon as the baggage could be moved across.
Fresh from a reverse more disastrous than that of Colenso, the army was yet able to retire unmolested; the bridges themselves were taken to pieces for future use, General Buller being the last man across. On the morning of the 27th the enemy dropped a few shells into the river without effect, and the turning movement was a thing of the past.
Jan. 25-27, 1900.] The Army Recrosses the Tugela.
In his telegraphic report, General Buller especially praised the conduct of the Scottish Rifles, King's Royal Rifles, Lancashire Fusiliers, and 2nd Middlesex. He pointed, too, with a satisfaction which caused deep uneasiness at home, because it seemed to show that the British Army was in very truth a beaten force and had been on the very edge of disaster, to the ease with which the 20,000 British soldiers had been withdrawn to the south of the river.
Causes of the defeat.
The causes of the defeat were many. In the first place must be set a faulty military system. The Boers, observes Mr. Churchill, would have placed 300 men on Spion Kop, who, by taking cover and shooting carefully among the rocks, would have suffered but little from the artillery fire. The British generals massed first 2,000, and then 5,000 men upon the height—a target for every shell. The failure to construct serviceable entrenchments has already been noticed, and in some degree explained, but it is possible that if the British infantry had been regularly trained to the use of the spade, the difficulties would have been overcome. The fog was an element by no means favourable to our success; it prevented the troops from seeing where to advance, and gave the enemy time to rally and collect. The breakdown of all organisation and organising power at the close of a day of desperate and prolonged conflict is not altogether to be wondered at.
"If at sundown the defence of the summit had been taken regularly in hand, entrenchments laid out, gun emplacements prepared, the dead removed, the wounded collected, and, in fact, the whole place brought under regular military command, and careful arrangements made for the supply of water and food to the scattered fighting line, the hill would have been held, I am sure," wrote General Buller. "As this was not done I think Colonel Thorneycroft exercised a wise discretion."
In his despatch, covering and commenting upon the various reports, Lord Roberts gave the final and well-balanced judgment of a great soldier. He held that General Buller's original plan for a turning movement had been well conceived and had every probability of success if only it had been executed. He blamed, for the failure upon Spion Kop, General Buller, because of his "disinclination to assert his authority and see that what he thought best was done"; Sir C. Warren, because of his "errors of judgment" and "want of administrative capacity," and because he had not himself visited the summit in the hours of crisis; and Colonel Thorneycroft, because of his "unwarrantable and needless assumption of responsibility." But the nation will not forget that while the gravest mistakes were made, they were made by generals who were brave, patriotic Englishmen, under the stress and anxiety of conflict. It is painful to have to record the fact that the man who was probably least to blame was the one singled out for punishment. Colonel Crofton was retired from his command, because of the brief message he had signalled to headquarters announcing the dangerous position on Spion Kop. Some months later, after the publication of the despatches, Sir C. Warren was recalled from Natal and given an administrative post in Griqualand West.
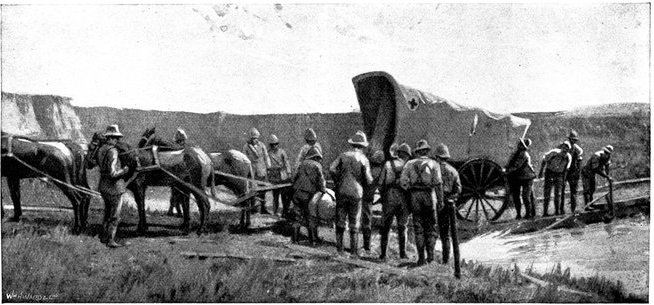
AN AMBULANCE WAGGON STUCK FAST ON A BROKEN BRIDGE NEAR POTGIETER'S DRIFT.
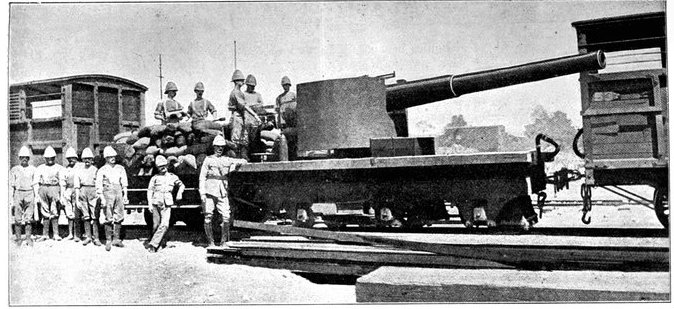
NAVAL 6-INCH GUN ON ITS SPECIALLY-DESIGNED TRUCK.