PIANO.
Reading edition
Use a box with a cover which entirely overlaps, like a writing paper box.
1. Stand the cover on one end; cut it the right height for the piano.
2. Study the picture to see just what parts of the sides and top are to be cut away.
3. Cut the box the same height as you cut the cover.
4. Carefully study the picture. Notice how the box is made to fit into the piano, by cutting down the edges of box until they are as deep as “A” in the picture. Fasten the parts together.
5. Use the other end of the box for the key-board; cut and fit this very carefully; then fasten with two fasteners at each end.
6. Draw the black and white keys on a strip of white paper or cardboard, and fasten it on.
7. Cut, “score,” bend and fasten the music rack as shown in the picture.
8. The picture will show you how one prong of each fastener is pushed through from the back, and bent to look like a pedal. The other prong turns up a little over the edge to make it firm.
9. Paint with rosewood, mahogany or black enamel.
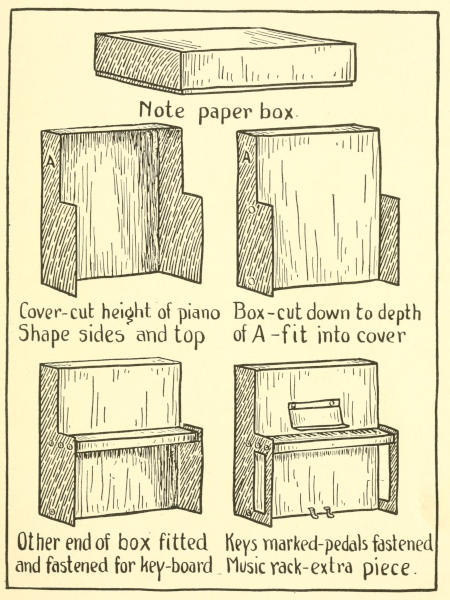
Details of Piano.
Note paper box.
Cover—cut height of piano
Shape sides and top
Box—cut down to depth of A—fit into cover
Other end of box fitted and fastened for key-board
Keys marked—pedals fastened
Music rack—extra piece.