How To Lay Linoleum Floors
Reading edition
In the past, linoleum has been regarded by many as a temporary floor-covering. Not much care has been used in laying it. But you want well-finished floors in your home that will need a minimum amount of attention as the years go by. For this reason, we strongly recommend that you have your linoleum floors installed by the merchant from whom you buy the goods. Experience has taught their layers how to cut the linoleum so as to avoid waste and how to lay it to prevent buckling and cracking, conditions which result from faulty workmanship.
Skilled Workmanship Required
Insist that your linoleum be laid right. If the merchant does not employ skilled mechanics to do this work, go to a merchant who has a staff of layers and who will guarantee his laying. He will make a charge for the cost of labor and materials; but, in the long run, it will prove greater economy for you to pay well to have your linoleum laid properly than to have the laying done in a makeshift manner in order to save a few cents per yard.
LAY LINOLEUM AS A PERMANENT FLOOR
When you purchase a good grade of linoleum to be installed as a floor in your living-room, dining-room, or even in the kitchen or bathroom, naturally you desire to have it put down as a permanent floor. The most satisfactory way to install linoleum is to cement it down solidly over a lining of builders’ deadening felt paper. This will give you a permanent floor, smooth, firm, without cracks or crevices. Owing to the variations in moisture conditions, any wood underflooring will expand in summer and dry out in winter, leaving cracks. Linoleum cannot be cemented directly to such a wood underflooring without possibility of damage. One of the chief advantages of the felt lining is that it tends to take up this expansion and contraction, thus saving the linoleum floor from breaking or cracking. In addition, the felt acts as a cushion, deadening sound and adding to the warmth and comfort of the floor, making it delightful to walk or stand on.
Should it become necessary, in time, to remove such a linoleum floor, this can be done easily, without damage to the linoleum.
Laying Linoleum Over Felt Paper
Leading contract linoleum layers and good stores have adopted the felt paper method of laying linoleum and recommend its use to their customers. A brief description is given here of this method in order that you may understand how the work should be done. If your merchant is not yet equipped to lay linoleum by this method, ask him to write for a copy of our linoleum layers’ handbook, “Detailed Directions for Laying and Caring for Linoleum,” which lists all of the materials and equipment needed, and includes illustrations showing the several steps in laying linoleum by this improved method. A copy of this handbook will also be sent to you, without charge, upon request.
In cementing linoleum down over felt paper, the felt is first cut into lengths to go across the short way of the room. The quarter-round floor molding is removed, and the felt fitted snugly at each end. A linoleum paste is then applied to the undersurface of the felt, which is then rolled or pressed down until it adheres firmly to the floor.
The lengths of the linoleum are next pressed in position crosswise to the direction of the felt strips, or the long way of the room. One piece is laid at a time. The surface of the felt under each strip of linoleum is well coated with paste, except for four to six inches along each end and side and along the seams, which spaces are left bare. The linoleum is put down and rolled. After the paste has begun to dry, the free edges of the linoleum are trimmed to fit neatly at all points. Then waterproof linoleum cement (a kind of glue) is applied to the felt along all edges and seams back under the linoleum for a distance of four to six inches. This cement makes the floor perfectly water-tight. Finally, the linoleum is well rolled with a heavy roller to insure perfect adhesion at all points.
Weights, such as face brick or sand bags, are placed against each other lengthwise along all edges and seams to press the linoleum firmly against the felt while the cement dries. After twenty-four hours, the bricks are removed; and the floor is ready for use. The molding is put back into place, and the floor is cleaned thoroughly. If plain or inlaid linoleum has been laid, it should be waxed at once and polished.
LAYING DIRECT ON WOOD FLOORS
A less permanent way to install linoleum is to tack or nail it directly on the wood floor. Where a more or less temporary floor covering is desired, as in the cases of tenants on short leases, etc., this method may be made to suffice. However, wherever the linoleum is to be installed as a permanent floor, instead of wood or other floors, we strongly recommend that it be laid over felt paper as just described.
Directions are given in the paragraphs following for laying linoleum directly on wood or concrete floors, without the use of a felt lining. This method is described at greater length in the handbook previously mentioned, “Detailed Directions for Laying and Caring for Linoleum,” but the main steps in the process are here fully outlined.
Preparation for Laying Linoleum
The floor should be perfectly dry and clean, the surface smooth and even. All cracks should be filled, nails should be removed, and the uneven edges of the boards planed off, if necessary. The quarter-round molding should be taken up carefully from the baseboard all around the room.
In cold weather, linoleum becomes brittle. If you are laying your floor in winter, be sure to let the roll of linoleum stand on end in a warm room for at least forty-eight hours before unrolling it.
Laying the Linoleum
When ready to lay, first measure the linoleum carefully and, if possible, cut it to run lengthwise in the opposite direction from the boards in the floor. Trim it ¼ to ½ inch short at each end, just so the edge of the linoleum will be covered by the quarter-round molding when this is replaced. Along the side walls the linoleum should not be placed tight against the baseboard, but, just as at the end, a space of ¼ to ½ inch wide should be left. The edges of the linoleum at the seams, however, should be butted tightly against each other, with the pattern properly matched.
Laid in this manner, the linoleum will have an opportunity to expand underneath the edge of the quarter-round molding. In replacing the quarter-round, do not fasten it down tight against the surface of the linoleum. The quarter-round must not bind the material at any point, but should be nailed to the baseboard in such manner as to permit the lifting out of the linoleum easily should retrimming become necessary.
Should a buckle or air-bubble develop in the linoleum, it must be smoothed out, and the edge of the linoleum under the floor molding cut back a trifle, if needed to take up the expansion. Do not put any brads in the linoleum during the expansion period.
Fitting Around Pipes and Projections
Care must be taken to fit the linoleum neatly around radiators, waste pipes, doorways, wall projections, etc. Where possible, the gas stove, kitchen range, and other movable equipment should be disconnected, and linoleum laid under it carefully to insure tight joints. Good workmanship in fitting adds much to the appearance of the linoleum floor.
Fastening Linoleum
In many cases it will be found that it is not necessary to fasten linoleum to the floor at all, when it has been laid under the quarter-round molding at the sides and ends. The molding itself will be all that is required to hold the material in place.
Where it becomes necessary, however, to fasten the linoleum to wood floors, use No. 18, ¾-inch, wire brads. Never use carpet tacks. The brads should be set in ⅛ to ¼ inch from the edge and should be spaced about four inches apart along the edges and three inches apart on seams. The brads should be driven down until the heads are lost in the surface of the linoleum.
LAYING LINOLEUM ON A CONCRETE FLOOR
The only way to fasten linoleum to concrete in your laundry, entry-way, bathroom, or any other concrete floor, is by means of paste and waterproof cement. Here, again, it is advisable to have your linoleum cemented down over a lining of deadening felt paper, according to the method previously described. Again we recommend that you have this work done by your merchant’s experienced workmen. But should you decide to lay the material without the use of the felt lining, the following directions are given for your guidance.
Please note that the linoleum should never be laid over concrete floors in basements which are in direct contact with the earth beneath unless the concrete has first been thoroughly waterproofed. The moisture in the earth will inevitably come up through the concrete and loosen the linoleum. Waterproofing a concrete floor must be done by a roofing or waterproofing contractor who understands thoroughly how to do this work.
Laying the Linoleum
The method of laying linoleum over a concrete floor is similar to the final operation of laying linoleum over felt, as described on pages 41 to 42. Use Armstrong’s Linoleum Paste for pasting the centers of the linoleum strips to the concrete, and Armstrong’s Waterproof Linoleum Cement for gluing the edges and seams to the concrete floor, so as to prevent water from getting underneath the fabric.
After removing all dirt and dust and filling the expansion joints with plaster of Paris, apply Armstrong’s Linoleum Paste to the concrete floor with a wide brush to within four to six inches of each side and end of the linoleum strip, which space is left bare for the later application of the cement. Put the width of linoleum in place and roll it out at once, before the paste dries. Repeat the same operation with the succeeding strips of linoleum, butting the edges of the strips together tightly. Trim the ends to fit snugly against the wall. Then lift the edges of the strips of linoleum along the sides and ends and apply Armstrong’s Waterproof Linoleum Cement with a paint brush to the concrete floor as far back as the paste will permit. Remove any cement that gets on the surface at once with alcohol. Finally, roll the linoleum with an iron roller to insure perfect adhesion.
Weights, such as pressed brick, sandbags, or other heavy objects, should then be placed along all seams and edges, and allowed to remain for not less than twenty-four hours.

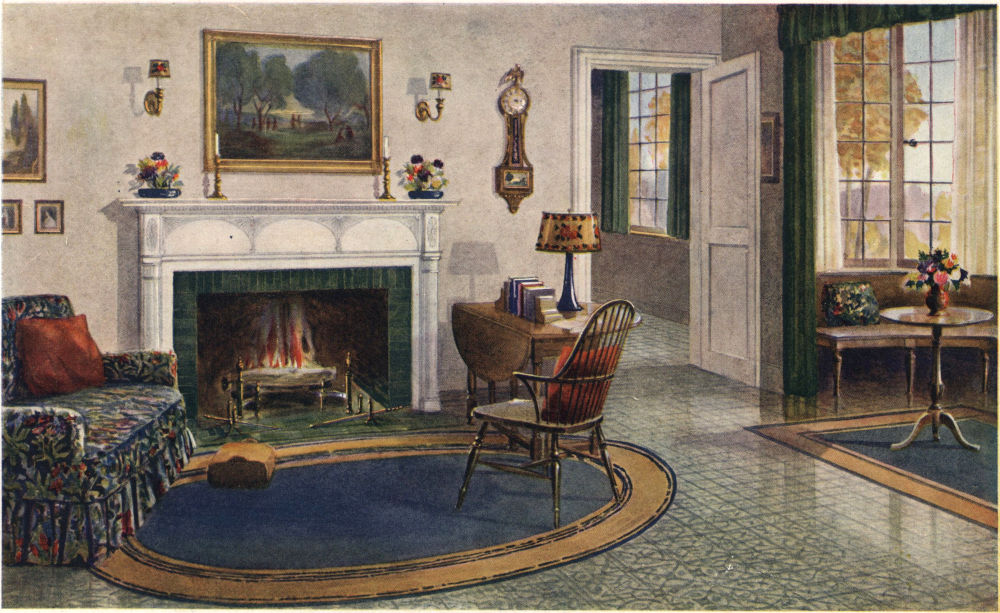
The green tile surrounding the blazing fire in this comfortable modern home has been chosen to harmonize with the green carpet-patterned linoleum. A touch of the complementary red, and the blues and yellows are blended in the fabrics to make the room cheerful. It is not overcrowded with furniture, but rather is arranged to give a spacious, open effect. Comfort and utility are two of the primary requisites of every living-room, characteristics not only of this room, but also of the floor of Armstrong’s Linoleum, Carpet Inlaid Pattern 752. Armstrong Bureau of Interior Decoration, Lancaster, Pa.
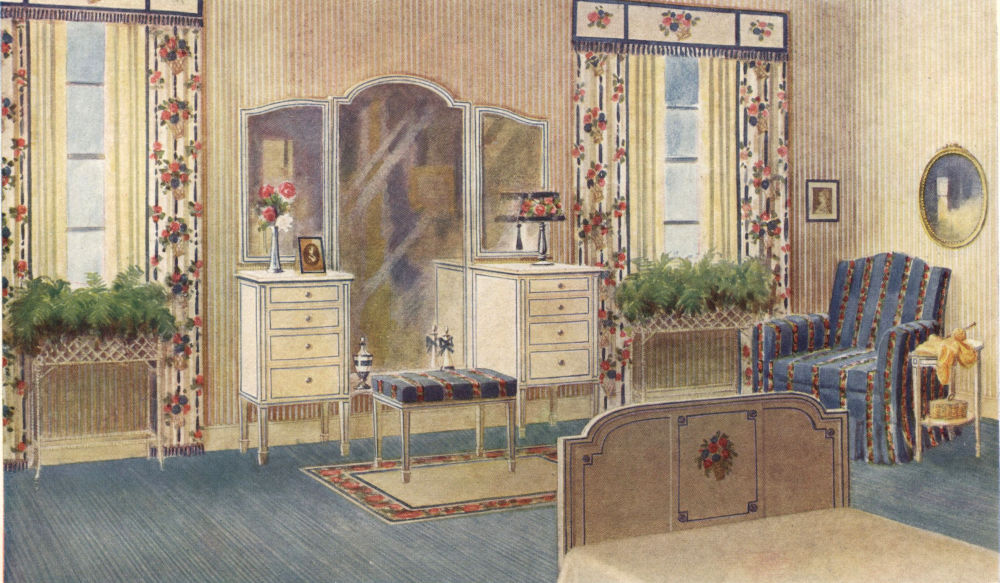
The color note of this young girl’s room has been carried into the floor—Armstrong’s Blue Jaspé Linoleum. It aids materially in contributing a bright, personal touch to the room. Combined with attractive draperies, painted furniture, and simple rugs, any of the jaspé or plain light-colored linoleums will give a similar charming effect; these, together with the interesting carpet inlaids or matting patterns, offer a wide opportunity for originality in selecting a distinctive floor as the starting-point in the decorative scheme. Armstrong Bureau of Interior Decoration, Lancaster, Pa.
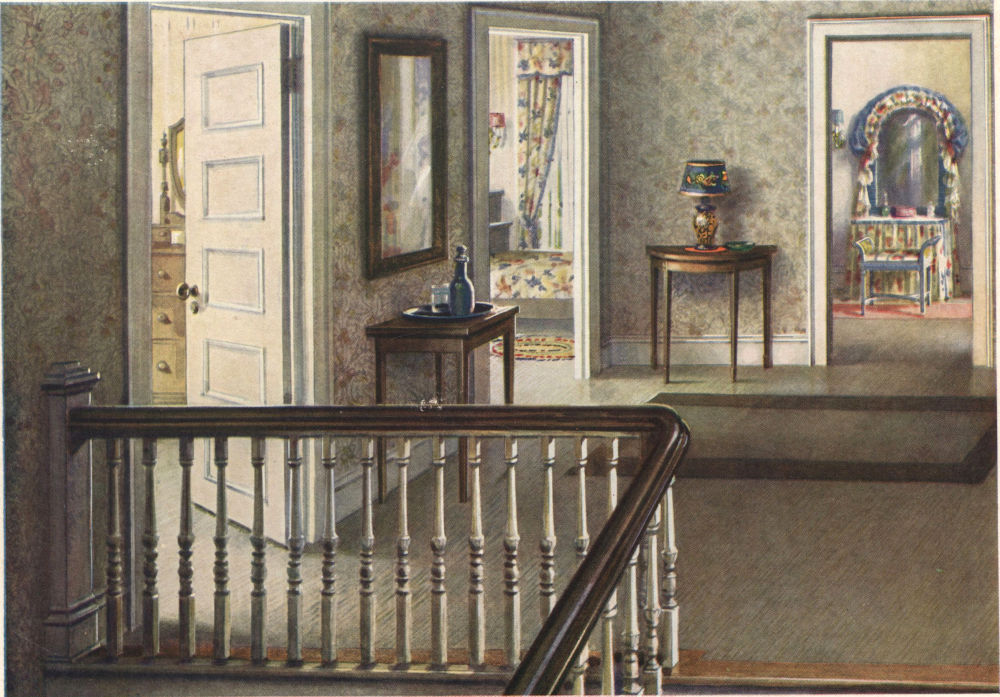
Here the gray jaspé linoleum floor has been used to group the entire second floor suite as a decorative unit. The gray jaspé is particularly pleasing as a background for fabric rugs and other furnishings. Such a floor is always perfectly sanitary, and, waxed occasionally, is always attractive in appearance. Armstrong Bureau of Interior Decoration, Lancaster, Pa.
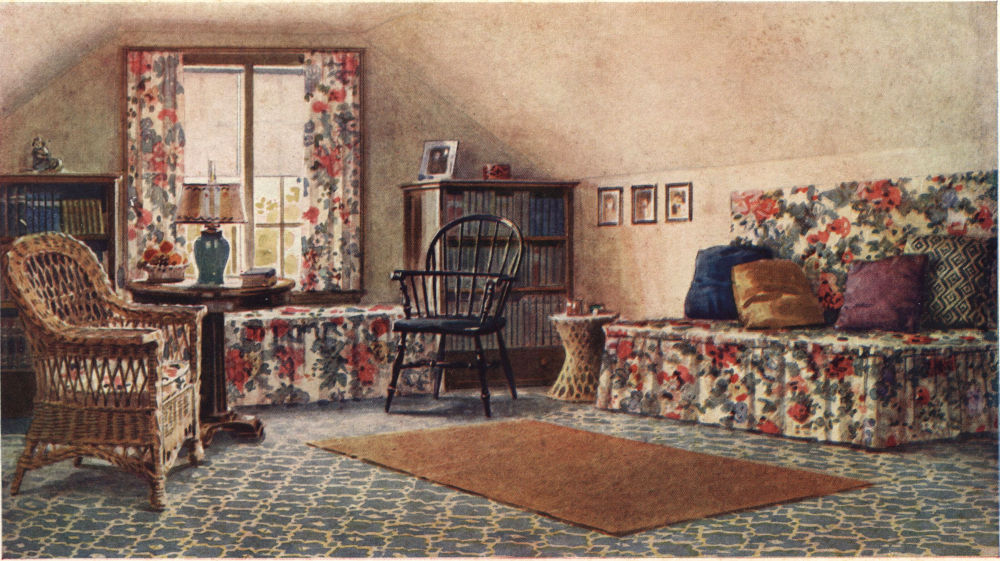
In many homes the attic is being changed from a store-room into an attractive, comfortable spare room, and at little expense. In this attic the outlay was slight. A skillful use of odd pieces of furniture and the pleasing blending of the draperies and coverings with the attractive carpet pattern of the printed linoleum floor have made this room one of the most interesting in the home. In such a room Armstrong’s Printed Linoleum will give splendid service for years, and also aids materially in the working-out of the decorative plan. Armstrong Bureau of Interior Decoration, Lancaster, Pa.
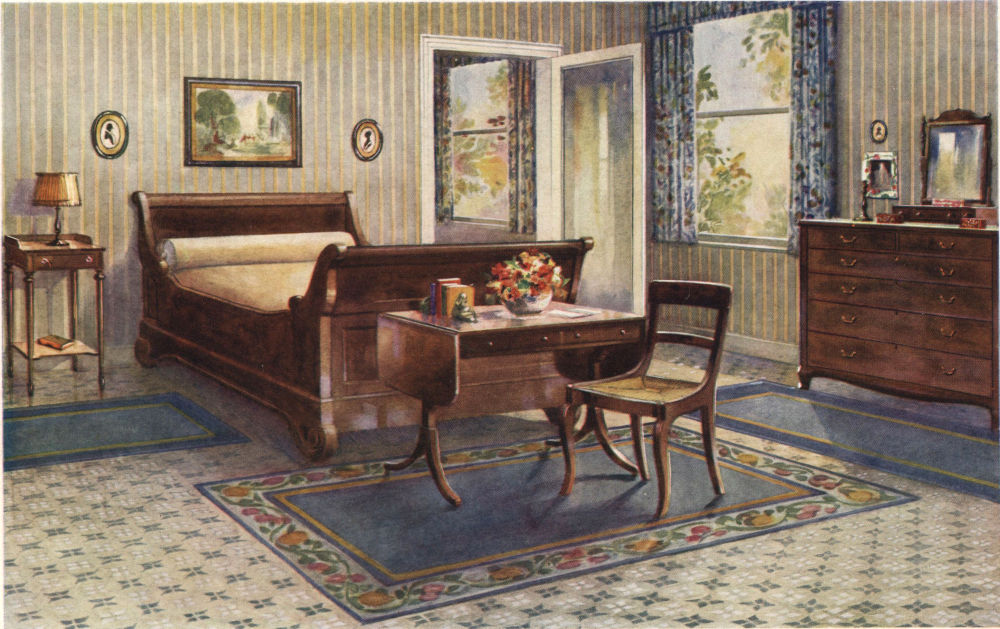
This bedroom is bright and comfortable, and still has enough restraint to give a feeling of peace and repose. The curtains, paper, and decorations are in perfect harmony with the pleasing carpet pattern of the linoleum floor, which blends with the fabric rugs and serves as a background for the entire color scheme. Armstrong Bureau of Interior Decoration, Lancaster, Pa.
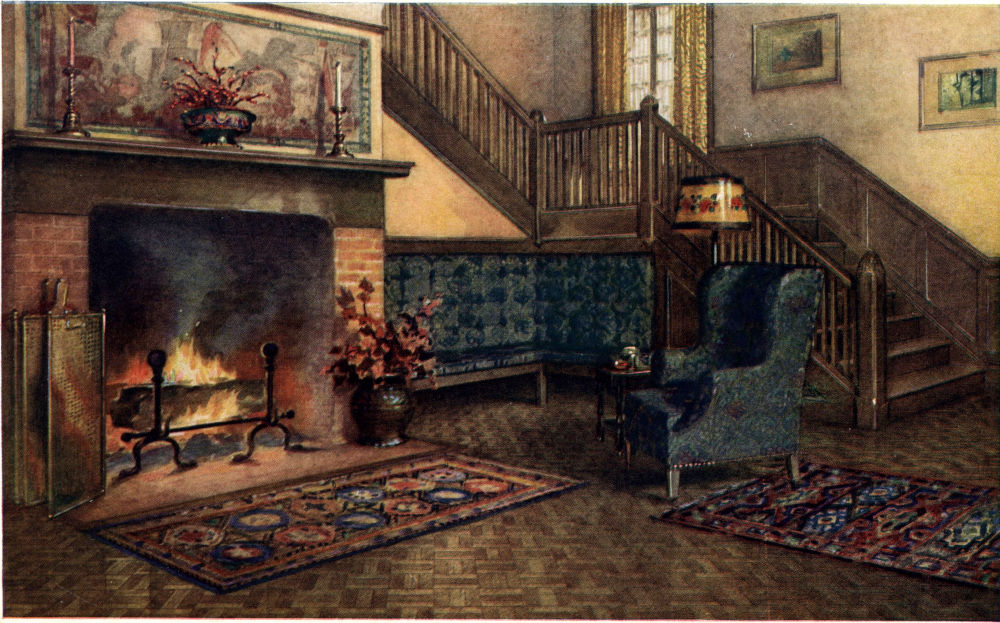
In this comfortable, home-like, hall living-room the floor of Armstrong’s Parquetry Linoleum, Pattern No. 690, makes a definite contribution to the pleasing decorative scheme. The furnishings are simple, not expensive, but have been selected because of their color values and their relation to each other. And the parquetry linoleum is not only less costly than wood, but it is more sanitary and much easier to take care of. Armstrong Bureau of Interior Decoration, Lancaster, Pa.
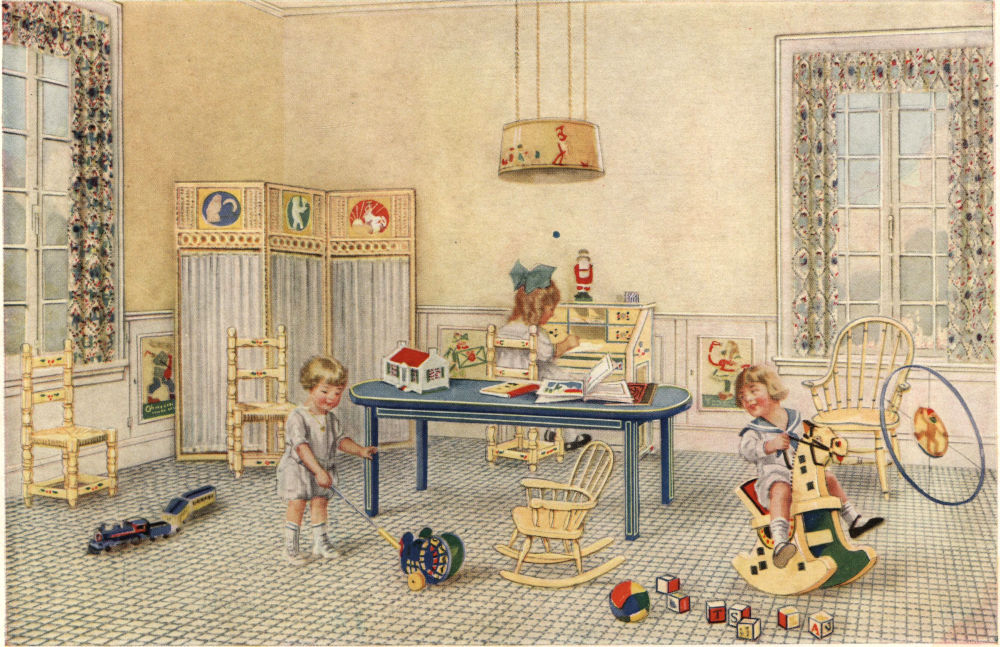
Both the color and the texture of objects used in a child’s room should suggest cleanliness, freshness, cheerfulness and durability. At the same time they should represent his interests and his pleasures. To all these ends linoleum is expressly adapted. The walls, furniture, hangings and toys in this room have been selected to harmonize with these ideas and with the linoleum floor, which is ivory, turquoise blue and light gray in color.
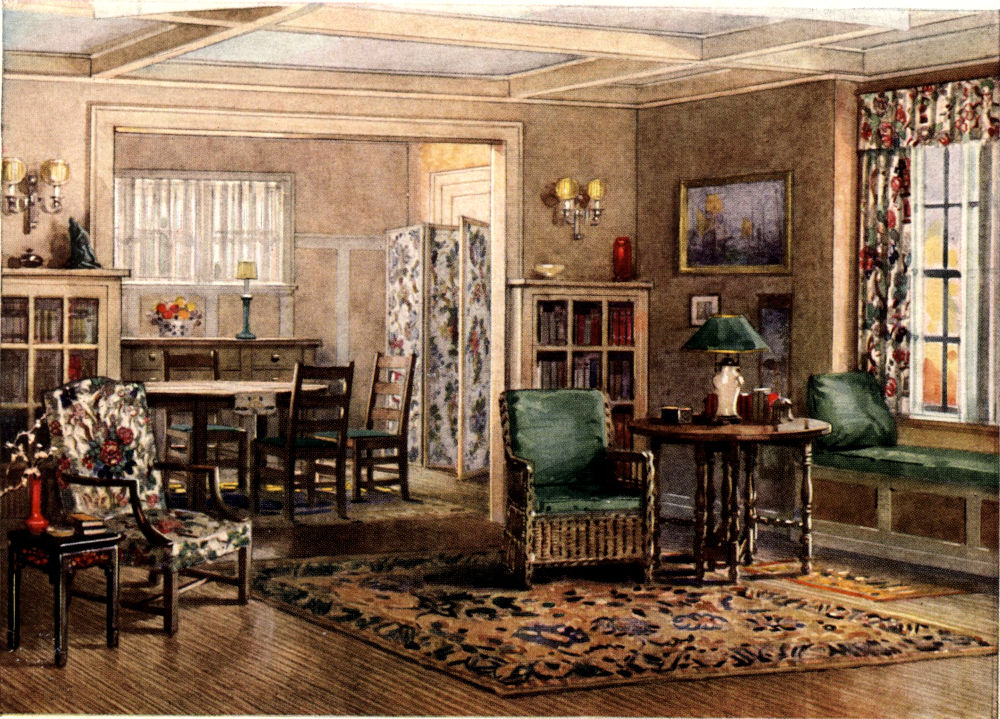
The color combination rather than expensive furnishings makes these bungalow rooms inviting. Floors of Armstrong’s Brown Jaspé Linoleum, brown furniture, and tan walls make a good background for the color of the curtains, cushions, vases, and lampshade. The decorative value of books is well demonstrated in this picture. Armstrong Bureau of Interior Decoration, Lancaster, Pa.
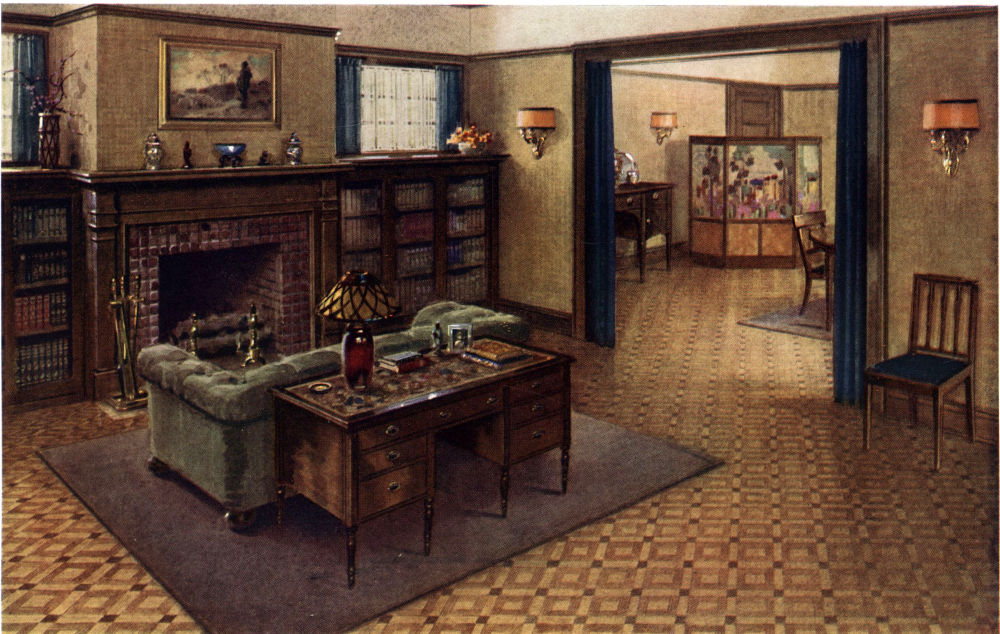
Beauty and good taste are at once apparent in this well-appointed home. The floor is not oak, as one might suppose, but is Armstrong’s Parquetry Linoleum, as beautiful in its graining as hardwood, and more comfortable to walk on. The cost is cut in half. These permanent linoleum floors will never require expensive refinishing. Armstrong Bureau of Interior Decoration, Lancaster, Pa.
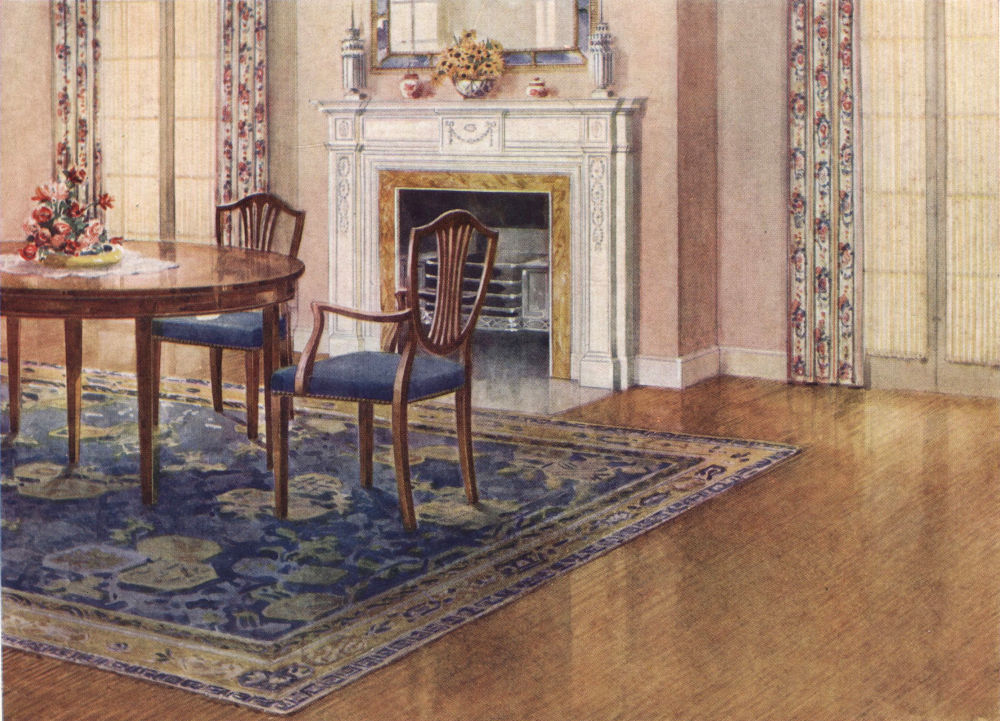
In this cheery dining-room the early American furniture is happily combined with the Chinese rug and the brown jaspé linoleum floor (Color No. 11). One feels that this room has been planned in good taste and that the linoleum floor has contributed its part to the atmosphere of refinement. More comfortable than wood, and easier to keep clean, permanently laid linoleum floors have their place in the modern home.—Armstrong Bureau of Interior Decoration, Lancaster, Pa.
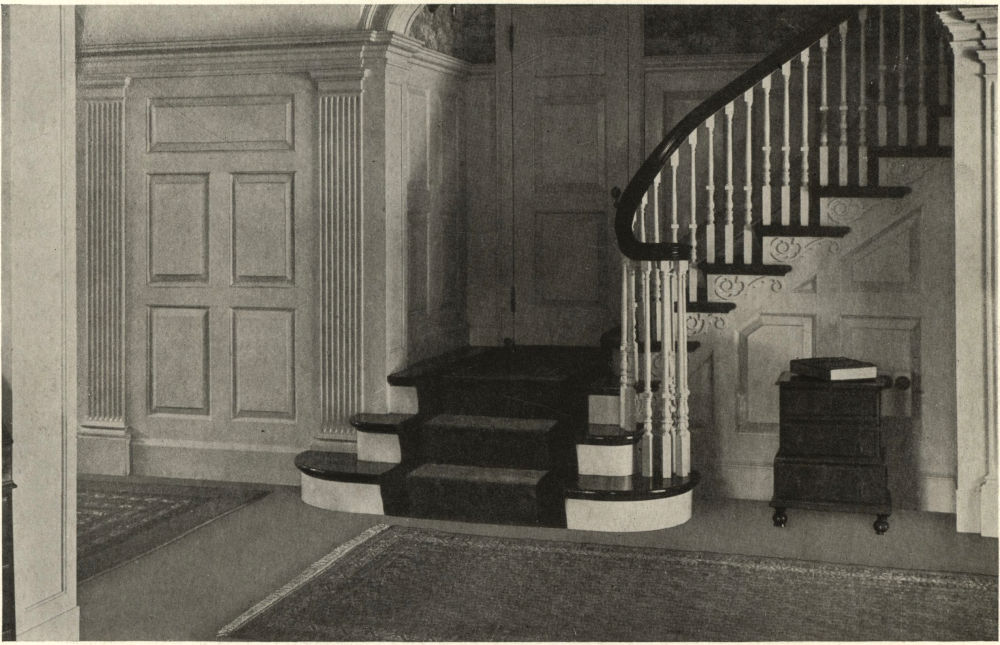
Plain dark gray linoleum makes an appropriate floor for old-fashioned houses—either in new-old houses, or to replace the worn floors of houses being remodelled. In this stately Colonial home, the linoleum harmonizes with the beautiful ivory woodwork, and makes a perfect background for the Oriental rugs.
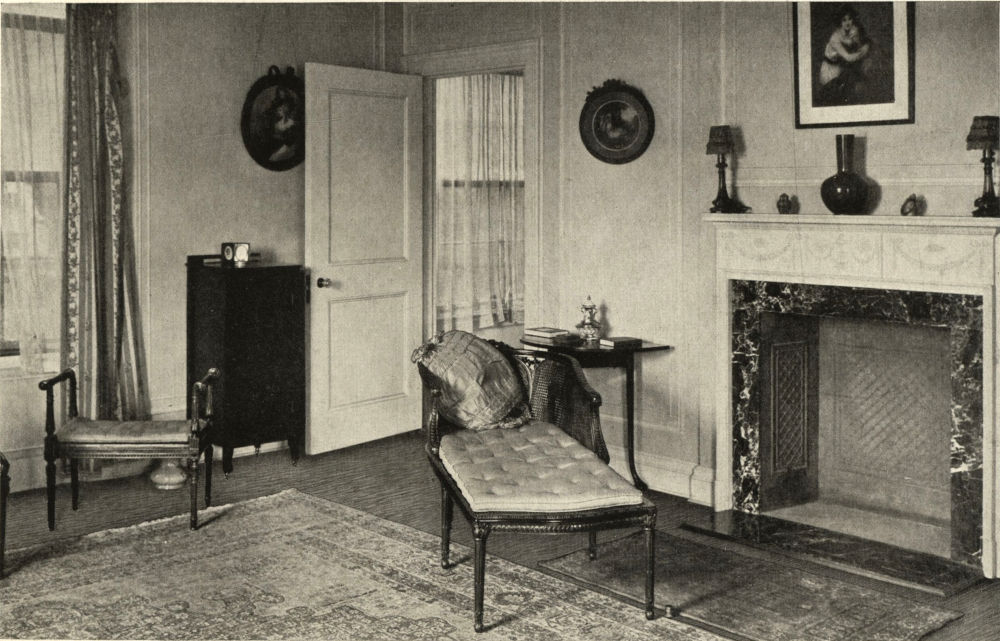
An atmosphere of simple elegance is attained by the beautifully proportioned wall spaces, and the slender-legged French furniture used in this room. In harmony is the gray Jaspé Linoleum which, waxed and polished, makes a perfect floor. Because of its neutrality, it is not only a good background for the furniture, but likewise for the rug and fabrics employed to make the room bright and attractive.
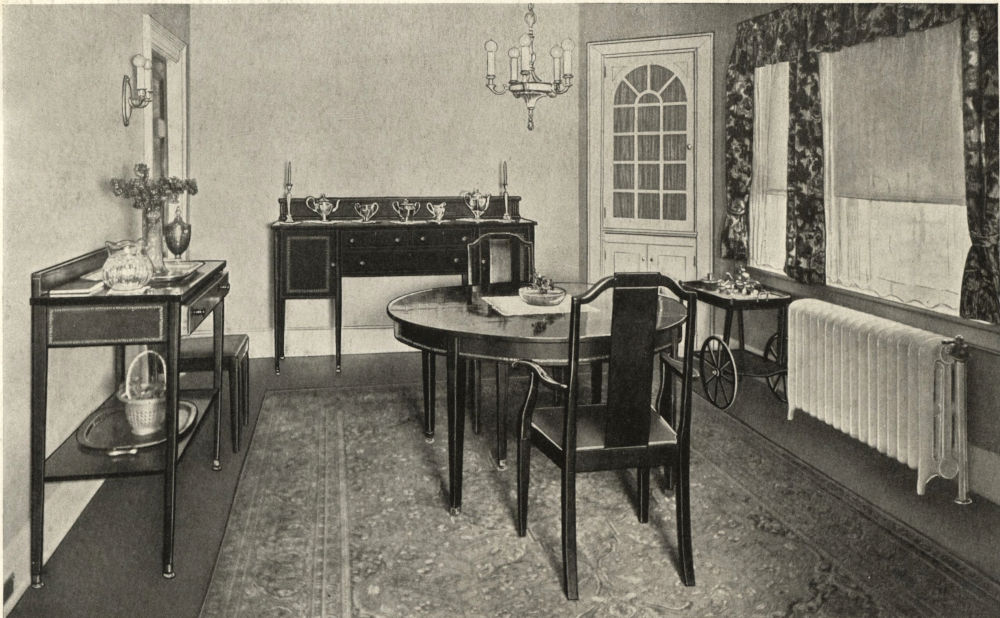
In this dining-room, the soft brown linoleum floor blends with the beautiful wood of the Sheraton furniture, the colorful draperies, and the fine rug. Linoleum is the logical floor for the dining-room, because it is so easy to care for. It is a quiet floor; also a particular advantage.
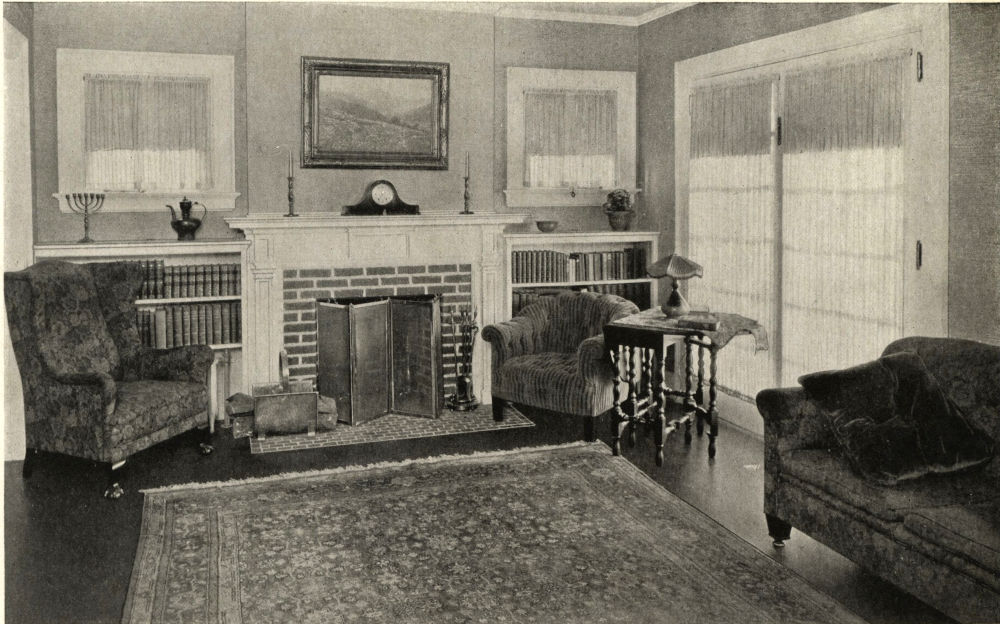
In this home of evident culture and refinement, linoleum floors were installed in every room, instead of wood. In the living-room, the plain floor, and the unobtrusive walls and curtains, are in pleasing balance with the figured Oriental rugs and upholsteries. The smooth surface of the floor, without cracks or crevices, suggests a feeling of fastidious cleanliness. An atmosphere of restfulness pervades the room.
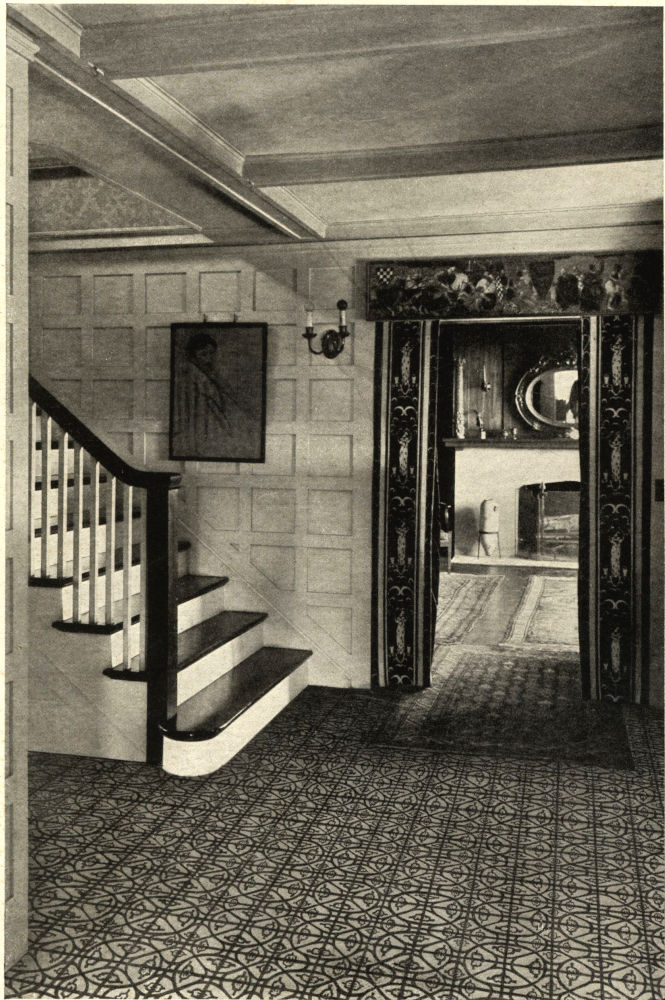
This interesting use, after the European manner, of a carpet inlaid linoleum floor through hall and living-room, illustrates how effectively a pattern can be employed in floors, as well as on walls and in hangings. The small all-over design gives the effect of a rich carpet, and yet the floor is sanitary, easy to care for, and durable.
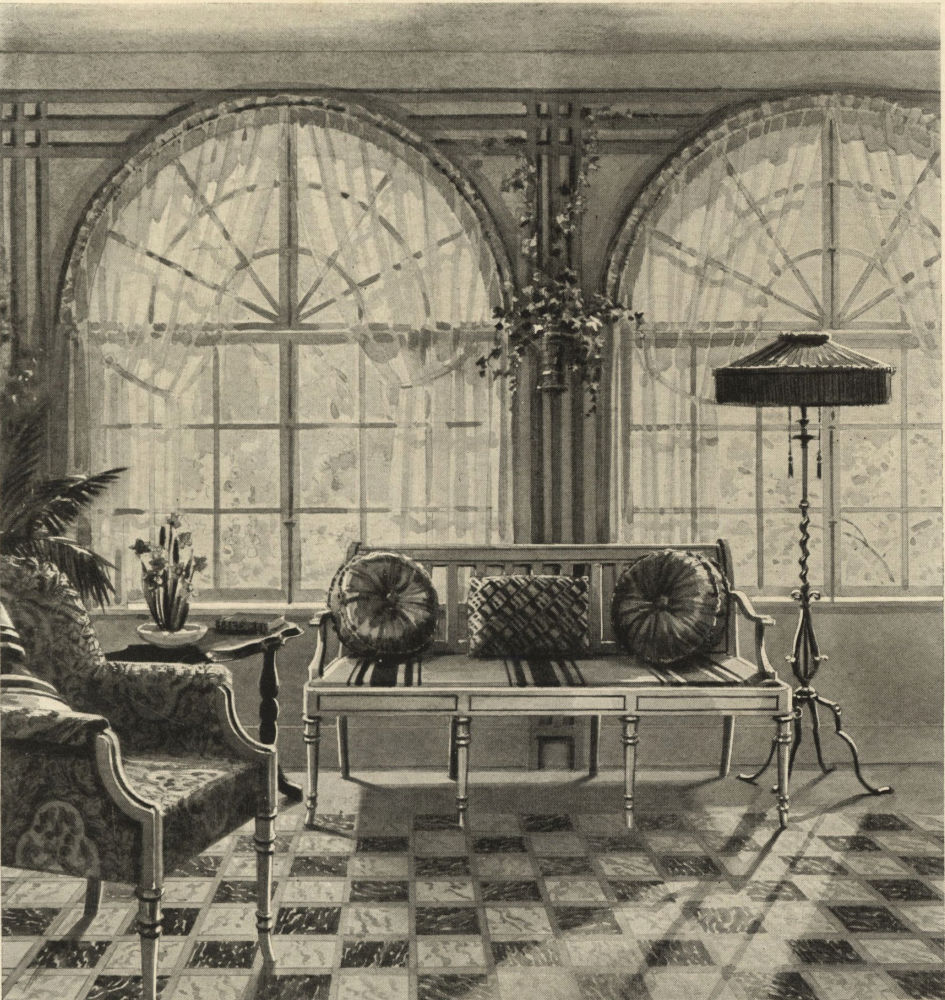
This sun parlor shows the decorative value of a linoleum floor. Here a marble design has been combined with a plain linoleum border. The charm of the room is due to the happy relation of the floor design and the interior architecture, as well as to the arrangement of the furniture. Neither too much nor too little is used—so that a spacious effect is obtained.