SECTION 7: TRAINING
Reading edition
701. GENERAL
a. In addition to introducing the student to the offensive and defensive movements of bayonet fighting, the initial stages of training should emphasize the development of speed, form, balance, timing, coordination, and a vicious, aggressive attitude, all important in bayonet fighting. The instructor works to develop a genuine determination in his students; i.e., to gain the initiative from the beginning and move in to kill the opponent. Each student yells and growls as he executes his practice moves to get into the proper habit. This gives the student the self-confidence and enthusiasm he needs. The instructor tries to make the yell spontaneous, if possible, but if students fail to perform properly, they are encouraged until they do so.
b. Future training rekindles the spirit of aggressiveness. Variety is employed in training to avoid boredom and useless repetition. The use of training aids such as the pugil stick and bayonet assault course provide this variety, and are also extremely valuable as training vehicles. Bayonet training should be as vigorous as possible in order to contribute to the physical condition of the student. It should be emphasized that bayonet fighting is not for the soft and paunchy.
702. DEMONSTRATION AND APPLICATION OF THE BASIC FUNDAMENTALS
a. The recommended sequence for demonstration and application of the basic fundamentals of bayonet fighting is as follows:
(1) Guard position and footwork.
(2) Attack movements.
(3) Defensive movements.
(4) Combined movements.
(5) Group attack and defense.
b. Each position and movement is explained in detail and demonstrated by the primary instructor. Fundamentals and footwork, as well as attack and defensive movements, are covered slowly and thoroughly.
c. After a thorough explanation and demonstration, the students move slowly through everything covered in subparagraph a, above, in slow motion, by the numbers, until they are thoroughly familiar with what they have been taught. Speed is increased as the students become more familiar with the movements until they are being conducted at full speed. Timing, enthusiasm, and an aggressive spirit are maintained.
d. The whole sequence should be completed for one group of movements before the next is taught. For example, the student should be thoroughly familiar with the positions and footwork, and have mastered them at the normal rate, before he is introduced to the attack movements.
e. After individual movements have been mastered, combinations and followup movements are taught. These movements are then practiced by the students until they become second nature. The most effective movement to follow another is influenced by the opponent’s reaction. These movements are stressed and practiced until they become automatic. The bayonet fighter cannot stop to consider his next move. It is necessary that the student be able to deliver a forceful, aggressive series of attack movements, accompanied by proper footwork, without hesitation or indecision.
f. Practice of the attack and defensive movements against another student at half speed facilitates correction of errors. The two students correct one another, and secondary instructors move among the students, assisting with corrections.
g. Throughout training the student should be relaxed to avoid rigidity. The weapons should be held firmly, but not tensely. All phases of bayonet fighting are practiced until they are executed instinctively. The student should be able to strike at openings without thinking, and remain in the attack until he has killed his opponent.
703. THE ASSAULT COURSE
a. Purpose.—The bayonet assault course is constructed in order to achieve the following objectives:
(1) To familiarize the student with situations simulating those with which he might be confronted in an actual combat situation.
(2) To aid in developing the student’s speed, strength, and endurance.
(3) To challenge the determination and will power of the student. These qualities are extremely important.
(4) To provide a means for obtaining good bayonet fighting habits.
(5) To develop skill in bayonet fighting and make the various movements instinctive and second nature.
b. Obstacles.—The model assault course presented in this publication consists of ten obstacles. They are offered as examples of what can be used. The number and type of obstacles included in any given course depend on the ingenuity of the builders and local conditions. These obstacles are attacked with a mockup rifle which should resemble the M-14 rifle in weight and dimensions.
(1) Obstacle number 1 represents an enemy in the guard position. The student executes a parry right, steps forward, and executes a jab. (See fig. 27.)
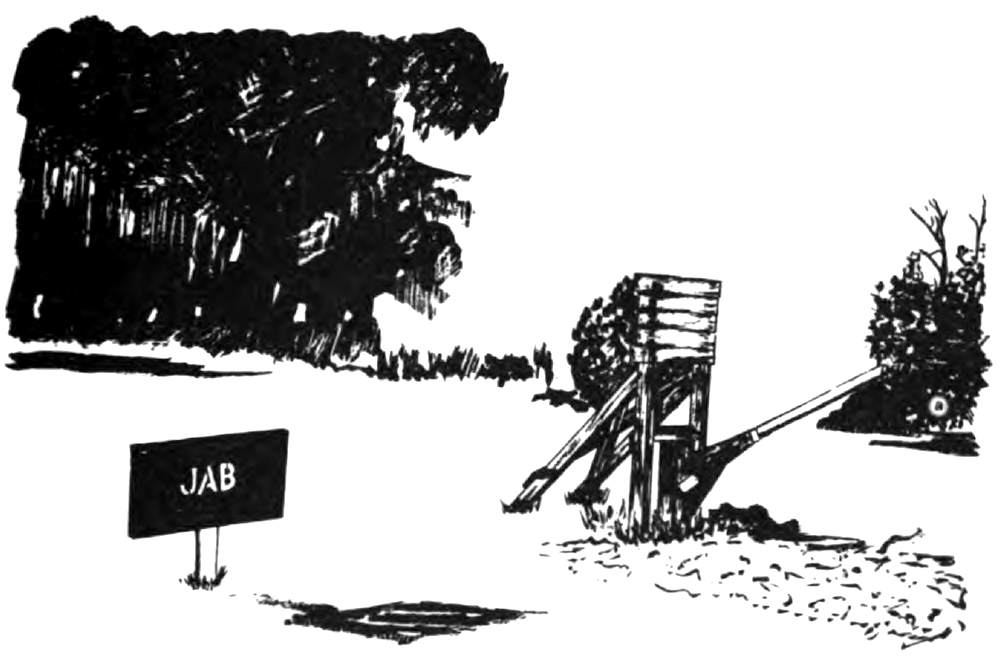
Figure 27.—Obstacle 1.
(2) Obstacle number 2 represents an enemy in the guard position. The student executes a parry right, steps forward and executes a vertical butt stroke. (See fig. 28.)
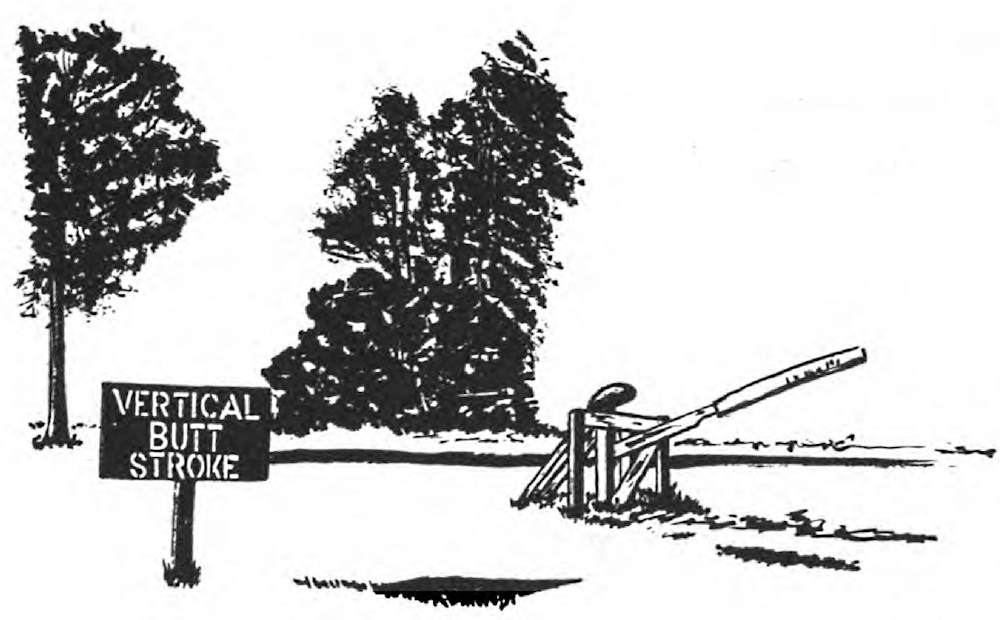
Figure 28.—Obstacle 2.
(3) Obstacle number 3 represents an opponent in a position best suited for attack by the smash. The student steps forward and delivers the smash. (See fig. 29.)
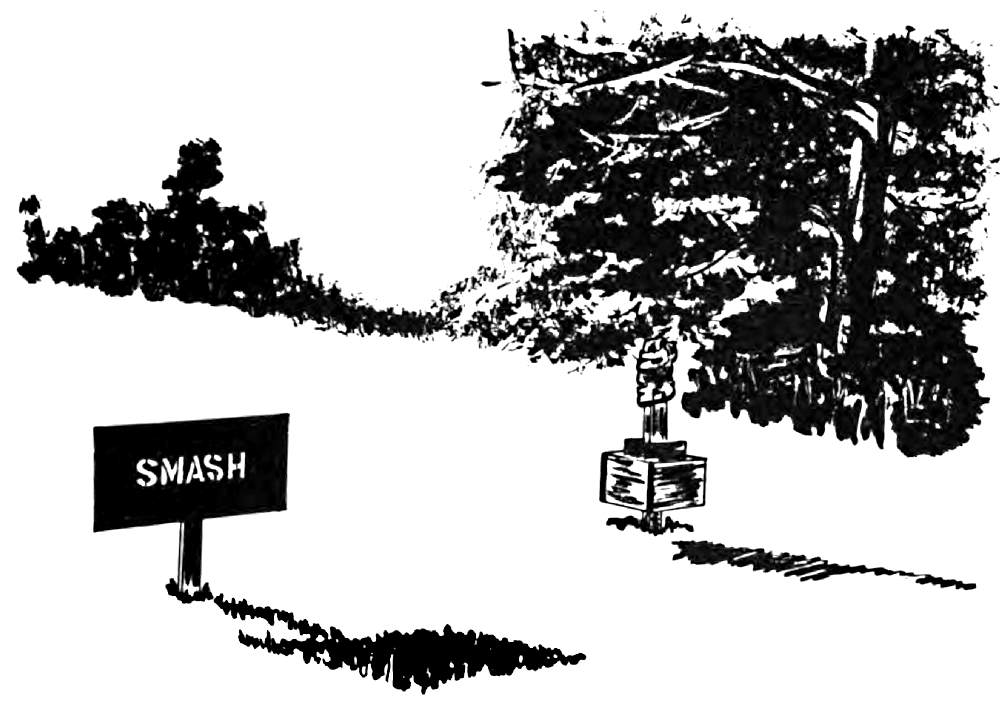
Figure 29.—Obstacle 3.
(4) Obstacle number 4 is a target for a vertical butt stroke. (See fig. 30.)
(5) Obstacle number 5 represents an opponent running toward the bayonet fighter. The student executes a jab so that the blade penetrates the center of the obstacle. The instructor emphasizes the importance of withdrawing the blade before moving on. (See fig. 31.)
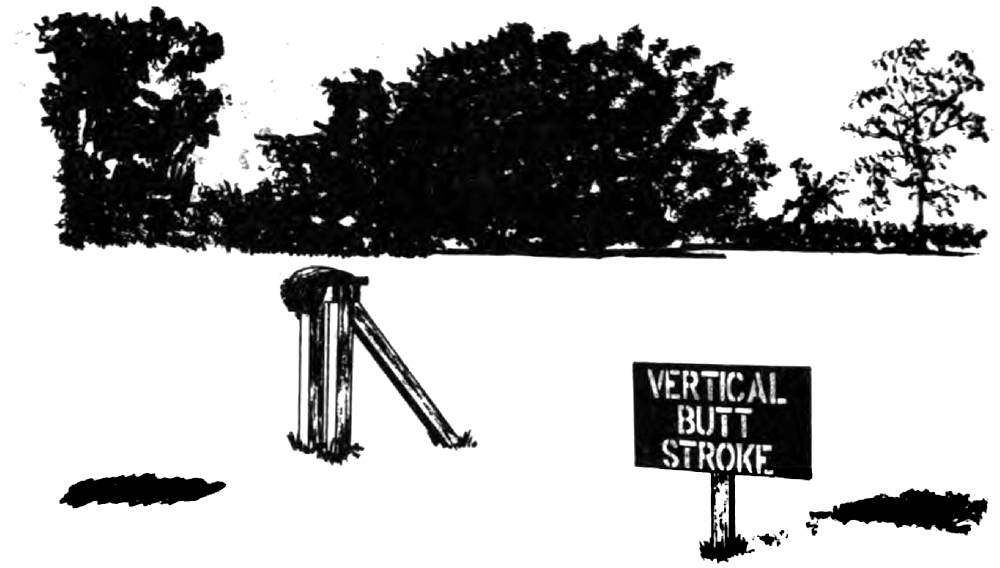
Figure 30.—Obstacle 4.
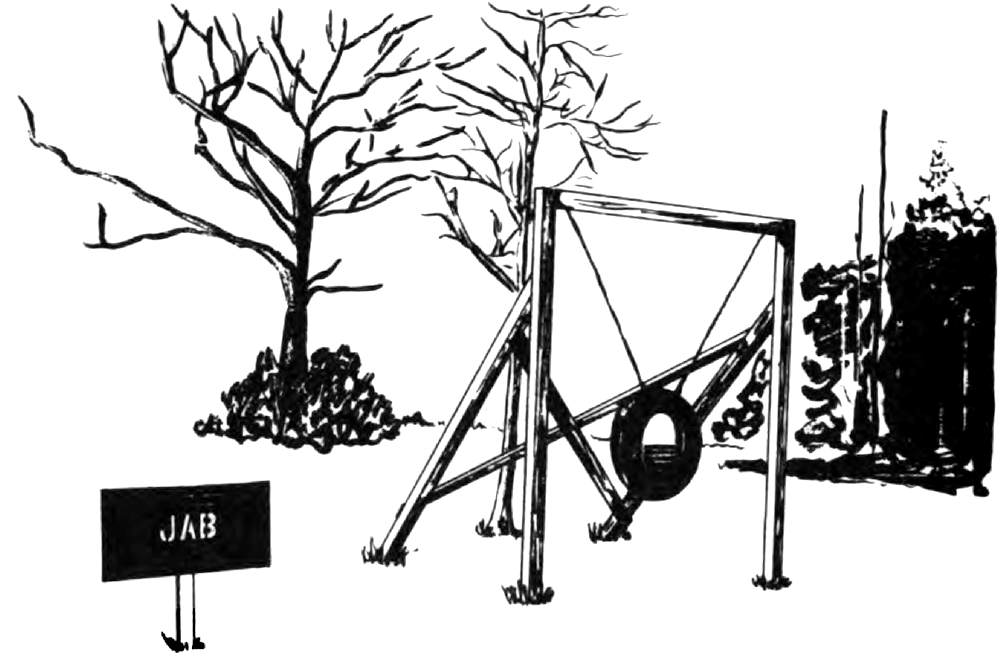
Figure 31.—Obstacle 5.
(6) Obstacle number 6 is a target for a smash. (See fig. 32.)
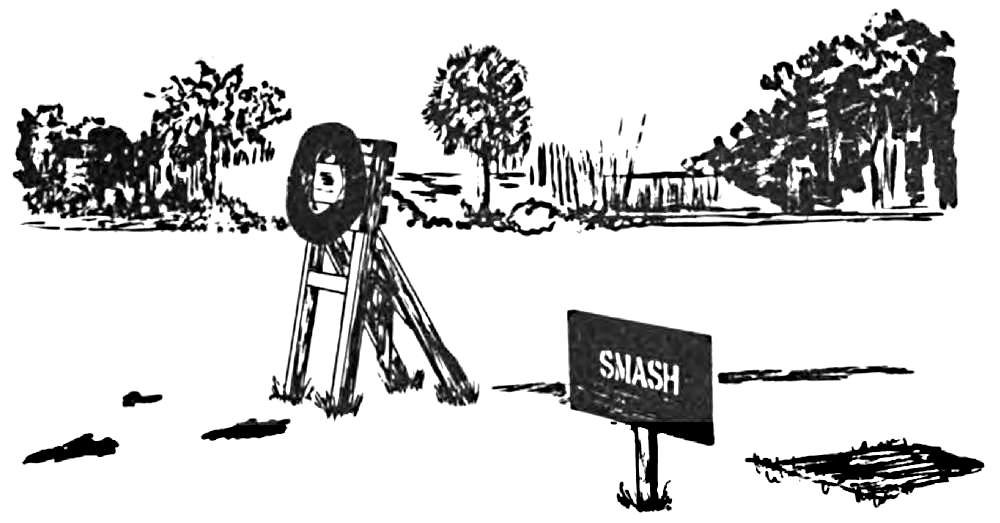
Figure 32.—Obstacle 6.
(7) Obstacle number 7 represents an enemy’s head and shoulders protruding from a foxhole. The student slashes at the tire portion of the obstacle. (See fig. 33.)
(8) Obstacle number 8 is a target for a horizontal butt stroke. The student executes the horizontal butt stroke, hitting the bag on top of the post. (See fig. 34.)
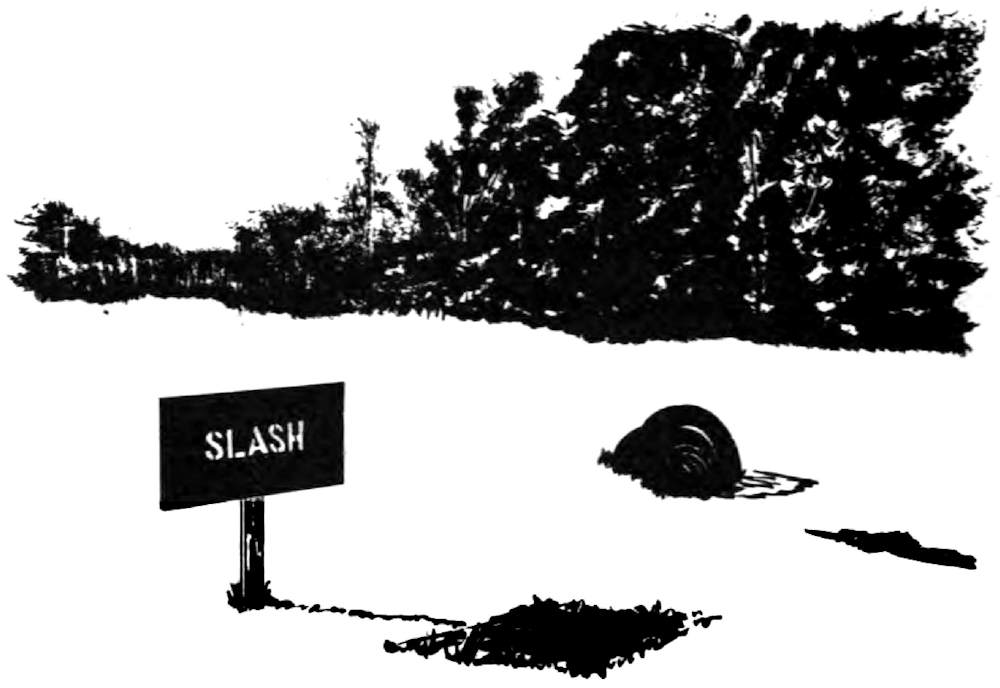
Figure 33.—Obstacle 7.
(9) Obstacle number 9 represents an enemy behind an embankment. The student charges over the embankment, turns to face the enemy, executes a jab, then withdraws. (See fig. 35.)
(10) Obstacle number 10 is a training aid which can be used in connection with either basic or advanced bayonet drill. It is inexpensive and versatile. The trainee has his choice of methods of attack and can utilize all accepted bayonet movements against this obstacle. It can be used to introduce a “free” movement within an established course, depending on the individuals speed or position, or to constitute an entire course, utilizing assistant instructors to call different methods of attack in order to vary the trainees approach to the aid. (See fig. 36.)
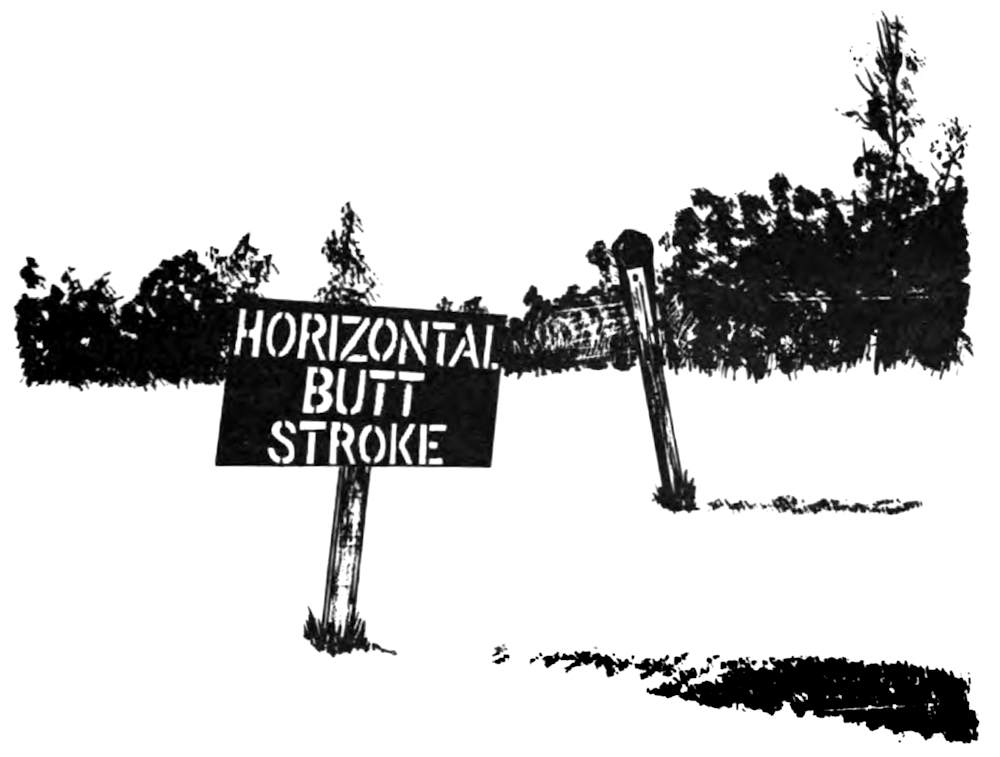
Figure 34.—Obstacle 8.
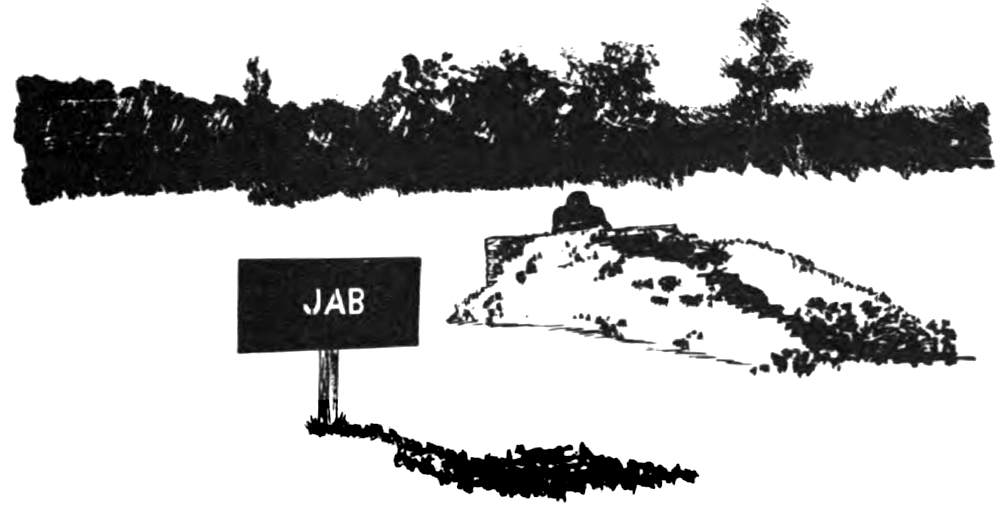
Figure 35.—Obstacle 9.
c. Construction.—The ten obstacles are constructed from readily available materials. They consist mostly of old auto tires, canvas, and 2 by 4 inches and 4 by 4 inches lumber. Obstacles 1, 2, and 10 have moving wooden arms which are not difficult to construct. The obstacles should be set far enough apart to allow maneuvering between them. The assault course can be laid out in any available terrain, and should be at least 200 to 300 meters in length. Rugged terrain provides excellent physical conditioning facilities. Natural obstacles such as streams, ridges, thick foliage, etc., can be used to make the course more difficult. Artificial obstacles such as wire entanglements, log walks, hurdles, and fences can also be added.
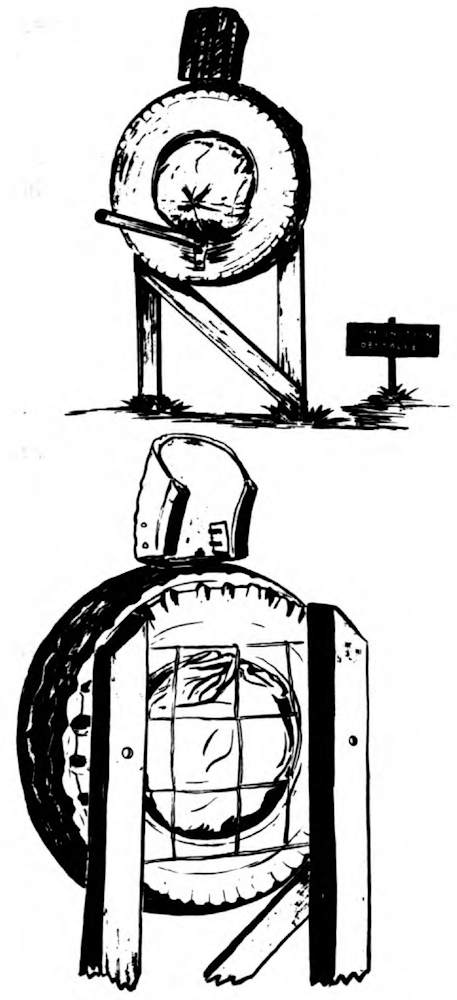
Figure 36.—Obstacle 10 (Combination Obstacle).
d. Safety Precautions.—Students should first run the assault course at a moderate pace, and increase their speed as their technique and physical condition improve. The instructor ensures that discipline and control are maintained. The instructor and his assistants station themselves along the course to observe the method of attack and make necessary corrections. In addition, the following safety precautions should be observed:
(1) Ensure that the bayonet is securely attached to the weapon before beginning the assault course.
(2) Caution personnel to remain in the line of obstacles. Serious injury can result if personnel are permitted to zigzag through the course.
(3) Do not permit personnel to attack the first obstacle until preceding personnel have reached the third obstacle.
(4) When the last obstacle is completed, personnel should be directed to return by specific routes to the designated marshalling area, remaining at least 5 yards away from the closest obstacle.
e. Demonstration and Application.—The first phase of the assault course training includes a demonstration of the technique of attacking each obstacle by the instructor. The instructor then runs the entire course employing the correct movements on each obstacle. The students then practice their movements on the individual obstacles. When the students have gained sufficient proficiency they move through the entire assault course.
704. THE PUGIL STICK
a. General.—The execution of the movements of bayonet fighting in response to a verbal command from instructors are kept to a minimum. This type of training is necessary to teach the movements, but once they have been learned the student must automatically execute them in response to the movements of his opponent. There is no substitute for practical application when learning a skill. Actual bayonet fighting is not practical because of the hazards involved. However, bouts employing the pugil stick bear a close resemblance to actual bayonet fights, and can be employed without serious injury to either contestant. The student sees for himself the importance of assuming the attack immediately, as well as the importance of aggressiveness and ferocity. He sees which combinations of blows are successful, and learns to understand the result of his making a mistake in an actual bayonet fight. Here he learns the meaning of the term “kill or be killed.”
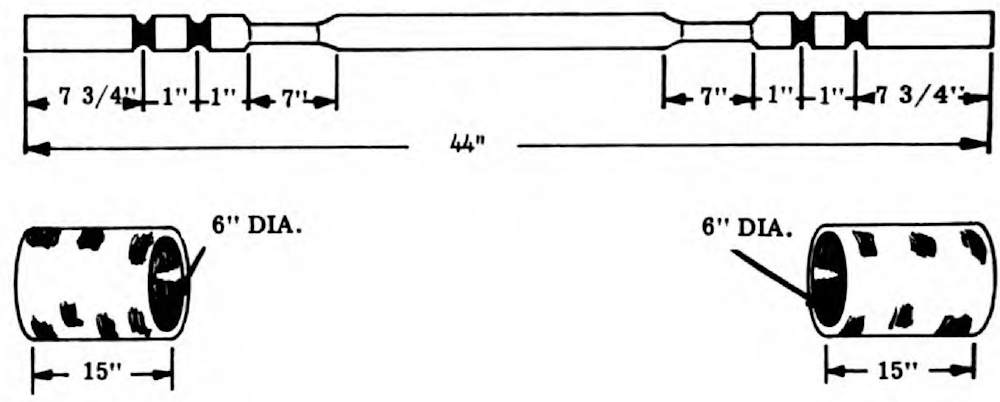
Figure 37.—The Pugil Stick Material.
b. Construction.—See figure 37.
(1) Materials for construction of the pugil stick include the following:
(a) An octagonal stick 1¾ inches in diameter and 44 inches long.
(b) Two canvas bags 10 inches long, one 6 inches in diameter and one 8 inches in diameter.
(c) Chopped foam rubber and cotton padding.
(d) A roll of foam rubber 15 inches wide.
(e) Tape, wire, and tacks.
(2) Method of Construction.
(a) Cut grooves ½-inch deep in the stick as shown in the diagram (see fig. 37). Taper the stick at the hand grips to approximately 1¼ inches in diameter.
(b) Fill the bags with chopped foam rubber and cotton.
(c) Wire and tack the bags to the end of the stick. Tighten the wire into the grooves at the end of the stick. The stick should extend 6 inches into the bag, leaving 4 inches of overlap and making the total length of the pugil stick 52 inches, the length of the M-14 rifle with bayonet.
(d) Cover the wire and tacks with tape.
(e) Wrap foam rubber around the center of the stick, leaving only the 6 to 8 inches of tapered hand grip exposed. Secure the foam rubber padding with tape.
(3) Size of Pugil Stick.—The pugil stick should be approximately the same length and weight as the M-14 rifle with bayonet attached. This enables the bayonet fighter to train with a weapon which closely approximates the weapon he uses in an actual combat situation.
c. Safety Equipment and Precautions
(1) Whenever engaged in a pugil stick bout, the student should be equipped with the following:
(a) A football helmet with full bird cage face mask.
(b) Lacrosse gloves.
(c) Protective cup athletic supporter.
(2) Instructors in charge of pugil stick bouts see that proper bayonet fighting procedures are followed by students engaged in bouts. The proper bayonet fighting grip is employed at all times. The pugil stick is not used as a baseball bat. In no instance do the hands leave the pugil stick. Neither throwing or swinging is allowed. Pugil stick fighters refrain from hitting their opponent with the center portion of the pugil stick.
(3) Instructors ensure that protective equipment is properly secured before the bout begins. Bouts will be stopped whenever one participant becomes completely defenseless, after a telling blow has been struck, when equipment becomes loosened or knocked off, or when the pugil stick is being used improperly. Students are instructed to stop all action when the whistle is blown.
d. Regulations for Bouts
(1) Students are normally paired off so that opponents are of approximately equal height and weight.
(2) Each bout is officiated by an instructor with a whistle.
(3) Contests continue until one contestant has scored a killing blow. A killing blow is one delivered solidly to the head, neck, groin, or midsection with the blade end of the pugil stick; and to the head, groin, or neck with the butt end of the stick. If a killing blow is struck in the first few seconds of the bout, for training purposes the bout may be continued for a prescribed period of time. The winner will be the individual who struck the most killing blows in the time allotted. Time limits may be set by the instructor, taking into consideration the physical condition of the students and the time available.
(4) Instructors periodically remind students that basic attack movements and combinations are most effective. Instructors also continually emphasize aggressiveness. They ensure that all trainees yell and growl while engaged in a bout.
(5) Short bouts, with rapid changing of equipment, retains enthusiasm and interest.
(6) Bouts begin with both contestants in the guard position and about 5 yards apart. (See figs. 38 and 39.)
(7) No score occurs if a student removes either hand from the weapon to throw or swing at his opponent. (See fig. 40.)
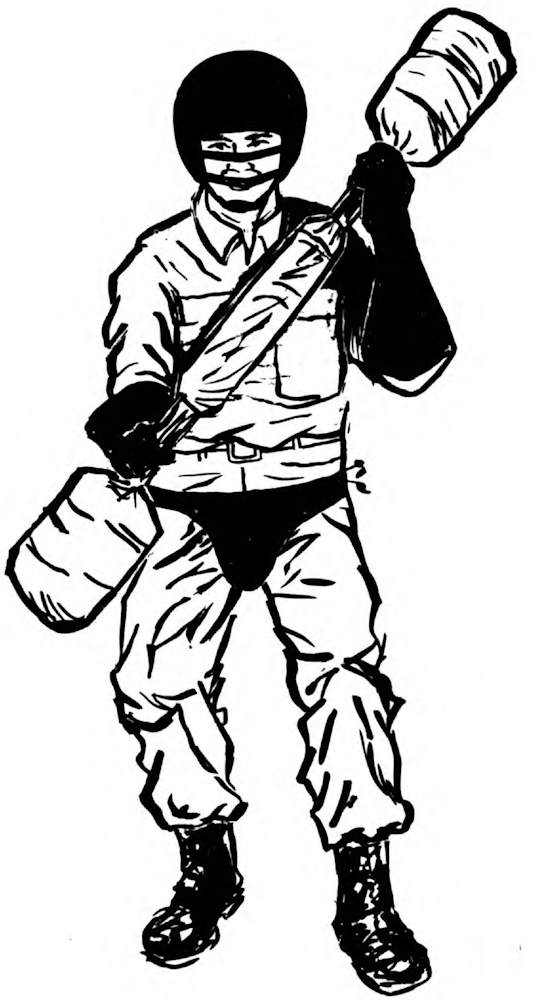
Figure 38.—On Guard With Pugil Stick.
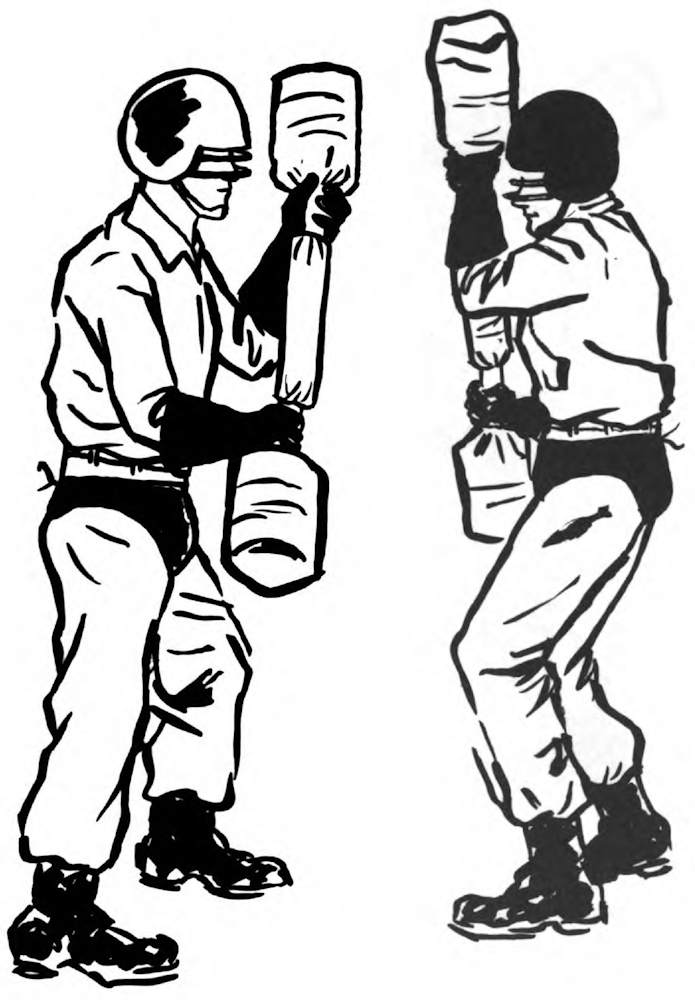
Figure 39.—Square Off With Pugil Stick.
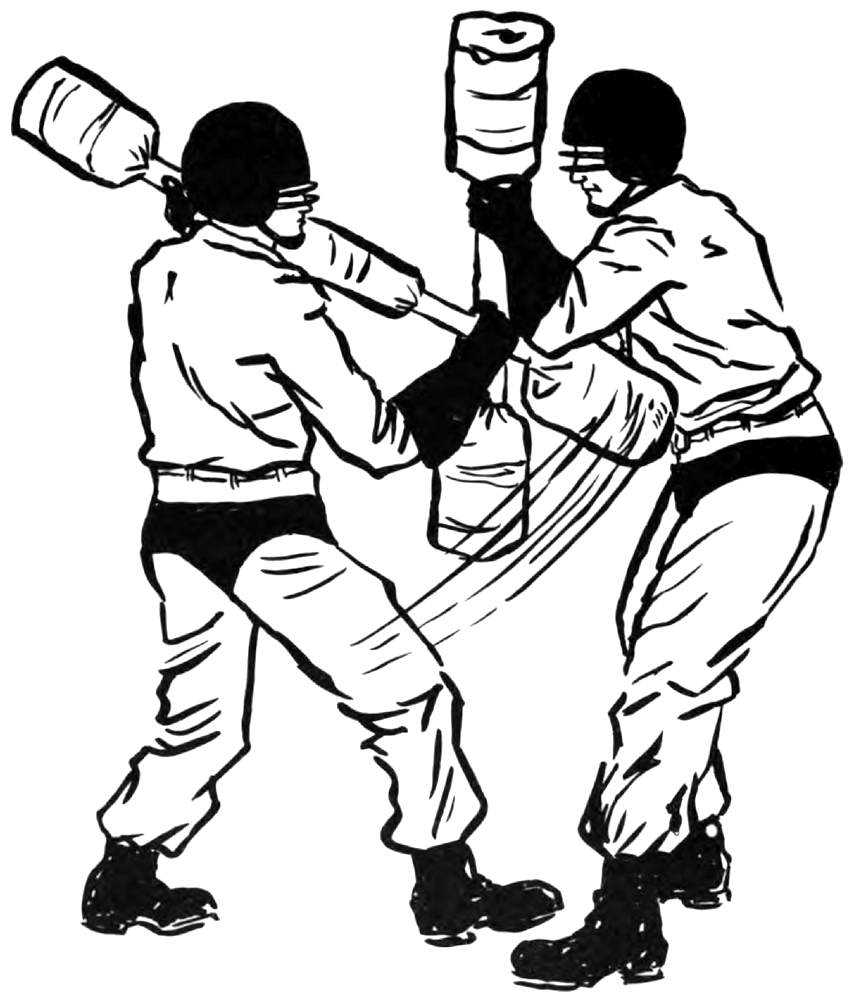
Figure 40.—Vertical Butt Stroke With Pugil Stick.
(8) A round-robin type elimination is effective in getting all students into bouts, and emphasizing the importance of aggressive action in winning. The winners of each bout are allowed to fight again after a brief rest, until they are defeated. This provides one winner in the end, with appropriate personal recognition.
e. Demonstration and Application.—All movements, offensive, defensive, and combinations are demonstrated with the pugil stick. The student is then given the opportunity to go through the movements with the pugil stick in slow motion, and then at normal speed. After gaining proficiency in all movements the students are given an opportunity to practice what they have learned against a target. An artificial stationary target offering resistance further develops timing and coordination. Heavy bags, similar to the type used by boxers in training, can be used effectively to train bayonet fighters. (See fig. 41.) After the student has attacked the dummies, allowing him the sensation of attacking a solid target, and practicing the attack movements, he is then ready for bouts against other students.
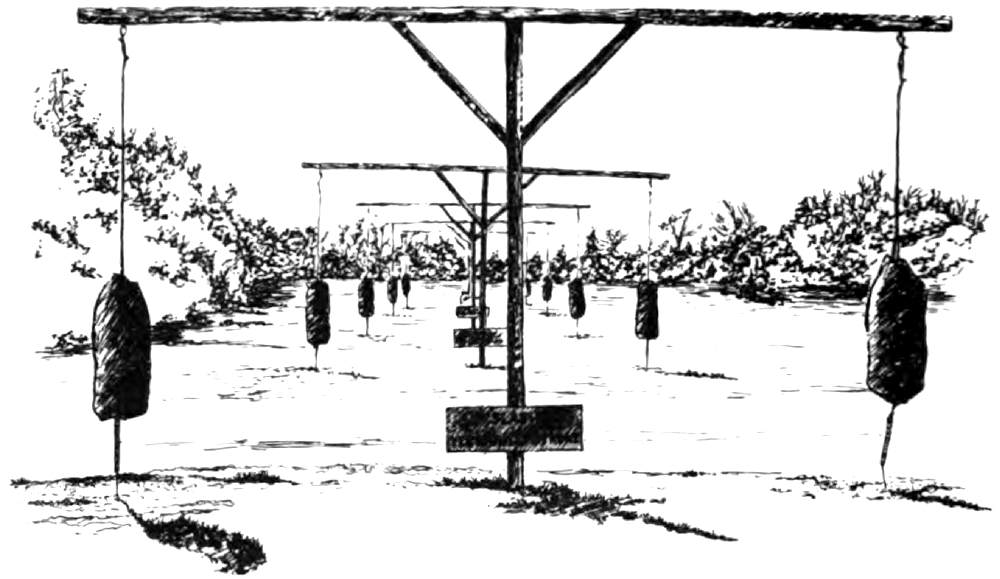
Figure 41.—Stationary Targets for Pugil Stick Training.