Part 1 — CHAPTER XI
Reading edition
A NEW RACE OF DOLLS
LIKE the little animals, these dolls are modelled of tissue-paper and they are equally substantial and durable. The dolls, as well as their dresses, shoes, and bonnets, are made without taking a stitch or using glue or paste. Nothing could be prettier or more suitable to hang on the Christmas-tree than these little ladies decked out in their fluffy tissue-paper skirts, and nothing will give greater delight to the children.
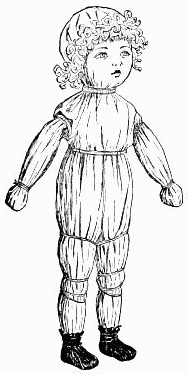
Here she comes. Little Miss Muffett.
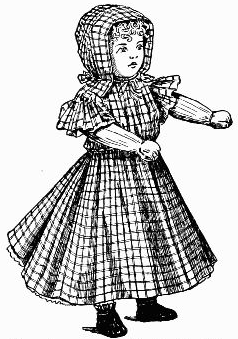
To make
Little Miss Muffett
you will need eight sheets of white tissue-paper, two sheets of flesh pink, not too deep in color, a quarter of a sheet of light-brown or yellow, and a small piece of black. Her underclothes will require one sheet of white and her dress and bonnet one sheet of any color you consider most becoming.
Fig. 149.—Creased tissue-paper for making doll.

Fig. 150.—Six sheets of tissue-paper folded together for making doll. Fig. 151.—Head of doll. Fig. 152.—Head tied on body.
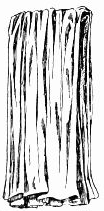

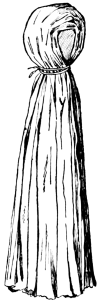
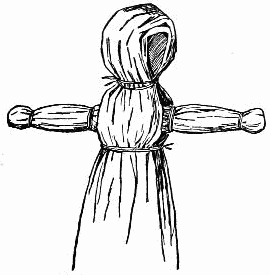
Take one sheet of the white paper at a time and draw it lengthwise through your hands, creasing or crimping it as in Fig. 149. Do this to all the eight sheets. Then, pulling six of them partly open, place them evenly one on top of another and fold through the middle (Fig. 150). Take another sheet of the crimped paper and roll it into a ball like Fig. 151. Open the folded paper, place the ball in the middle, bring the paper down over the ball and wrap and tie just below with coarse linen thread or white darning-cotton (Fig. 152). This is the head, which you must model into shape with your fingers, squeezing it out to make it fuller and rounder at the back and pinching it to give a chin to the face. Fold another crimped sheet like Fig. 153 for the arms. You will notice the ends do not quite reach the folds. The space left should measure a little over one inch. Crimp half a sheet of the pink paper and with it cover the arms; allow the pink to extend equally at each end beyond the white and fold over the ends, tying them as in Fig. 154. Then tie the loose ends down as in Fig. 155. Open the paper just below the head, slip the arms in place and tie below (Fig. 156).
Fig. 153.—Beginning the arms.
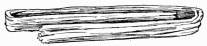
Fig. 154.—Pink paper over arms.
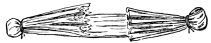
Fig. 155.—Outside of arms tied over inside.

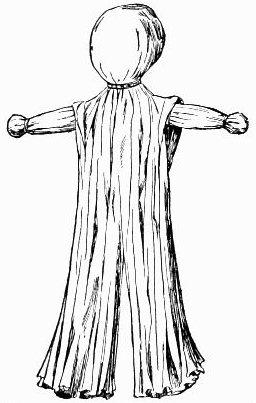
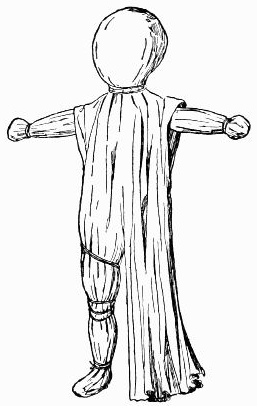
Spread out your smooth sheet of pink paper, place the doll's head directly in the centre and draw the paper down over head and body; keep it as smooth as possible over the face and wrap and tie at the neck (Fig. 157). Push the pink paper up on the shoulders and cut a slit about six inches long lengthwise through the middle of the entire mass of paper, as shown in Fig. 157. Wrap and tie each of the legs (Fig. 158) and tie once more under the arms (Fig. 161). Fold the bottom edges under and model the feet in shape (Fig. 158). The wrappings at the thighs and knees take slanting lines, which give a more natural shape to the legs than if the thread were simply wrapped round and round as at the ankles.
Fig. 156.—Arms in place.
Paint the Face
of Little Miss Muffett with water-colors, placing the features low on the head to give a babyish look, and make the eyes large and mouth small. Color the cheeks and chin a deeper pink, and put little touches of red just above the eyes near the inner corners and little streaks of blue just below the eyes.
Fig. 157.—The pink skin of tissue-paper over doll. Fig. 158.—Modelling legs of doll.
Miss Muffett's curls are furnished by
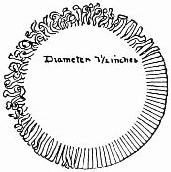
Fig. 159.—The wig.
The Wig,
which you are to make of brown or yellow paper, or black if you want a little brunette.
Cut a circle seven and one-half inches in diameter, and on the edge cut a fringe one inch in depth (Fig. 159). This is the hair, which you must curl by drawing it lightly over the blade of a penknife or scissors (Fig. 159).
Fit the wig on Miss Muffett's head, holding it in place with pins until you can tie it on just back of the curls (Fig. 161).
Now for the little lady's clothes. To make
The shoe.
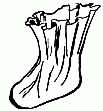
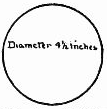
Fig. 160.—Pattern of shoe.
The Shoes,
which will be her first article of dress, cut out of the black tissue-paper two circles measuring four and one-half inches in diameter (Fig. 160); place one foot in the middle of a circle, draw the paper up around the ankle and wrap a number of times before tying. Put the other shoe on the other foot in the same manner, and your doll will look like Fig. 161.
Miss Muffett's Lingerie
consists of a union garment (Fig. 162) and a white skirt (Fig. 163). From one end of your remaining sheet of white paper cut a strip about seven inches wide, and at the middle cut a slit half-way up (Fig. 162). Draw this through your hands to crimp it, the creases to run lengthwise, that is, from top to bottom. Fit the little garment to the body, tying it just below the arms and again above the knees, where it will form ruffles.
Cut the white skirt in a circle seventeen inches in diameter with a circular opening in the centre (Fig. 163). Crimp the skirt and put it on over the feet, not the head, of the doll, wrapping and tying it in place around the waist.
Not only may tissue-paper be purchased in all colors, with their various shades and tints, but in pretty little checks, plaids, and figures as well, so Miss Muffett may have a dress equal in appearance to the cotton or silk gown of her china sisters.
Fig. 161.—Ready to be dressed.
Cut the skirt of
The Dress
after the white skirt pattern (Fig. 163), and the waist like the smaller circle (Fig. 164), which has one slit, from outer to inner edge, added to the opening at the centre.
Fig. 162.—Union garment.
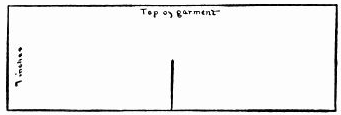
Fig. 163.—White skirt. Fig. 164.—Waist pattern.
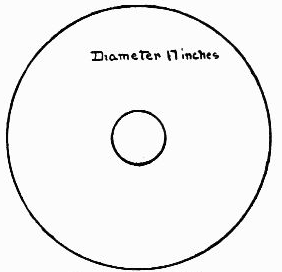
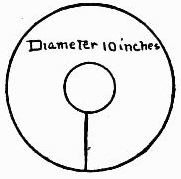
Fig. 165.—Pattern for sun-bonnet. Fig. 166.—Bonnet folded.
This waist circle should measure ten inches in diameter. Do not crimp the dress skirt, but put it on in all its crisp freshness, and tie in place at the waist-line. Adjust the waist on Miss Muffett, bringing the slit opening at the back. It looks very much like a cape now, doesn't it? But draw the fulness in at the bottom and around the arms at the shoulders, and you have a little waist with full short sleeves. Tie the waist rather high, and bring it down to bag slightly over the skirt as shown in the illustration of Miss Muffett. Cut
The sun-bonnet.
The Sun-Bonnet
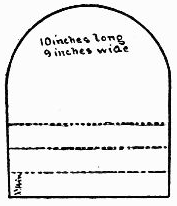
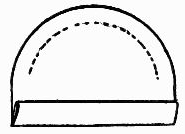
of the same paper as the dress. Fig. 165 shows the pattern, which is ten inches long and nine inches wide. Fold the straight edge over three times, according to the dotted lines in Fig. 165, making the folds one and one-quarter inches wide. Fig. 166 shows the bonnet folded, and the dotted line around the curve indicates where it is to be gathered in at the neck.
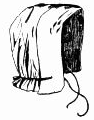
Fit Fig. 166 on Miss Muffett's head, allowing the folded edge to extend slightly beyond her face, then draw the bonnet down at the back and gather it in with your fingers until it sits snugly to the neck. Through the middle of the fold, one inch from each end, puncture a hole, and through these two holes pass the thread that goes around the back of the bonnet and ties under Miss Muffett's chin. See illustration of sun-bonnet.