Part 3 — CHAPTER VIII Spring-edge Upholstery
Reading edition
The two examples of furniture illustrated in Fig. 49 are two types which are upholstered in a very different manner from any of the processes described thus far. This is spring-edge work, and is very generally employed on sofas, lounges and settees. In upholstery of this kind the springs must be placed flush with the outside of the frame. This necessitates bending the springs out somewhat.
Fig. 50 shows a chair of this type with webbing attached and the method of stitching the springs to the webbing. Note the spacing of the webbing. Fig. 51 shows a top view of the same seat. Notice that the springs are flush with the outside surface of the rail. The spring wire is shown attached and formed. This form must be accurately made for it determines the final outline of the seat. The wire is fastened near the ends to the upholstery blocks, with staples, and to the springs by means of stitching twine coiled and tied. There is on the market a certain metal clip for fastening the coil and wire together. These clips are attached by means of a pair of special pliers.
Fig. 52 shows the seat in a natural view. Note the method of tying the springs. This is different from the method previously described. The twine is brought down inside of a spring and tied to a second or third coil instead of over the outside top coil. This permits the top coil to lie horizontal, and braces the spring so it remains vertical. Fig. 51 also illustrates this method. A twine is also tacked to the top of the frame and carried up to the spring wire and down to the frame again. It is clearly shown in Fig. 52. This twine braces the springs and prevents sagging, and results in a vertical motion rather than partially horizontal when the seat is used.
Over this spring work a piece of burlap is then placed and tacked with 4-oz. tacks on the top edge of the frame, as illustrated in Fig. 53. This burlap must fit tight enough to be smooth, but care must be exercised that it does not fit so tight as to result in the pulling down of the springs. Next place a layer of tow over the burlap. Follow with another piece of burlap, and sew onto the spring wire instead of tacking to the frame as in a hard-edge seat. Next form the hard edge, and finish off with tow or moss as described previously.
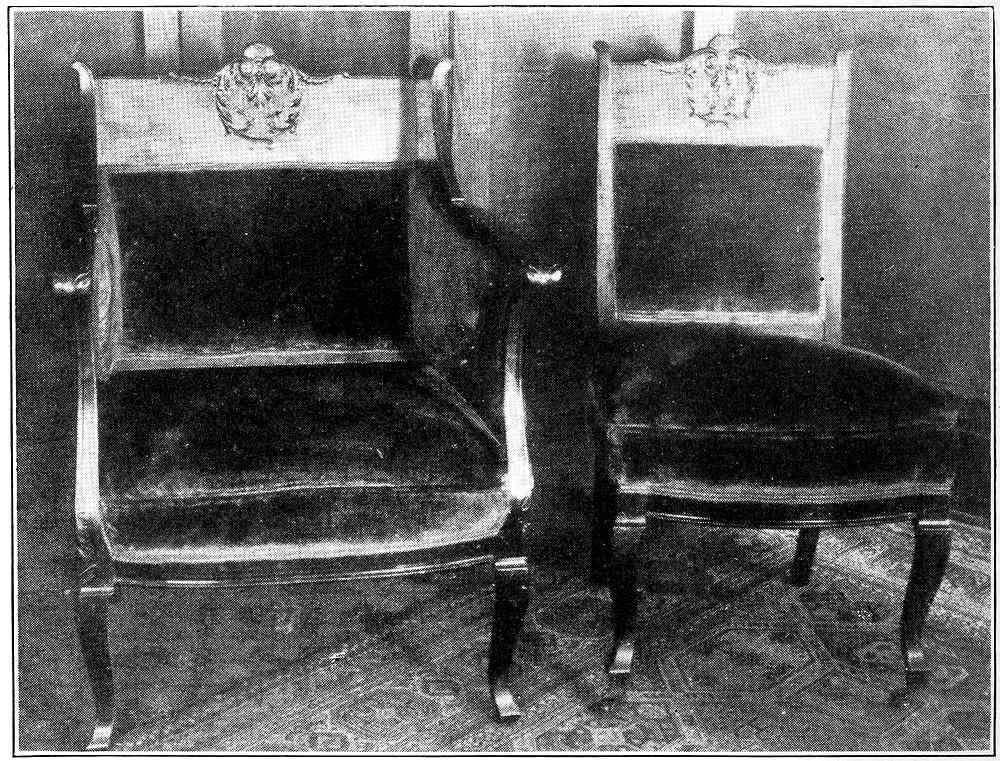
FIG. 49
Fig. 54 shows the various steps in the building up of a seat. After the tow has been placed lay on a piece of blue sheet wadding or a layer of cotton batting. Lay the cover over this and tack it loosely upon the frame and upholstery blocks at the back; stretch toward the front and fasten underneath the spring wire with skewers, and secure it in a similar manner at the sides. Then adjust it carefully; tack permanently at the back, and then sew just under the spring wire. These stitches may be seen at the left in Fig. 54.
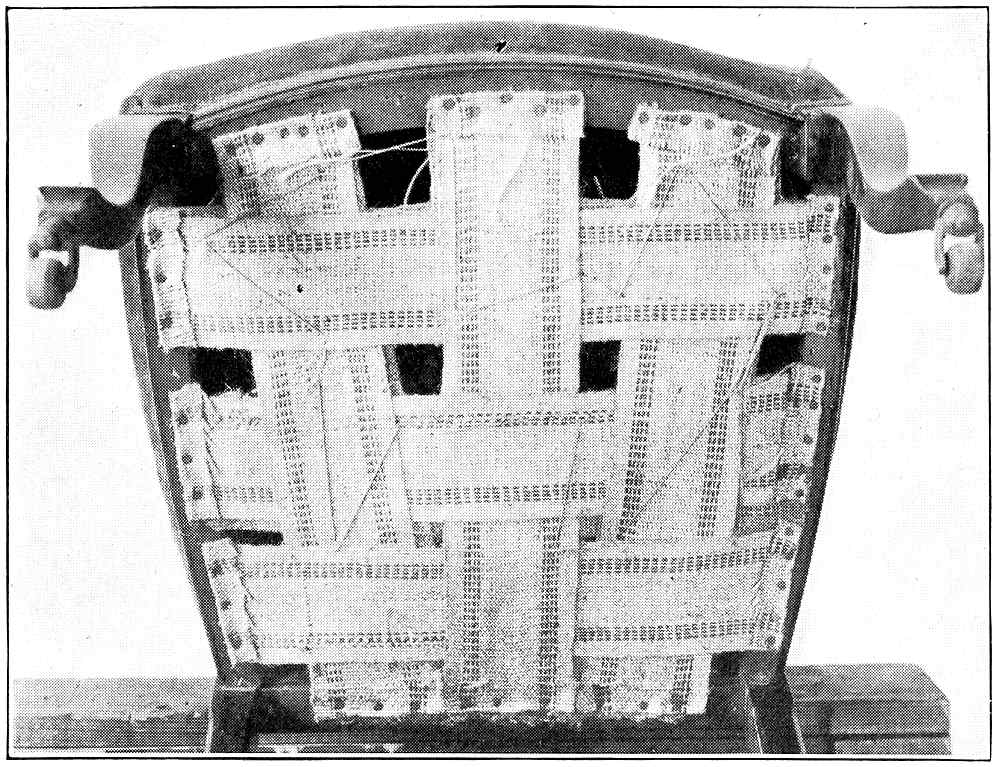
FIG. 50
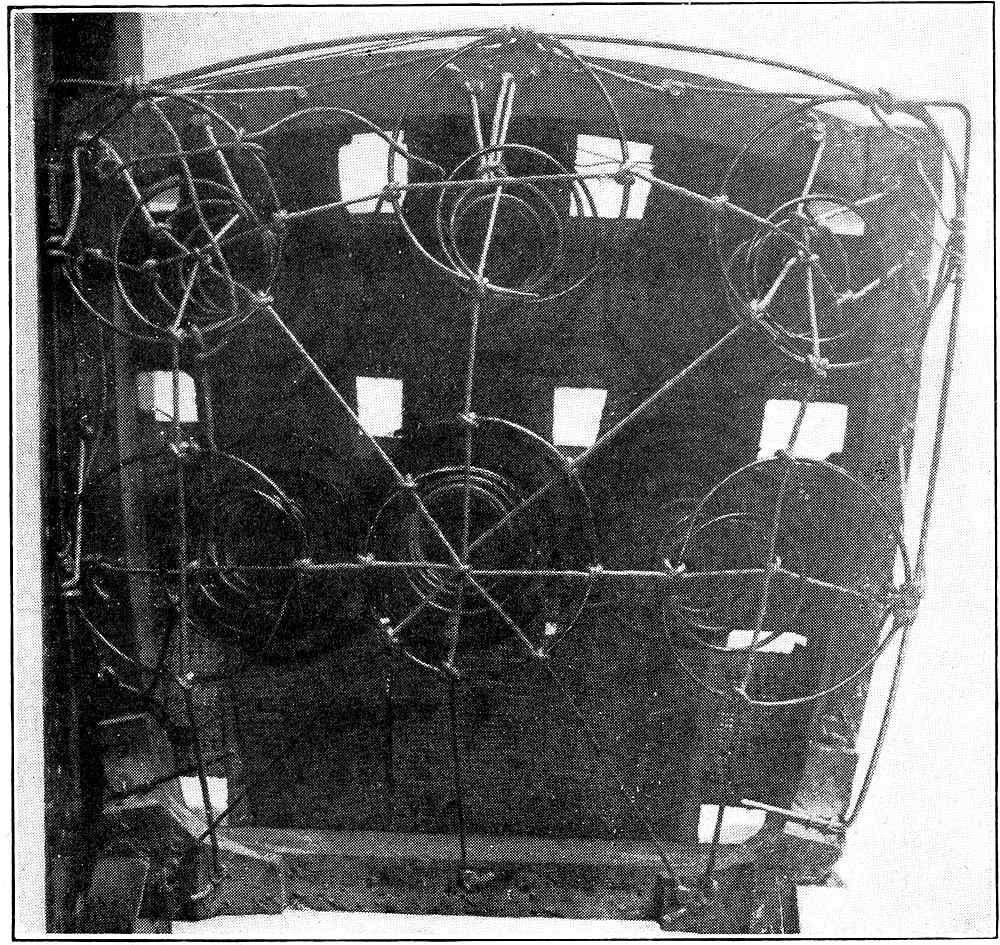
FIG. 51
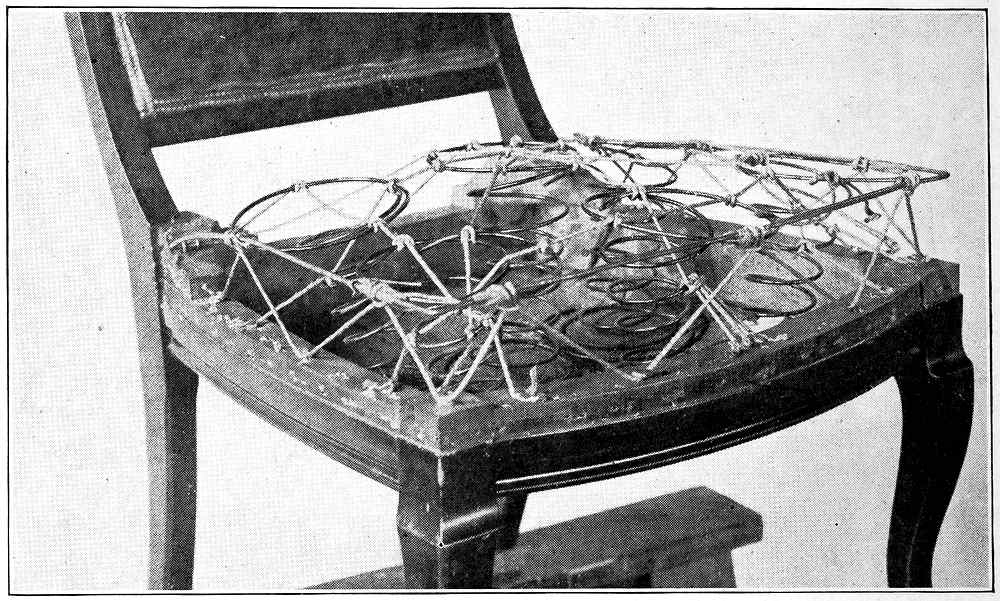
FIG. 52
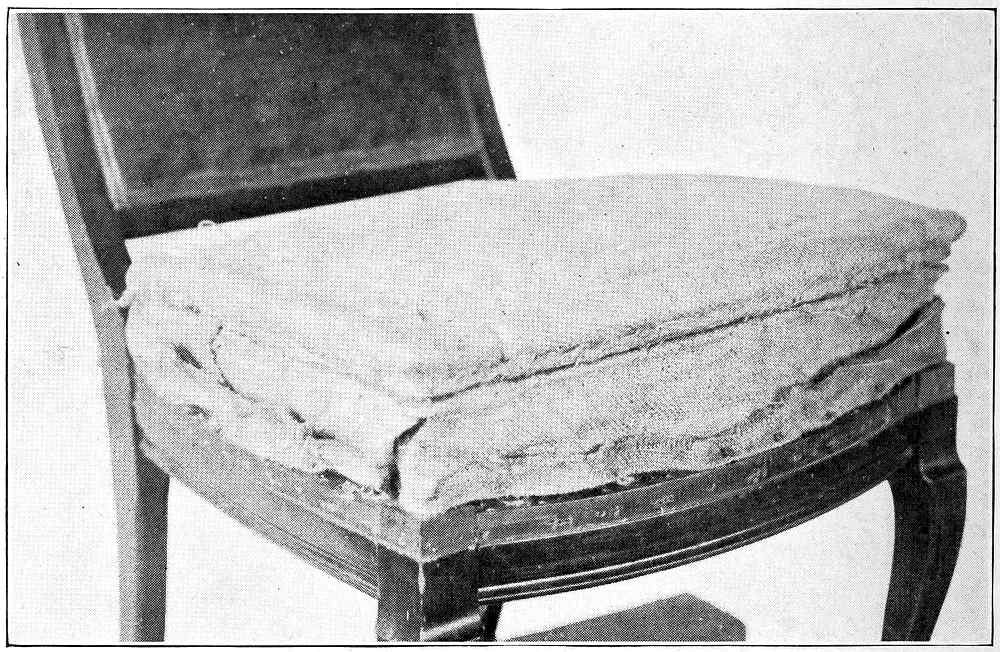
FIG. 53
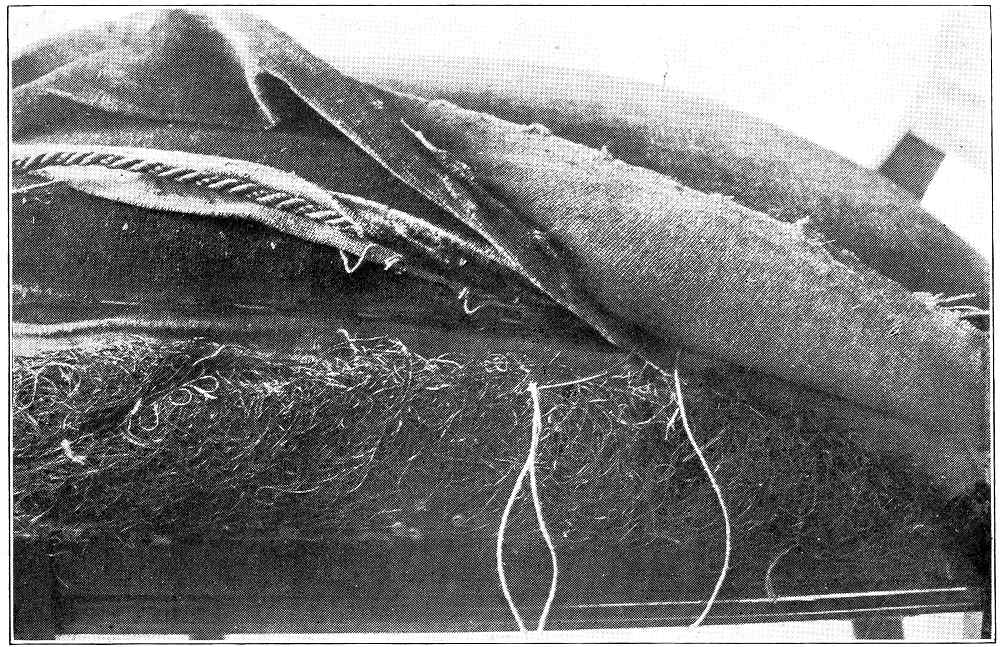
FIG. 54
The next step is the placing of the welt edge. This edge is clearly shown in Fig. 55. Just below the turn of the top piece a beading may be seen. This is the welt edge, and immediately below is the band. In Fig. 54 is shown a close view of the welt edge. The process of making it is as follows: Fold a narrow strip of cloth around a soft cord. Hold it against the seat with the edges down; turn the band inside out and sew its lower edge. Run the curved needle thru it and the welting so that the seam comes immediately above the seam which fastens the top cover to the seat. Sew from right to left, for then the piece may be handled conveniently with the left hand while sewing is done with the right. Three pieces are manipulated in this work; the cord, the narrow band of cloth folded around the cord, and the front band. This process may be simplified if a sewing machine is employed. Then the welting cord may be sewed into the top edge of the front band. When this is sewed to the chair seat but one piece remains to be managed.
The front band should be draped or folded at the corners. This fold may be noticed at the corners of the chair seat in Fig. 55, and it allows the band to run about the corner full and smooth. This is all the more necessary because some stuffing is placed behind the band to keep the band from falling in when the edge of the seat is pressed down.
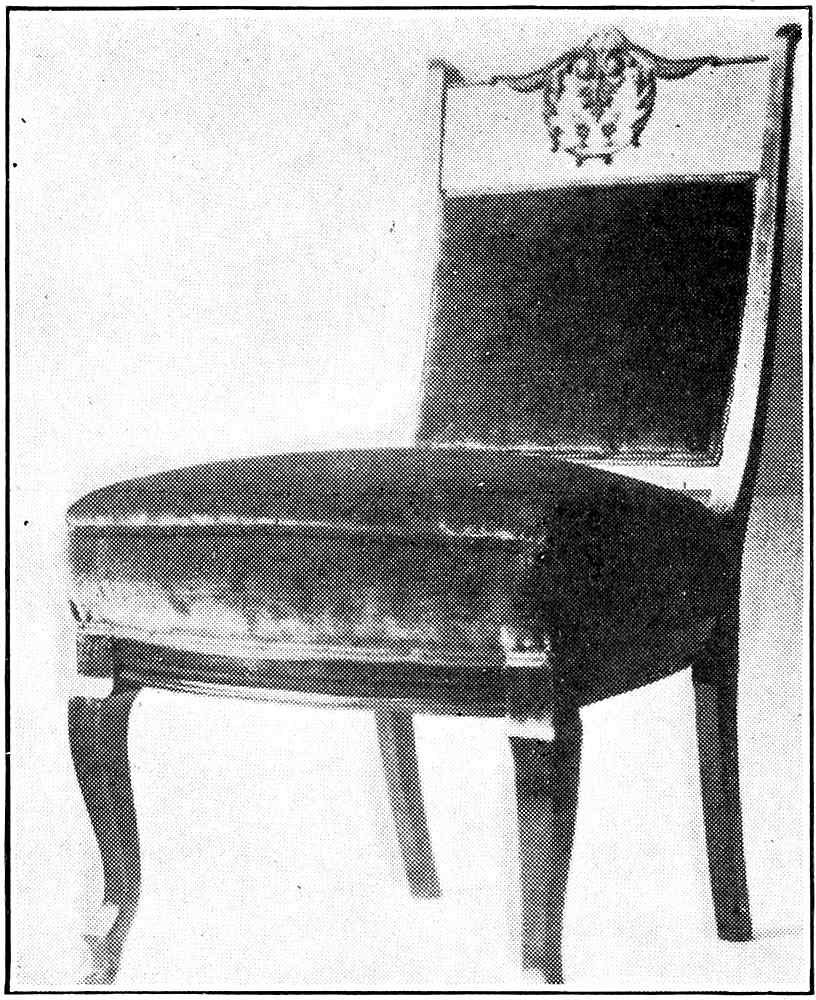
FIG. 55
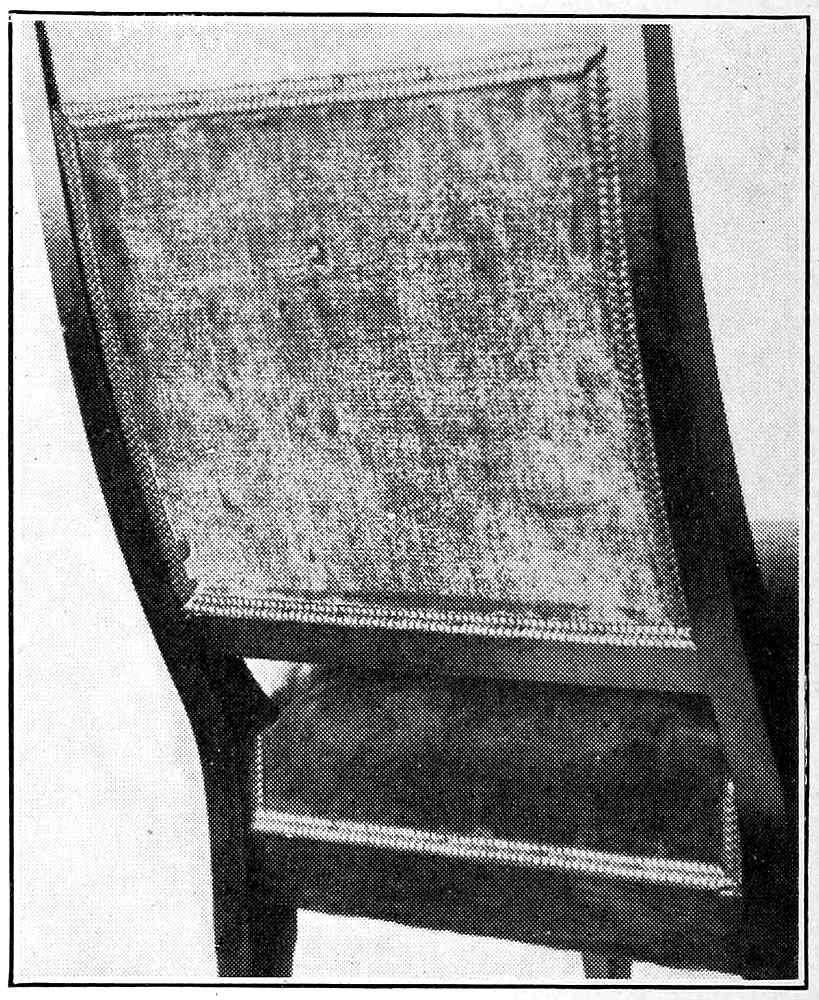
FIG. 56
In Fig. 56 is shown the gimp. It is generally fastened with gimp tacks, but in very fine work it is glued in place. Glueing has a distinct advantage where the gimp must be placed around curves for then it may run continuously rather than in a series of straight lines between tacks, as is necessary when tacks are employed.
In Fig. 57 are shown a series of problems in upholstery; in Fig. 58, the application of such type problems to structures of a distinctly useful nature.
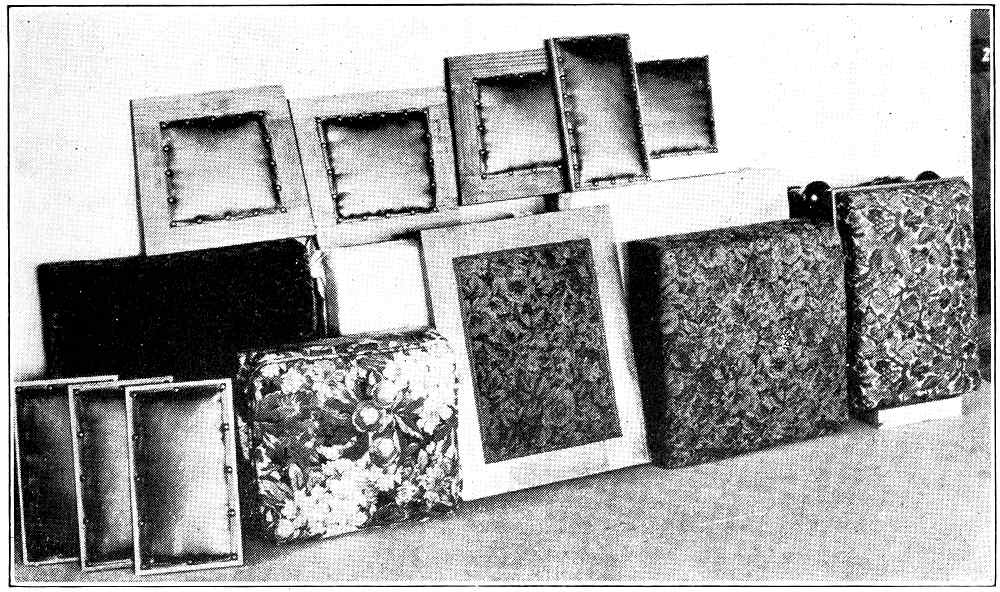
FIG. 57
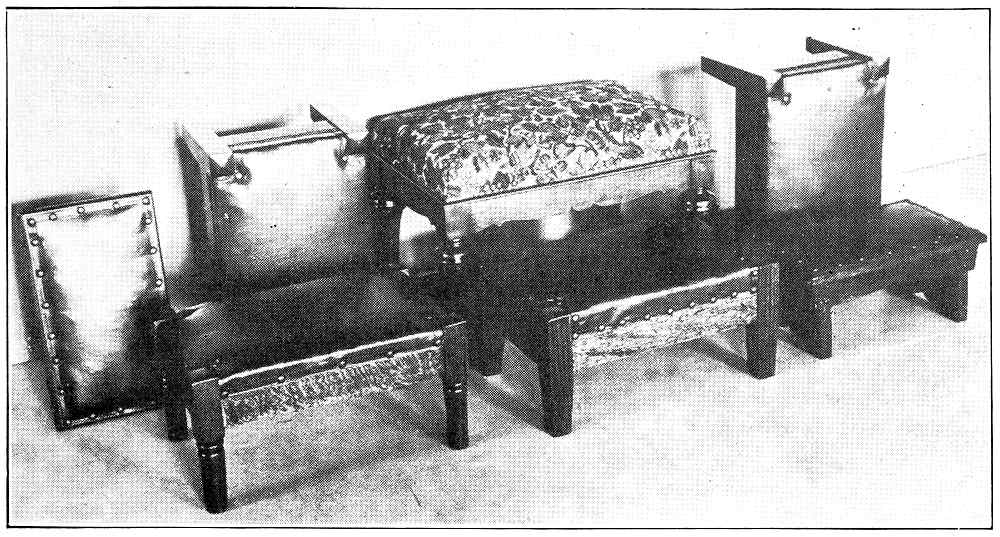
FIG. 58
OUTLINES
GROUP I.—FIRST METHOD—UPHOLSTERING A PLAIN BOARD SURFACE.
Tool Processes Topics For Class Discussion Problems
Shaping stuffing: moss, tow, kapok, alva, cork shavings or excelsior. Preliminary talks on upholstering tools. Preparation of stuffing. Footstool. Cart. Chest cover. Shirtwaist box. Box lid.
Stretching and tacking muslin or burlap cover. Advantage of tacking and stretching goods from center toward corners.
Covering with wadding or cotton batting. The need of wadding or cotton.
Attaching cover, imitation leather, genuine leather or textiles. Different classes of covers appropriate for different uses. Cost, durability, appearance and comfort.
Gimping. Appropriate gimps for different covers. Nails: Metalene, Perfection and Leather. Spacing of nails. Method of folding gimp at corners.
GROUP I.—SECOND METHOD
Attaching burlap or webbing strips. Forming hard edges. Advantages of hard edges. Leg rest. Footstool.
Placing of stuffing. Desirable form to seat.
Adjusting muslin. Reason for use of muslin under cover.
Placing of wadding. Placing of cover. Folding at corners. Gimp or no gimp.
Placing and nailing of gimp.
GROUP II.—UPHOLSTERING A FRAMED STRUCTURE.
Rounding inside edges of rails. Advantages of rounding or chamfering arrises. Footstool. Chair seat and back. Slip seats.
Tacking on webbing, or Attaching board bottom. Comparison of webbing with board bottom.
Attaching burlap. Size of burlap to permit making of hard edge.
Making hard edge.
Stuffing.
Tacking muslin over stuffing. Reasons for loose or slip tacking.
Regulating.
Covering with wadding or cotton batting.
Stretching and tacking outside cover. All-over upholstery. Show wood upholstery. Welt edge work.
Tacking on cambric. Need for cambric.
GROUP III.—HARD-EDGE UPHOLSTERY.
Tacking webbing in place, or Attaching slats. Preventing the clicking of springs. Easy chair. Settee seats. Cricket seats.
Placing springs. Different sizes and shapes of springs for different uses.
Sewing springs.
Tying springs. Importance of well tied springs.
Tacking on burlap.
Placing stuffing for hard edge. Over-hang of stuffing.
Tacking on light burlap. Sewing hard edge. Different methods of sewing. Constant regulating.
Evening seat with double stuffing and cotton.
Tacking on muslin.
Placing outside cover. Blind sewing.
Tacking on cambric.
GROUP IV.—SPRING-EDGE UPHOLSTERY.
Attaching webbing, or Attaching slats. Difference when compared with hard-edge work. Side chair. Arm chair. Sofas and lounges.
Placing springs. Difference in placement of springs when compared with hard-edge work.
Attaching spring-wire edge.
Tying springs. Difference between this and former work.
Placing burlap.
Stuffing.
Placing burlap over stuffing.
Stitching edge.
Placing muslin. Need of layer of cotton batting when hair is used for stuffing.
Attaching outside cover.
Sewing welt edge. Advantages of welt edge.
Gimping. Different methods of attaching gimp.
INDEX
(NUMBERS REFER TO PAGES)
Brocades, 14
Burlap, 12, 16, 23
Cambric, 13, 27, 46, 61, 62
Chase Leather, 14
Chintz, 14, 15
Cricket, 46, 62
Denim, 14, 15
Fabric, 7, 8, 13, 18, 20
Footstool, 13, 16, 28, 35
Gimp, 15, 16, 20, 23, 32
Hammer, 11
Tacks, 58
Gunny, 13
Hair, 46
Cloth, 15
Hammer, Gimp, 11
Hard-edge, 17, 27, 31, 38
Italian Hemp, 15
Knot, Clove Hitch, 41
Double Slip, 45
Leather, Artificial, 14, 46, 60
Genuine, 14
Leg Rest, 17, 21, 60
Loose Cushions, 8
Marokene, 14, 16, 23, 36
Metalene, 15, 23
Mole Skin, 14
Moss, 13, 46, 54, 60
Mule Skin, 14
Muslin, 13, 16, 23
Nails, 9, 15, 16, 37
Leather, 15
Metalene, 15, 36
Perfection, 15
Needles, Curved, 11, 45, 57
Double Pointed, 11, 39, 48
Triangular Pointed, 11
Overstuffed, 52
Pad Seat, 52
Pantasote Leather, 14
Plush, 15
Queen Anne Stool, 6, 47, 50
Regulator, 11, 13, 16, 19
Reps, 15
Re-upholstery, 50, 51
Satin, 15
Scissors, 11
Seat, 17, 24, 27
Frame, 25, 26
Skewers, 11
Slip-Tack, 34, 43, 45, 61
Springs, 12, 15, 38, 53
Spring Edge Twine, 15, 39
Wire, 53, 54, 57, 63
Squabs, 8
Stitching, 15, 43, 45
Blind, 46, 47, 48, 62
Twine, 15, 38
Stools, 16, 21, 23, 28
Stuffed-Double, 46
Stuffing, 11, 12
Alva, 13, 60
Cotton Batting, 46, 60
Cork Shavings, 13, 60
Excelsior, 13, 60
Curled Horse Hair, 12, 46
Kapok, 13, 60
Moss, 13, 46, 60
Tow, 12, 16, 23, 32
Tacks, 16, 17, 23
Tapestry, 7, 14
Textiles, 7, 14, 60
Tools, 11
Tow, 12, 16, 23, 32
Tufting, 10
Twine, 15, 40
Tying Springs, 15, 53, 62, 63
Upholstery, 11, 21
Blocks, 18, 28, 31, 53, 54
Velours, 15
Velvet, 15
Wadding, 13, 16, 26, 27, 36, 60
Webbing, 11, 18
B. F. M., 11
L. M. C., 11, 12
Stretcher, 11, 25, 28
Welt Cord, 18, 57, 58
Edge, 11, 37, 57, 63